How to Configure Google Analytics
Introduction
Google Analytics 4 (GA4) allows you to monitor your website's traffic, understand visitor behavior, measure conversions, and gain valuable insights into your site's performance.
This guide will walk you through creating a Google Analytics property, obtaining your Measurement ID, and integrating it with your eDirectory website.
Step 1: Access Google Analytics
1.1. Sign in to your Google Analytics account: Google Analytics
1.2. Click Start Measuring.

Step 2: Create Your Property
2.1. Fill in the requested information:
- Enter your desired "Account Name."
- Optionally, adjust the "Account Data Sharing Settings" to your preferences.

2.2. Click Next.
2.3. Fill in the requested information:
- Property Name (usually your website name)
- Reporting Time Zone
- Currency

2.4. Click Next.
2.5. Business Details: for the purpose of this guide, we recommend selecting:
- Industry Category: Business & Industrial
- Business Size: Small
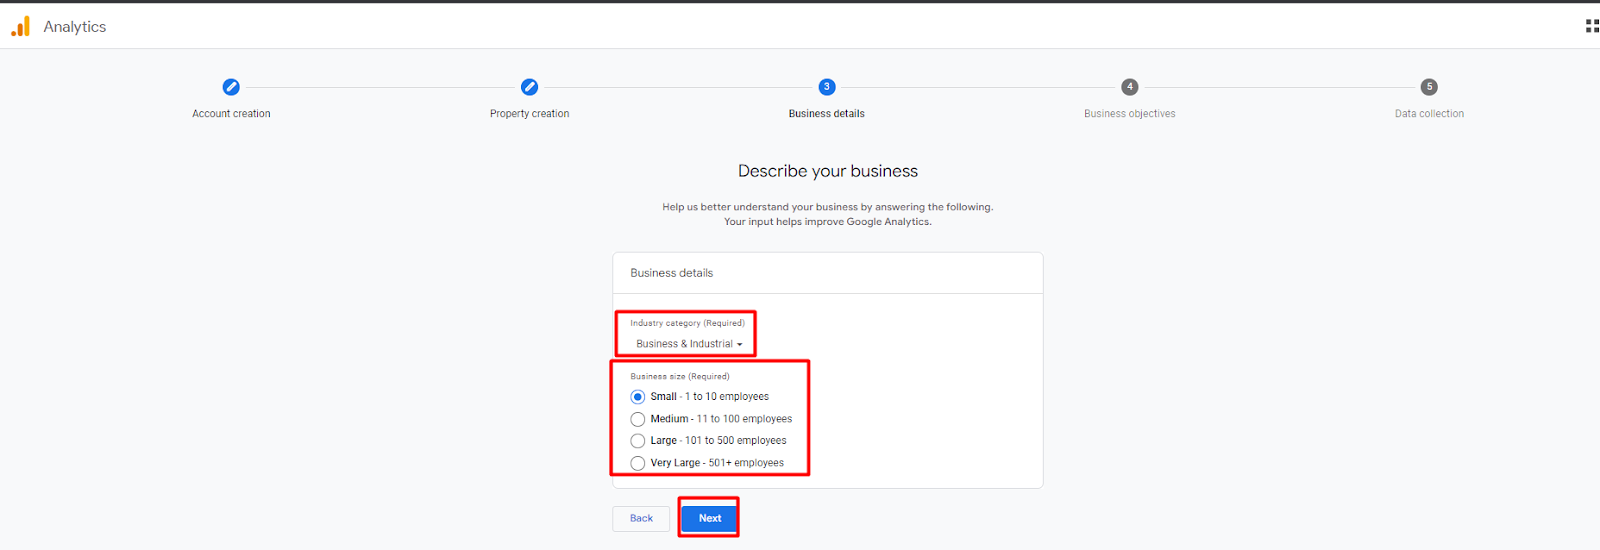
2.6. After making your selections, click Next.
Note: These options are used by Google for reporting recommendations only and do not affect your Analytics tracking. If another category better matches your business, feel free to select it instead.
2.7. Business Objectives: next, you'll be asked to select your Business Objectives.Choose the objectives that are most relevant to your website. These selections simply help Google customize your Analytics dashboard and recommendations.
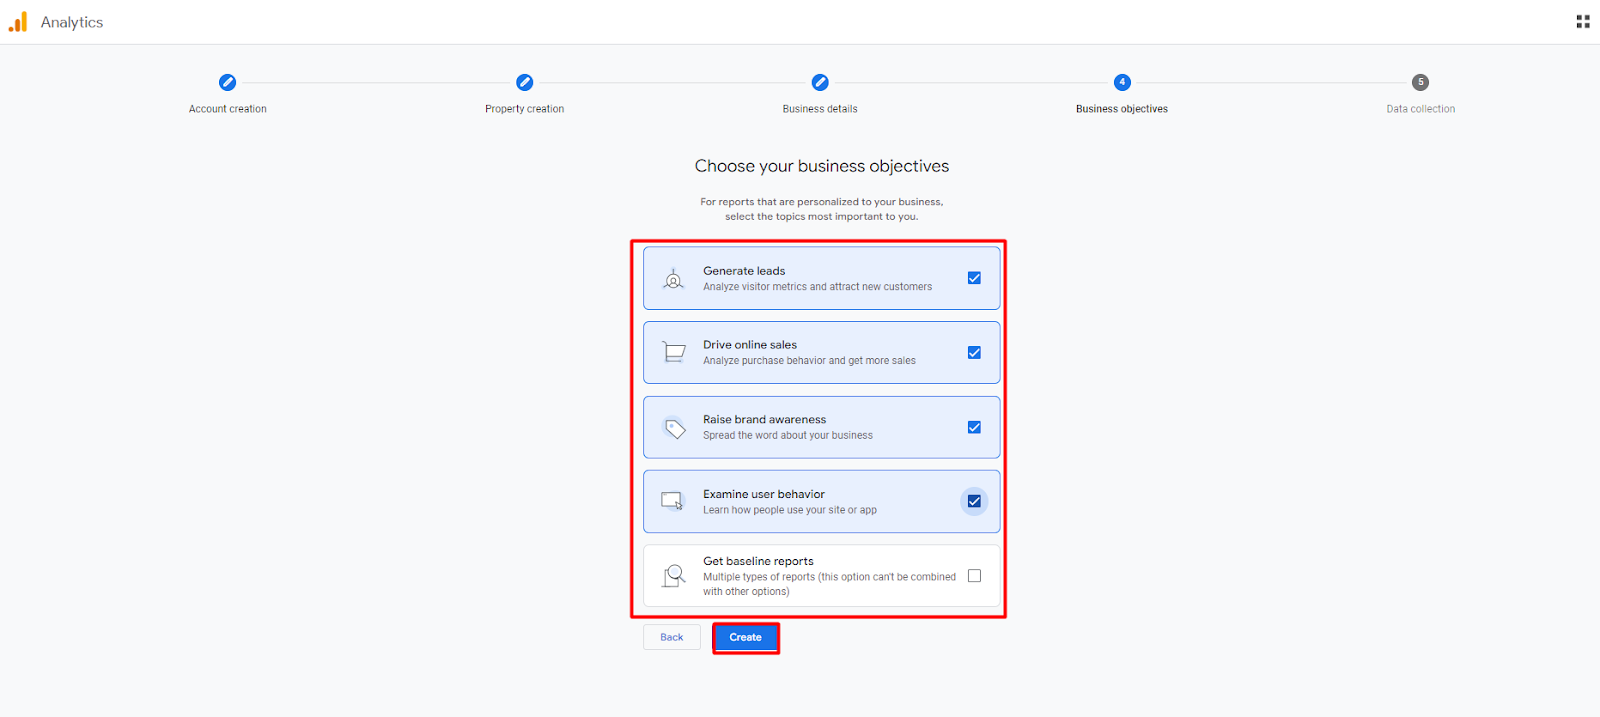
2.8. Once you've selected your preferred options, click Create.
2.9. Accept the Terms of Service: Google will then display its Google Analytics Terms of Service Agreement. Read the agreement, select your country if prompted, and click I Accept to continue.
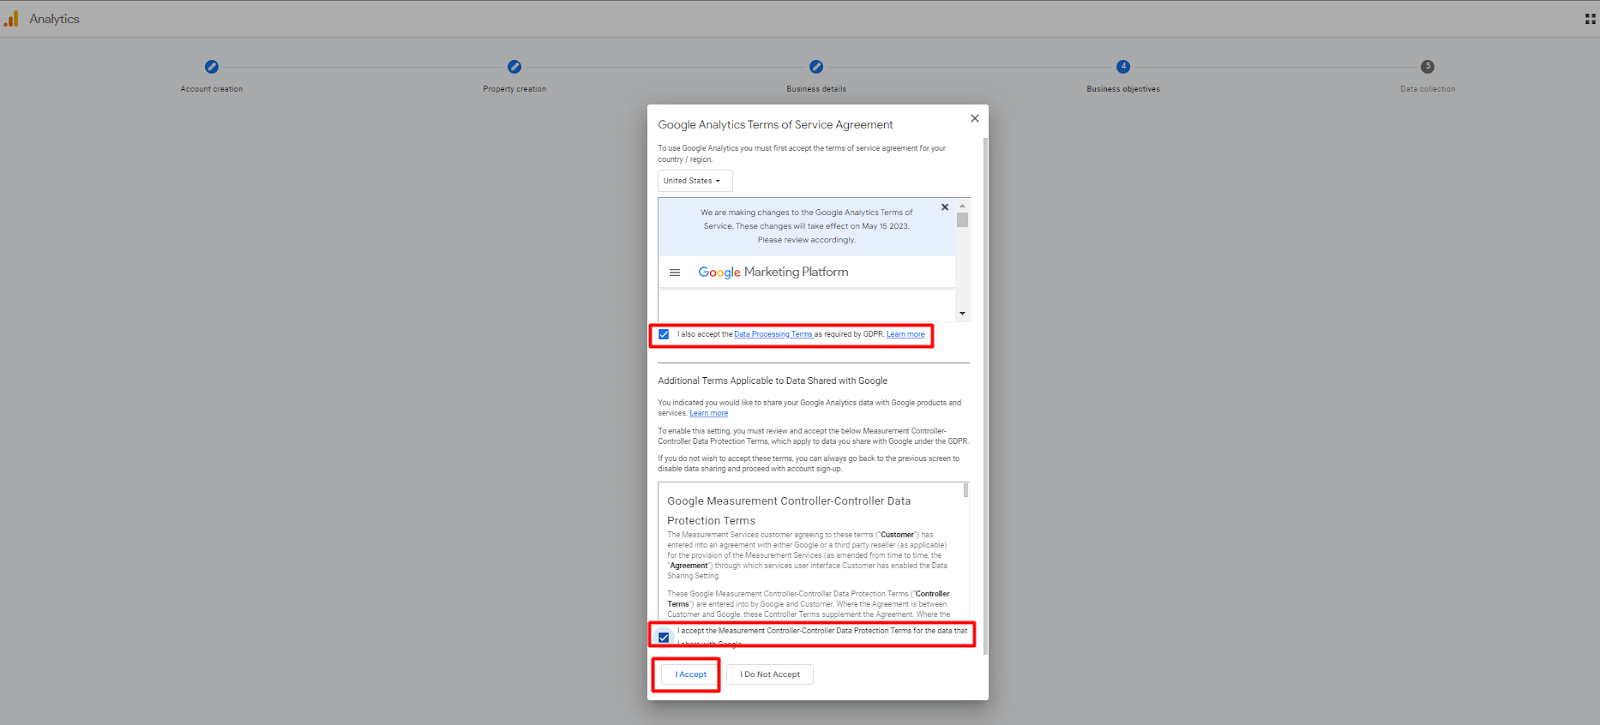
Once you've accepted the Terms of Service, your Google Analytics property will be created, and you'll be taken to the Data Stream Configuration page, where you'll connect your website to Google Analytics.
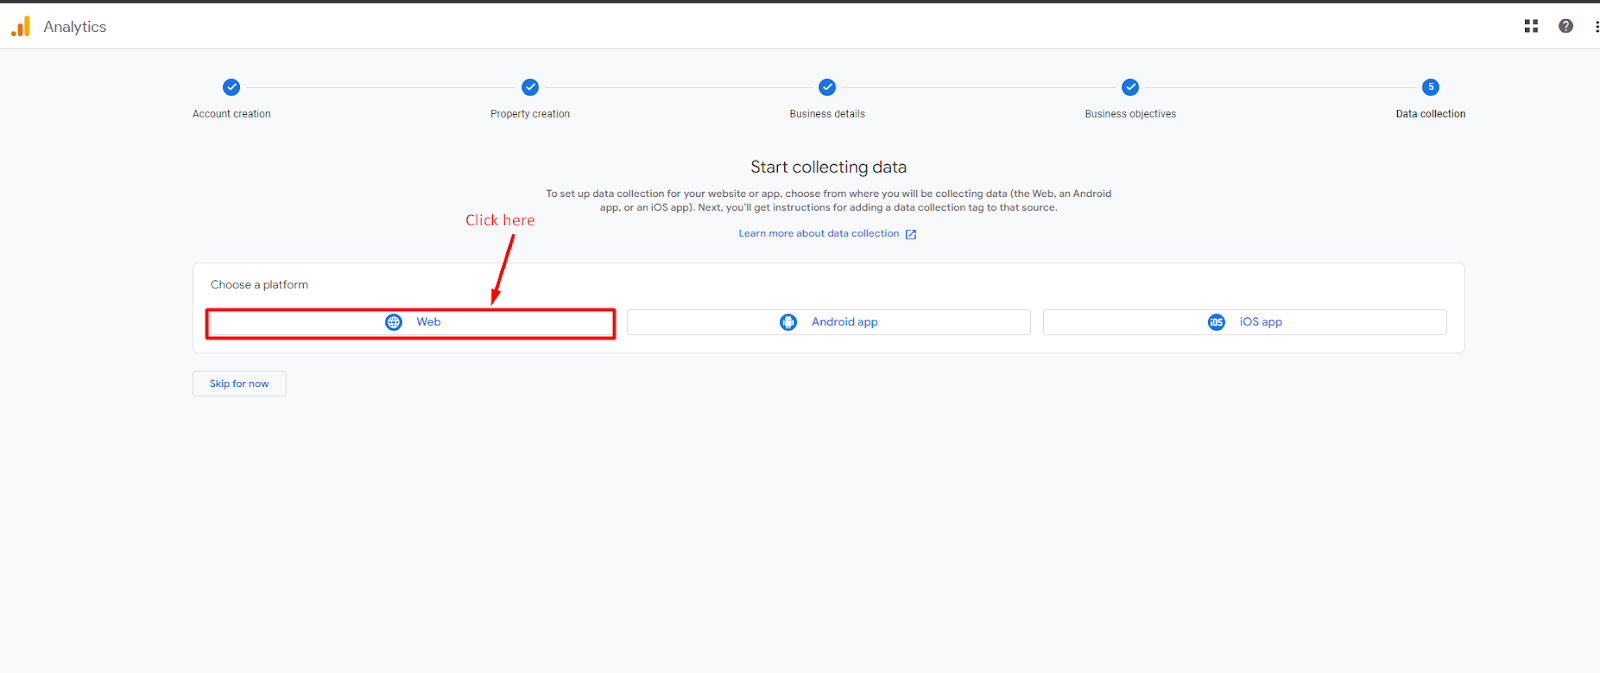
Step 3: Configure a Data Stream
3.1. After creating the property, Google will ask you to create a Data Stream. Select "Web"
3.2. Enter:
- Website URL
- Stream Name (usually your website name)
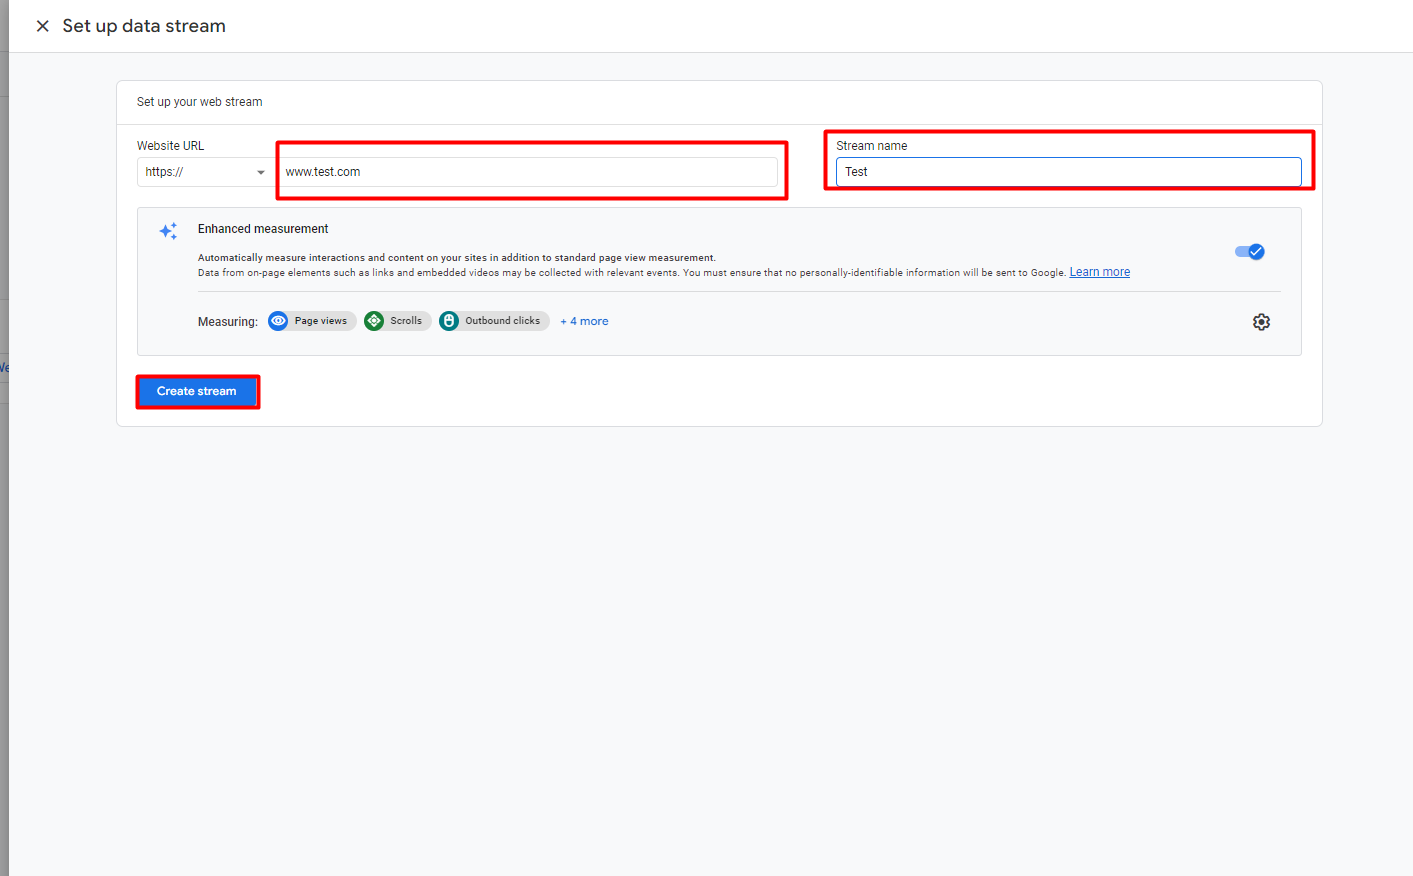
Important Note: Replace “test” with your site domain, ensuring the URL is in the proper format (e.g., www.test.com).
Additional Requirement: Ensure to have a live domain linked to your site before configuring Google Analytics in your site. Contact the support team at support@edirectory.com if you need a domain change or check out our instructional article to learn more: Domain Change: How can I proceed to change my domain?
3.3. Click Create Stream.
Step 4: Obtain Your Measurement ID (Important)
4.1. After clicking Create Stream, Google Analytics may take a few moments to finish creating the stream. Please wait while the page loads.
4.2. Once loading is complete, Google will display a window containing code similar to the example below:
<!-- Google tag (gtag.js) -->
<script async src="https://www.googletagmanager.com/gtag/js?id=G-EXM9LK40LF"></script>

<script>
window.dataLayer = window.dataLayer || [];
function gtag(){dataLayer.push(arguments);}
gtag('js', new Date());

gtag('config', 'G-EXM9LK40LF');
</script>
4.3. Don't worry — you do not need to copy or understand this code. The only information you need is the Measurement ID, which is the code beginning with "G-".
For example: G-EXM9LK40LF
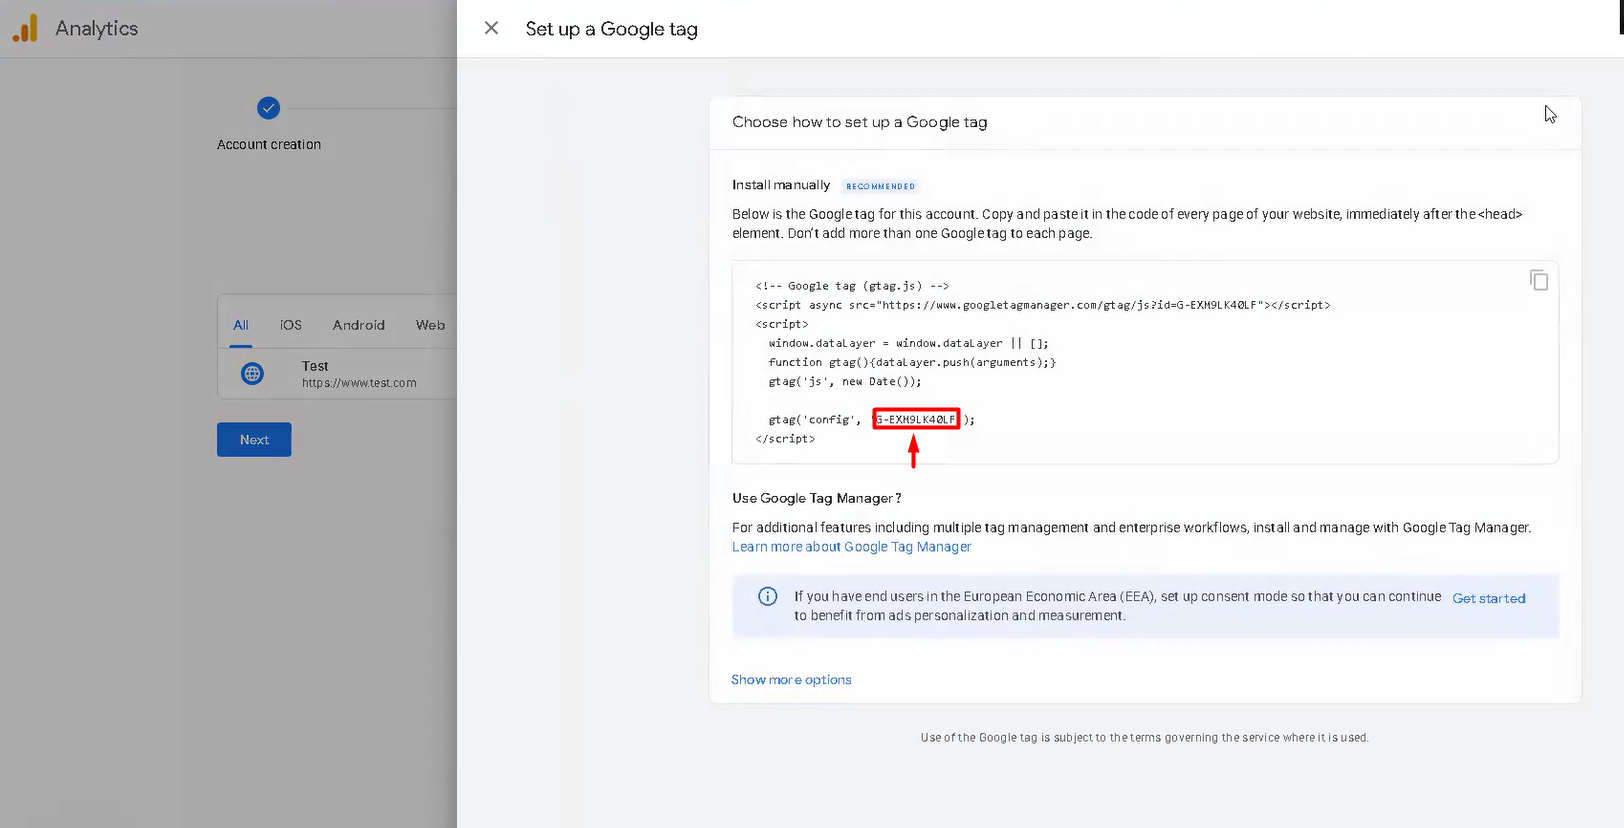
4.4. Simply copy this code.
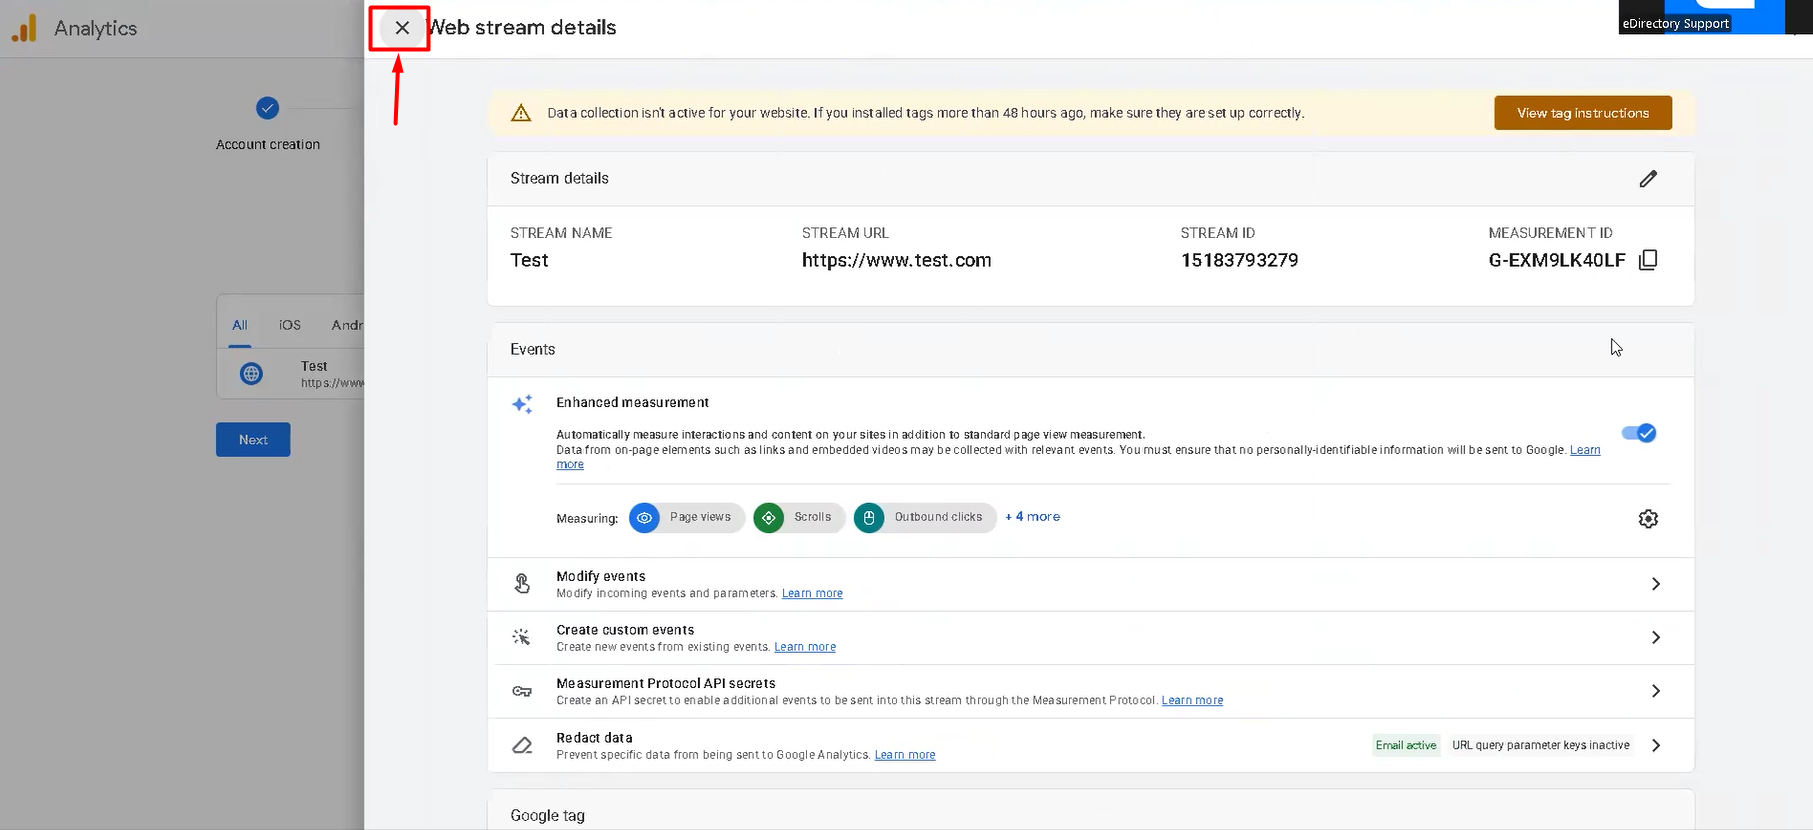
Easier Method
4.3. Instead of copying it from the code snippet, you can simply close the code window.
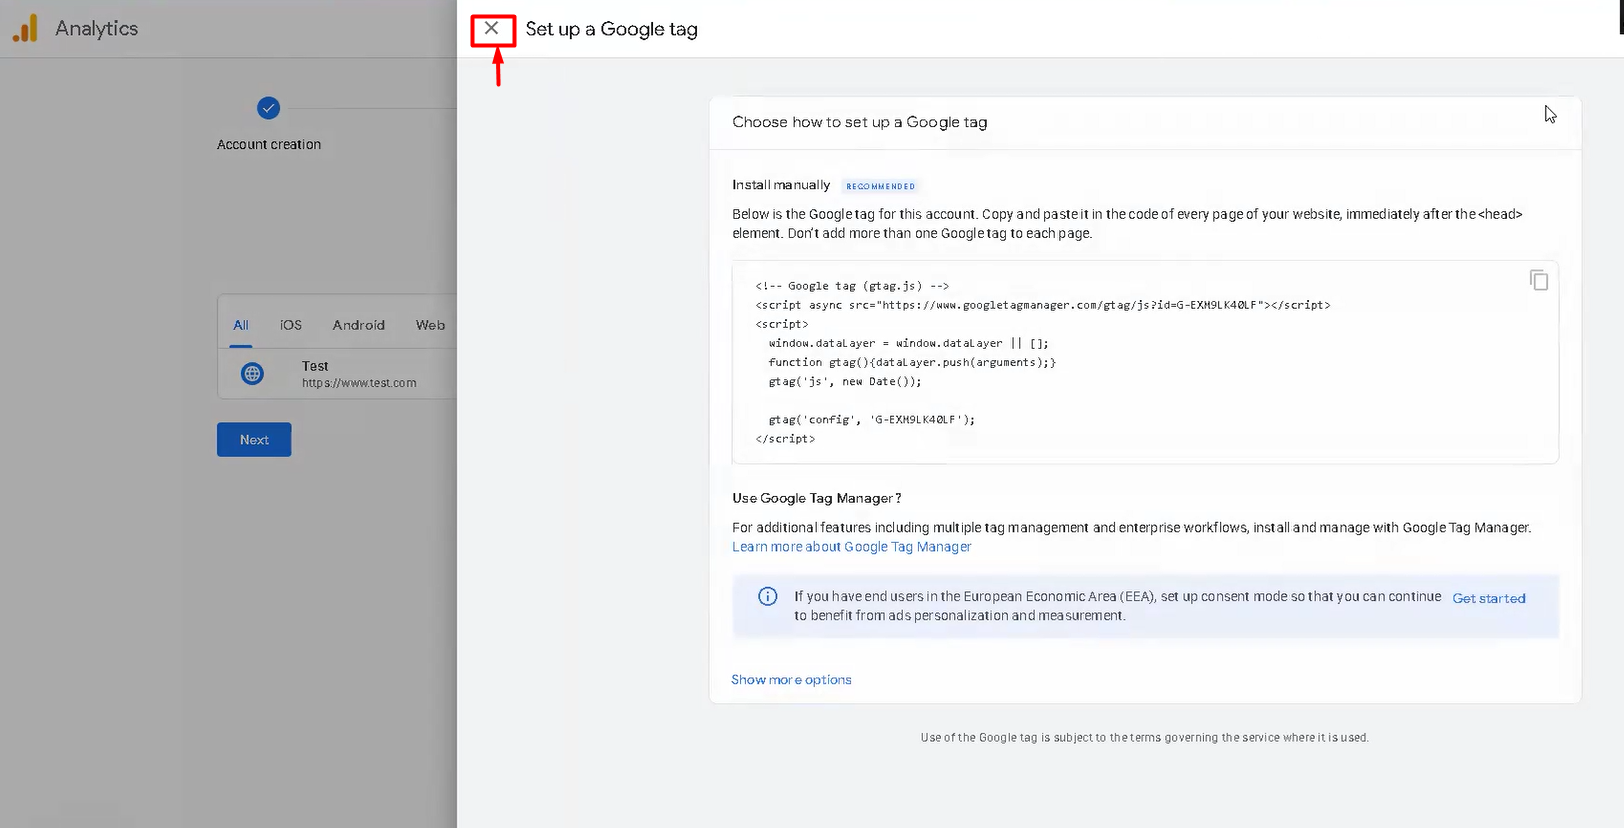
4.4. Google Analytics will automatically display only the Measurement ID, making it much easier to copy.
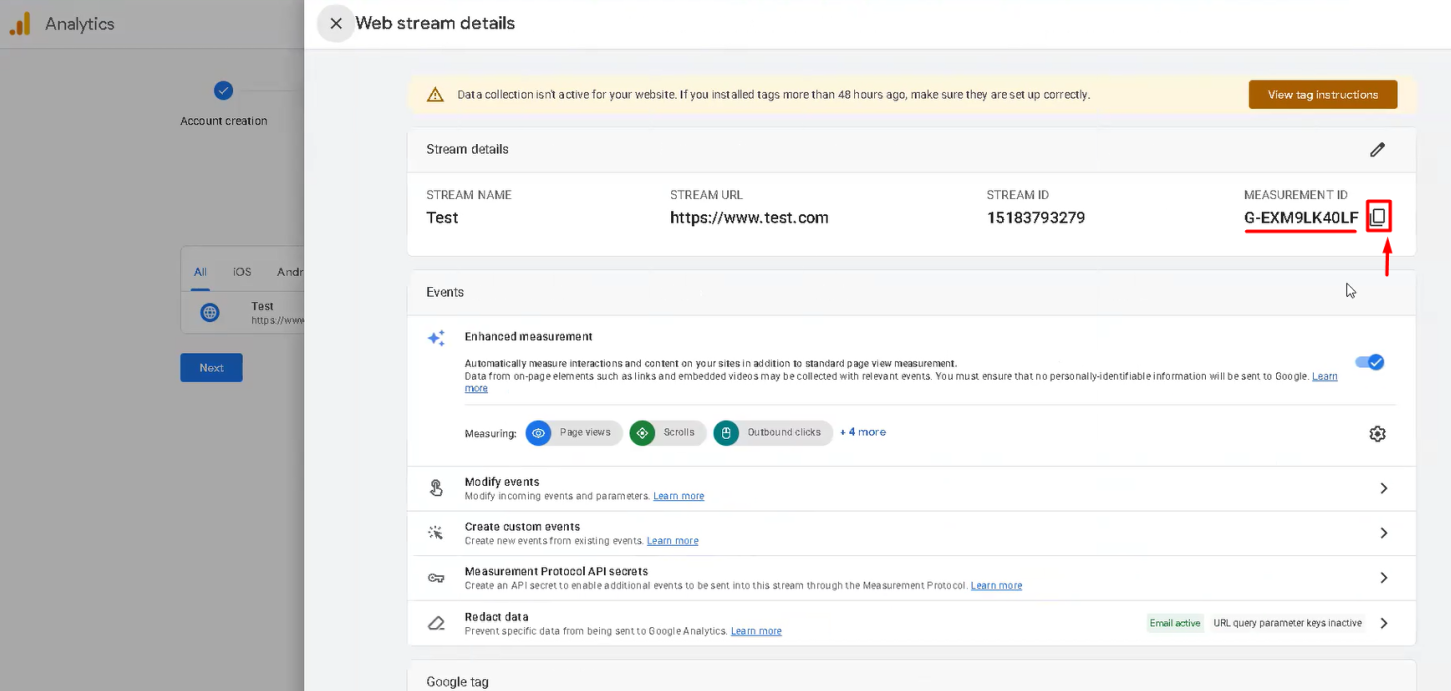
For example: G-EXM9LK40LF
Copy this value.
This is the only information you will need to integrate Google Analytics with eDirectory.
Step 5: Integrate Google Analytics into eDirectory
5.1. In your eDirectory Site Manager, navigate to Settings → Google Integrations → Google Analytics
5.2. Paste your Measurement ID (the code beginning with G-) into the Google Analytics field.
5.3. Check the options:
- Front
- Sponsors
- Sitemgr
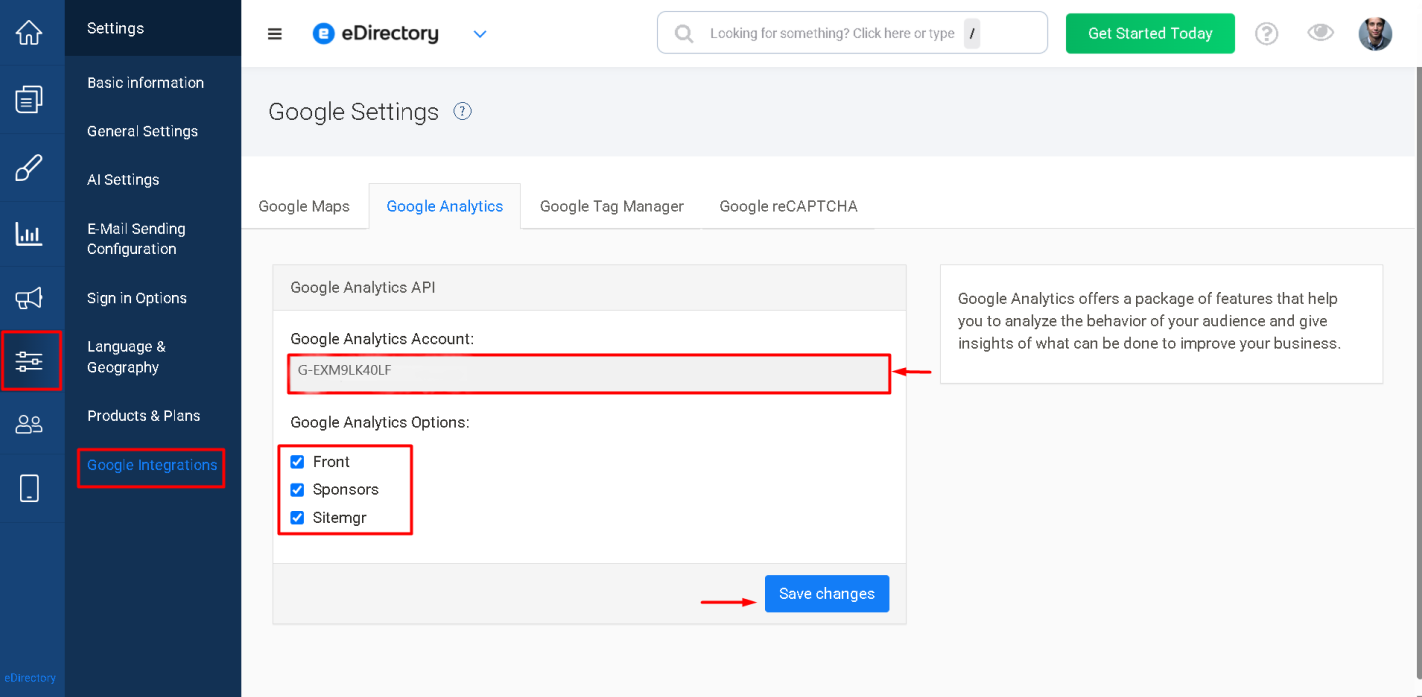
5.4. Click Save Changes.
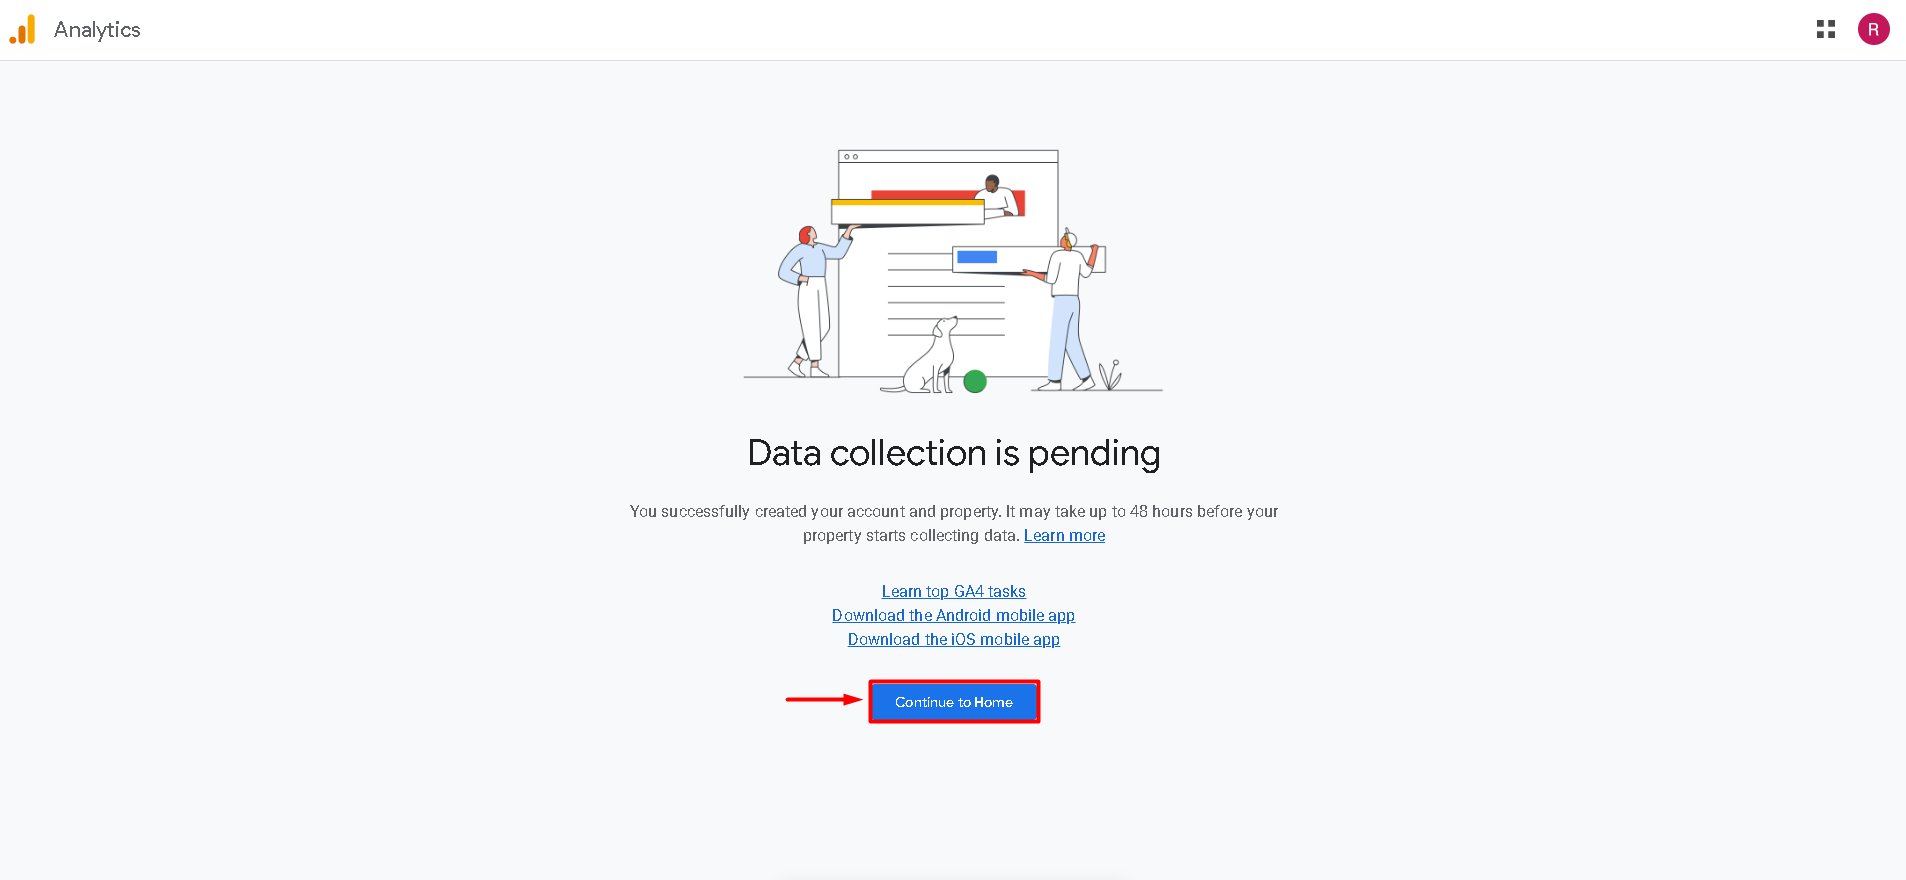
Step 6: Finish the Google Analytics Setup
6.1. After saving the Measurement ID in eDirectory, return to the Google Analytics setup page.
6.2. Close the Measurement ID window if it is still open.
6.3. Click "Next"

6.4. Then click "Continue to Home"
6.5. Google will ask which email notifications you would like to receive. Select your preferred options and click Save.
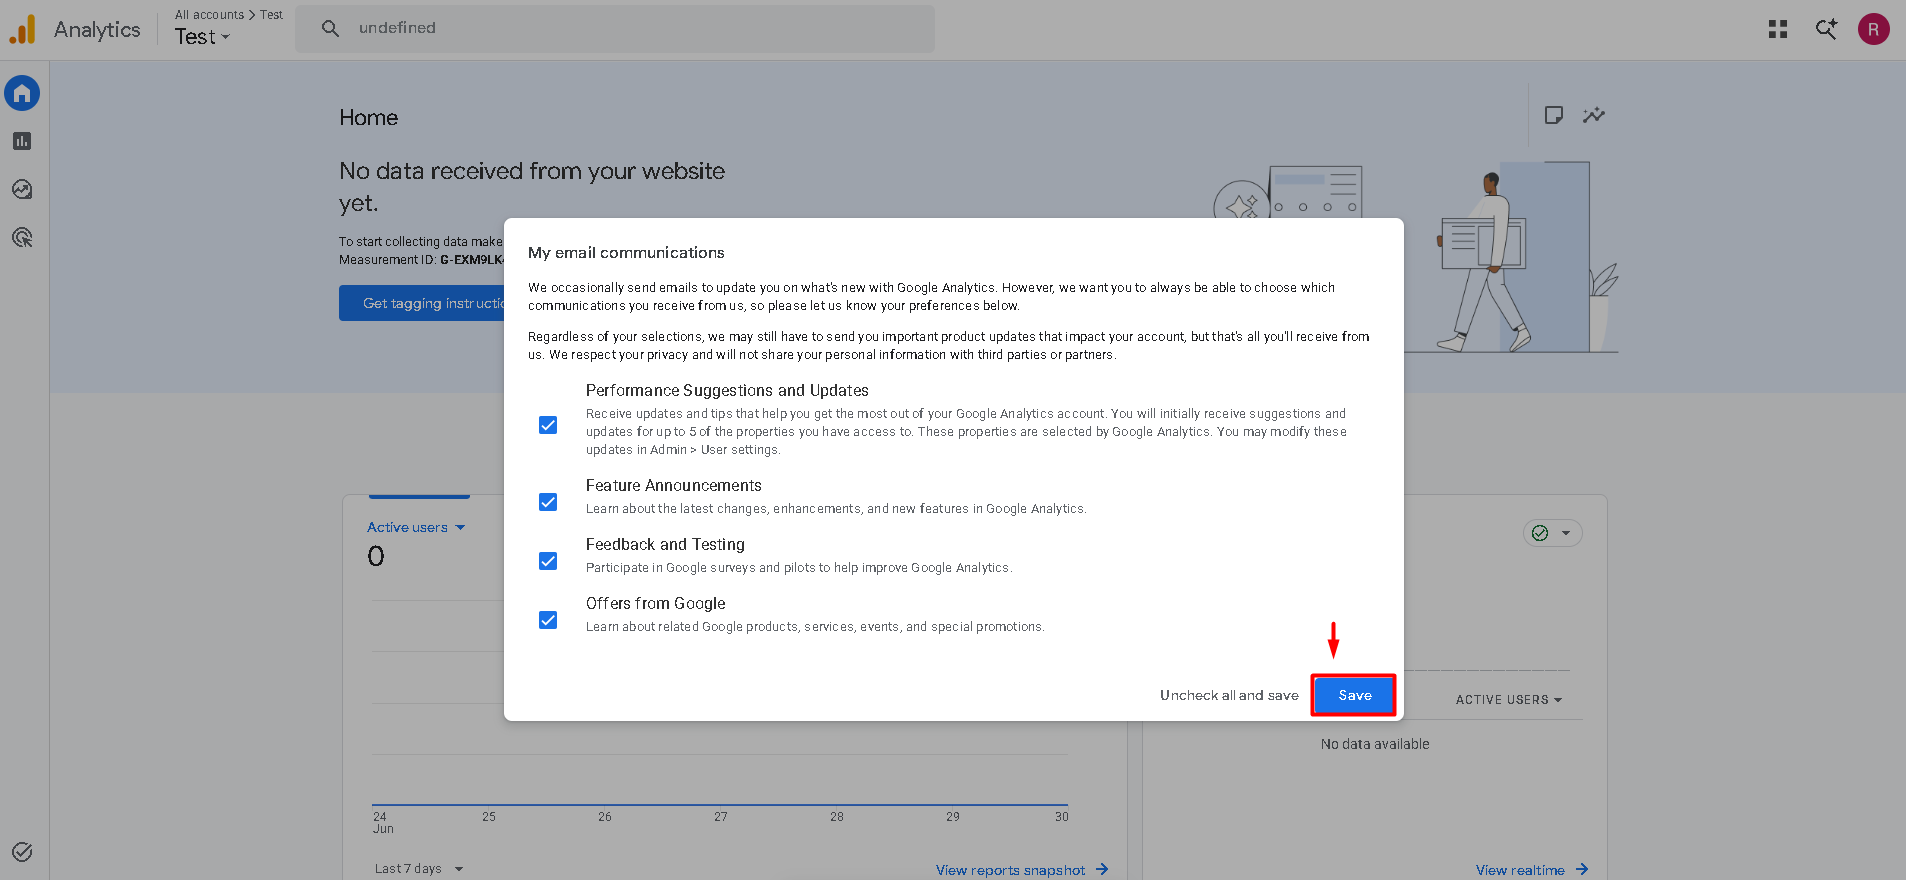
6.6. Your Google Analytics property is now fully configured.
Verifying the Integration
Once setup is complete, you'll be taken to your Google Analytics dashboard.
To verify that everything is working:
- Open your website in another browser tab.
- Browse a few pages.
- Return to Google Analytics.
- Wait a few moments for Google to process the visit.
You should begin seeing active users appear in the Realtime report.
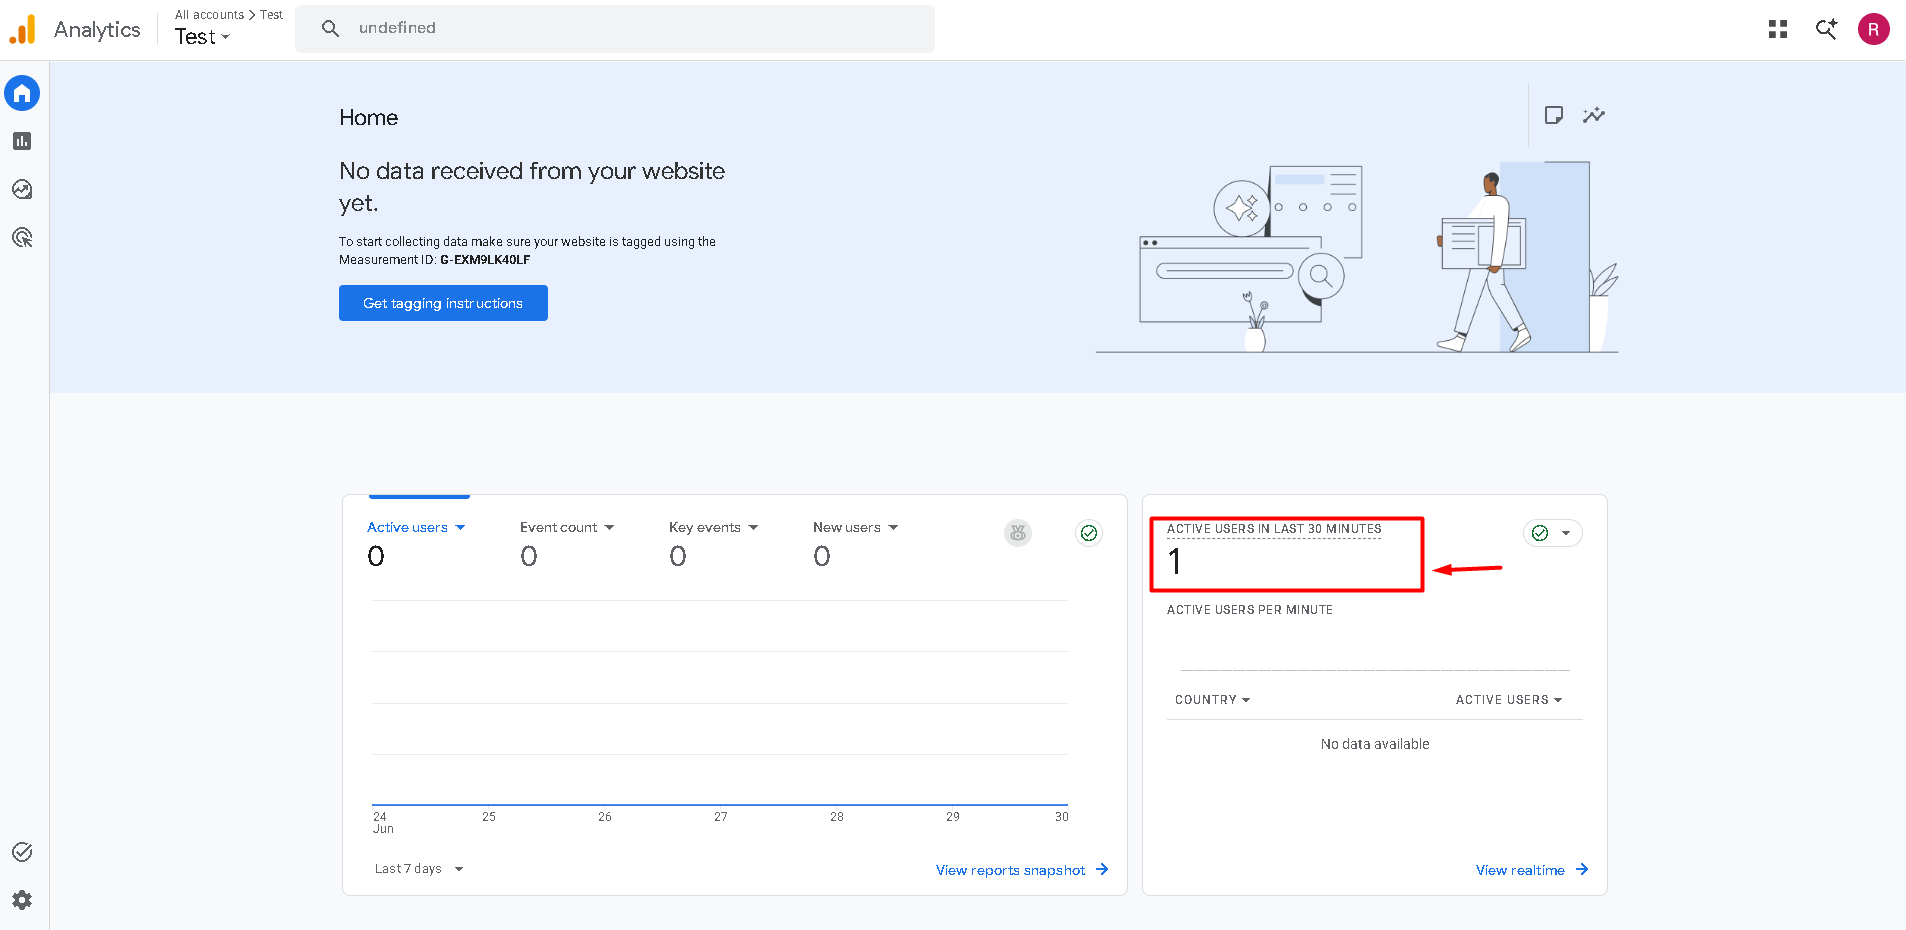
Please note that Analytics data is not always instantaneous. While Realtime data usually appears within a few minutes, standard reports may take several hours before displaying data.
What Can You Do with Google Analytics?
After integrating Google Analytics, you can monitor a wide variety of website metrics, including:
- Number of visitors
- Active users
- Page views
- Most visited pages
- Traffic sources
- Visitor locations
- Device types (Desktop, Mobile, Tablet)
- User engagement
- Conversion events
- And much more
Google Analytics provides valuable insights that can help you improve your website and better understand your audience.
Troubleshooting
I cannot find the Measurement ID.
After creating the Data Stream, wait for Google Analytics to finish loading. If the code window appears, simply close it. Google will display the Measurement ID (beginning with G-) separately.
My website isn't showing any visitors.
- Verify that the Measurement ID was copied correctly.
- Make sure you clicked Save Changes in eDirectory.
- Visit your own website and wait a few minutes.
- Check the Realtime report in Google Analytics.
My reports are empty.
This is normal for a newly created property.
Realtime reports usually update within minutes, while standard reports can take several hours (sometimes up to 24 hours) before displaying data.
Learn More
For more information about Google Analytics and its features, please refer to Google's official documentation: Google Analytics Help Center
Conclusion
Congratulations! Your Google Analytics 4 property is now integrated with your eDirectory website.
You can now track visitor activity, monitor website performance, and use Analytics reports to better understand how users interact with your website and make informed decisions to improve their experience.