How to Configure Login with Google
Introduction
Offering a streamlined login experience is crucial for user satisfaction and engagement on your website. Google Login provides a convenient and secure way for users to access your eDirectory site using their existing Google accounts, eliminating the need for new registrations and memorizing additional passwords. This article provides a comprehensive, step-by-step guide to integrating Google Login seamlessly with your eDirectory platform, enhancing user convenience and simplifying the login process.

Prerequisite: Before proceeding, ensure that your eDirectory website is connected to its final live domain. Google Login cannot be configured using a temporary URL or development domain. If you need to change your domain, please refer to our Domain Change video before proceeding.
Steps to Configure Google Login
Step 1: Access the Google Cloud Platform Console
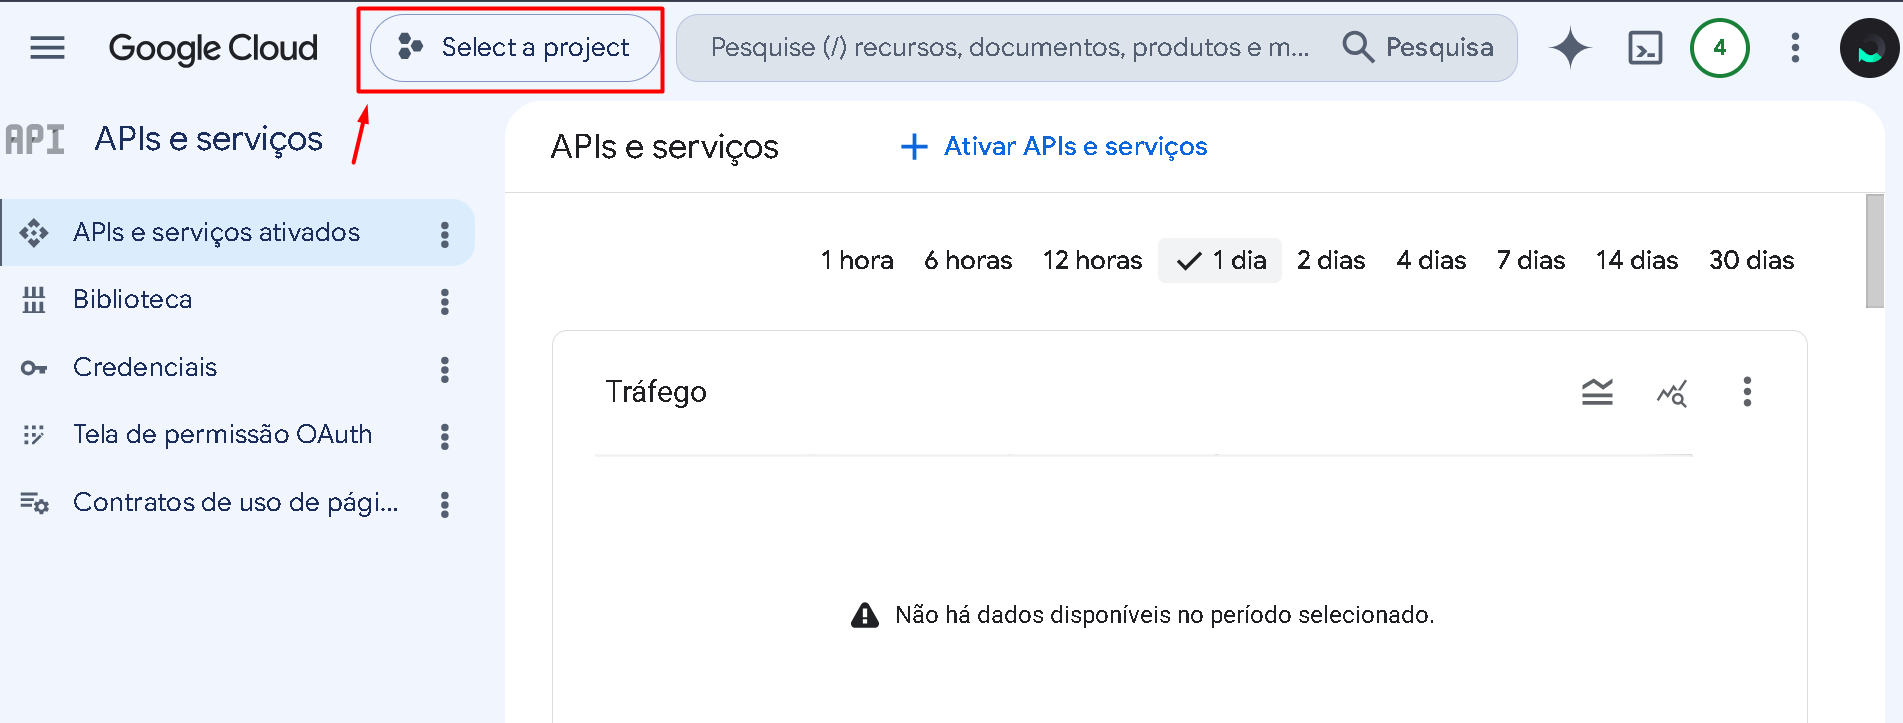
1.1. Visit the Google Cloud Platform Console
1.2. In the top-left corner of the page, click the project selector. Depending on your account, this may display either "Select a project" or the name of an existing project.
Note: If a project is already selected and displayed at the top of the page, and it is the project associated with your website, leave it selected and proceed directly to Step 3: Configure the OAuth Consent Screen. There is no need to create a new project.

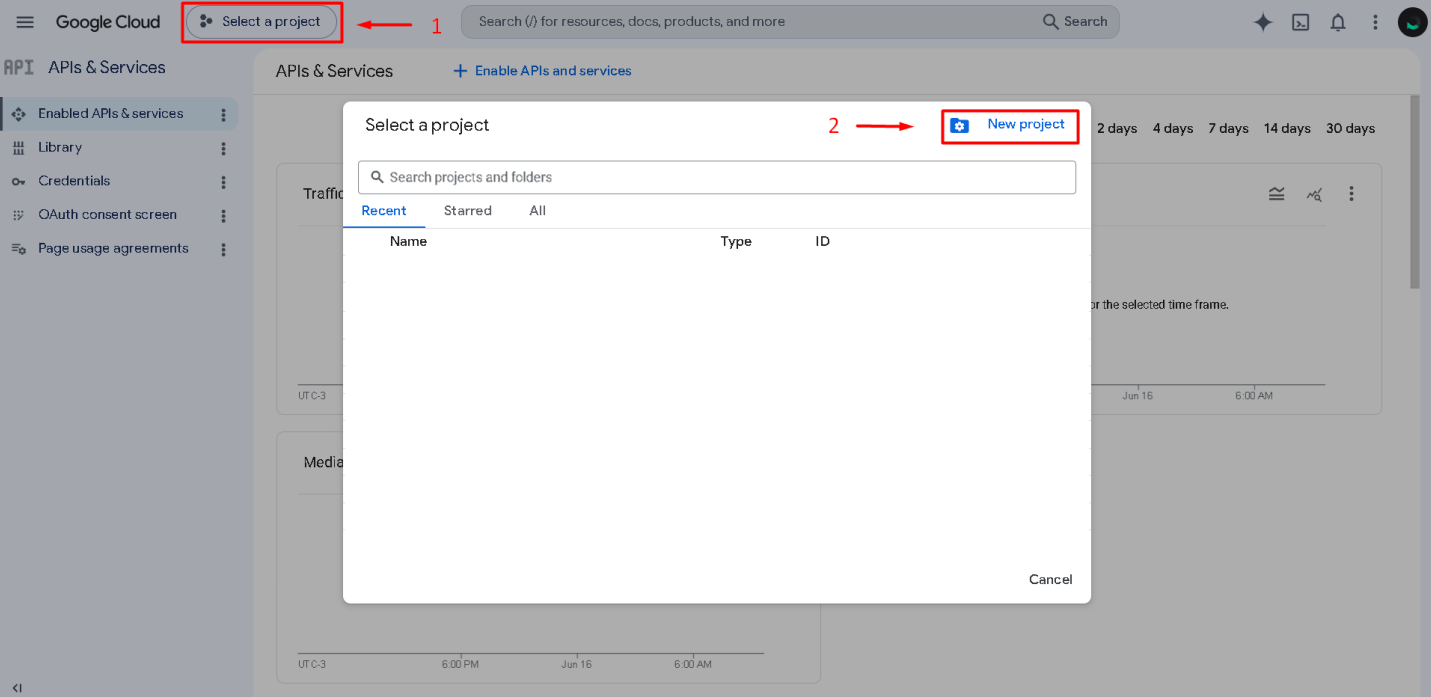
1.3. If you do not already have a project for your website, click "New Project."
Step 2: Create Your Google Cloud Project
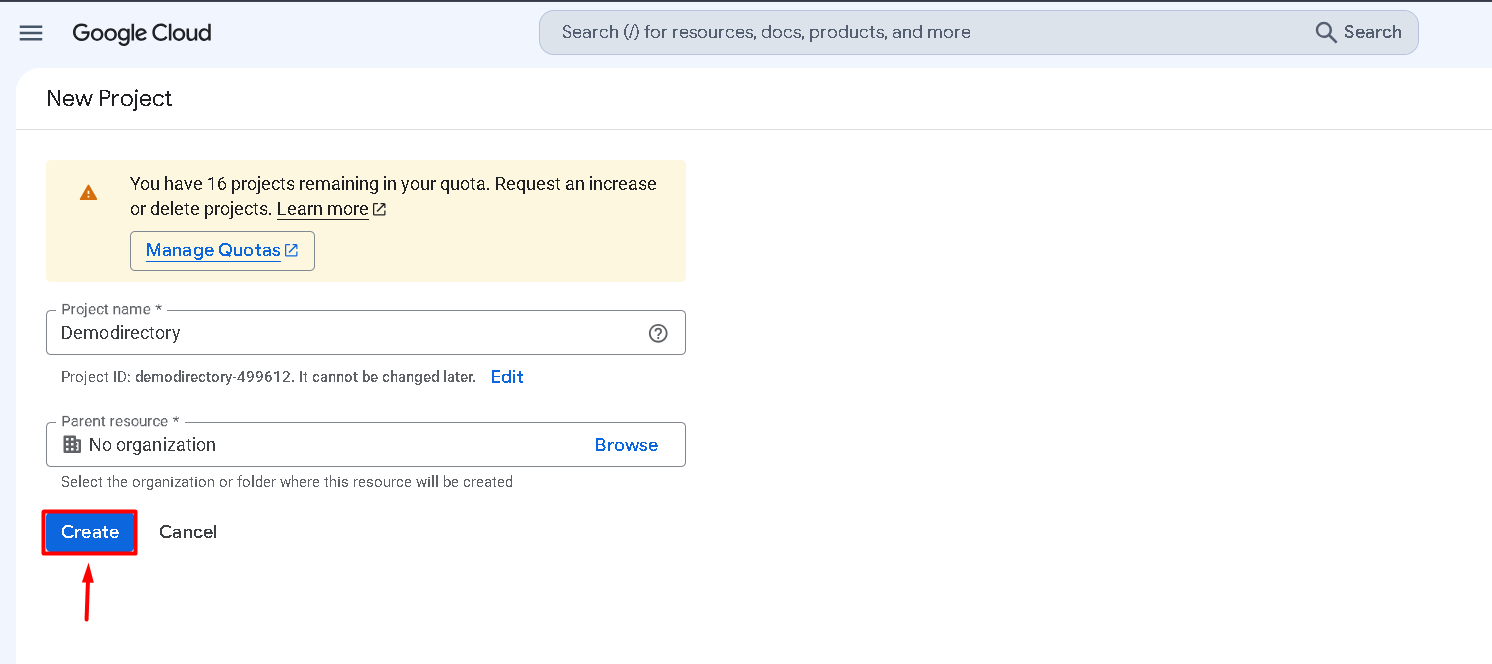
2.1. Complete the required fields as follows:
- Project name: Enter a descriptive name, such as your site's name.
- Organization: If applicable, select your organization from the dropdown.
2.2. Once the information is complete, click "Create."
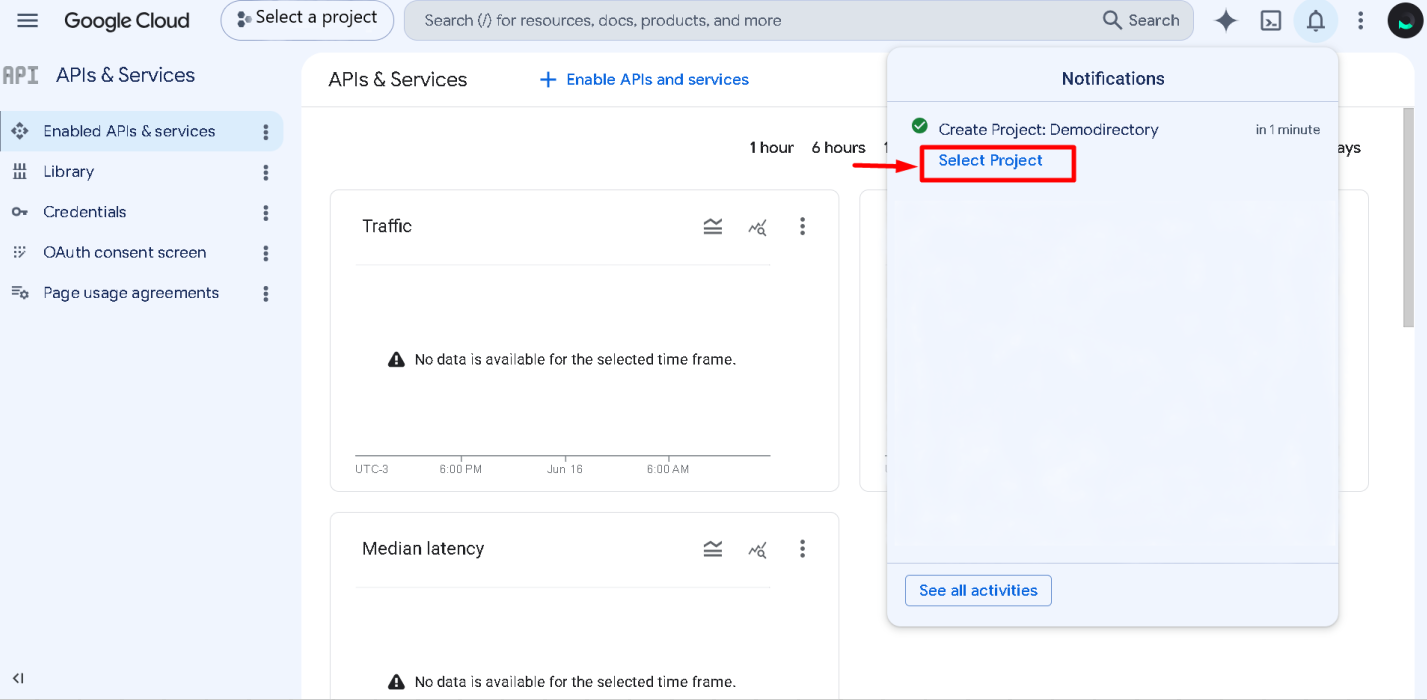
2.3. Click "Select Project" to open the newly created project.
Step 3: Configure the OAuth Consent Screen
3.1. Once your project is created, ensure it is selected from the dropdown menu at the top of the page.
3.2. In the left-hand menu, click "OAuth consent screen."
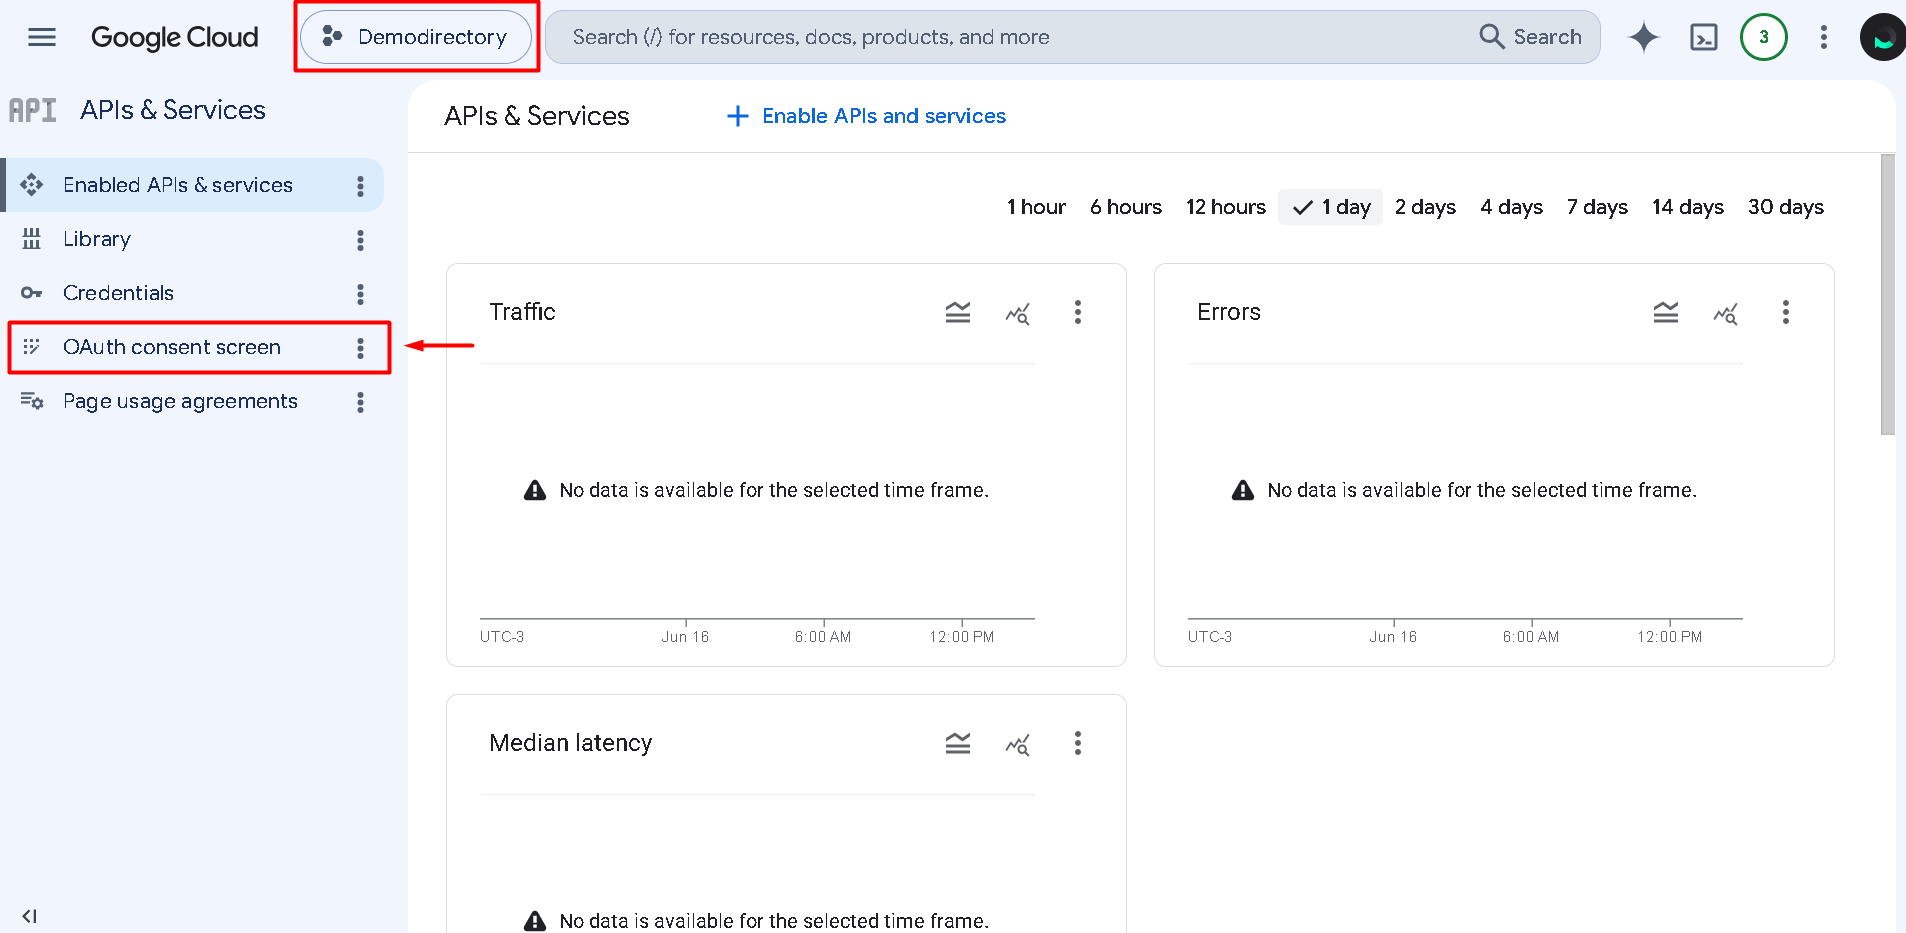
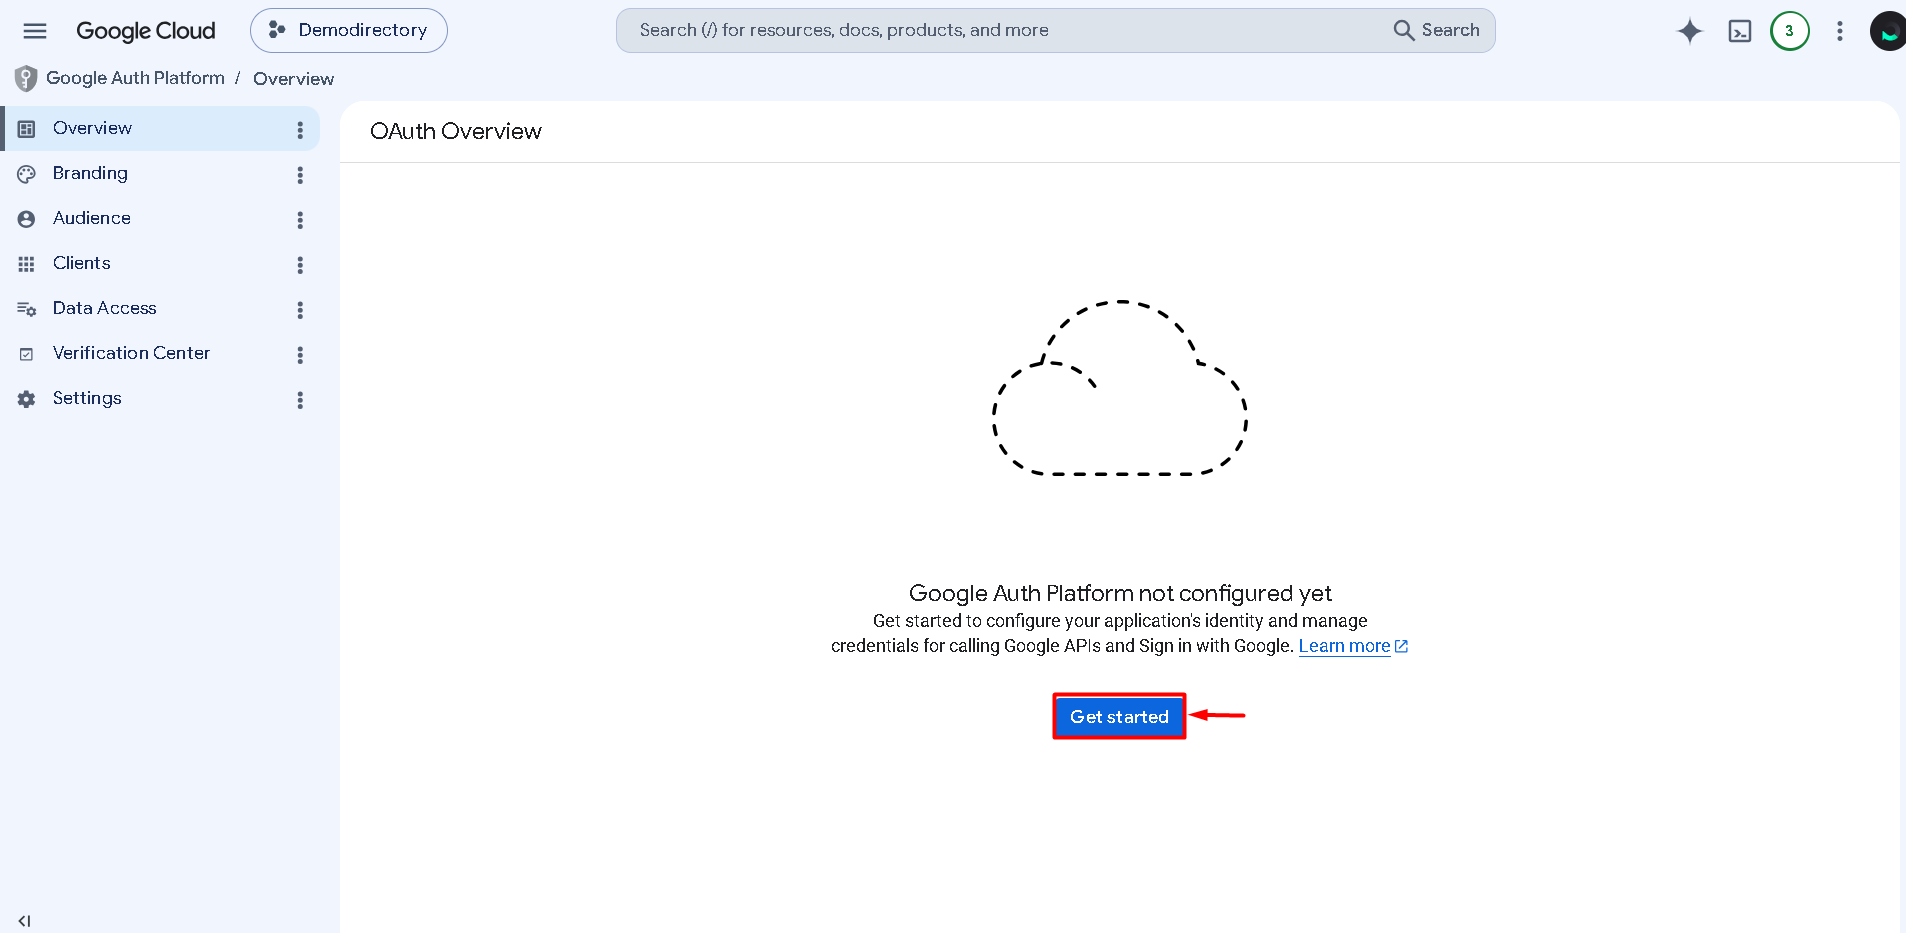
3.3. Click "Get Started."
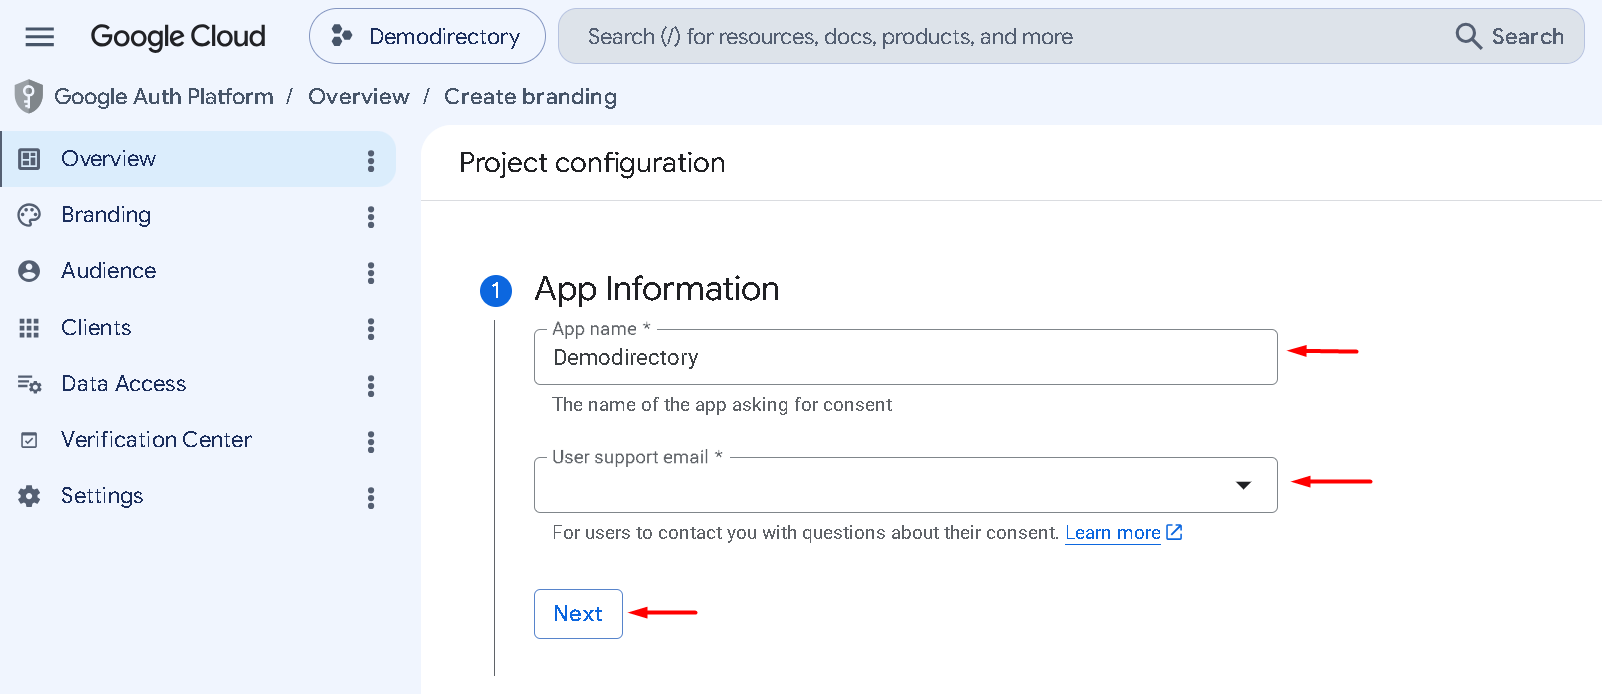
3.4. Complete the required fields as follows:
- App name: Enter your website's name.
- User support email: Provide your primary email address.
3.5. Click "Next."
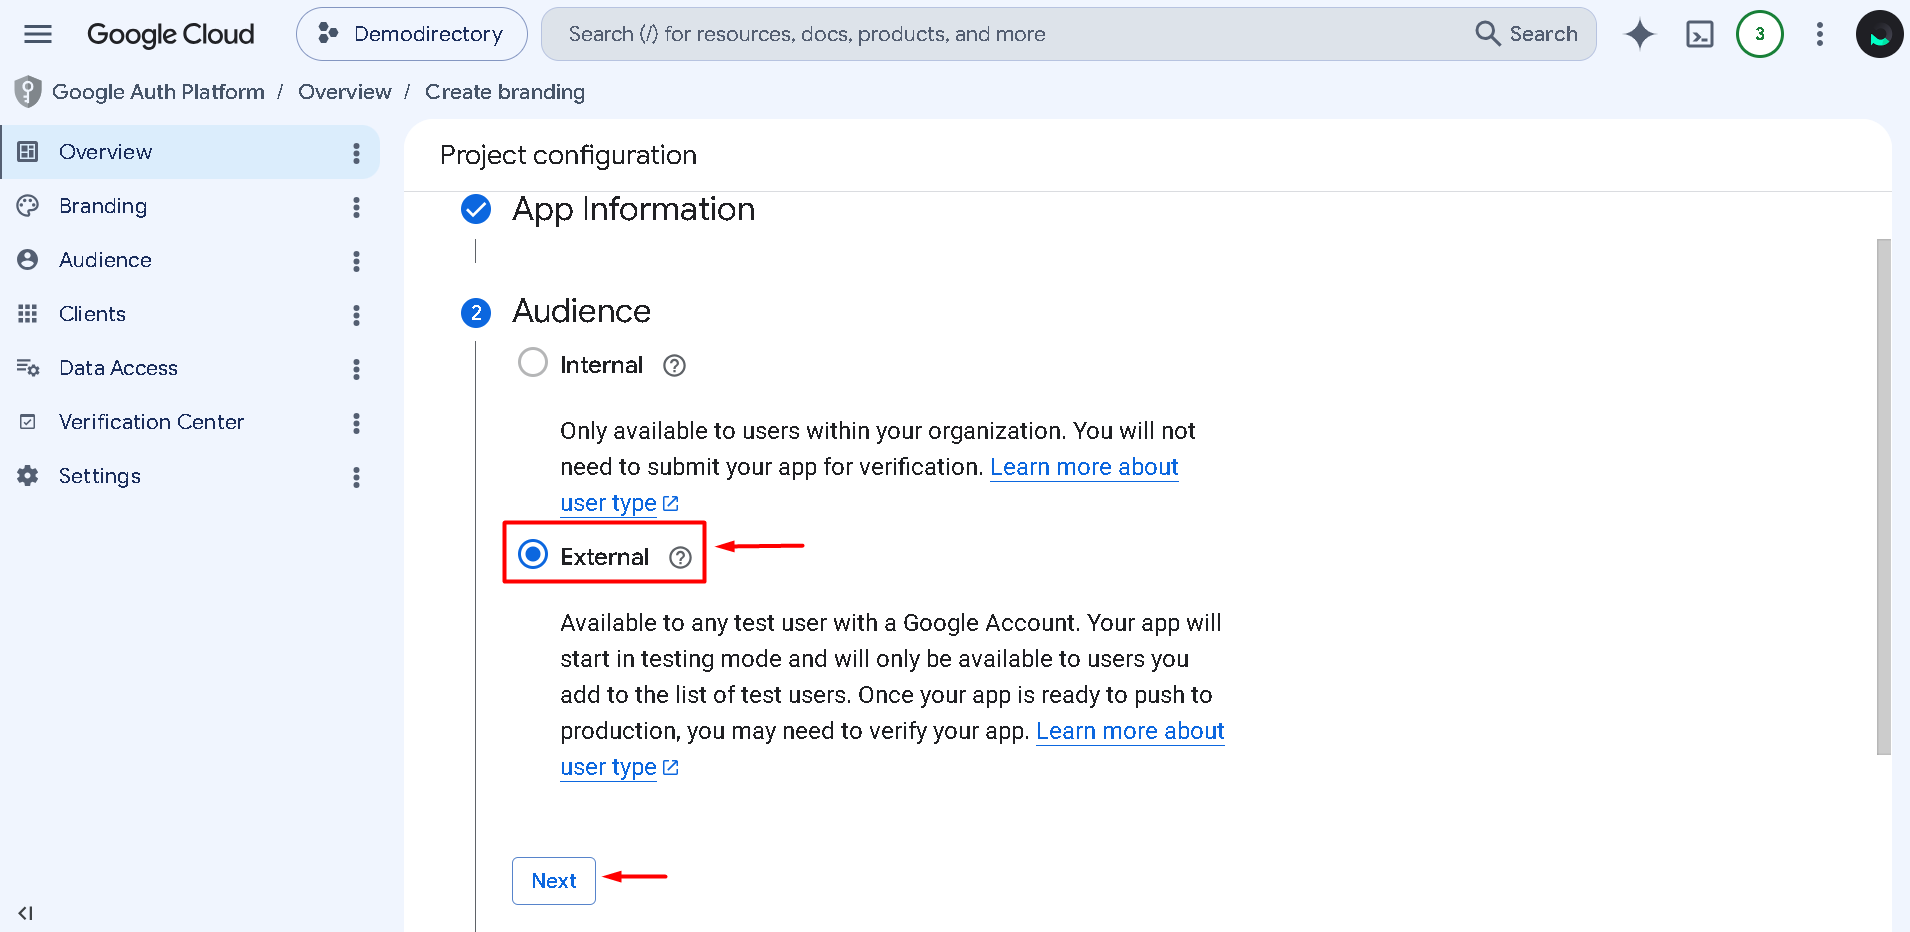
3.6. Select the "External" option and click "Next."
3.7. Type your email address in the "Developer contact information" section and click "Next."
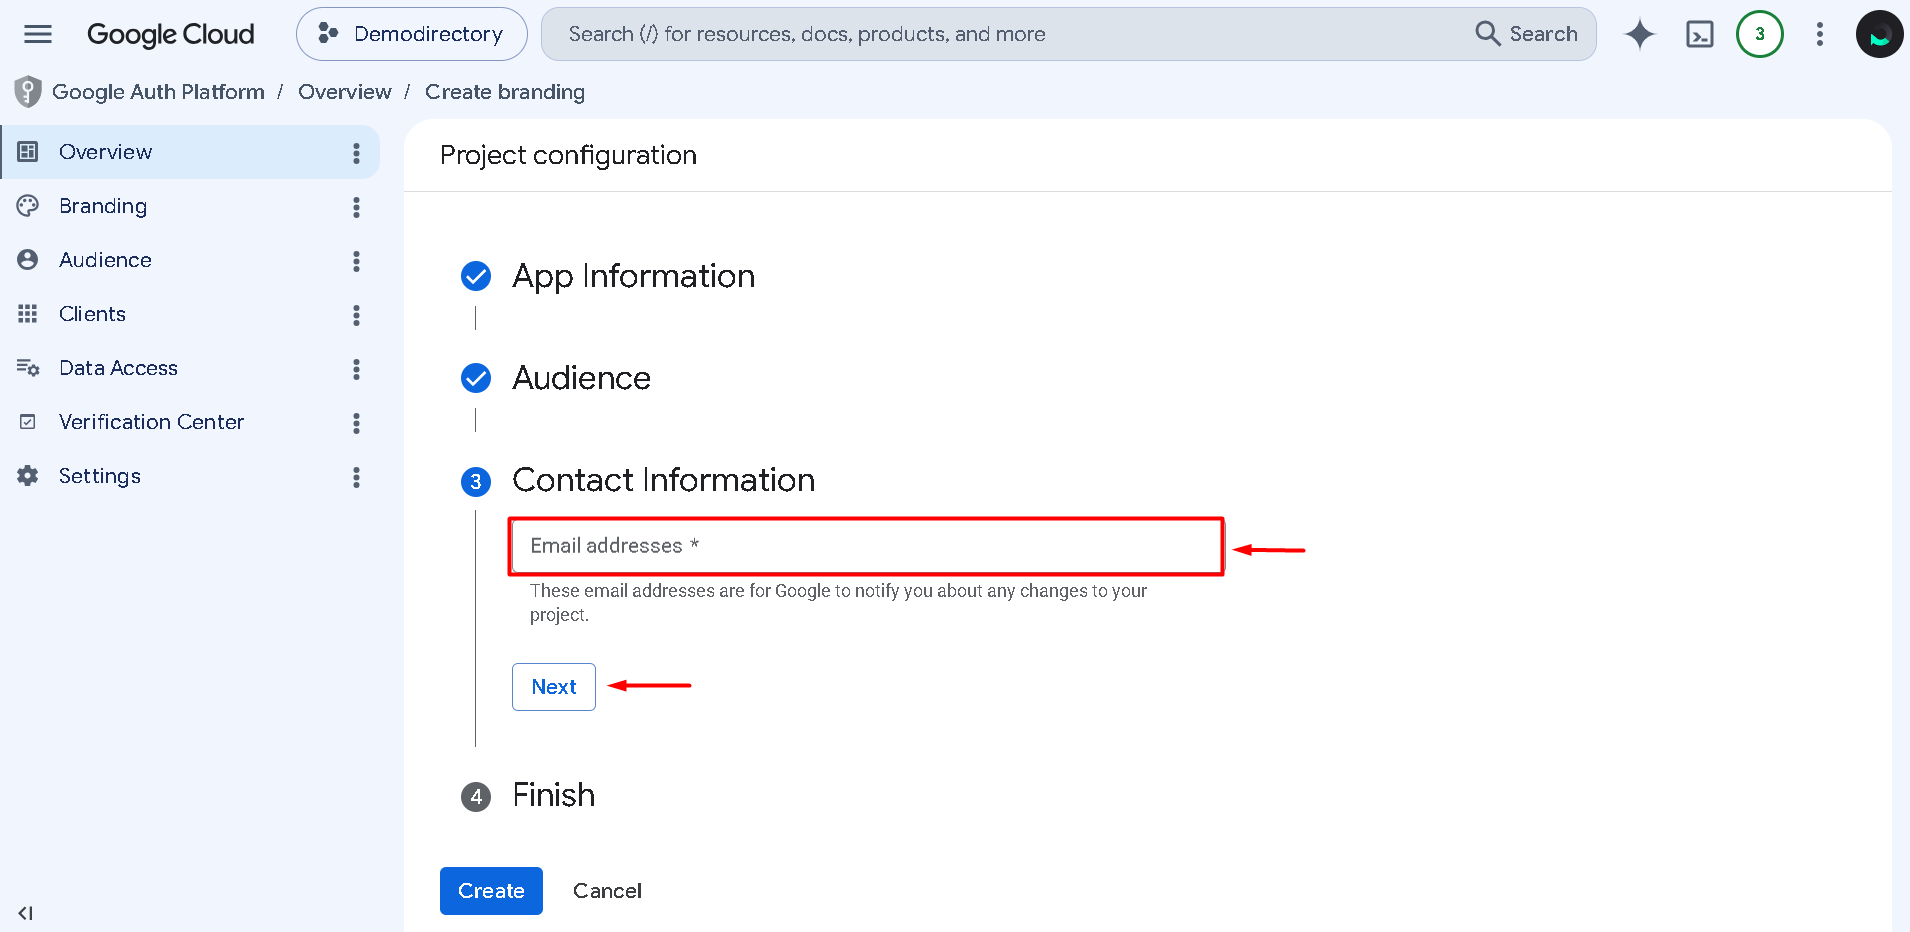
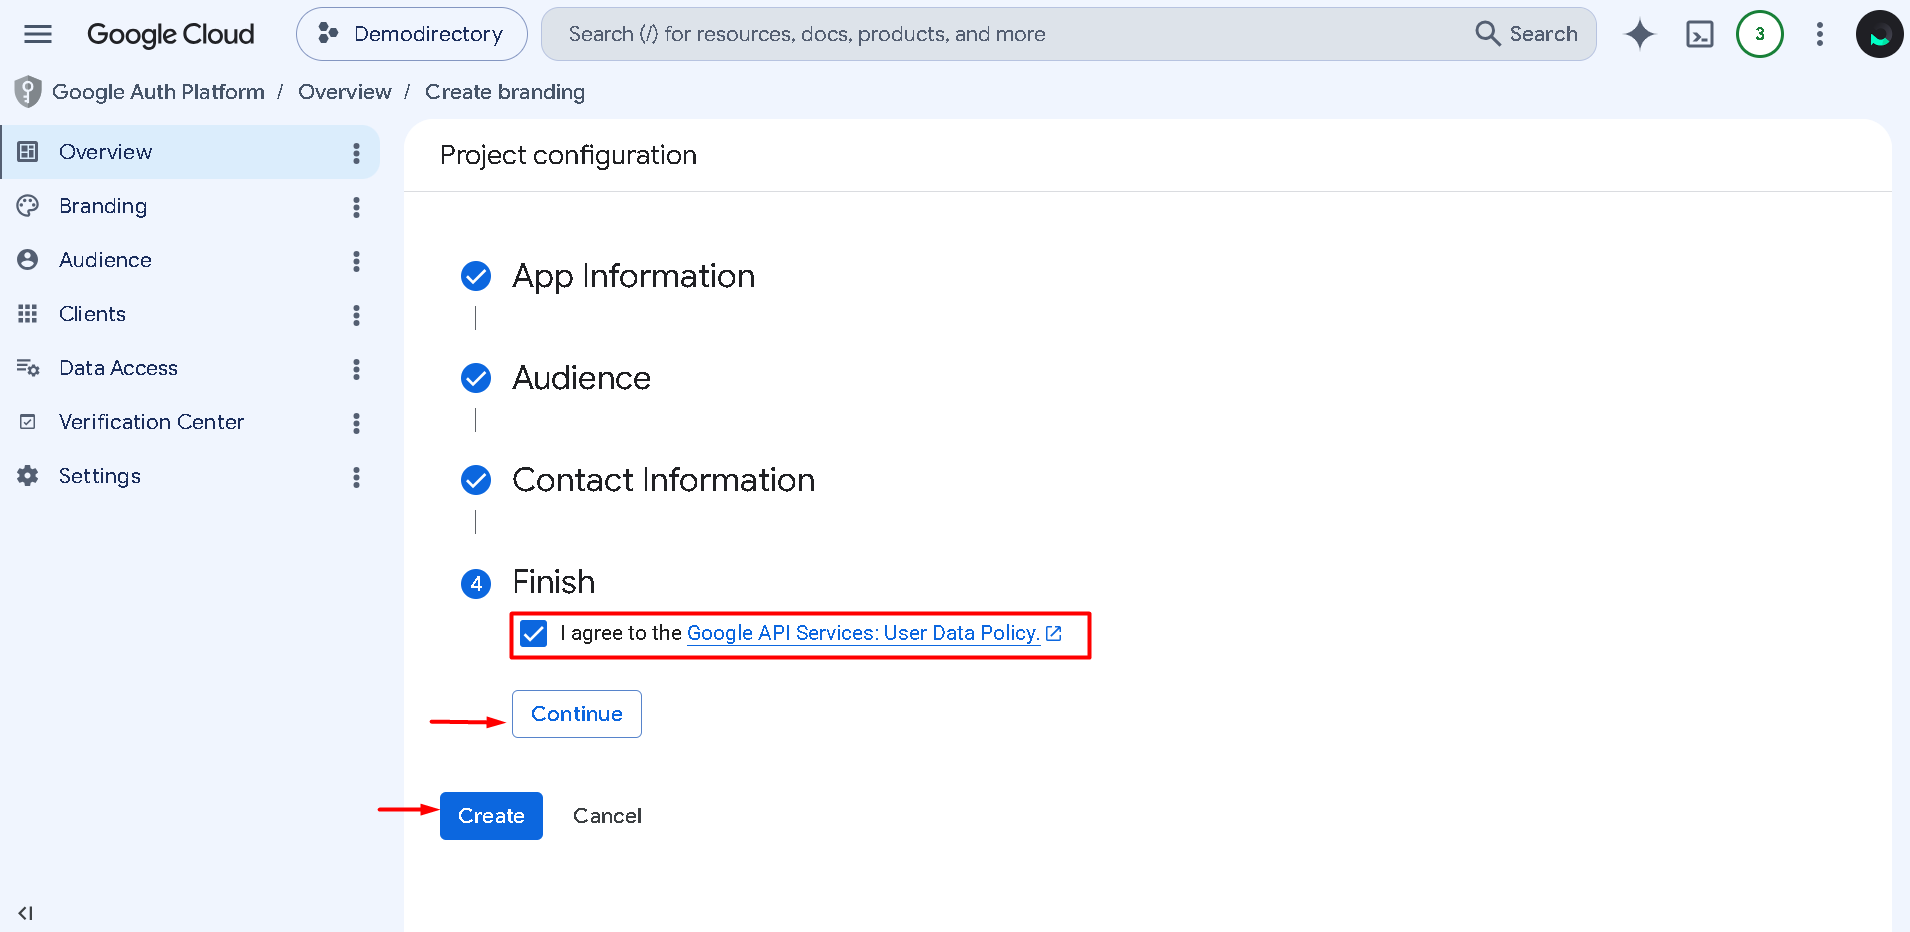
3.8. Ensure the box to agree to the terms is checked, then click "Continue," followed by "Create."
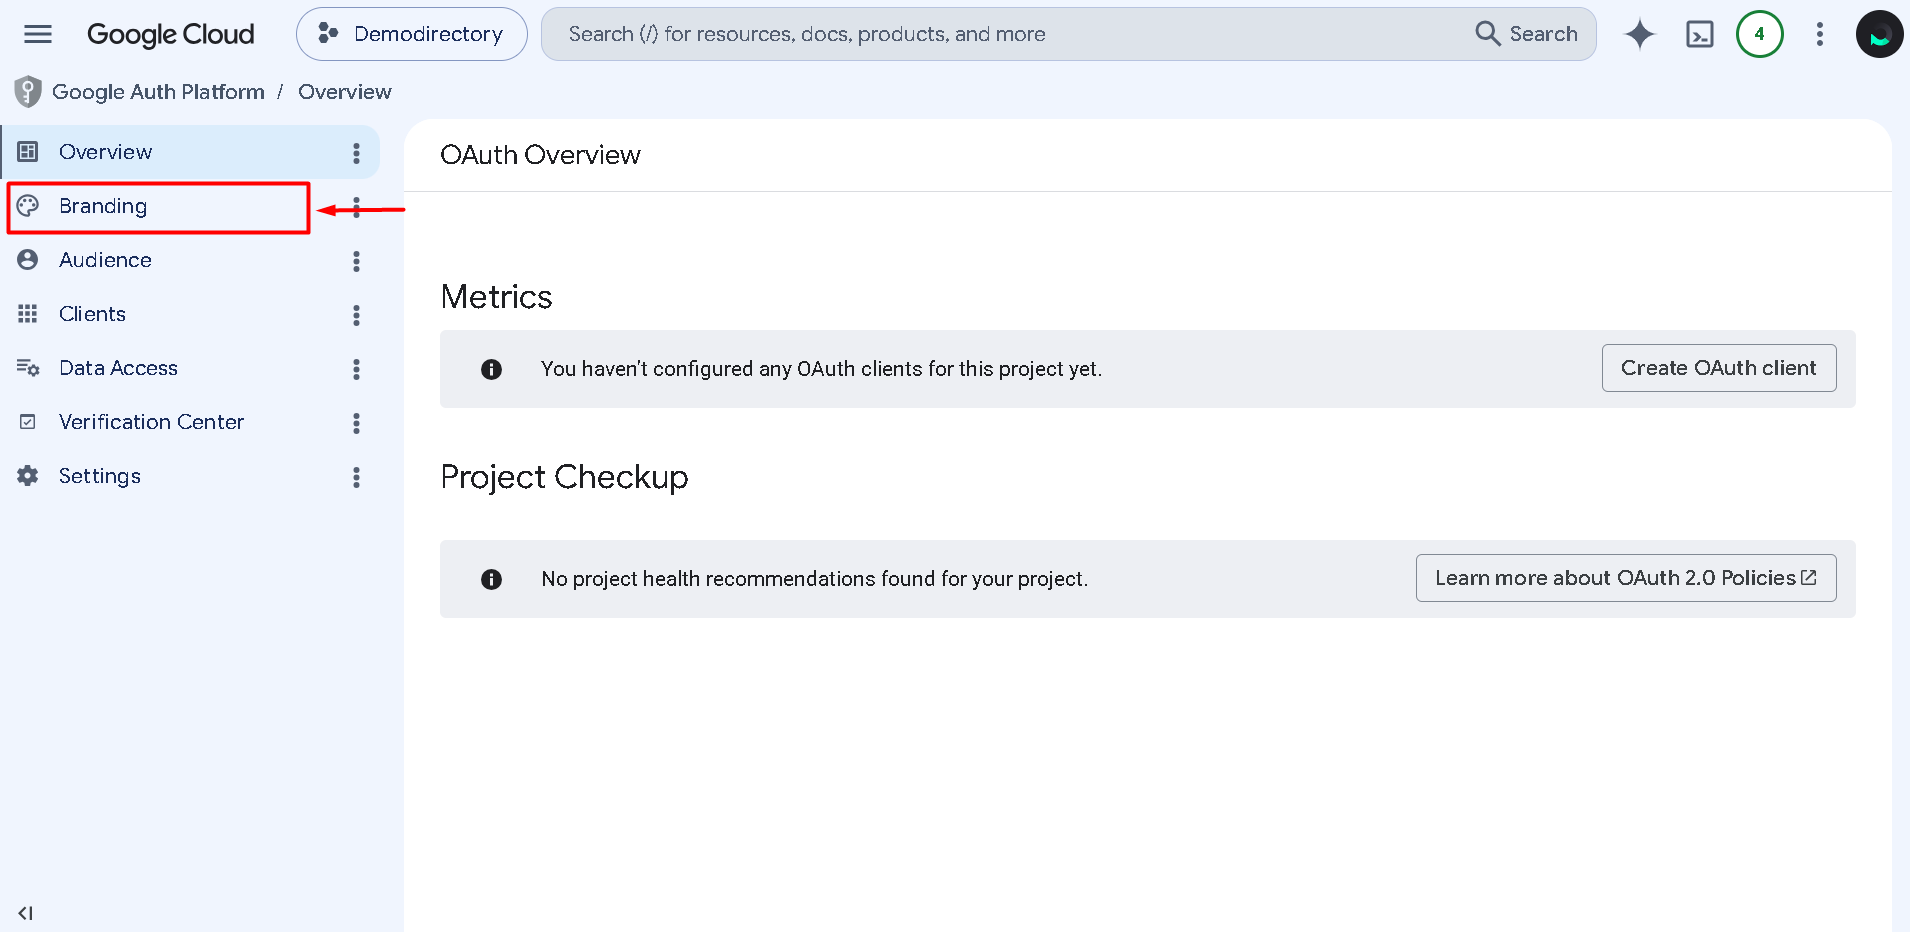
Step 4: Configure Branding Information in Google Cloud Console
4.1. Click "Branding."
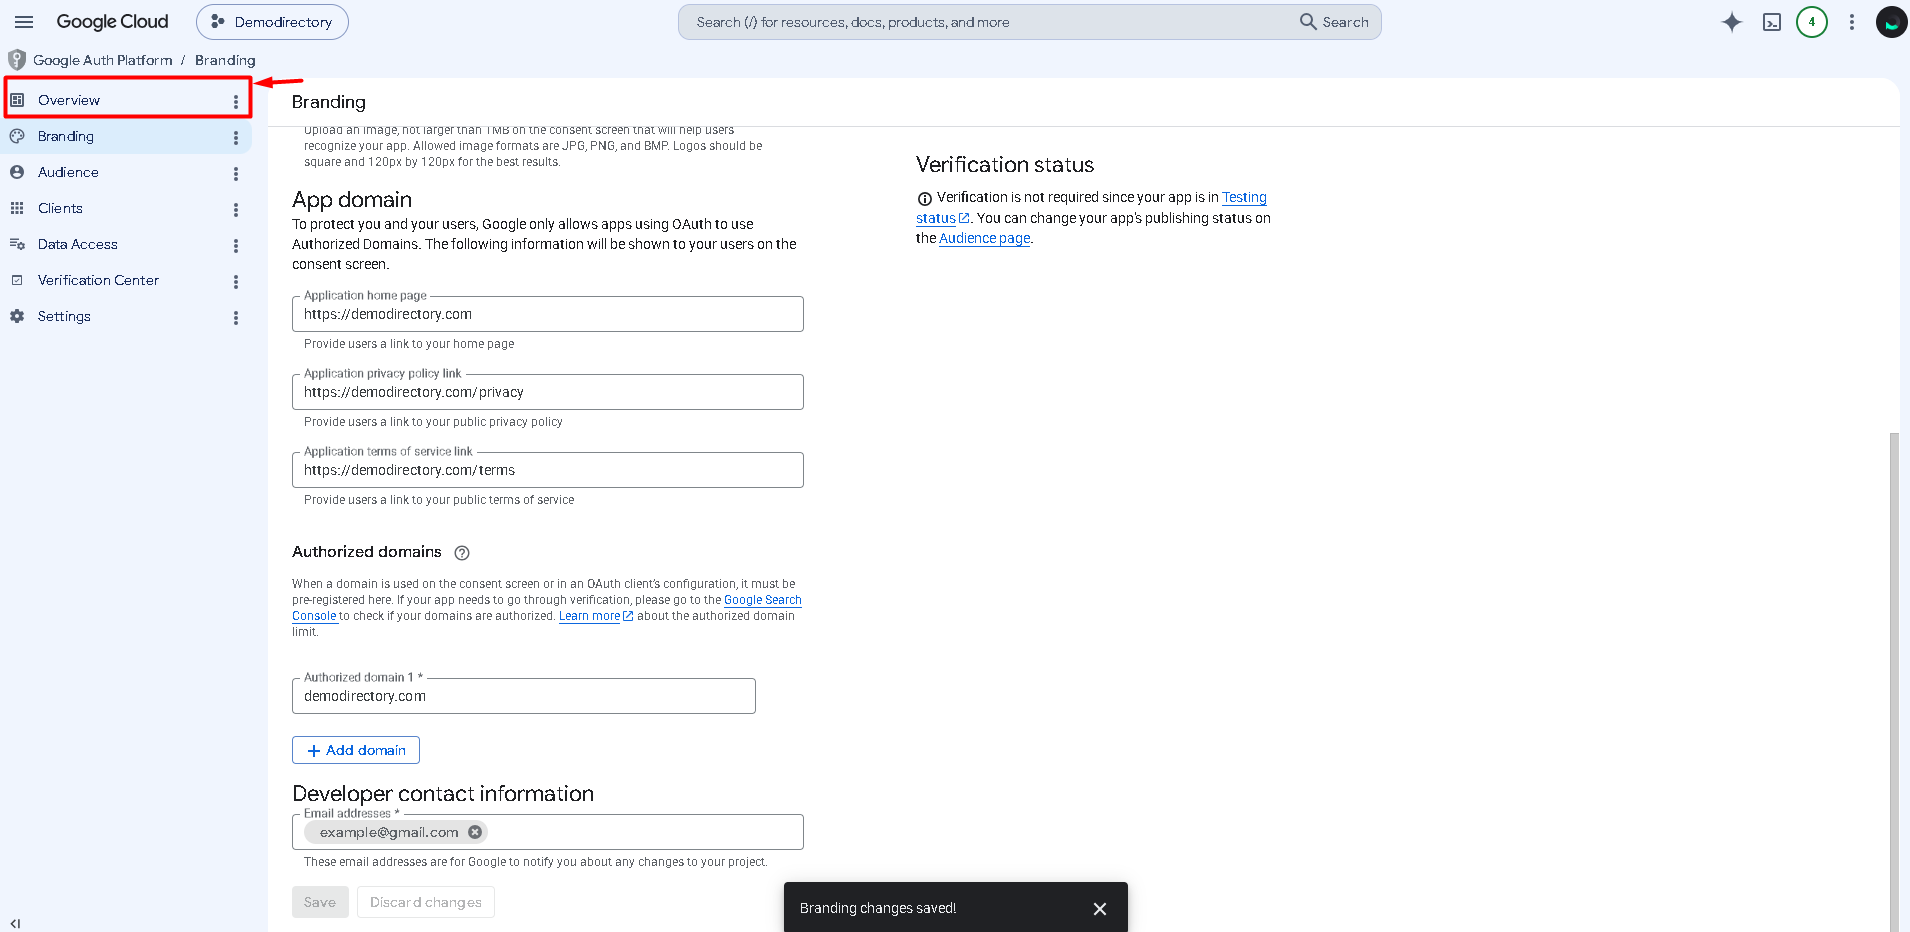
4.2. Scroll down to the App domain settings and complete the required fields as follows:
- Application homepage: Link to your website's homepage (e.g.,
https://www.example.com). - Privacy Policy URL: Link to your website's privacy policy page. (e.g.,
https://www.example.com/privacy). - Terms of Service URL: Link to your website's terms of service page.(e.g.,
https://www.example.com/terms). - Authorized Domains: Click "Add Domain" and enter only your root domain name, without
http://,https://, orwww. For example, if your website ishttps://www.example.com, enter:example.com - Developer contact information: Your primary email address.
4.3. Click "Save."

Step 5: Create Your Google Login Credentials
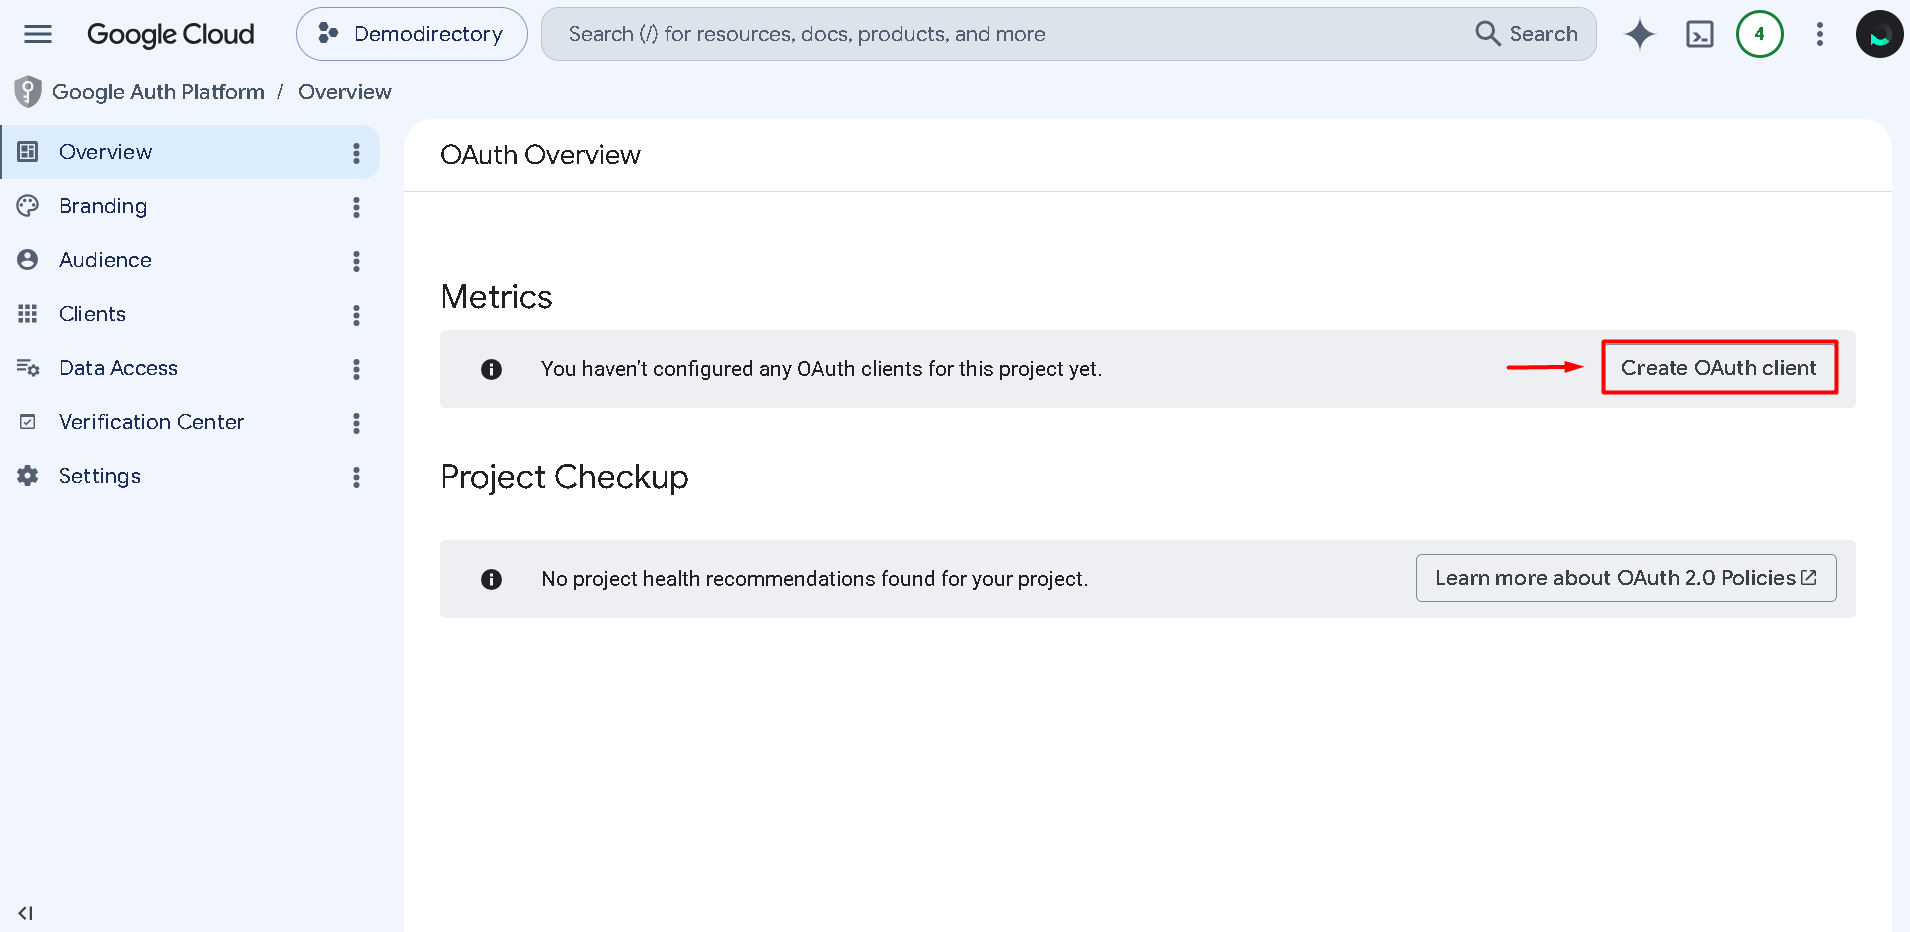
5.1. Click "Overview."
5.2. Click "Create OAuth Client."
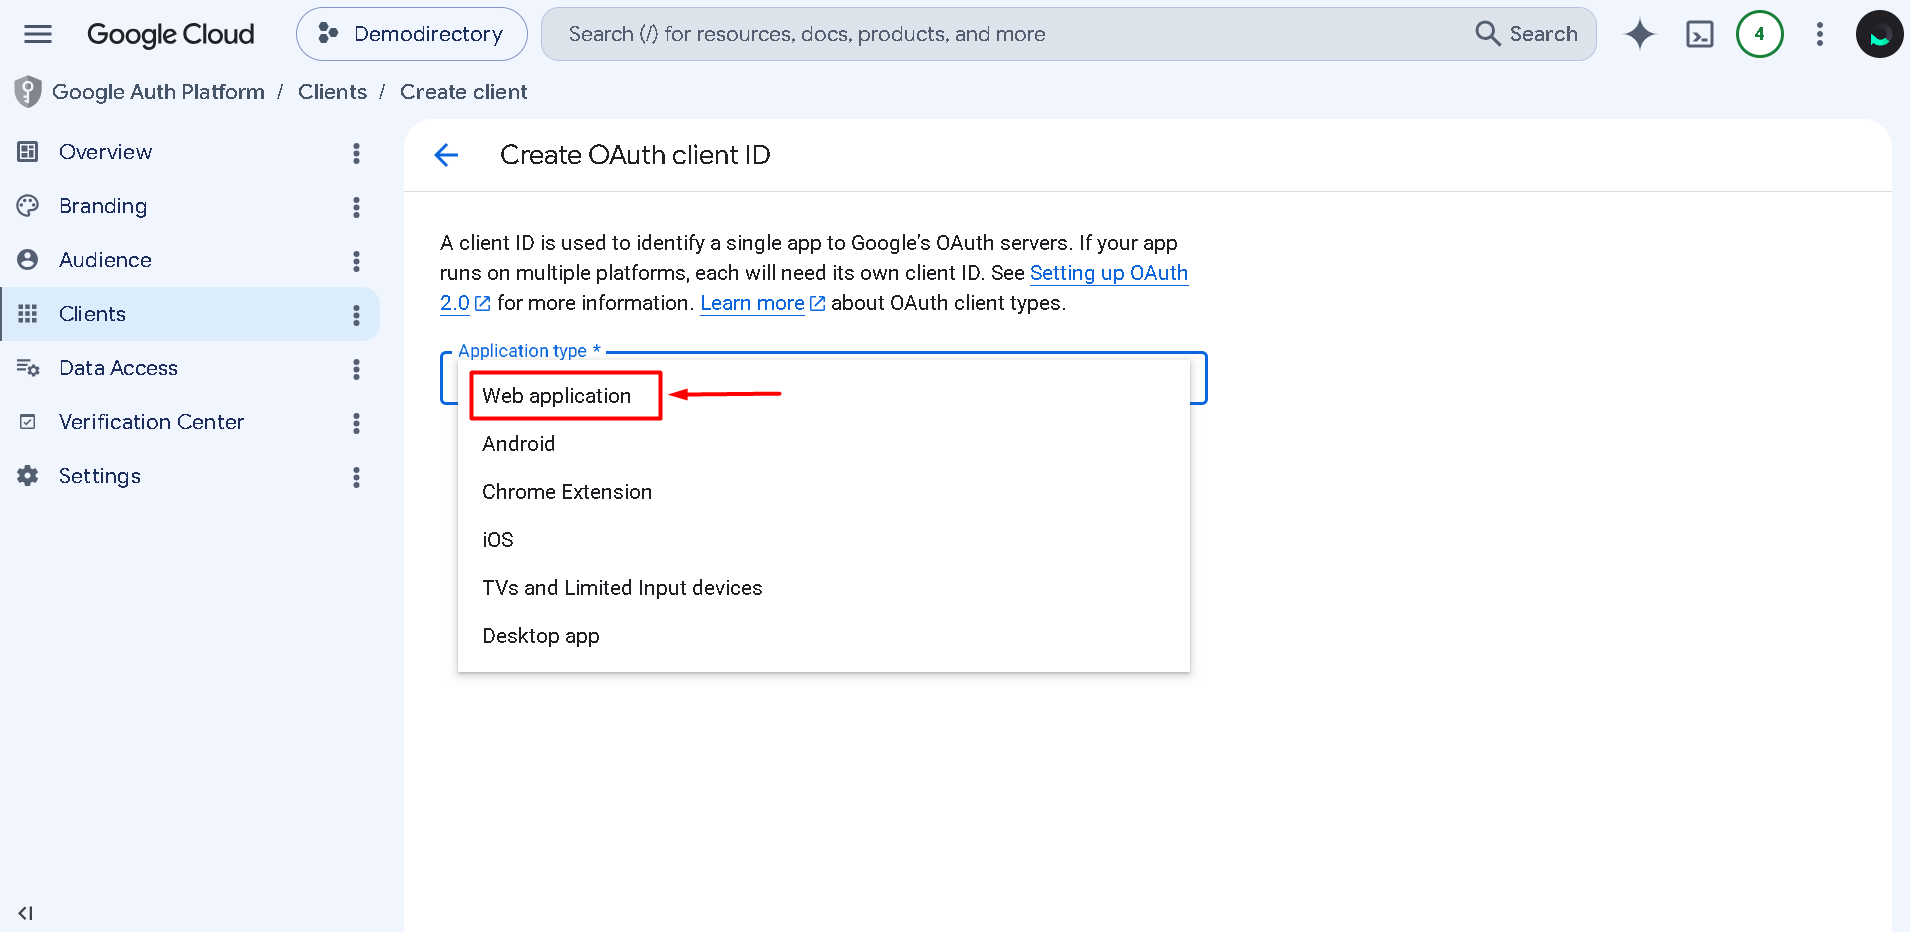
5.3. Select "Web application" as the "Application type."
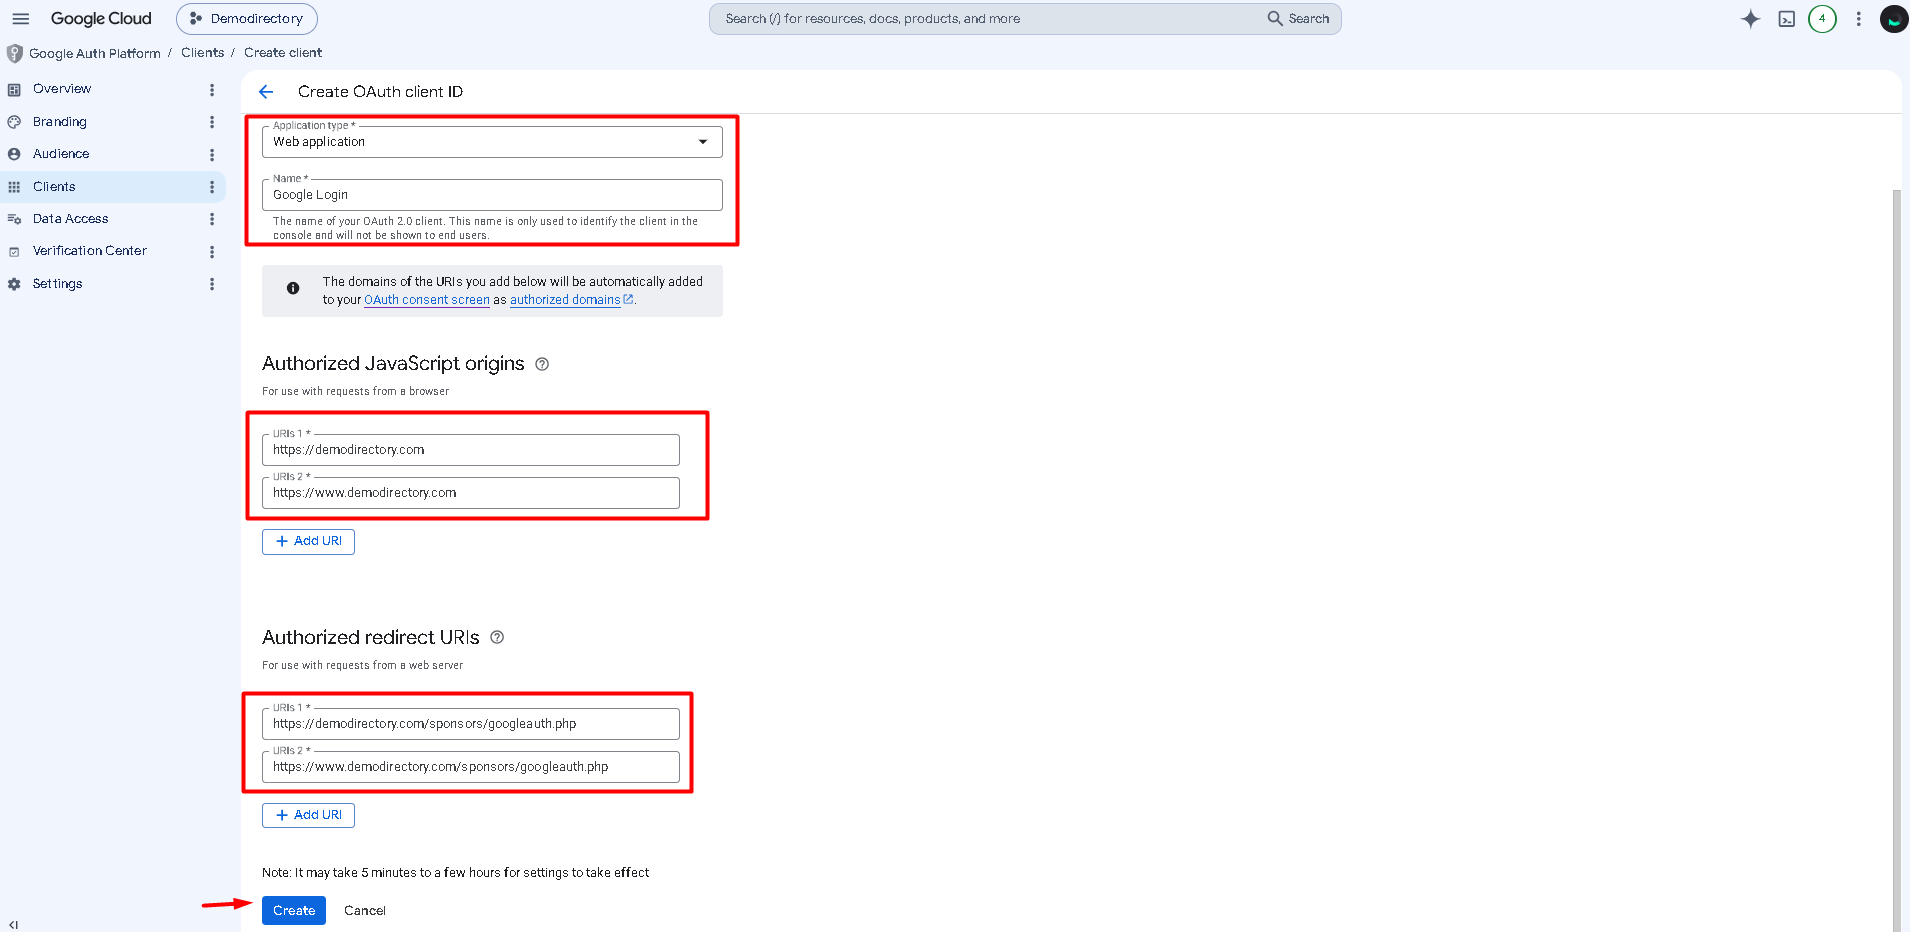
5.4. Configure the following:
- Name: Assign a recognizable name, such as "Google Login."
- Authorized JavaScript origins: Add your website's homepage URL in both of the following formats (replace
example.comwith your actual domain):
https://www.example.com
https://example.com
- Redirect URIs: Add the extension
/sponsors/googleauth.phpto your website's base URL in both of the following formats (replaceexample.comwith your actual domain):
https://www.example.com/sponsors/googleauth.php
https://example.com/sponsors/googleauth.php
5.5. Click "Create" to generate the OAuth client credentials.
Note: Add both the "www" and non-"www" versions of your domain to ensure Google Login works correctly regardless of how visitors access your website.
5.6. A confirmation window will appear displaying your newly created OAuth credentials. Click "OK" to continue.
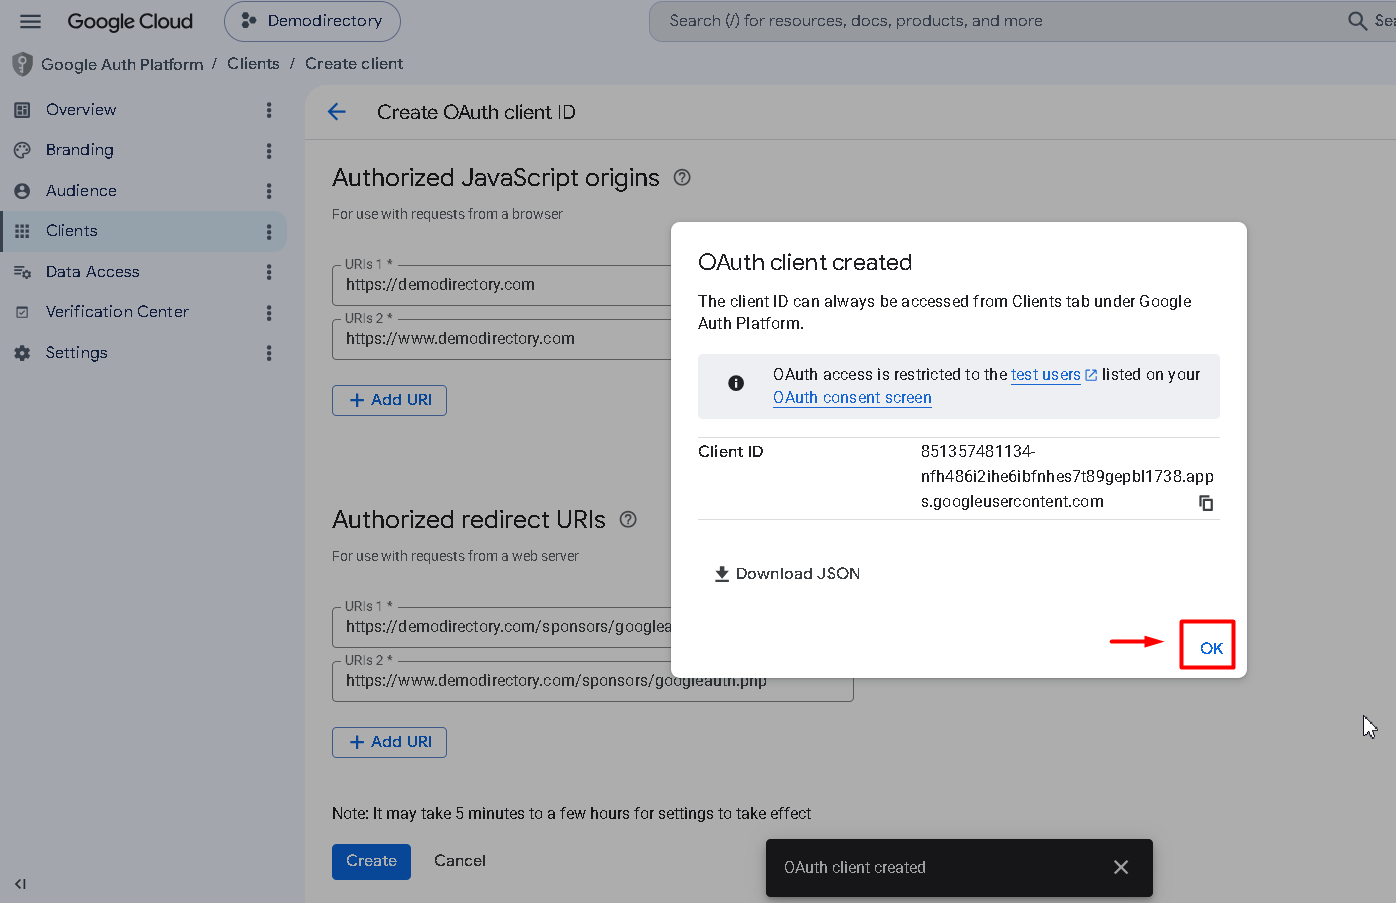
5.7. Click the pencil icon to access the OAuth client details.

5.8. Copy the Client ID and Client Secret displayed on this page. You will need both values in Step 6.

Note: Google may periodically update the appearance and wording of the Google Cloud Console. If you notice minor differences in labels or layouts, look for the closest matching option.
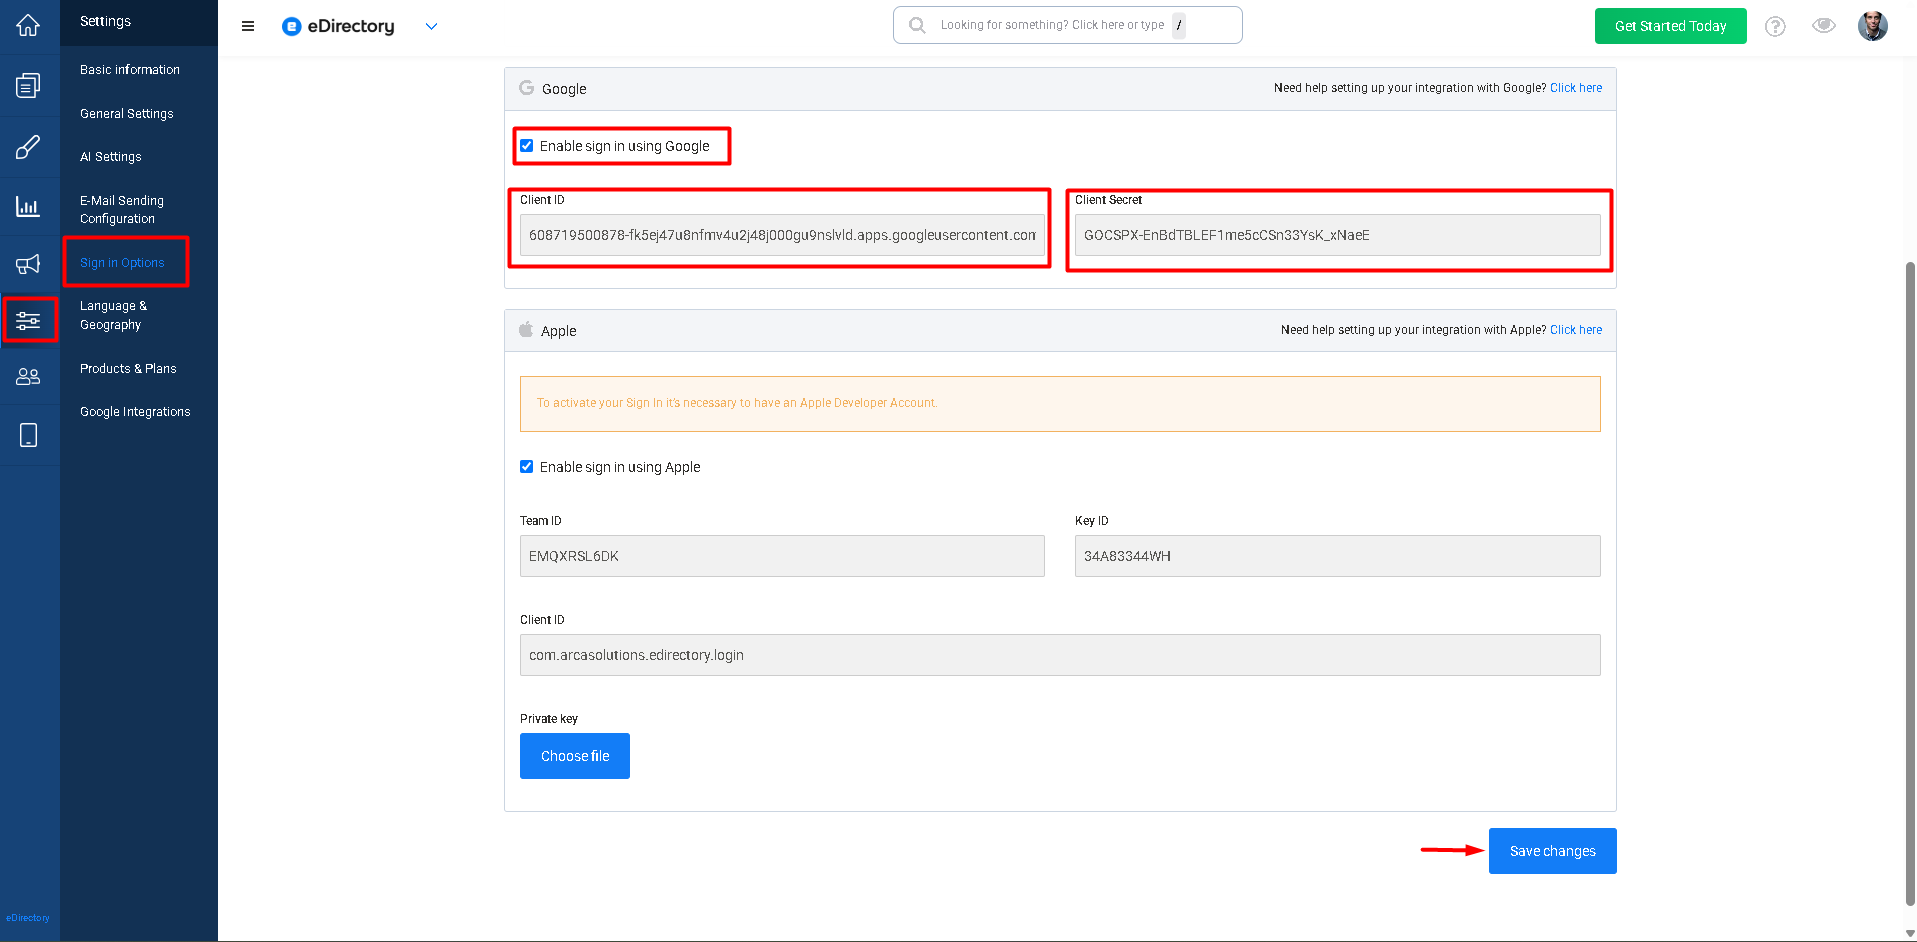
Step 6: Integrate Google Login Credentials into eDirectory
6.1. Log in to your eDirectory Site Manager.
6.2. In Site Manager, navigate to Settings → Sign-in Options.
6.3. Check the box next to "Enable sign in using Google."
6.4. Paste the "Client ID" and "Client Secret" you copied from the Google Cloud Console into their respective fields.
6.5. Click "Save Changes."
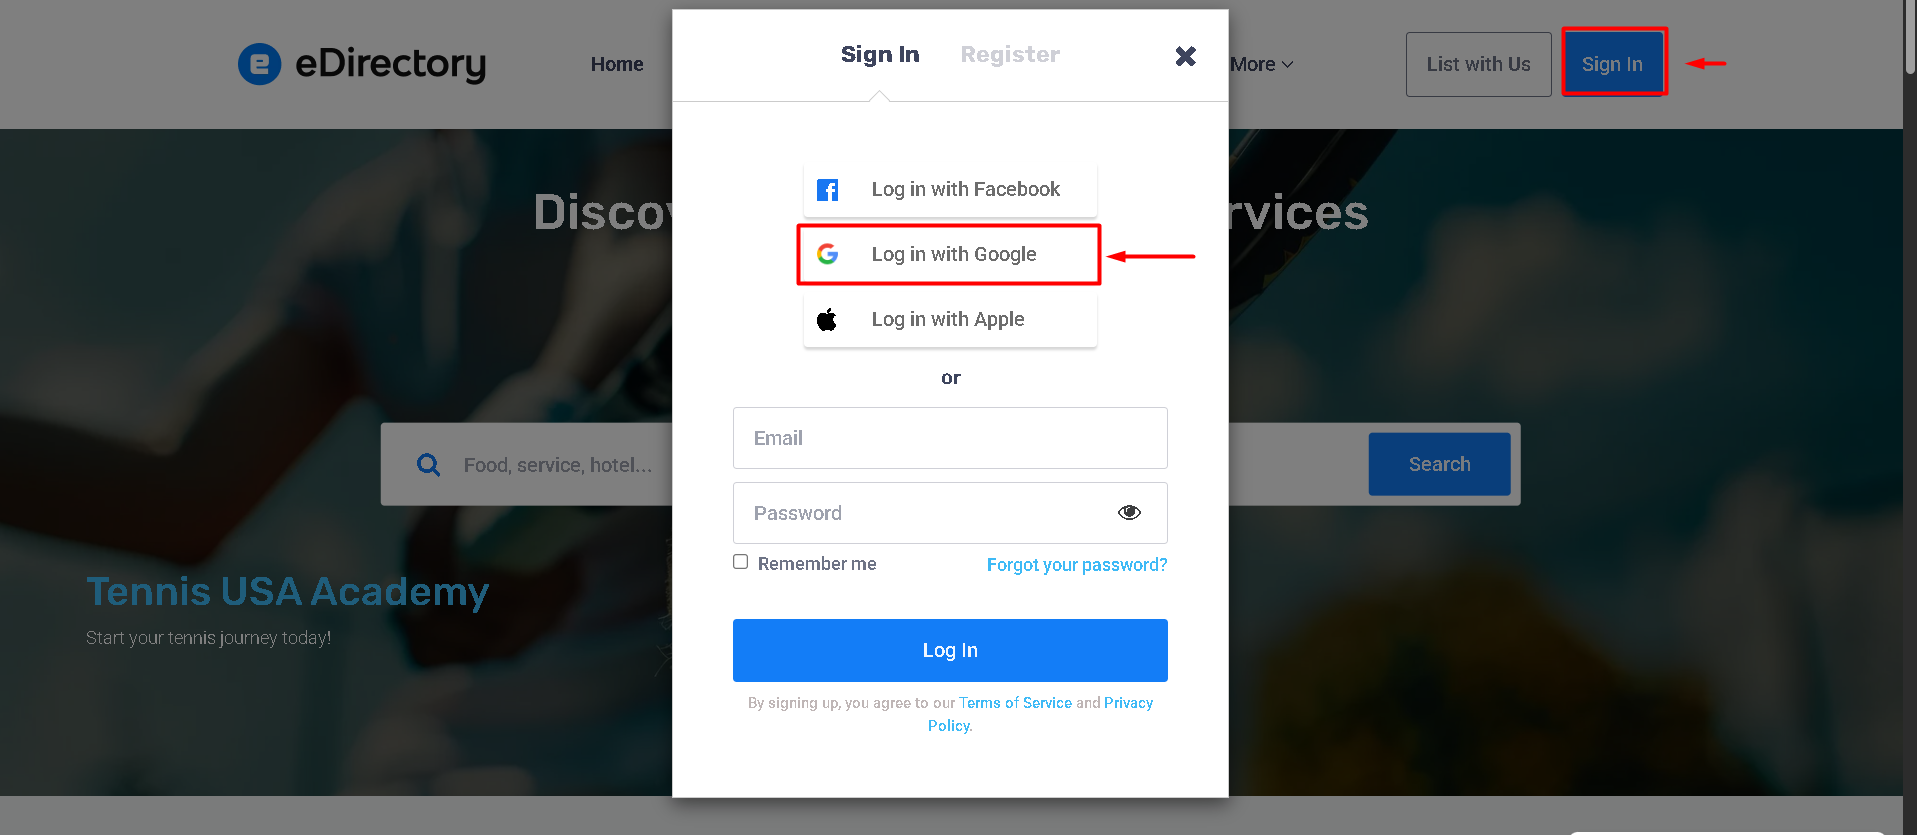
6.6. Test the Google Login integration. Visit your website's sign-in page and verify that the "Sign in with Google" button is displayed and that you can successfully sign in using a Google account.
Conclusion
Google Login is now configured on your eDirectory website. Your users can sign in using their Google accounts, providing a faster, more secure, and more convenient login experience.