How to Activate PayPal in my eDirectory
Introduction
To facilitate seamless transactions and receive payments from your customers on your eDirectory platform, configuring a payment gateway is a fundamental requirement. PayPal Standard is a widely recognized and trusted payment solution that allows you to accept payments securely. This article provides a step-by-step guide to setting up the PayPal Standard payment gateway on your eDirectory website.
Step-by-Step Guide to Configuring PayPal Standard on eDirectory
Step 1: Create or Access Your PayPal Account
Before you can integrate PayPal with your eDirectory site, you need to have a PayPal account. If you already have one, ensure it is active. If not, follow these instructions to create a new account:
- Visit the PayPal Website: Open your web browser and navigate to the official PayPal website.
- Sign Up for an Account: Click on the "Sign Up" button. You will be prompted to choose the type of account you wish to create. For integrating with eDirectory, it is best to create a Business account.


- Complete the Registration Process: Fill in all the required information accurately and follow the on-screen instructions to finalize your account registration.
Step 2: Configure PayPal Standard within eDirectory
Once you have an active PayPal account, proceed with the following steps to configure it as a payment gateway in your eDirectory Site Manager:
- Log in to eDirectory: Access your eDirectory administrative backend (Site Manager or sitemgr) using your credentials.
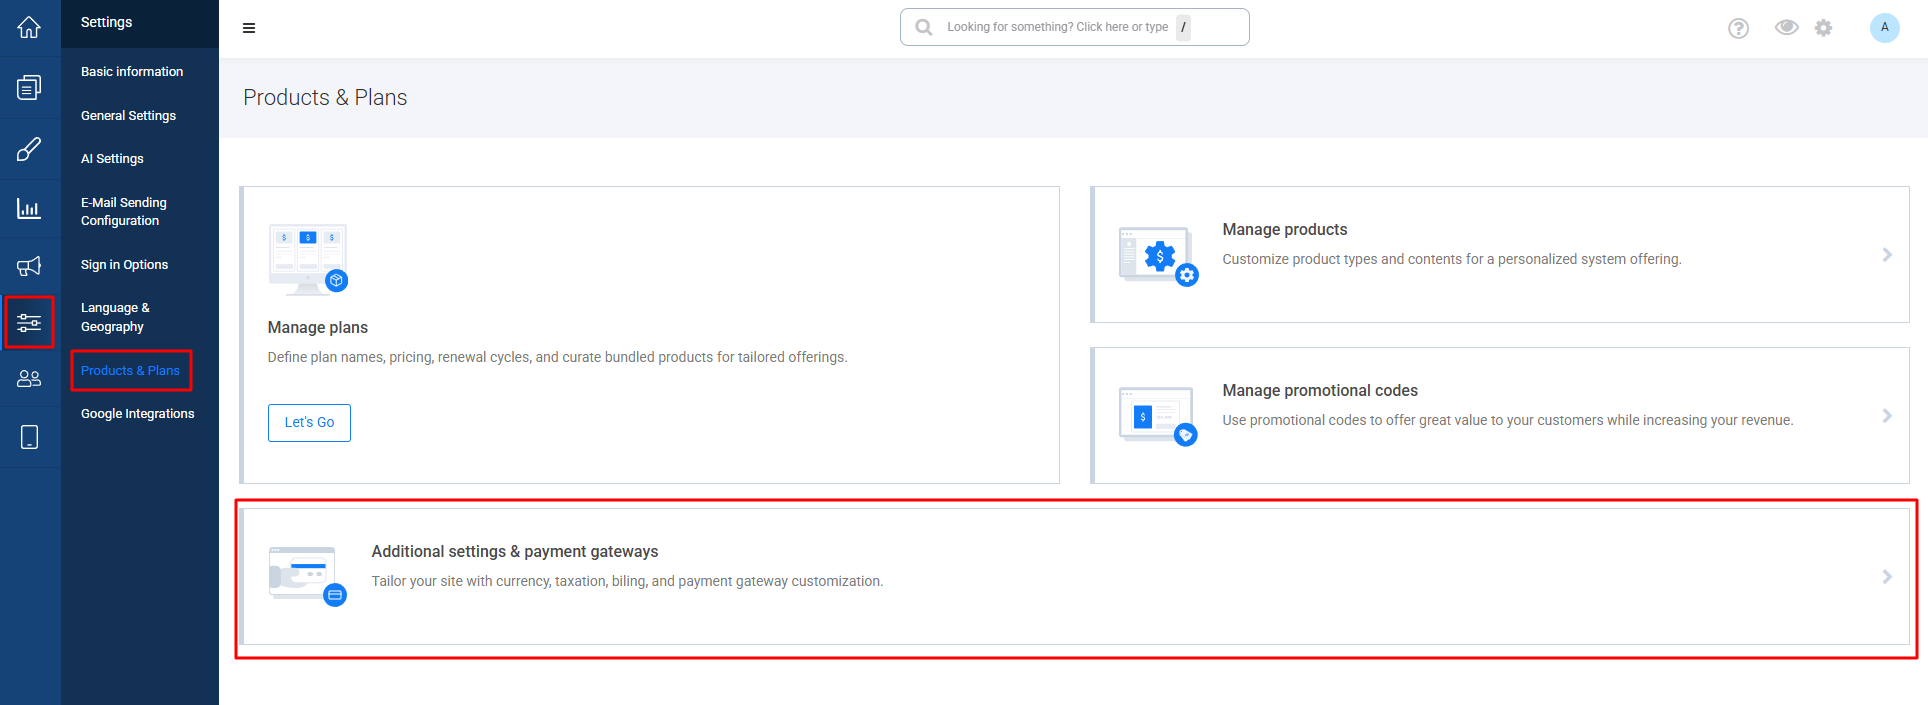
- Navigate to Settings: In the Site Manager dashboard, locate and click on the "Settings" section.
- Access Products & Plans: Within the Settings menu, select the "Products & Plans" option.
- Open 'Additional settings & payment gateways' Tab: On the Products & Plans page, click on the "Additional settings & payment gateways" tab.

- Enable PayPal: Find the "PayPal" option. Toggle the corresponding button to enable it as a payment gateway.
- Enter PayPal Account Email: In the designated field provided for PayPal, enter the primary email address associated with your PayPal account. Ensure this email address is accurate.
- Save Changes: After entering your PayPal email address, click the "Save" button to apply the configuration changes.

Step 3: Configure PayPal Business within eDirectory
In order to seize all PayPal has to offer, once you have created your Business account, you'll need to create the API credentials. Please see the steps outlined as follows:
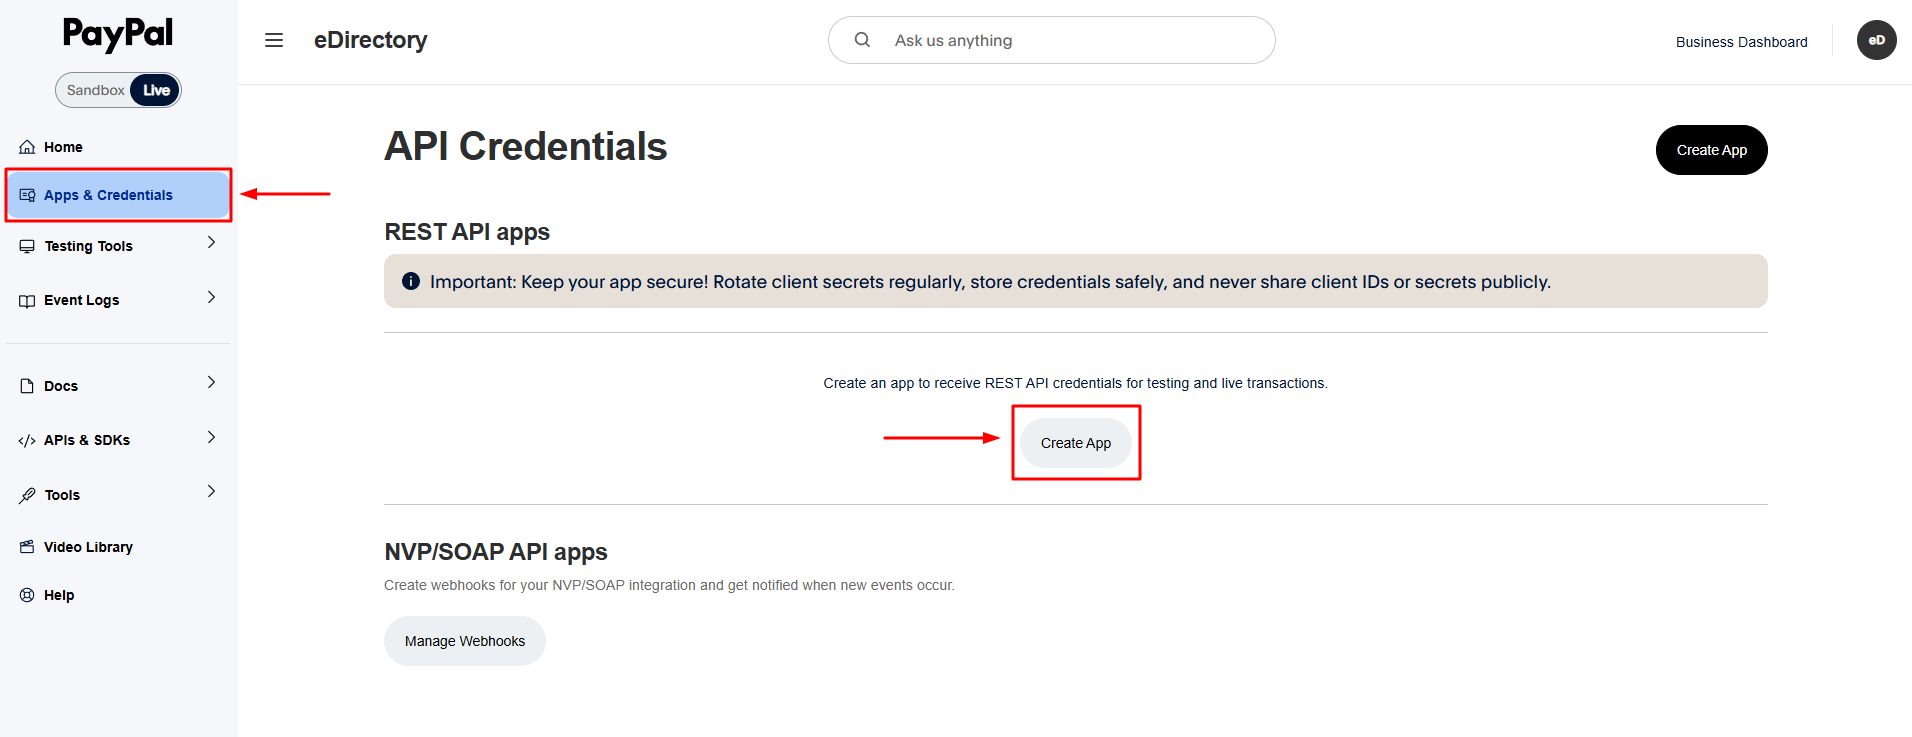
- Log in to your PayPal account through the Developer dashboard with this link: https://developer.paypal.com/dashboard/
- In the Home Page, click on 'Apps & Credentials' and then click on 'Create App'
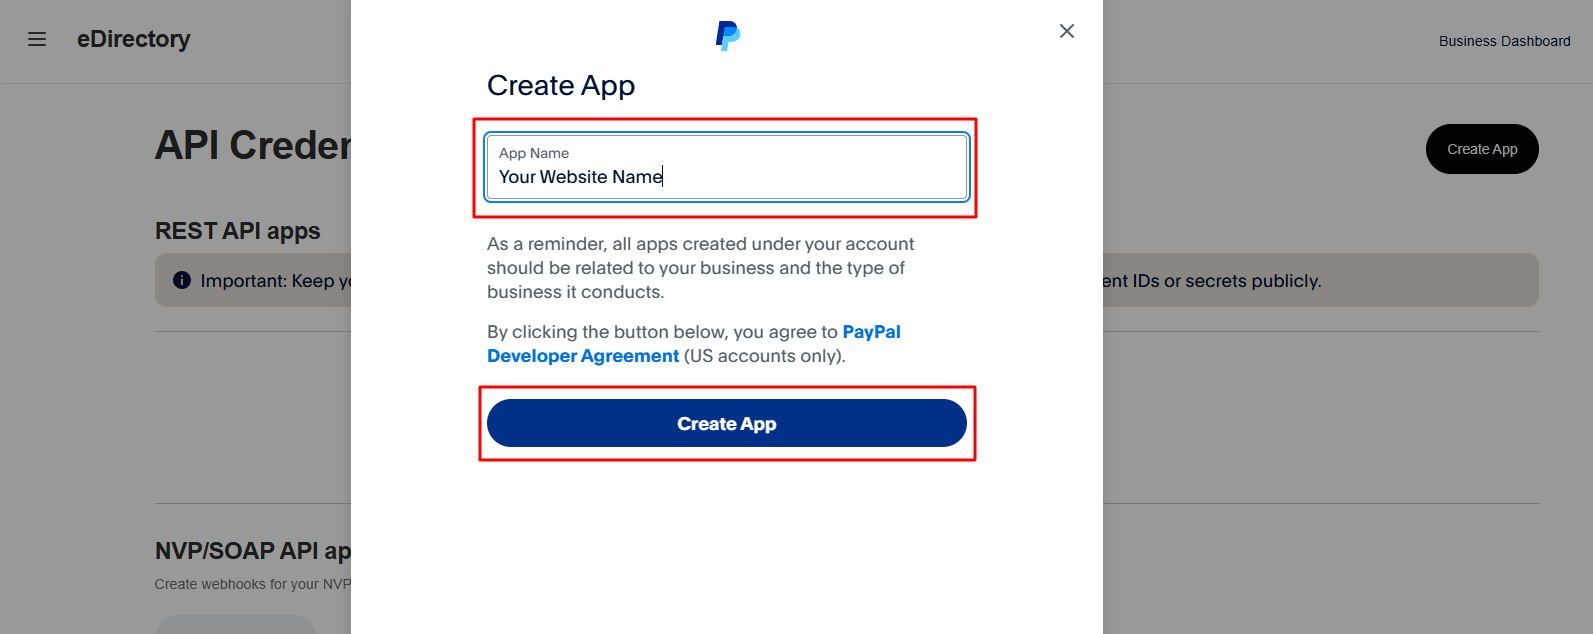
- Under 'App Name' add your website's name and click on 'Create App'.
- Copy your Client ID

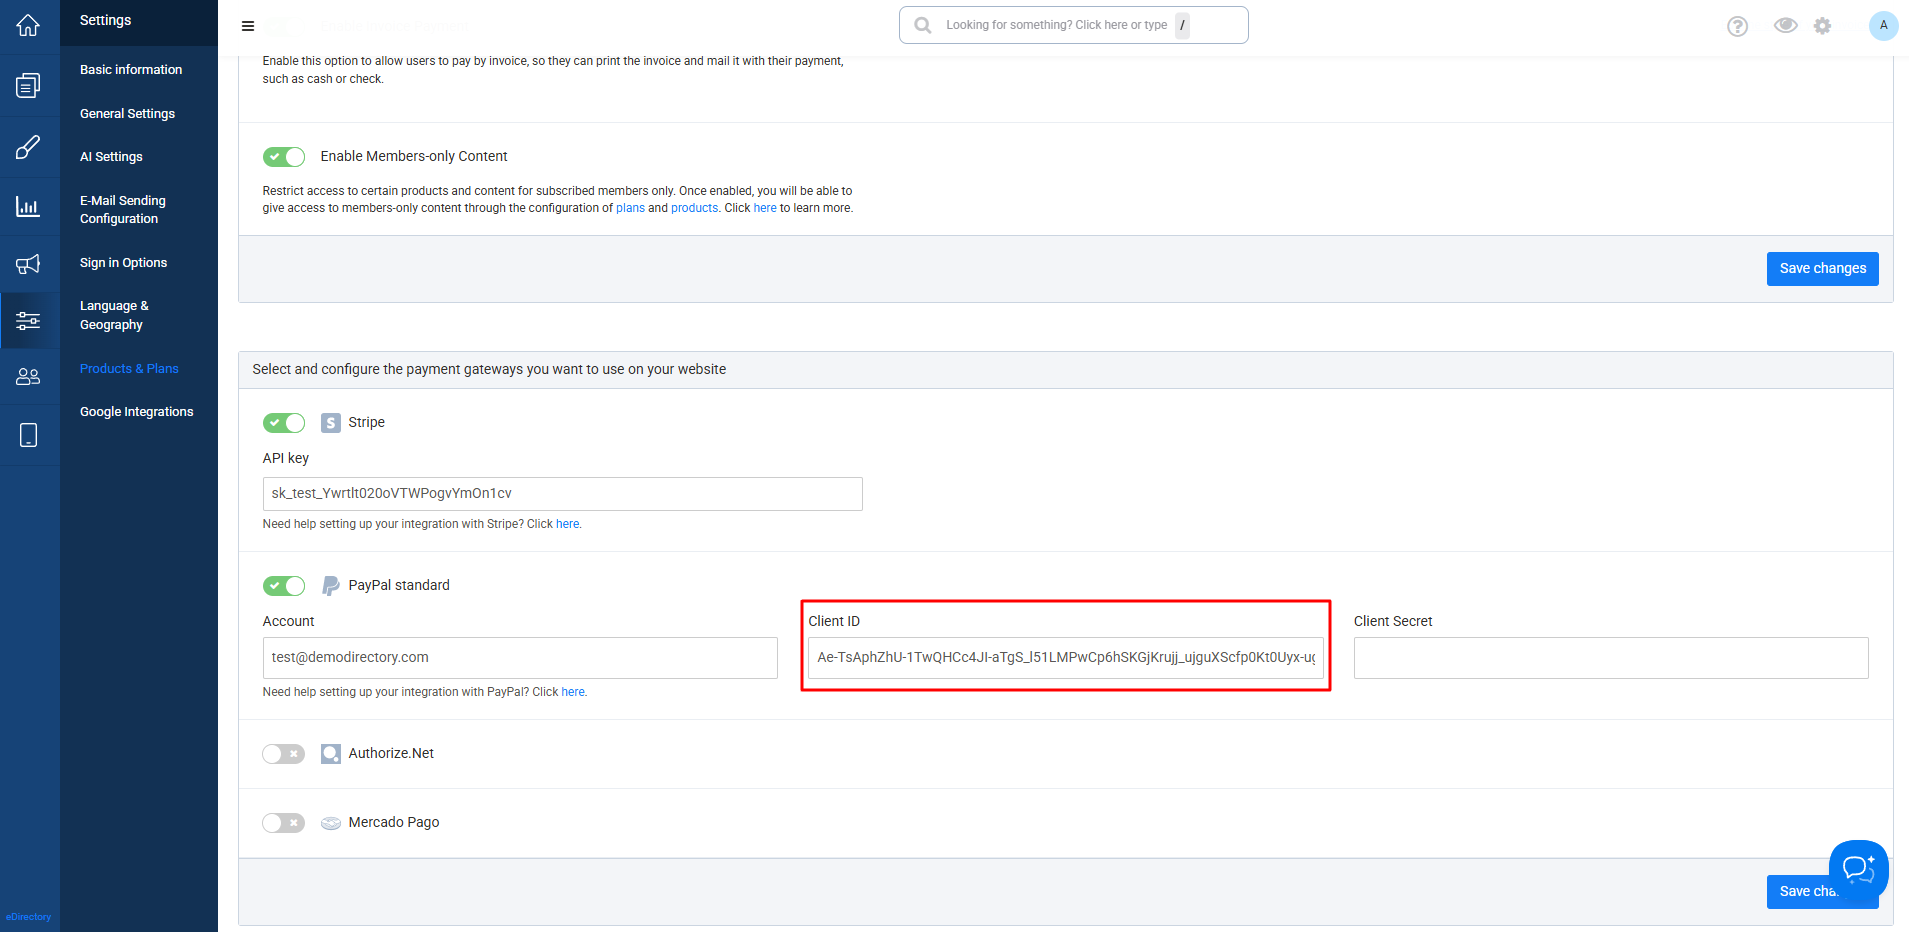
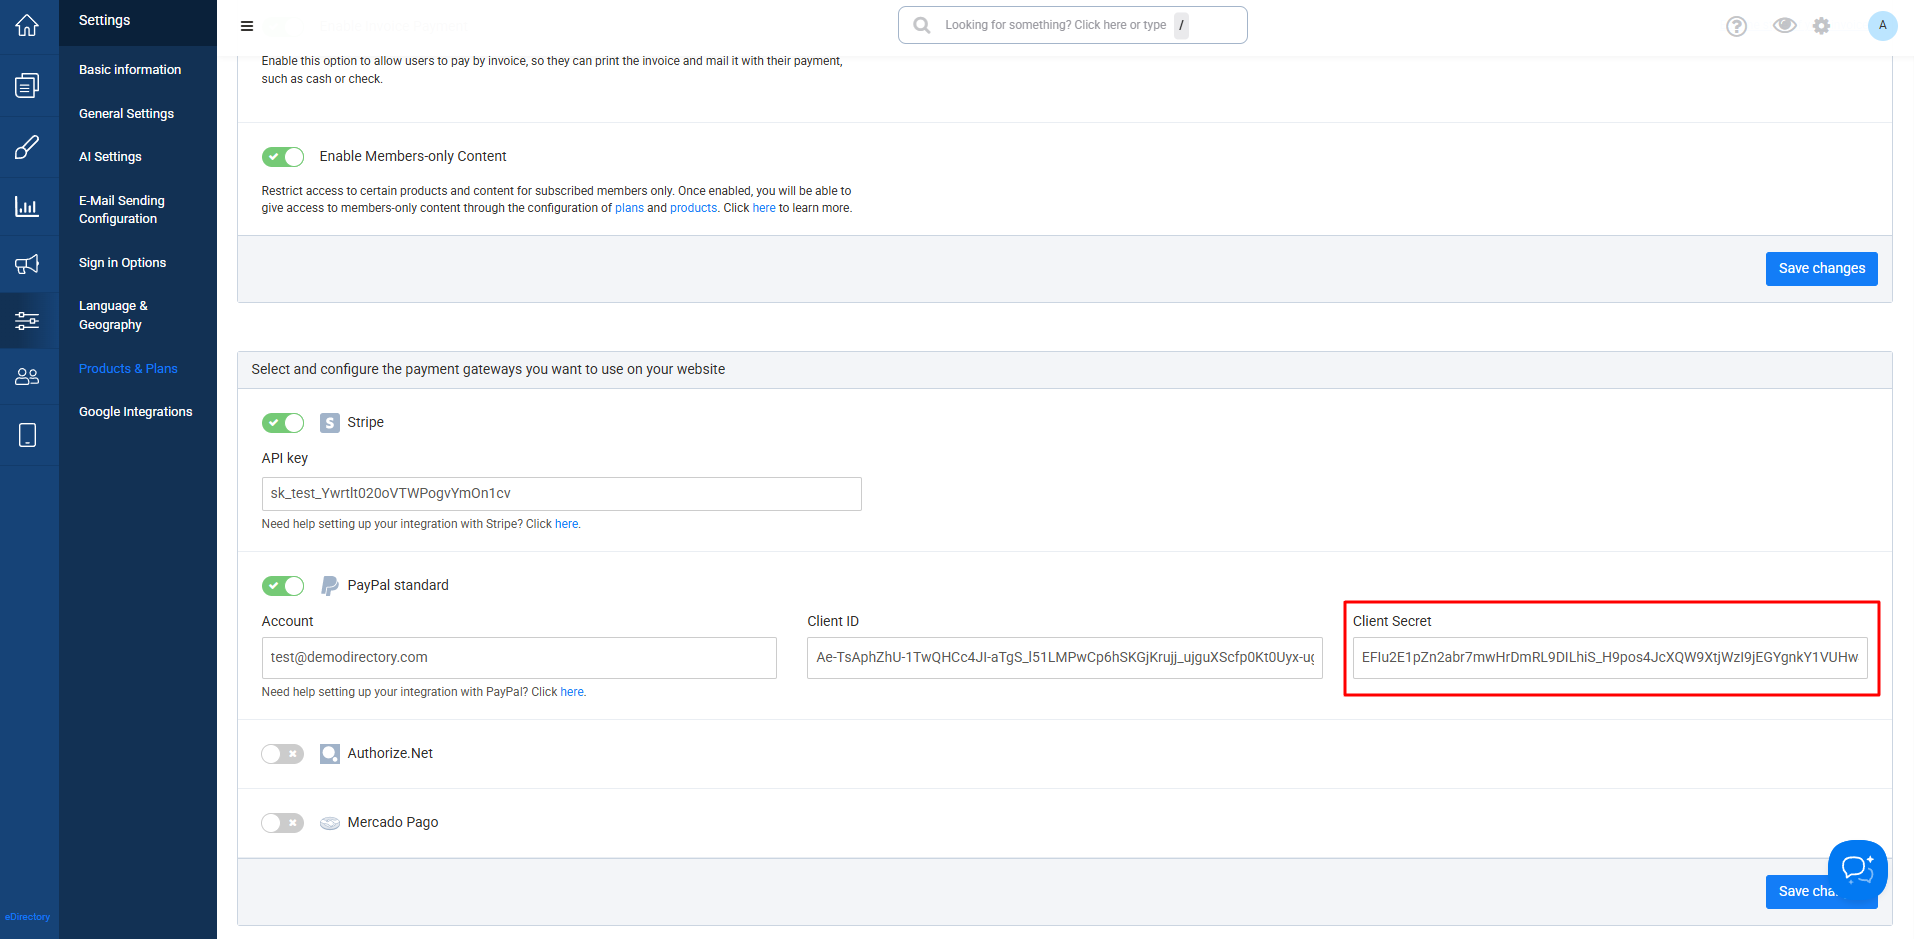
- Go back to your payment gateway settings in eDirectory going to Settings -> Products & Plans -> Additional settings & payment gateways and add the ID you just copied under 'Client ID'. Then hit the Save Changes button
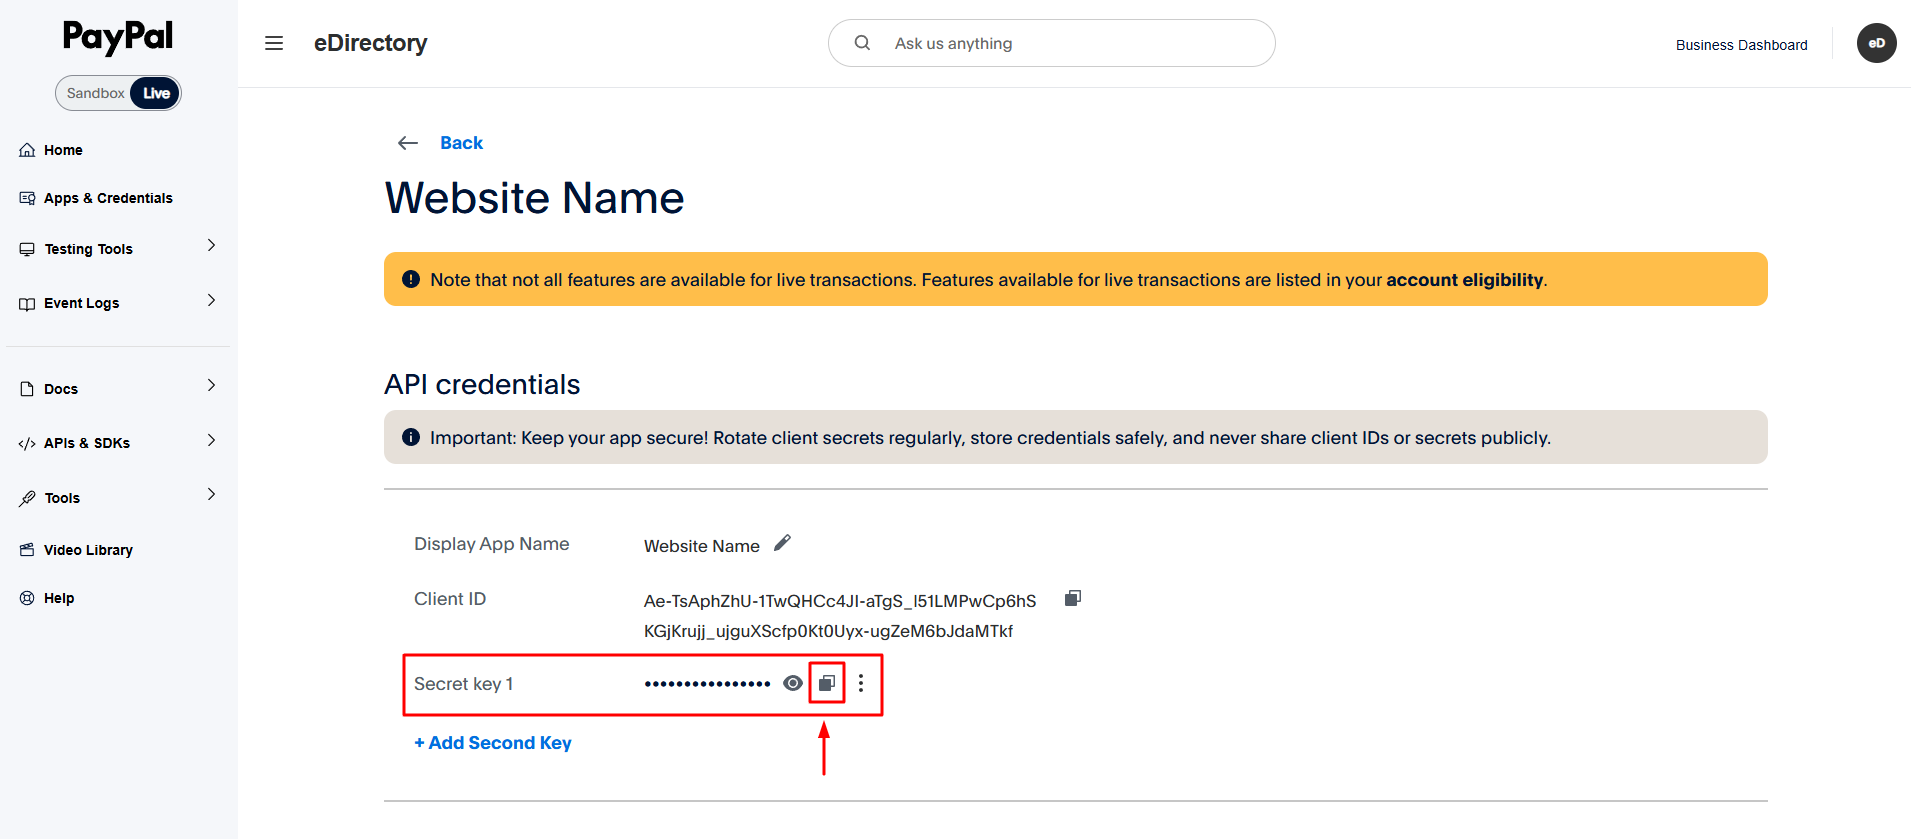
- Next, go back to your PayPal Developer page and copy the Secret Key and paste it in your eDirectory page next to Client ID under 'Client Secret' and hit the Save Changes button again.
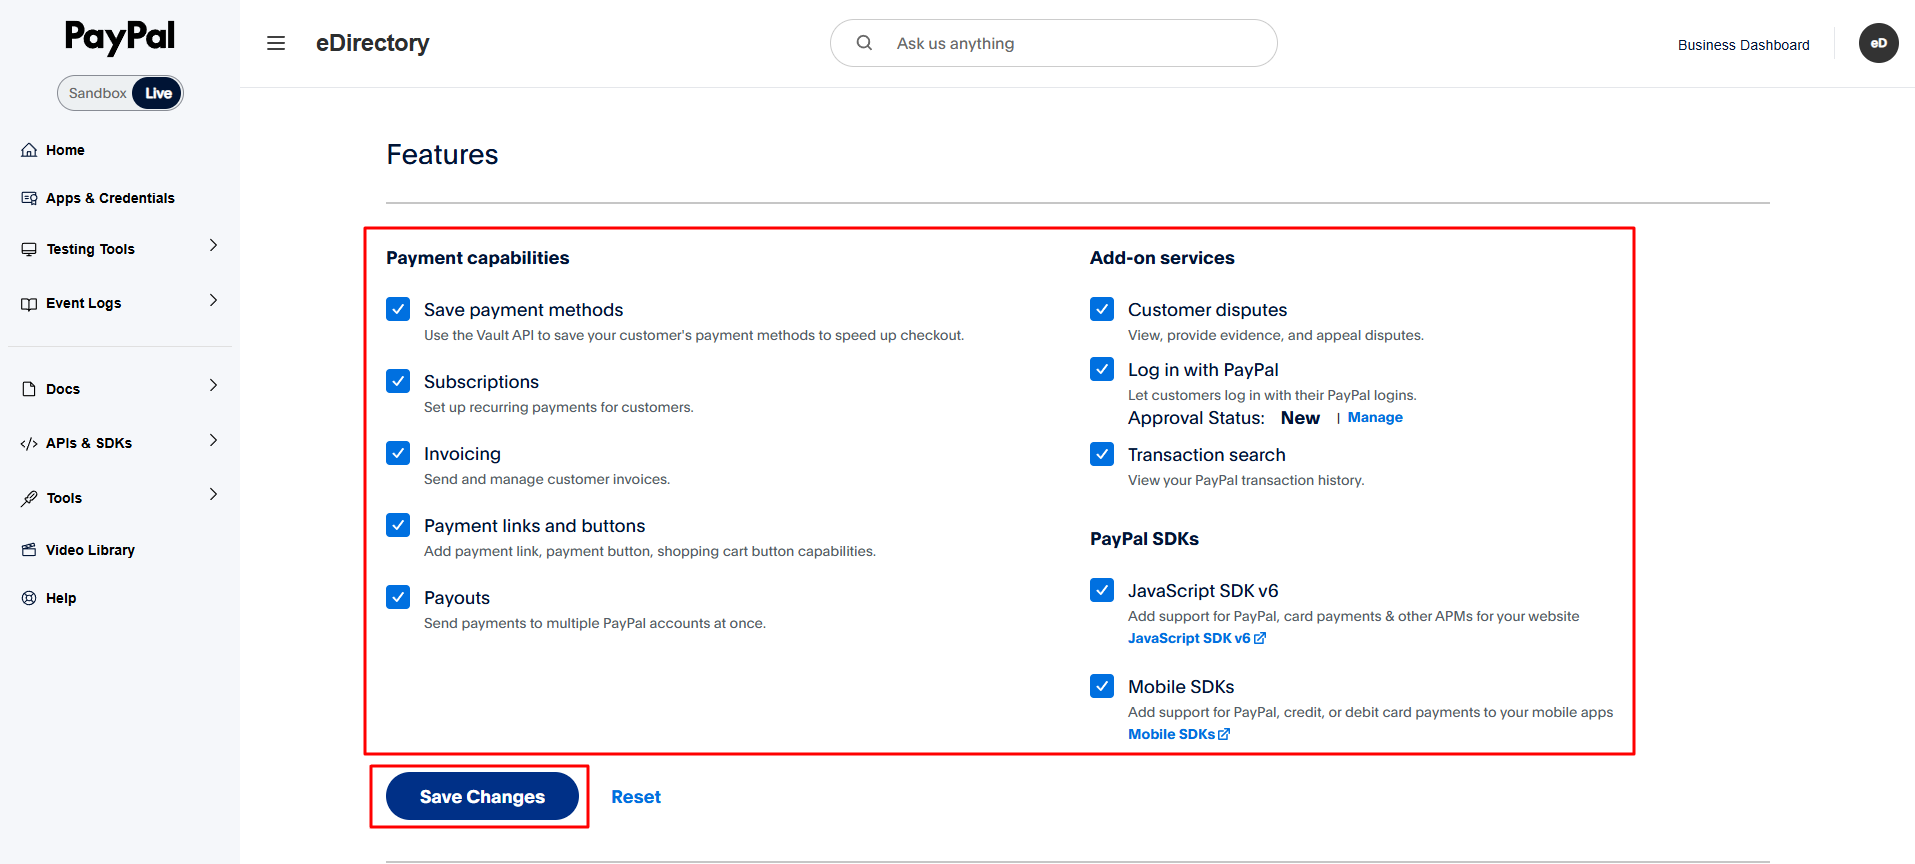
- On that same page you copied the Client ID and Secret Key, scroll down until you see the section 'Features'. Check all the boxes and hit the Save Changes button
Step 4: Configure PayPal IPN (Required)
Due to recent updates, PayPal notifications must be configured directly within your PayPal account to ensure that transactions are processed correctly and subscriptions are automatically activated. Please follow the steps below:
- Log in to your PayPal account: https://www.paypal.com/
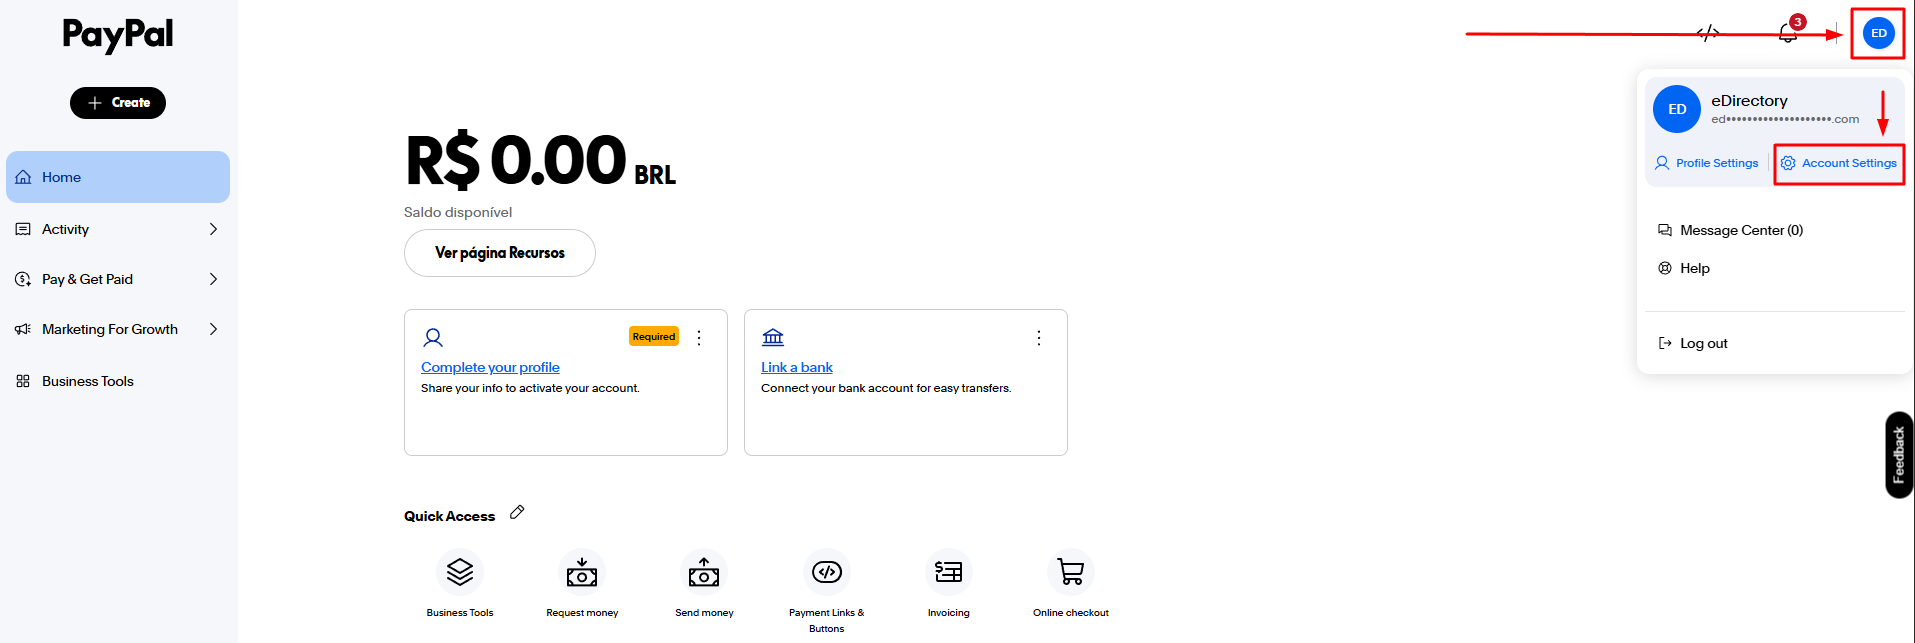
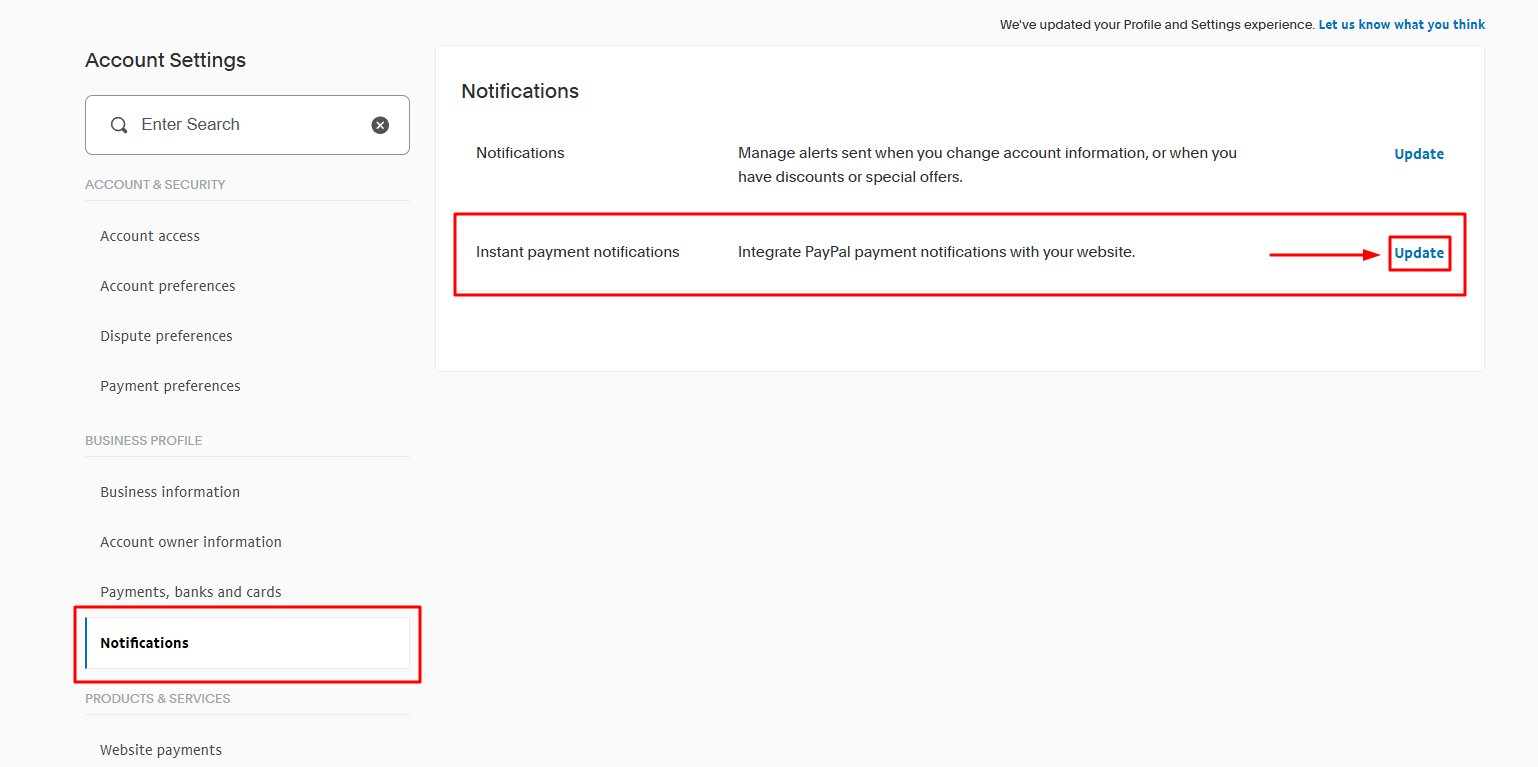
- Click on the icon on the top-right corner of your dashboard and then click on 'Account Settings'
- Navigate to Notifications and under Instant Payment Notifications click on 'Update'
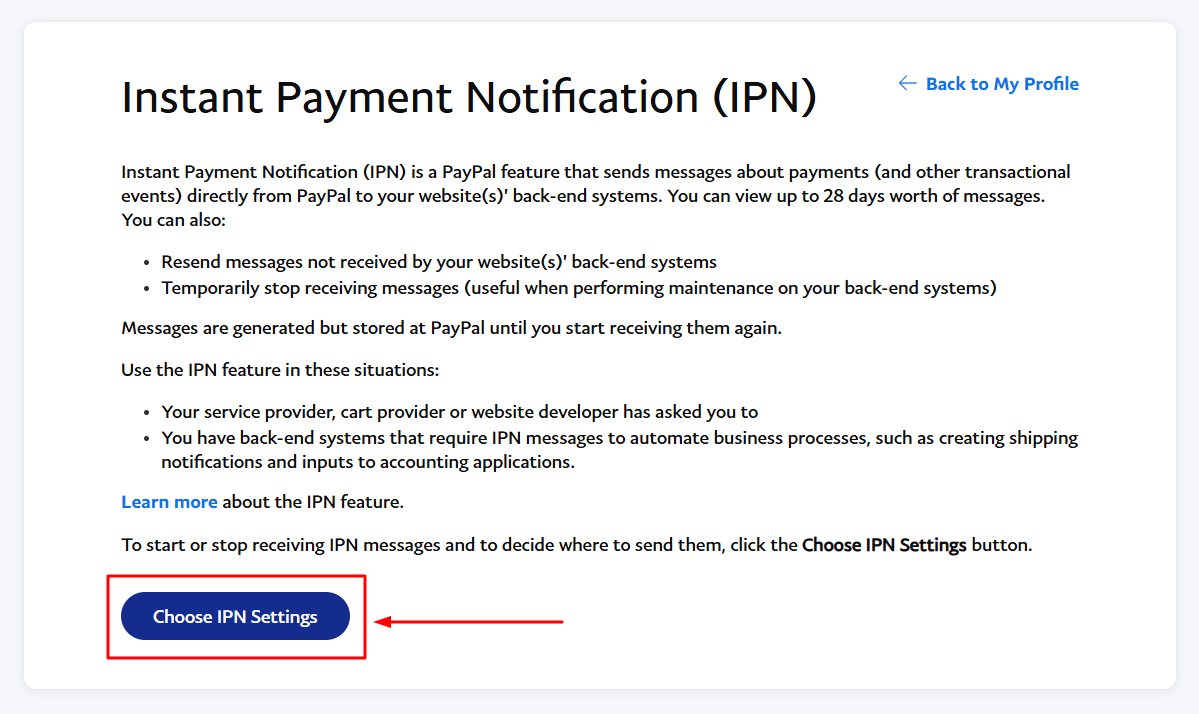
- Click on “Choose IPN Settings”
- Enter the following Notification URL:
https://yourdomain.com/sponsors/billing/receipt.php
Note: Replace “yourdomain.com” with your actual domain, e.g., edirectory.com
- Select the option “Receive IPN messages (Enabled)”

- Save the changes
This step is essential to ensure that PayPal sends transaction updates to your eDirectory site correctly.
Step 5: Verify PayPal Integration
After saving the PayPal Standard configuration in your eDirectory Site Manager, it is crucial to verify that the integration is working correctly. To do this:
- Perform a Test Transaction: Initiate a test purchase or subscription on your eDirectory website, going through the payment process and selecting PayPal as the payment method. This will allow you to confirm that payments are being processed correctly and that the transaction is successfully routed through your PayPal account.
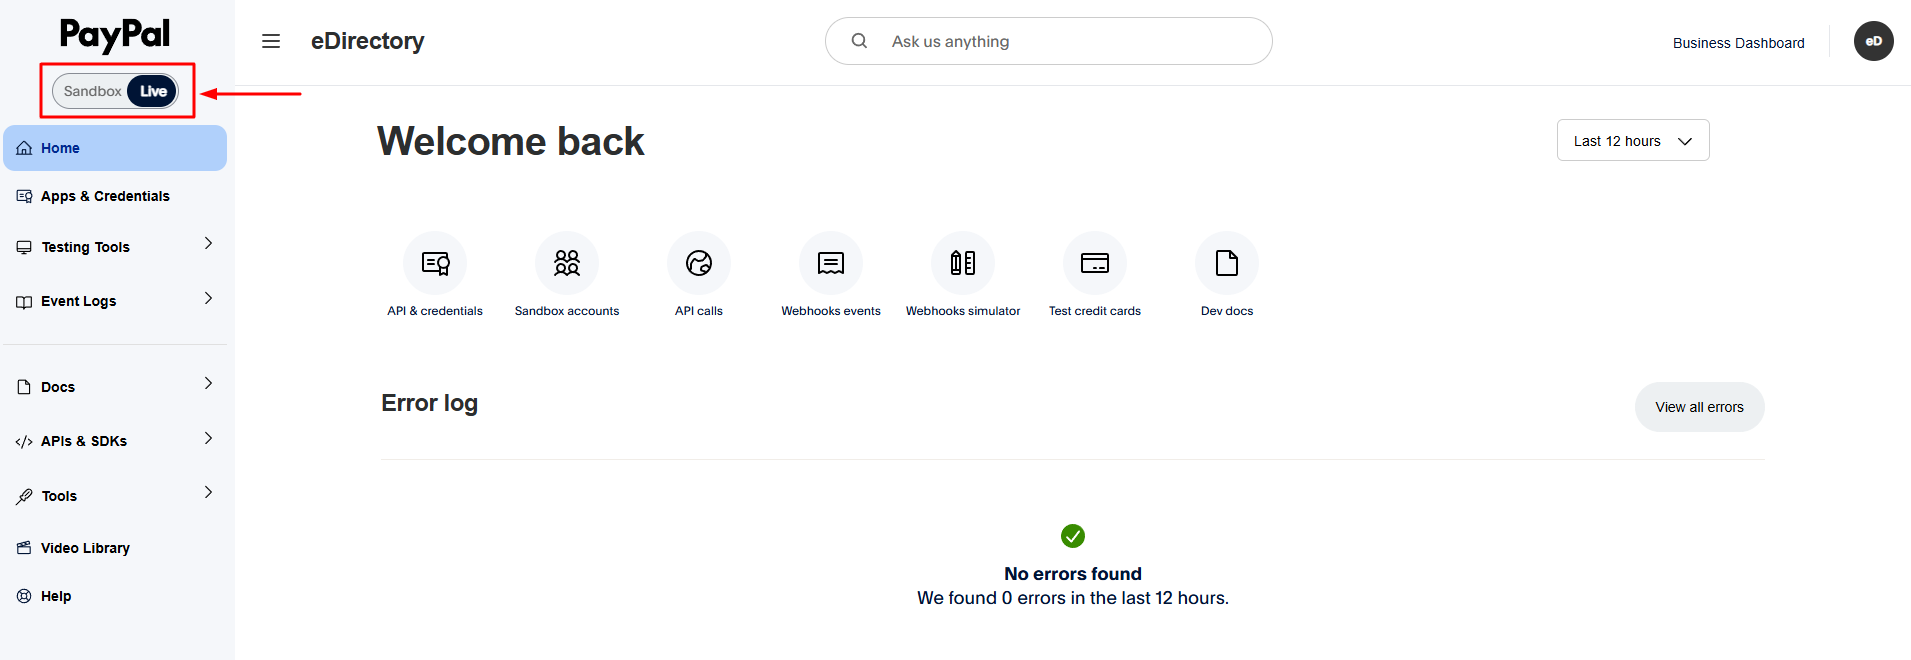
Attention: For the PayPal integration to work correctly on your site, your PayPal account must be in Live mode and not in Sandbox (test) mode.
To ensure your account is in Live mode, follow the steps below:
- Go to developer.paypal.com and log in with your Business account.
- In the left-hand menu, navigate to the "Apps & Credentials" section.
- Locate the environment setting and make sure the "Live" option is enabled.
Only with the Live environment activated will real payments and features like subscription cancellation by customers function properly.
Conclusion
By completing these steps, you will have successfully set up PayPal Standard as a payment gateway on your eDirectory platform. This will enable you to receive payments from your customers in a straightforward and secure manner. Should you encounter any difficulties during the configuration or require further assistance, please do not hesitate to reach out to the eDirectory support team for guidance