How to Configure Google Tag Manager
Introduction
Google Tag Manager (GTM) is a free tool provided by Google that allows you to manage and deploy tracking codes, marketing pixels, analytics scripts, and other website tags without modifying your website's source code.
By integrating Google Tag Manager with your eDirectory website, you can easily manage services such as:
- Google Analytics 4 (GA4)
- Google Ads Conversion Tracking
- Meta (Facebook) Pixel
- Custom HTML scripts
- Third-party marketing and analytics tools
Instead of editing your website's code whenever you need to add or update a tracking script, you can manage all your tags from a single, user-friendly dashboard.
This guide will walk you through creating a Google Tag Manager account, obtaining your Container ID, and integrating it with your eDirectory website.
Before You Begin
Before configuring Google Tag Manager, make sure you have:
- A Google Account
- Administrator access to your eDirectory Site Manager
- A live domain connected to your website
Important: Google Tag Manager requires your website to have an active domain (URL). If your website is still using a temporary URL or you need to change your domain, please contact our support team at support@edirectory.com before proceeding.
Step 1: Create a Google Tag Manager Account
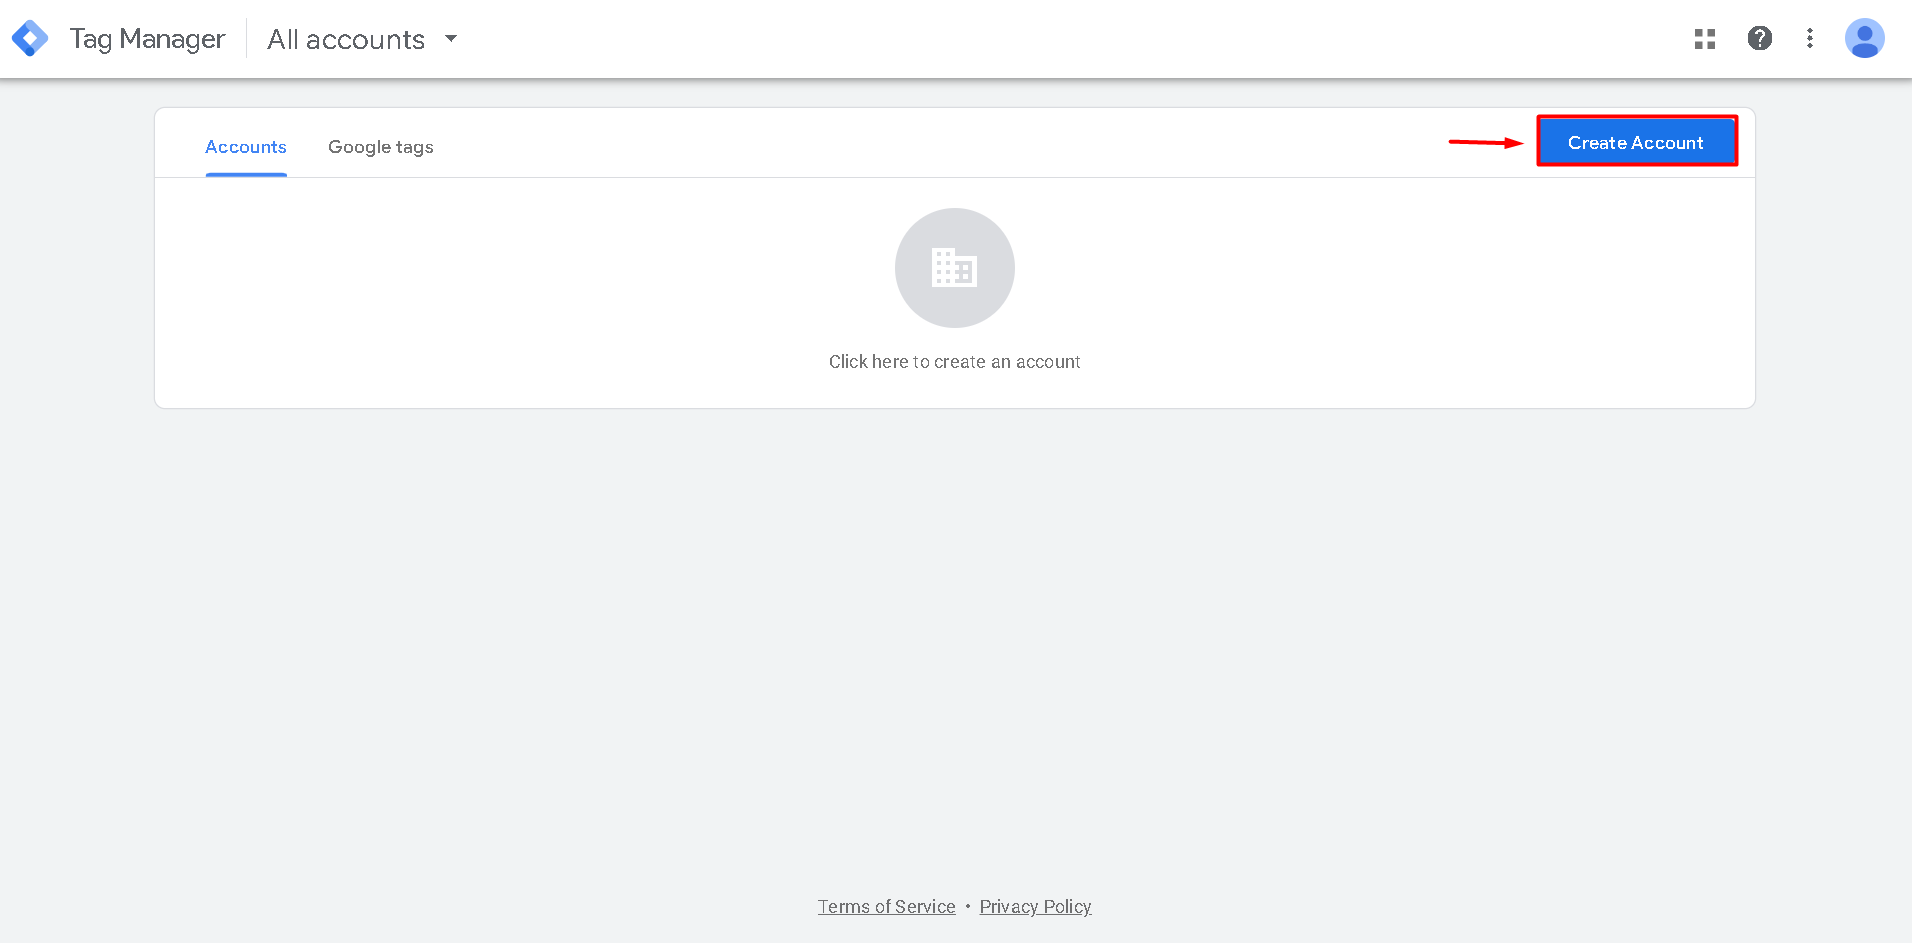
1.1. Visit the Google Tag Manager website and sign in with your Google Account.
1.2. Click Create Account.
1.3. Fill in the requested information:
- Account Name: We recommend using your company or organization name.
- Country: Select your country.
- Container Name: Your website's domain (for example, www.yourdomain.com)
- Target Platform: Select Web.
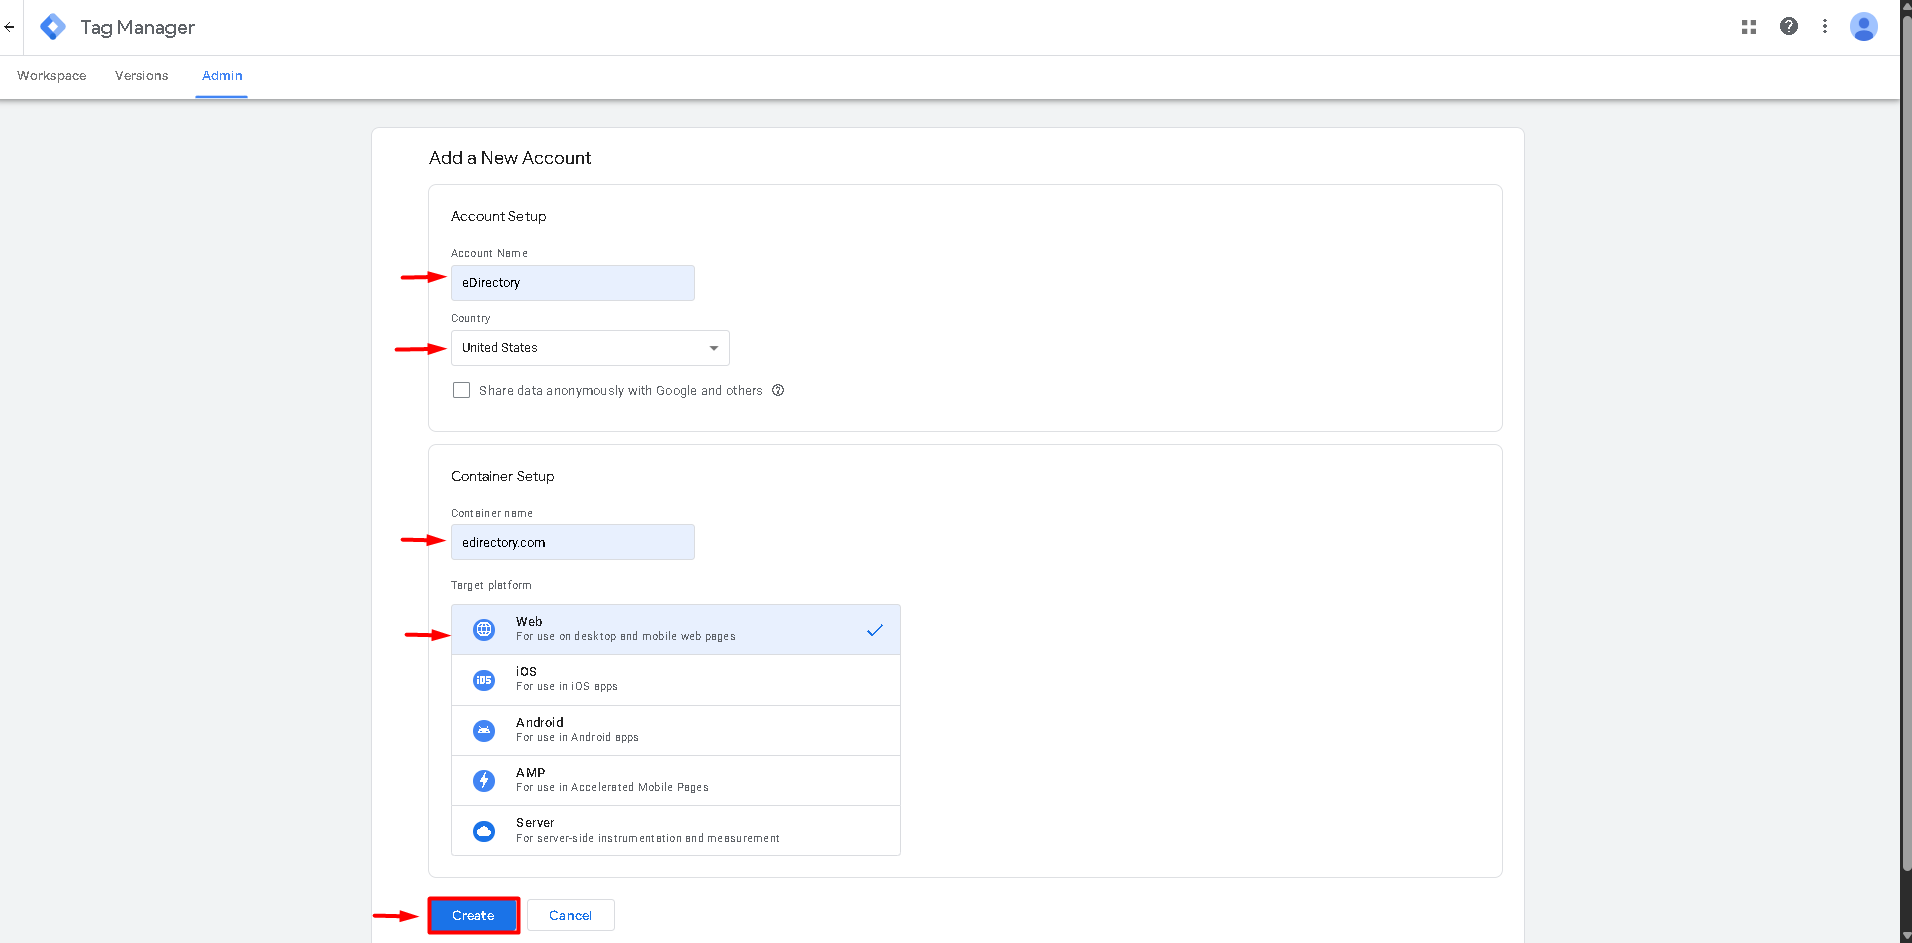
1.4. Click Create.
Step 2: Accept Google's Terms of Service
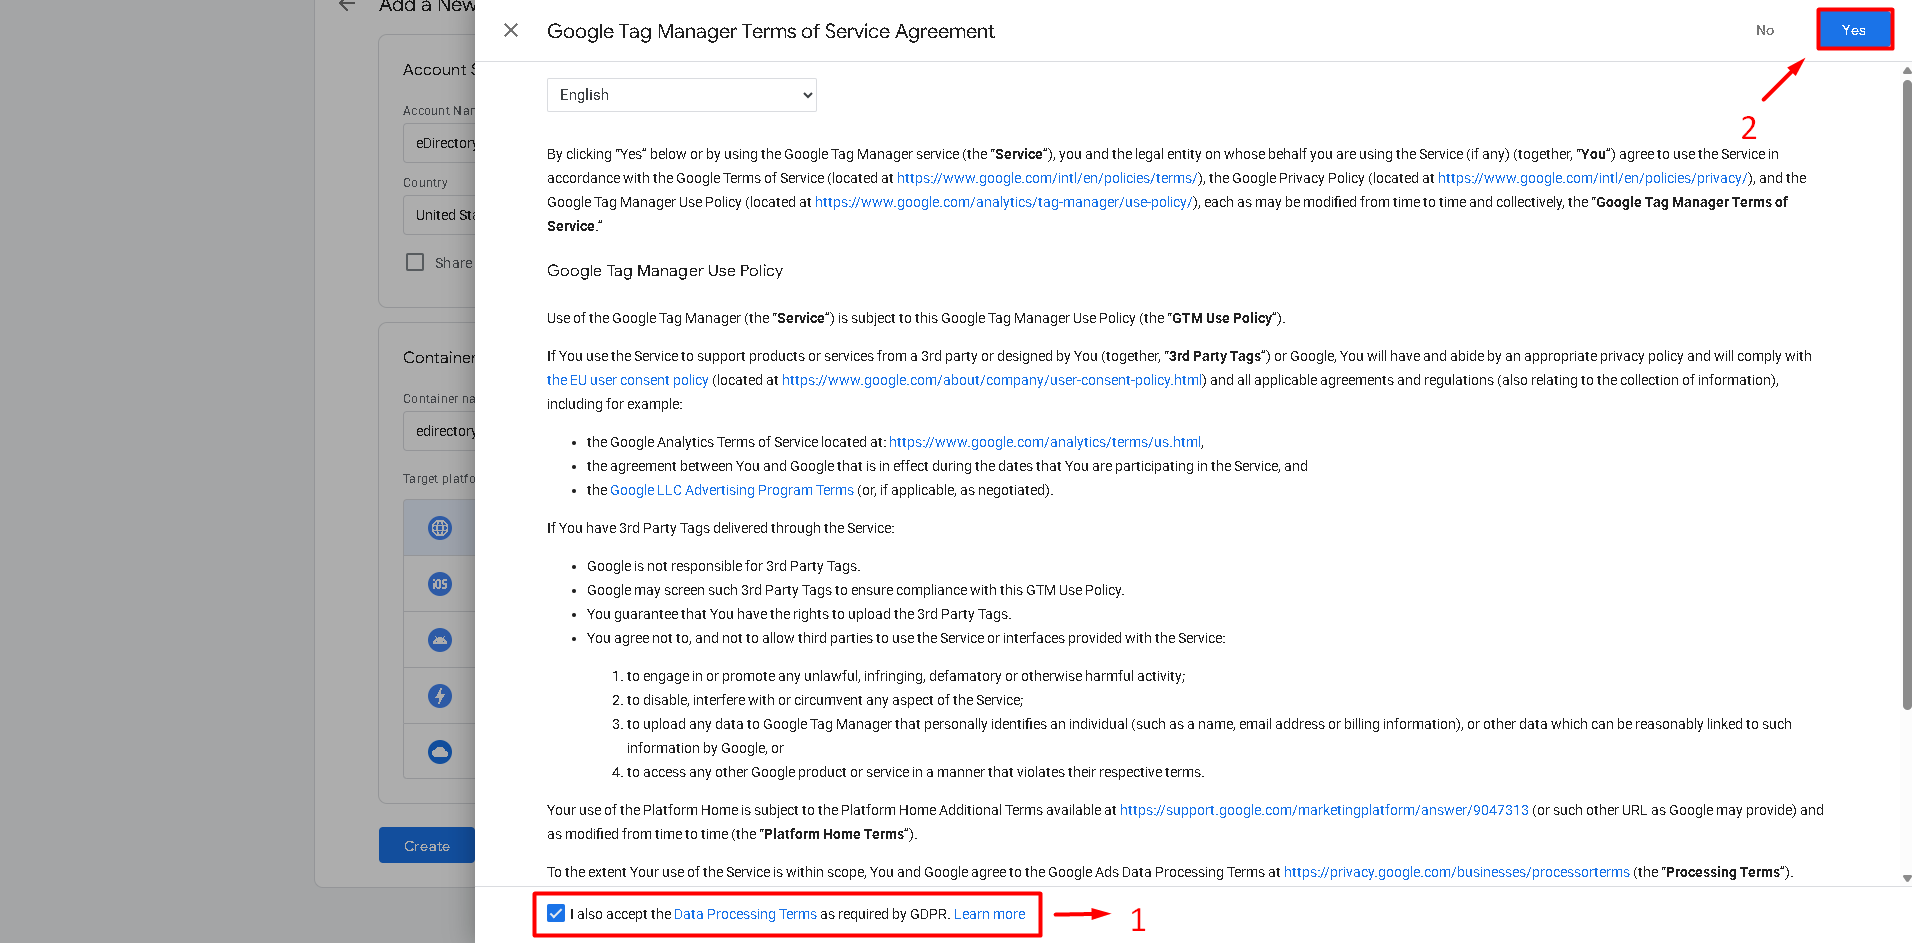
2.1. Google will display the Google Tag Manager Terms of Service Agreement. Read the agreement, check the box I also accept the Data Processing Terms as required by GDPR, and click Yes to accept the terms and continue.
Step 3: Obtain Your Container ID
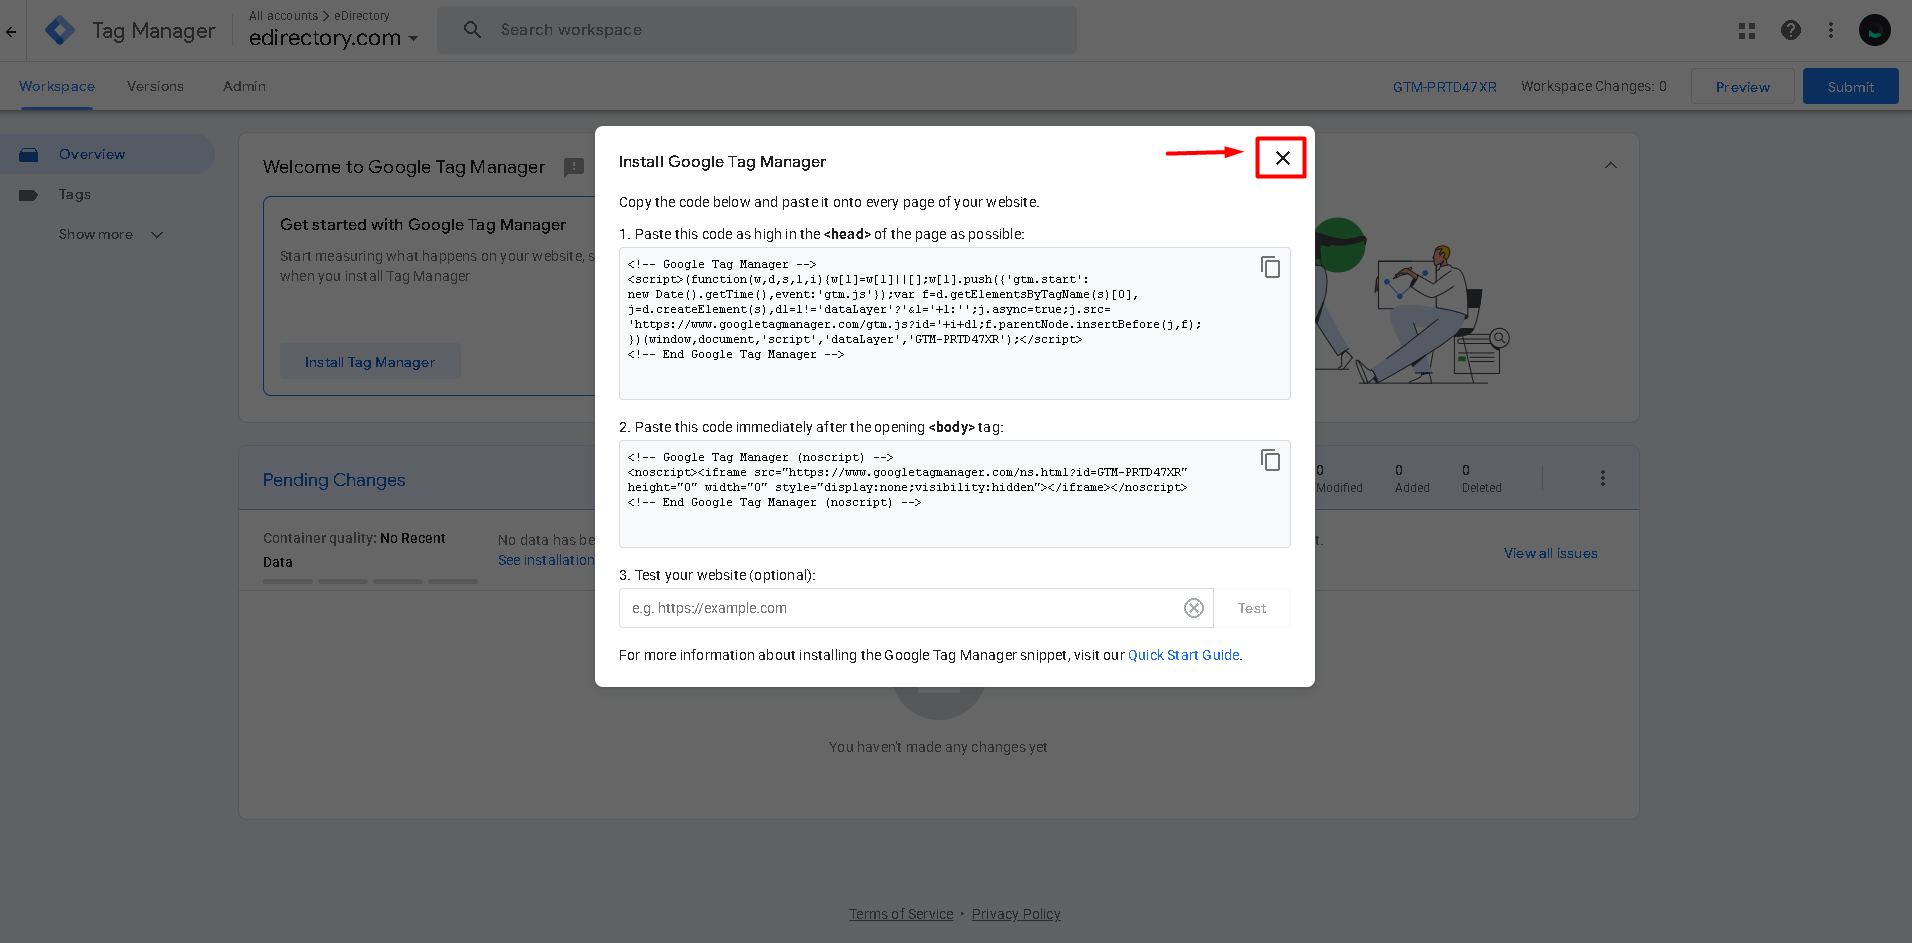
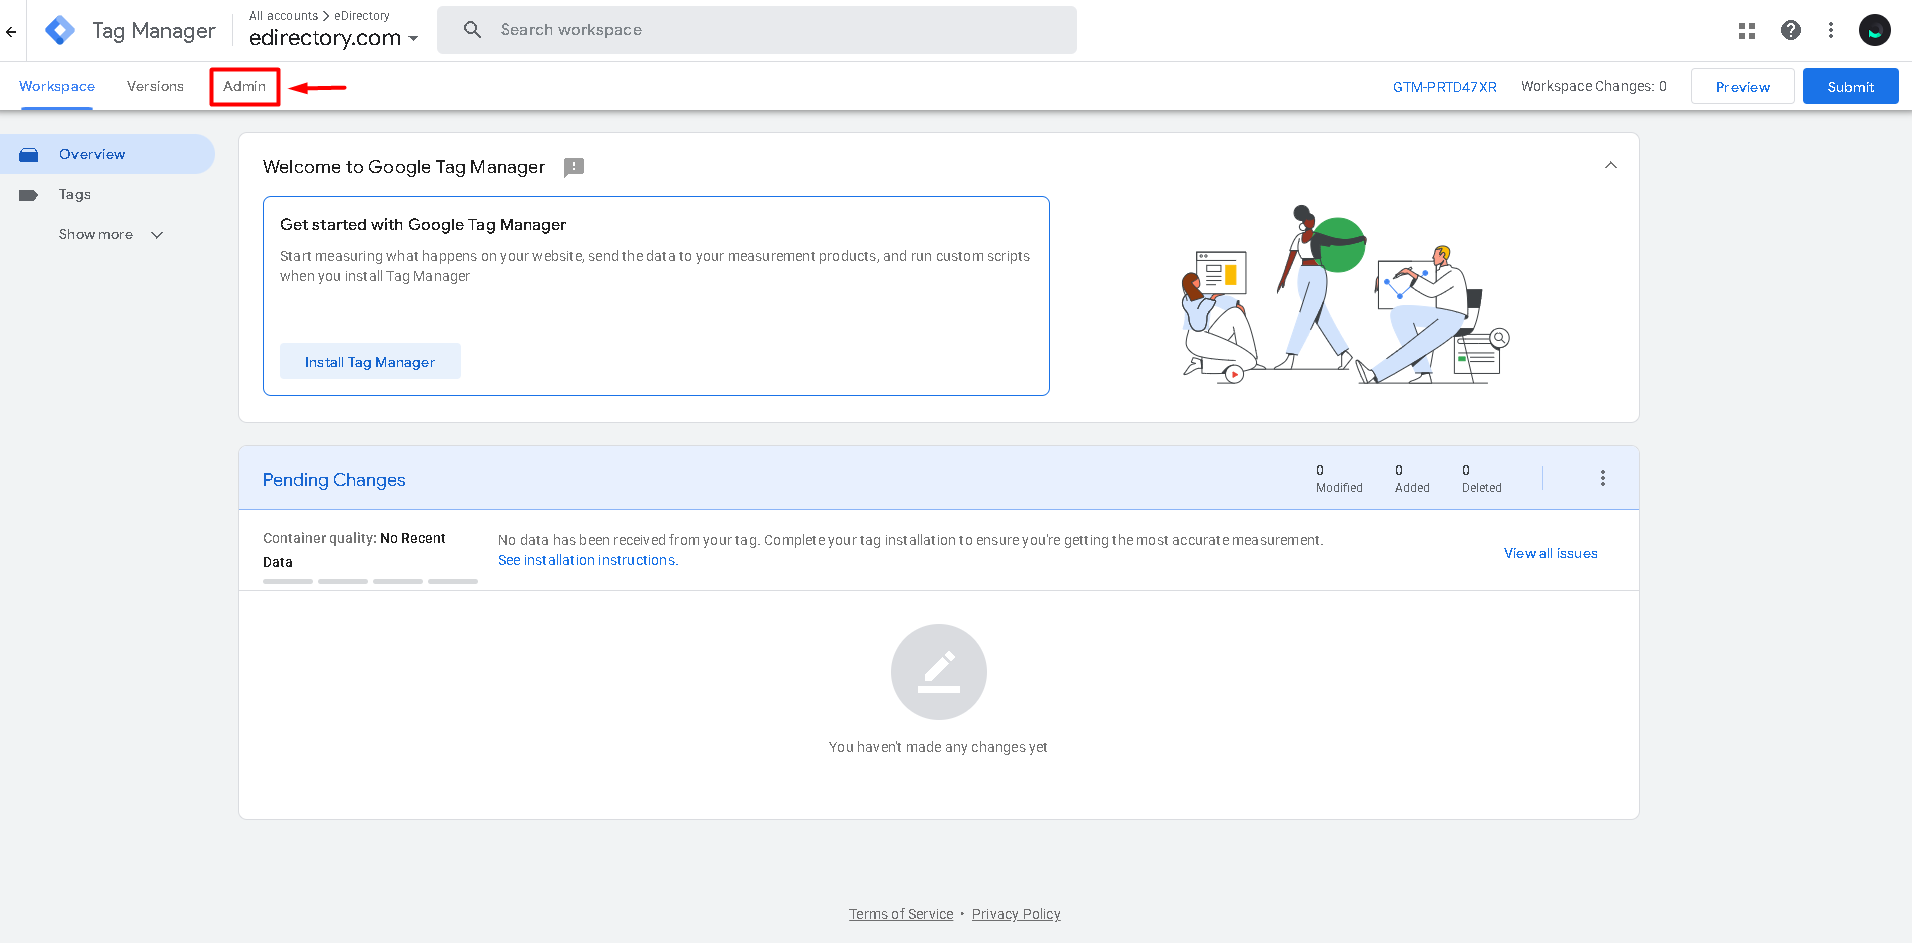
3.1. After your account is created, Google will display a window containing two code snippets for installing Google Tag Manager. Don't worry—you do not need to copy or install these code snippets manually. Simply click X to close the installation window.
3.2. In the Google Tag Manager dashboard, click Admin.
3.3.Locate your Container ID. The Container ID is displayed near your container name and follows this format: GTM-XXXXXXX
For example: GTM-PRTD47XR
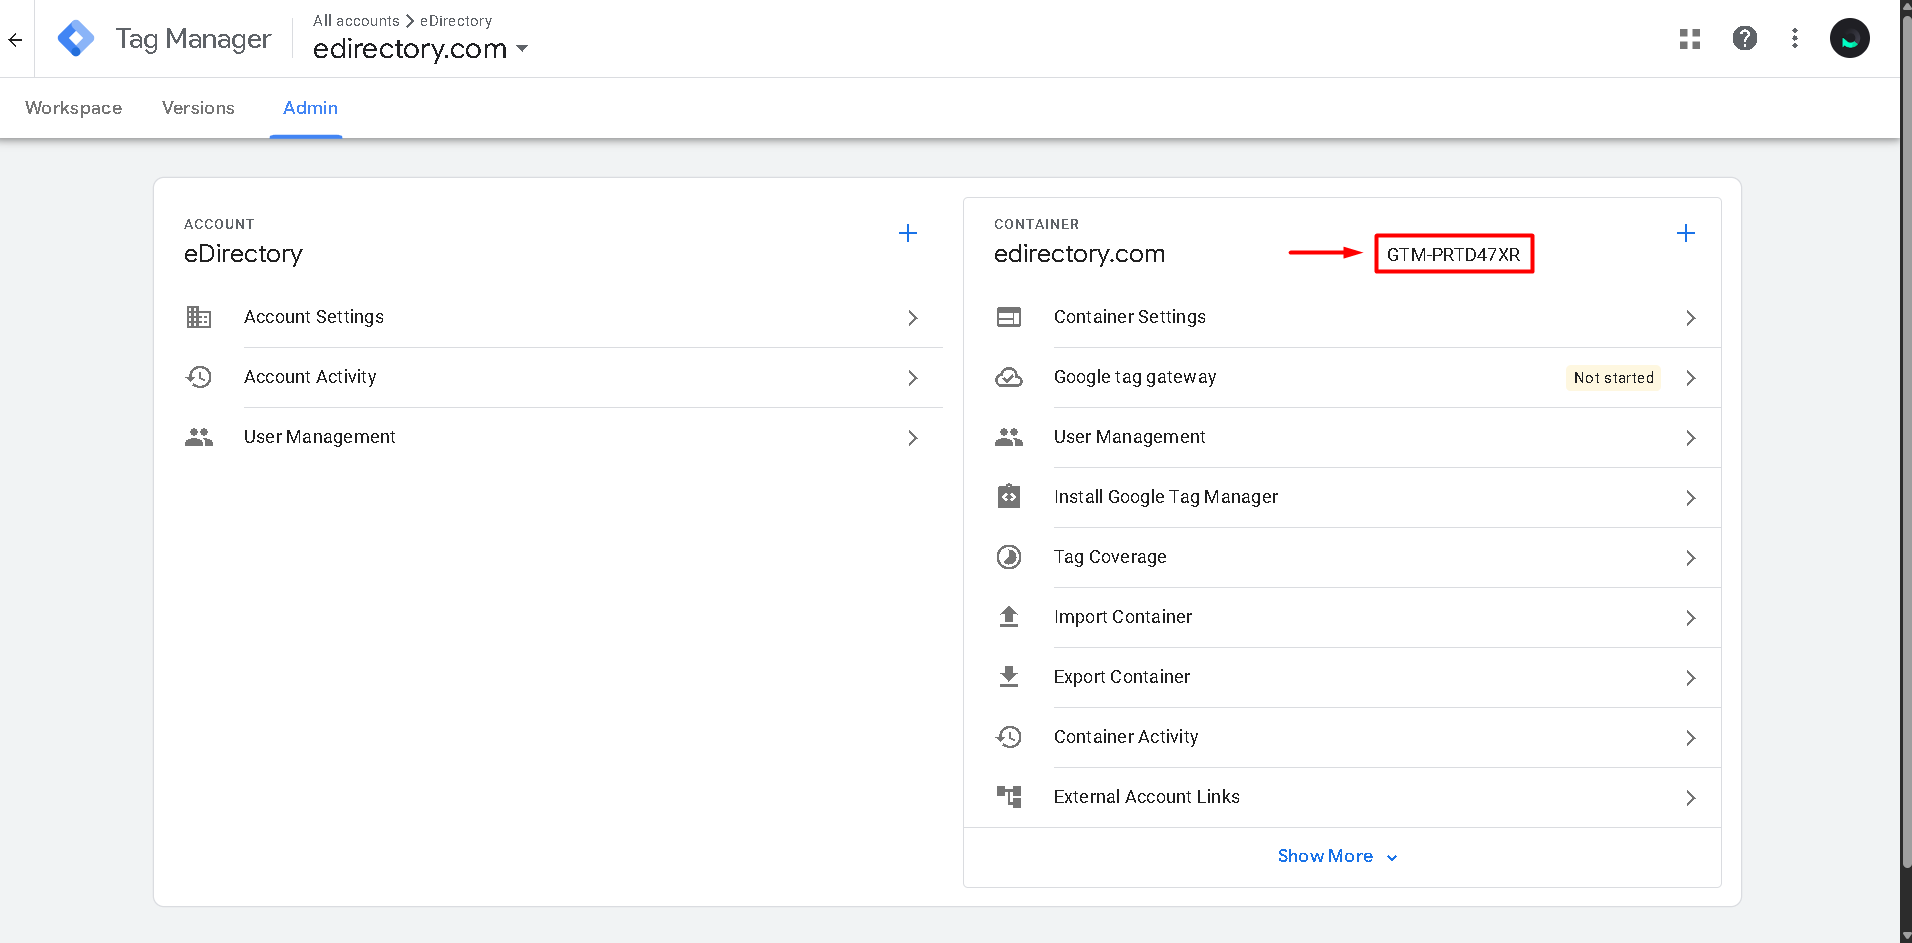
3.4. Copy this Container ID.
Note: You only need the Container ID (the value beginning with GTM-). You do not need to copy the installation code displayed by Google.
Step 4: Integrate Google Tag Manager with eDirectory
4.1. Log in to your eDirectory Site Manager.
4.2. Navigate to Settings → Google Integrations → Google Tag Manager.
4.3. Paste your Container ID (the value beginning with GTM-) into the Google Tag Manager Container ID field.
4.4. Check the option: Enable Google Tag Manager.
4.5. Click Save Changes.
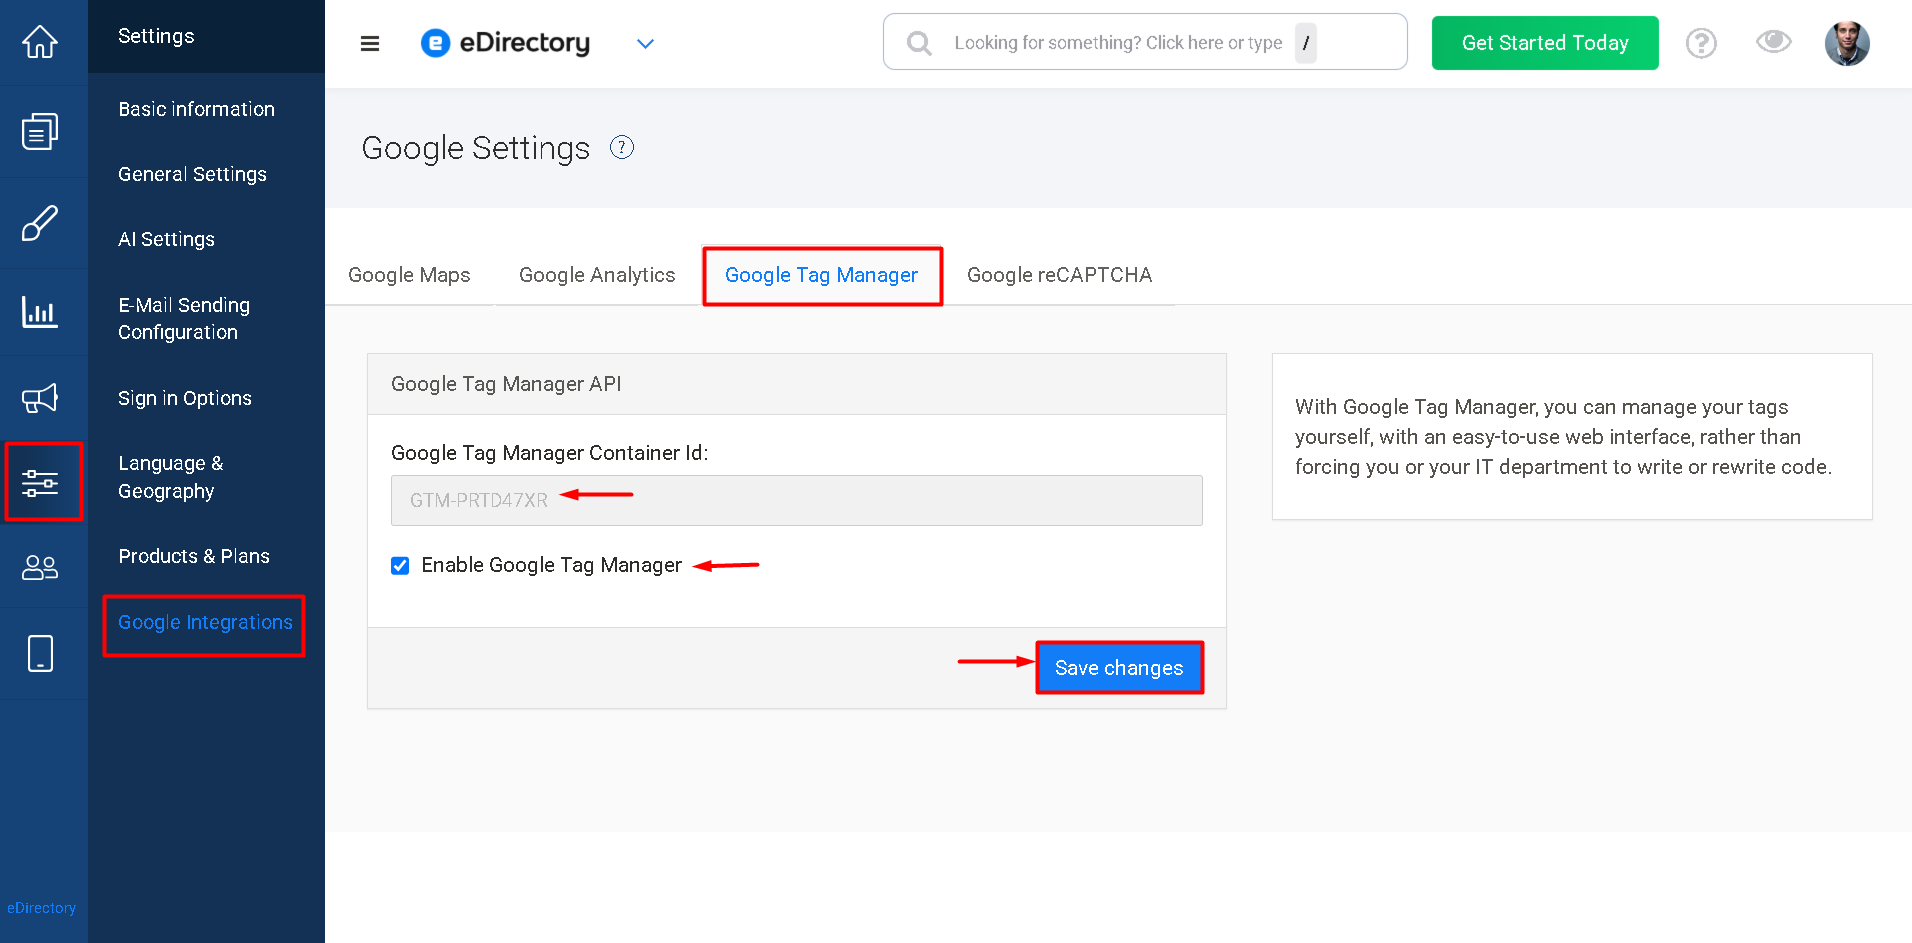
Google Tag Manager is now successfully integrated with your eDirectory website.
Managing Tags
Once Google Tag Manager has been integrated with your website, you can begin creating and managing tags directly from your GTM dashboard.
Examples include:
- Google Analytics 4
- Google Ads
- Meta (Facebook) Pixel
- Conversion Tracking
- Marketing Pixels
- Custom JavaScript
- Custom HTML
For detailed instructions on adding scripts through Google Tag Manager, please refer to our guides:
Conclusion
Congratulations!
Google Tag Manager is now integrated with your eDirectory website.
You can now centrally manage tracking codes, marketing pixels, analytics tools, and third-party scripts without modifying your website's source code. Using Google Tag Manager makes it easier to maintain your website, organize integrations, and quickly deploy new tracking technologies as your business grows.