
Listing Template: Description Widget
Introduction
The Description Widget gives you more flexibility when creating custom content fields for your listings.
The widget allows you to add text fields to a listing template that sponsors can fill out when creating or editing a listing. You can create either:
- A Short Description, limited to 140 characters.
- A Long Description, with no character limit.
These fields can be used to collect and display additional information about a listing, such as contact instructions, business details, features, or other relevant information.
🎥 See the Description Widget in Action
Watch the video below to see how to add the Description Widget to a Listing Template, create fields, and view the result on your site.
Step 1: Add the Description Widget to Your Listing Template
To create a new description field, first access the listing template where you want to add the field.
- Navigate to Content > Listings > Listing Template.
- Open the listing template you want to customize.
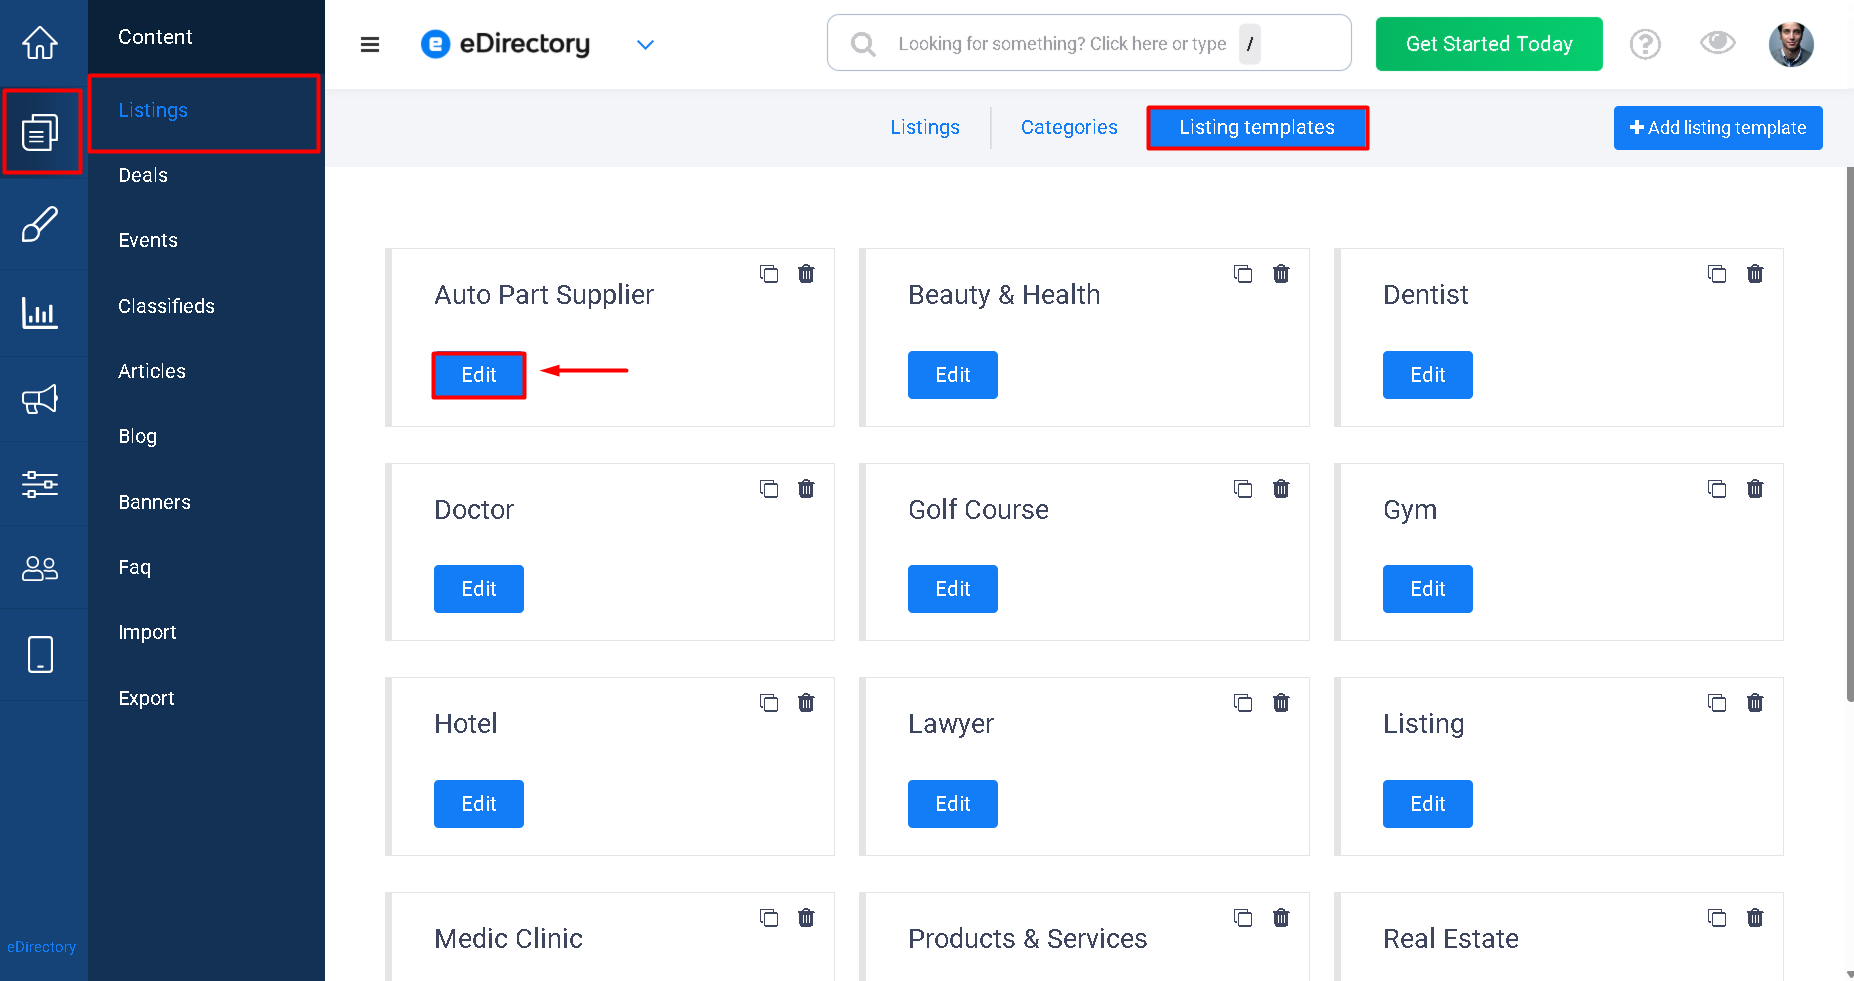
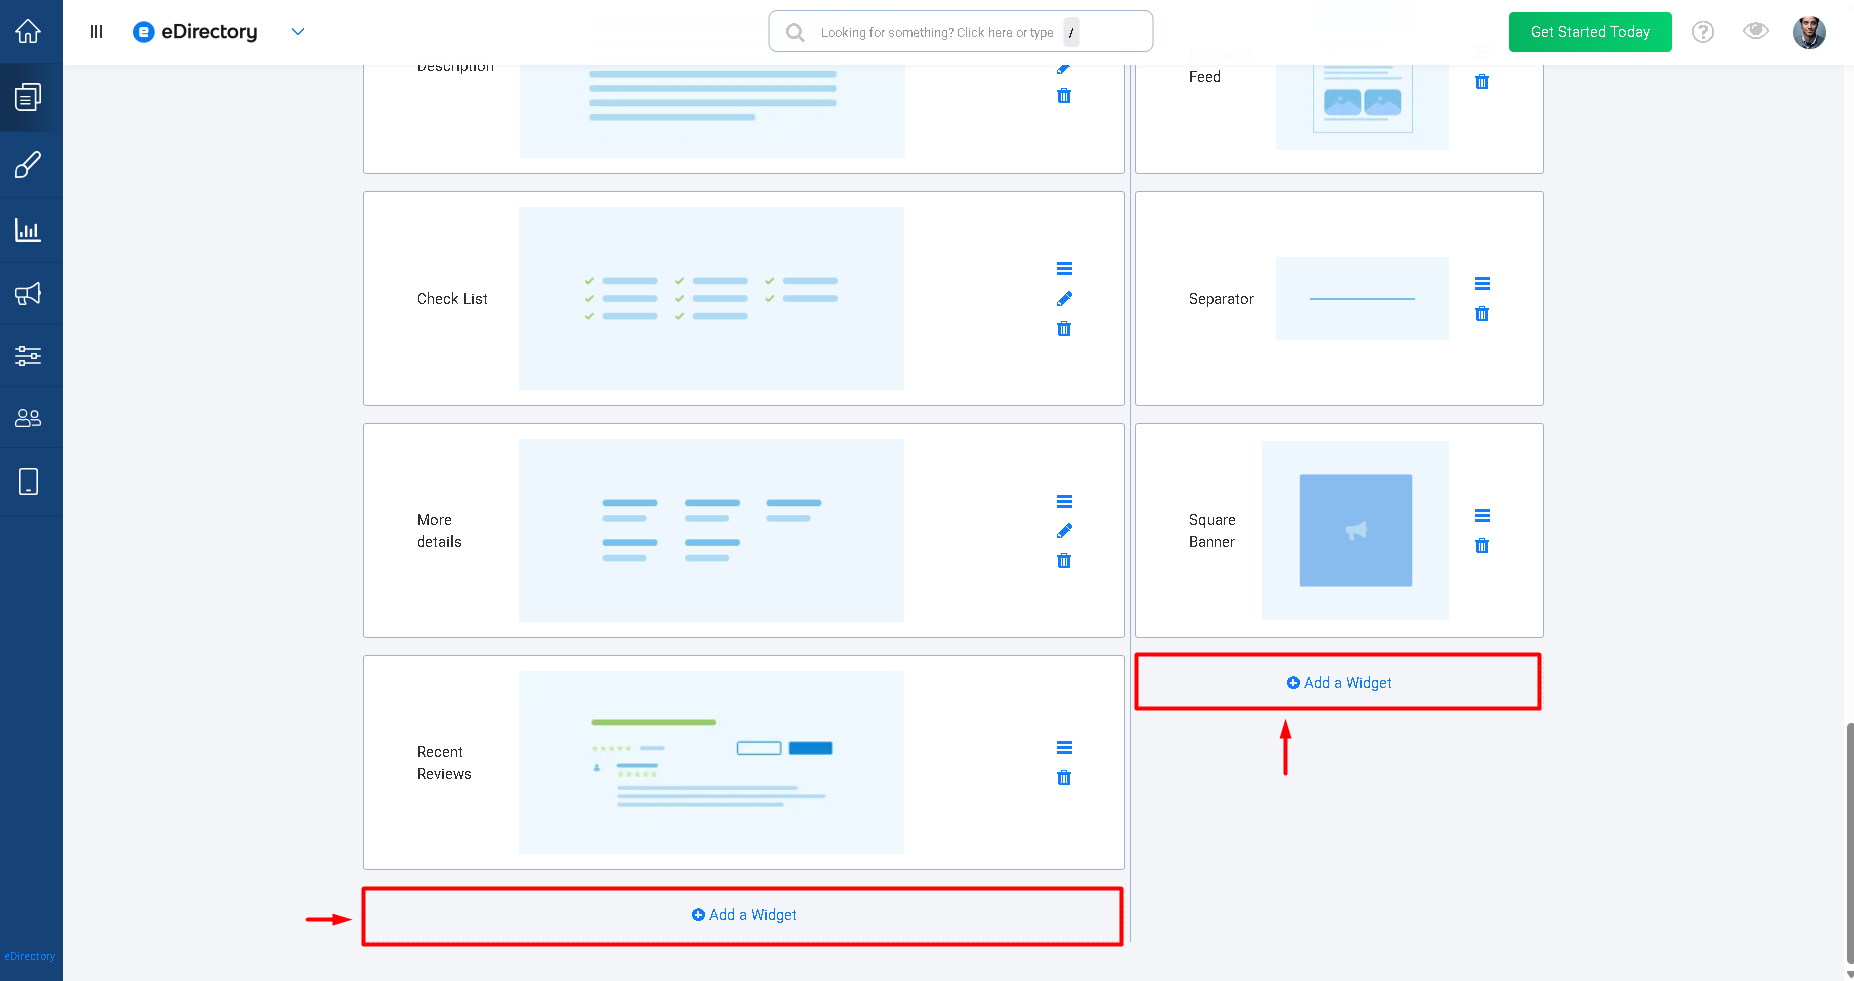
- Click the Add a widget button in the area where you want the description field to appear.
- Search for and select the Description Widget.
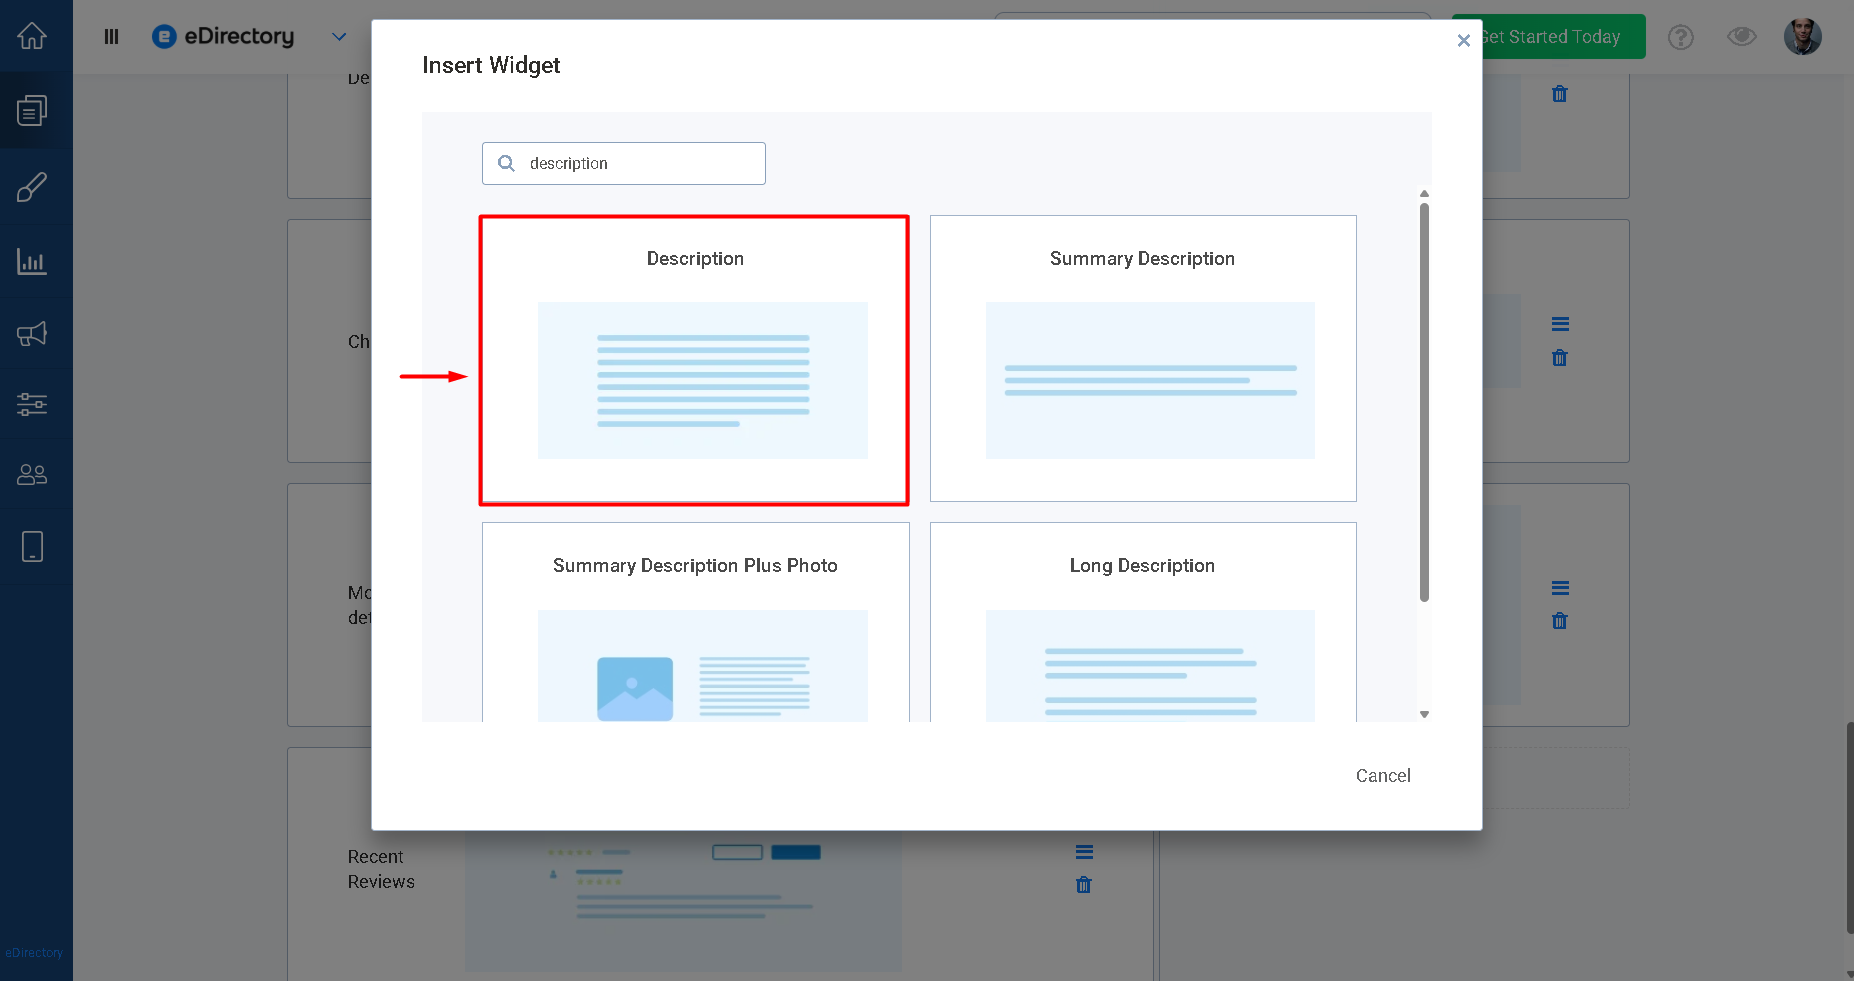
You can add the Description Widget multiple times to the same listing template, allowing you to create different fields for different types of information.
For example, you could add one field to the sidebar for contact information and another field in the main content area for a detailed description of the listing.
Step 2: Configure a Short Description Field
In this example, we will create a short description field that can be used to provide contact information for a car dealership.
2.1. Choose the Short Description Option
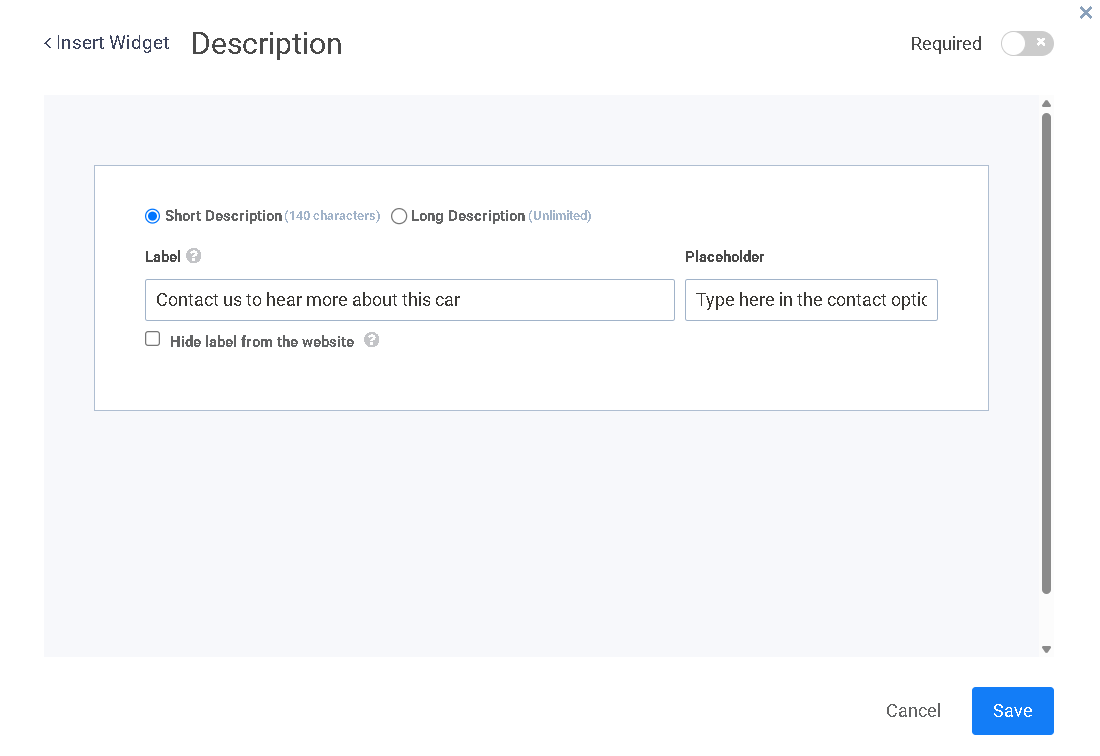
When configuring the Description Widget, select the Short Description option.
This option allows sponsors to enter a description of up to 140 characters.
2.2. Add the Field Label
The Field Label is displayed on the listing entry form and on the listing page.
Enter the label you want visitors and sponsors to see.
For example: Contact us to hear more about this car
If you want this label to appear on the listing page, do not select the Hide label from the website option.
2.3. Add a Placeholder
You can use the Placeholder option to provide instructions or a quick tip to sponsors when they are filling out the field.
For example: Type here in the contact options for your listing
The placeholder helps sponsors understand what type of information they should enter in the field.
2.4. Required
You can choose whether this field should be mandatory for sponsors to complete. Enable the "Required" toggle to make the field required, or disable it to make the field optional.
2.5. Save the Widget
After configuring the field, save the widget.
Step 3: Add a Long Description Field
You can also add a second Description Widget to collect more detailed information.
For example, you could use this field to describe the main features or differentiators of a business.
- Click the Add a widget button in the area where you want the widget to appear.
- Search for the Description Widget.
- Select the Long Description option.
The Long Description option does not have a character limit.
3.1. Add the Field Label
For this example, enter Differentials
3.2. Add a Placeholder
Add a placeholder to explain to sponsors what information should be entered.
For example: Describe here the main differentials of your listing
3.3. Required
You can choose whether this field should be mandatory for sponsors to complete. Enable the "Required" toggle to make the field required, or disable it to make the field optional.
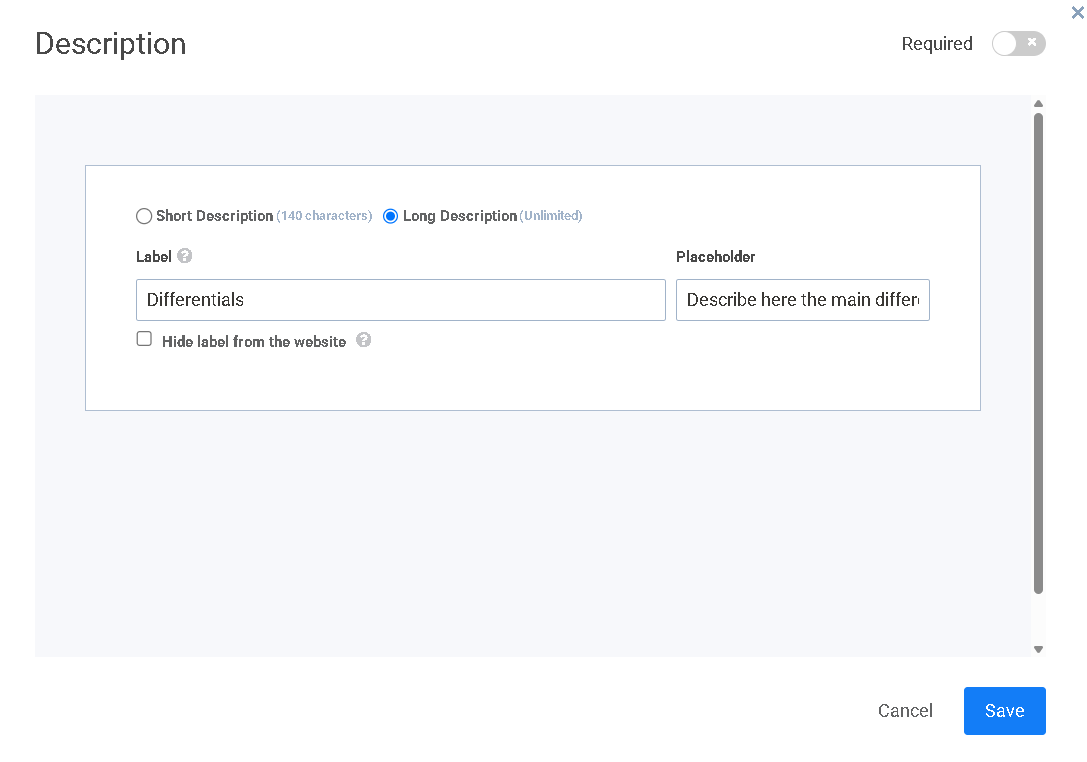
3.4. Save the Widget
Save the widget after completing the configuration.
Step 4: Save the Listing Template
After configuring all the Description Widgets you want to use, save your Listing Template.
The new description fields will now be available when sponsors create or edit a listing using this template.
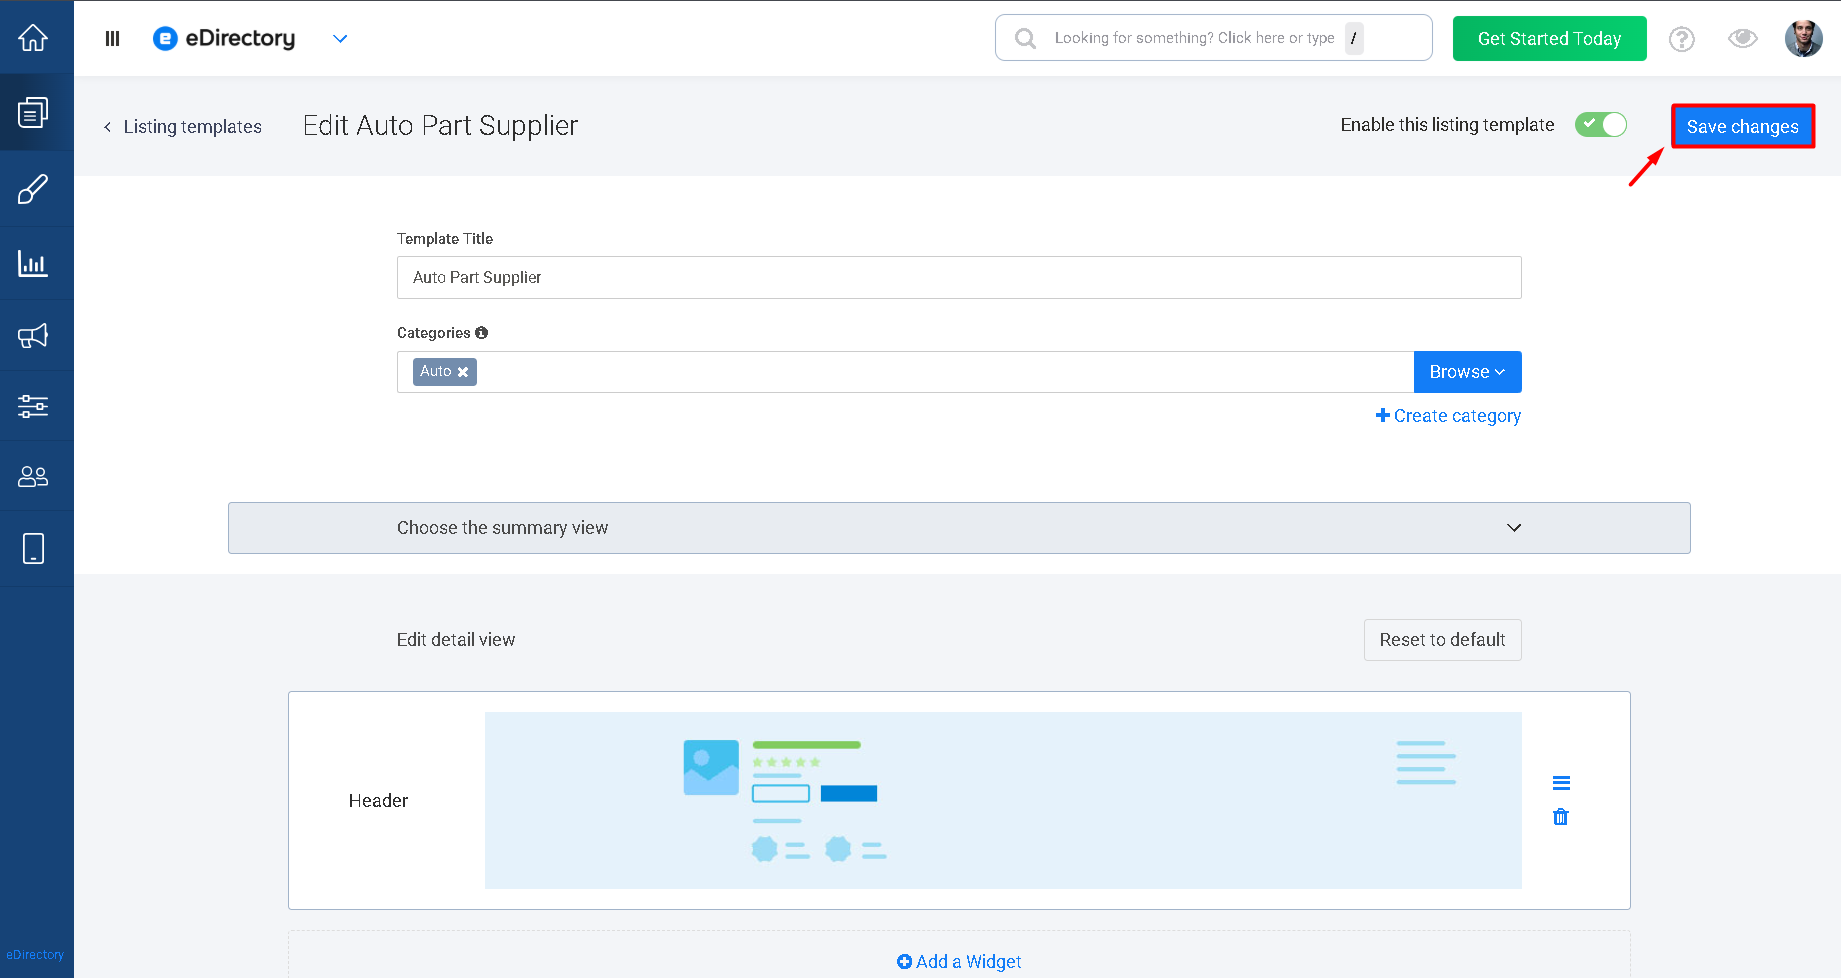
Step 5: Create a Listing Using the New Fields
To see how the new fields work, create a listing using the template you just customized.
5.1. Open the Listing Entry Form
Open the listing entry form under Content → Listings → Add listing.
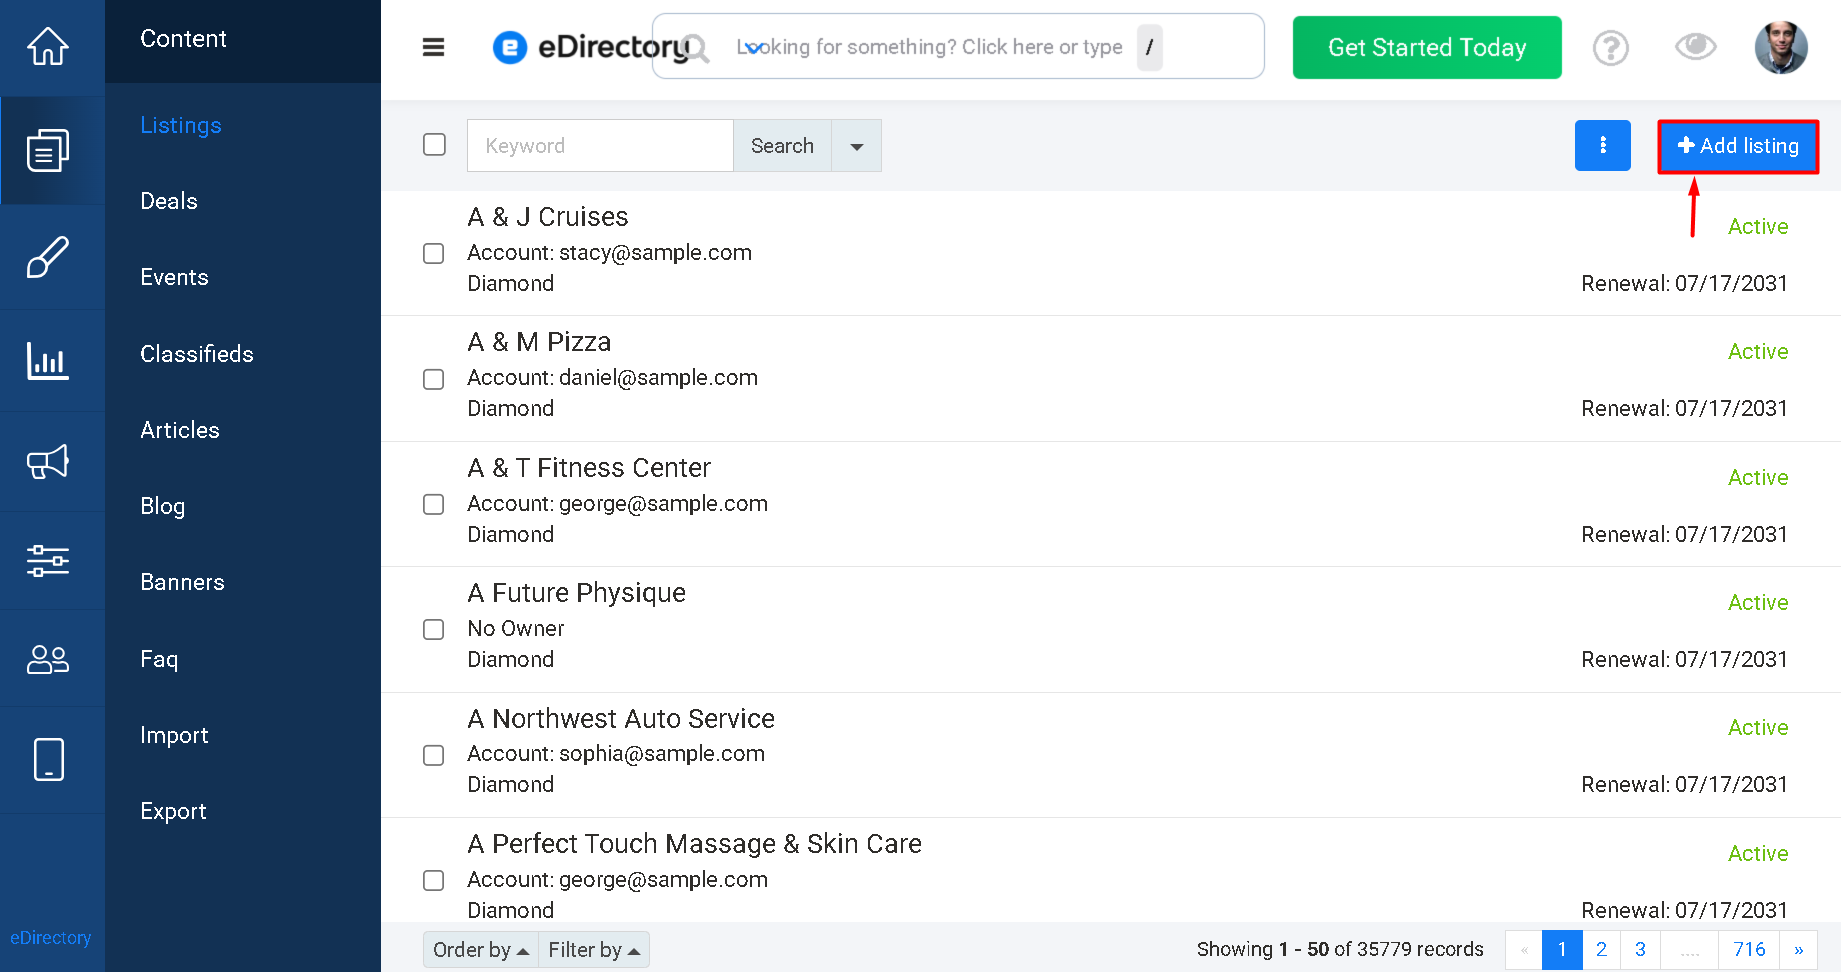
5.2. Select the Listing Template
Select the listing template containing your new Description Widgets.
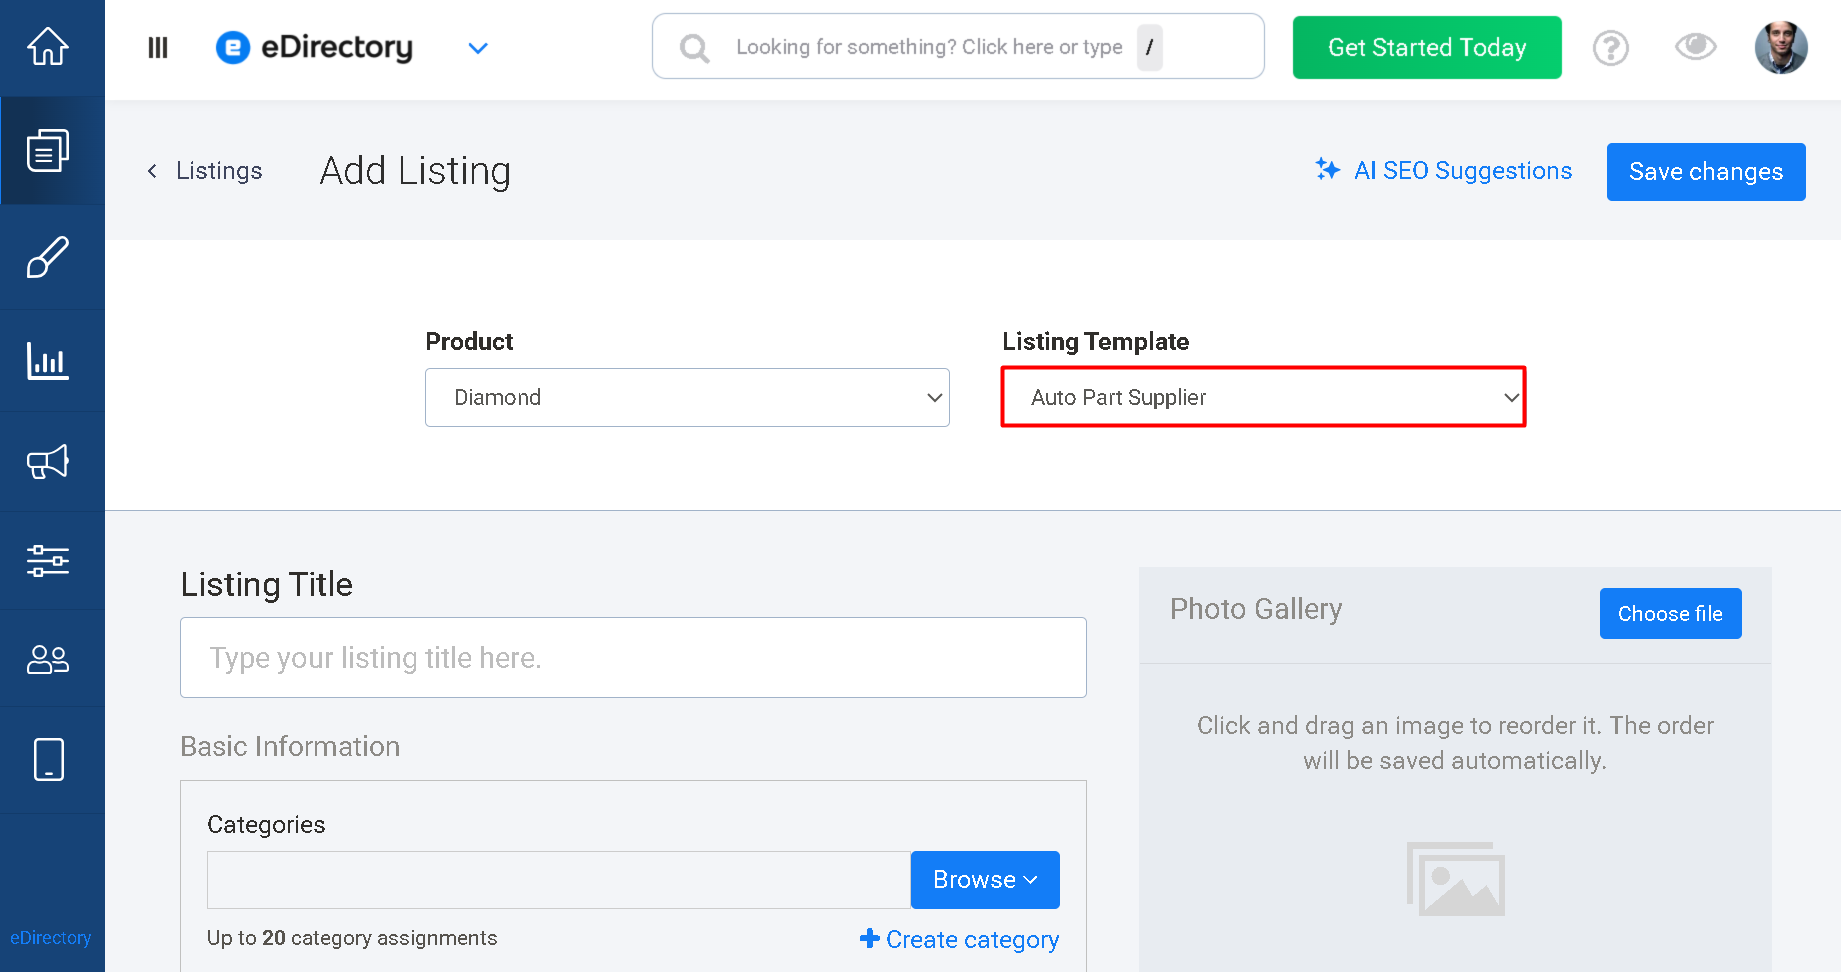
5.3. Complete the Required Listing Information
Complete the other required listing information.
5.4. Complete the Description Fields
Scroll to the last part of the listing entry form. The new description fields will be available there.
Enter the appropriate information into each field.
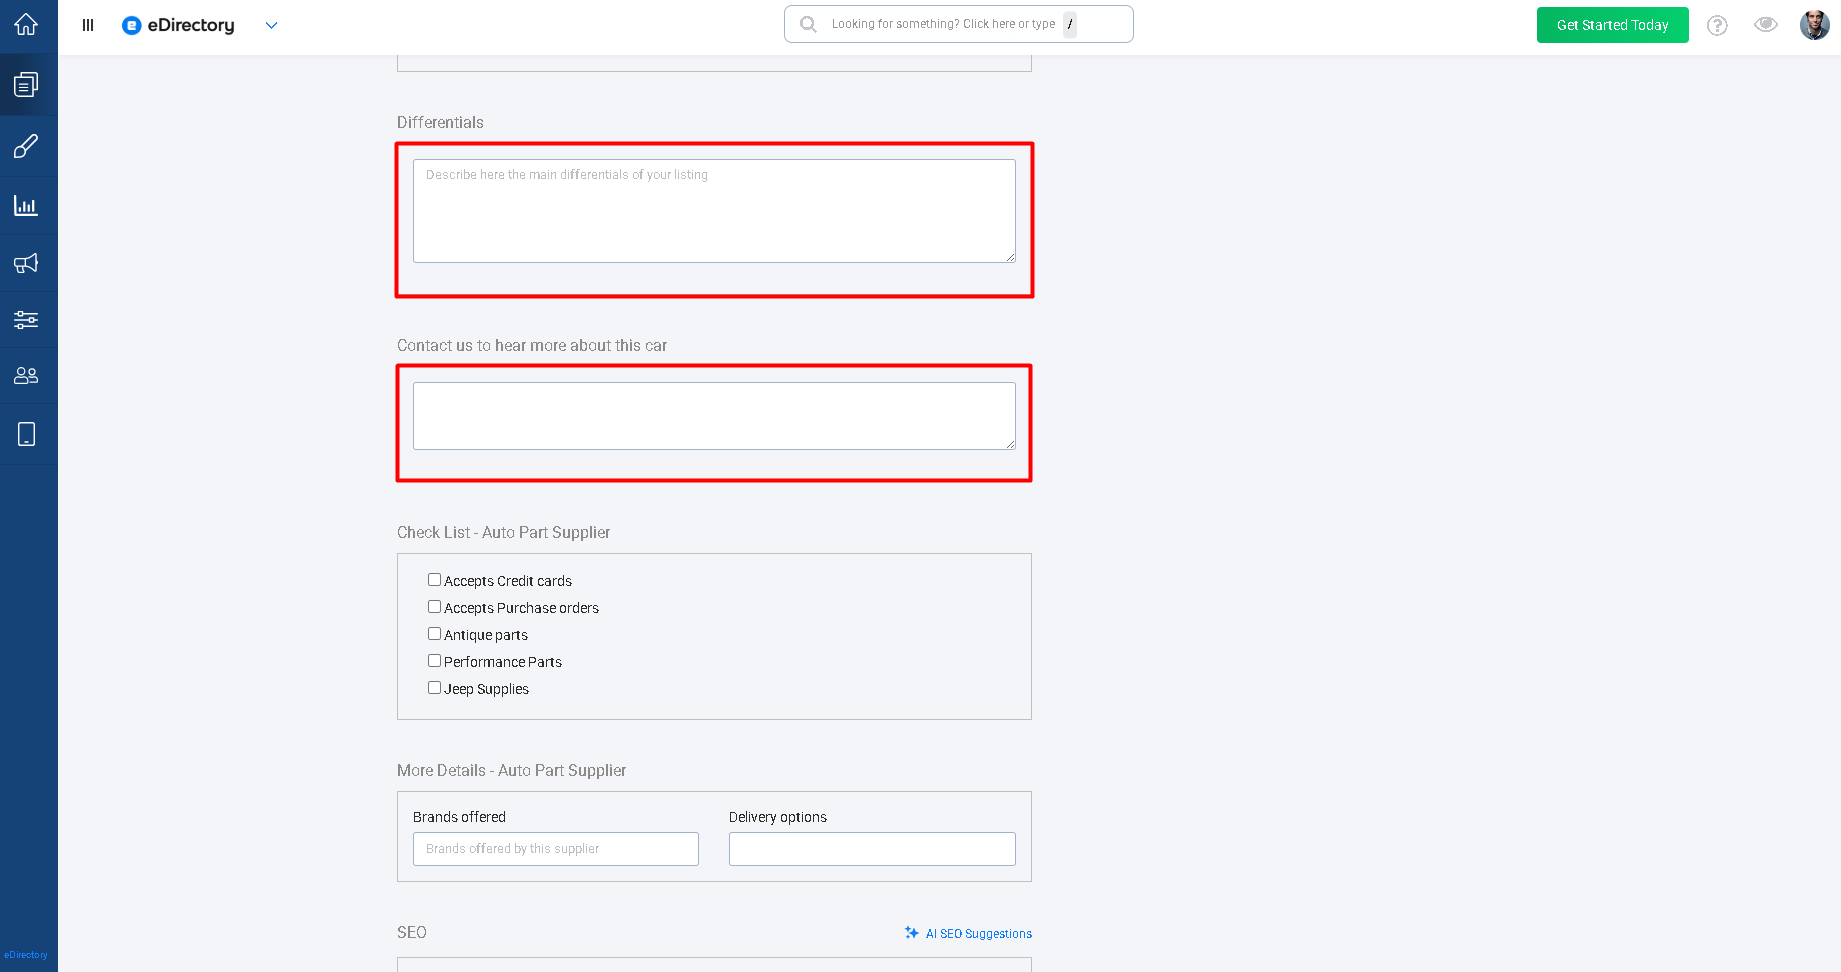
For example, you can enter contact information in the Short Description field and provide detailed information about the listing in the Long Description field.
5.5. Complete the Listing
Complete the remaining listing information.
5.6. Save the Listing
Save the listing.
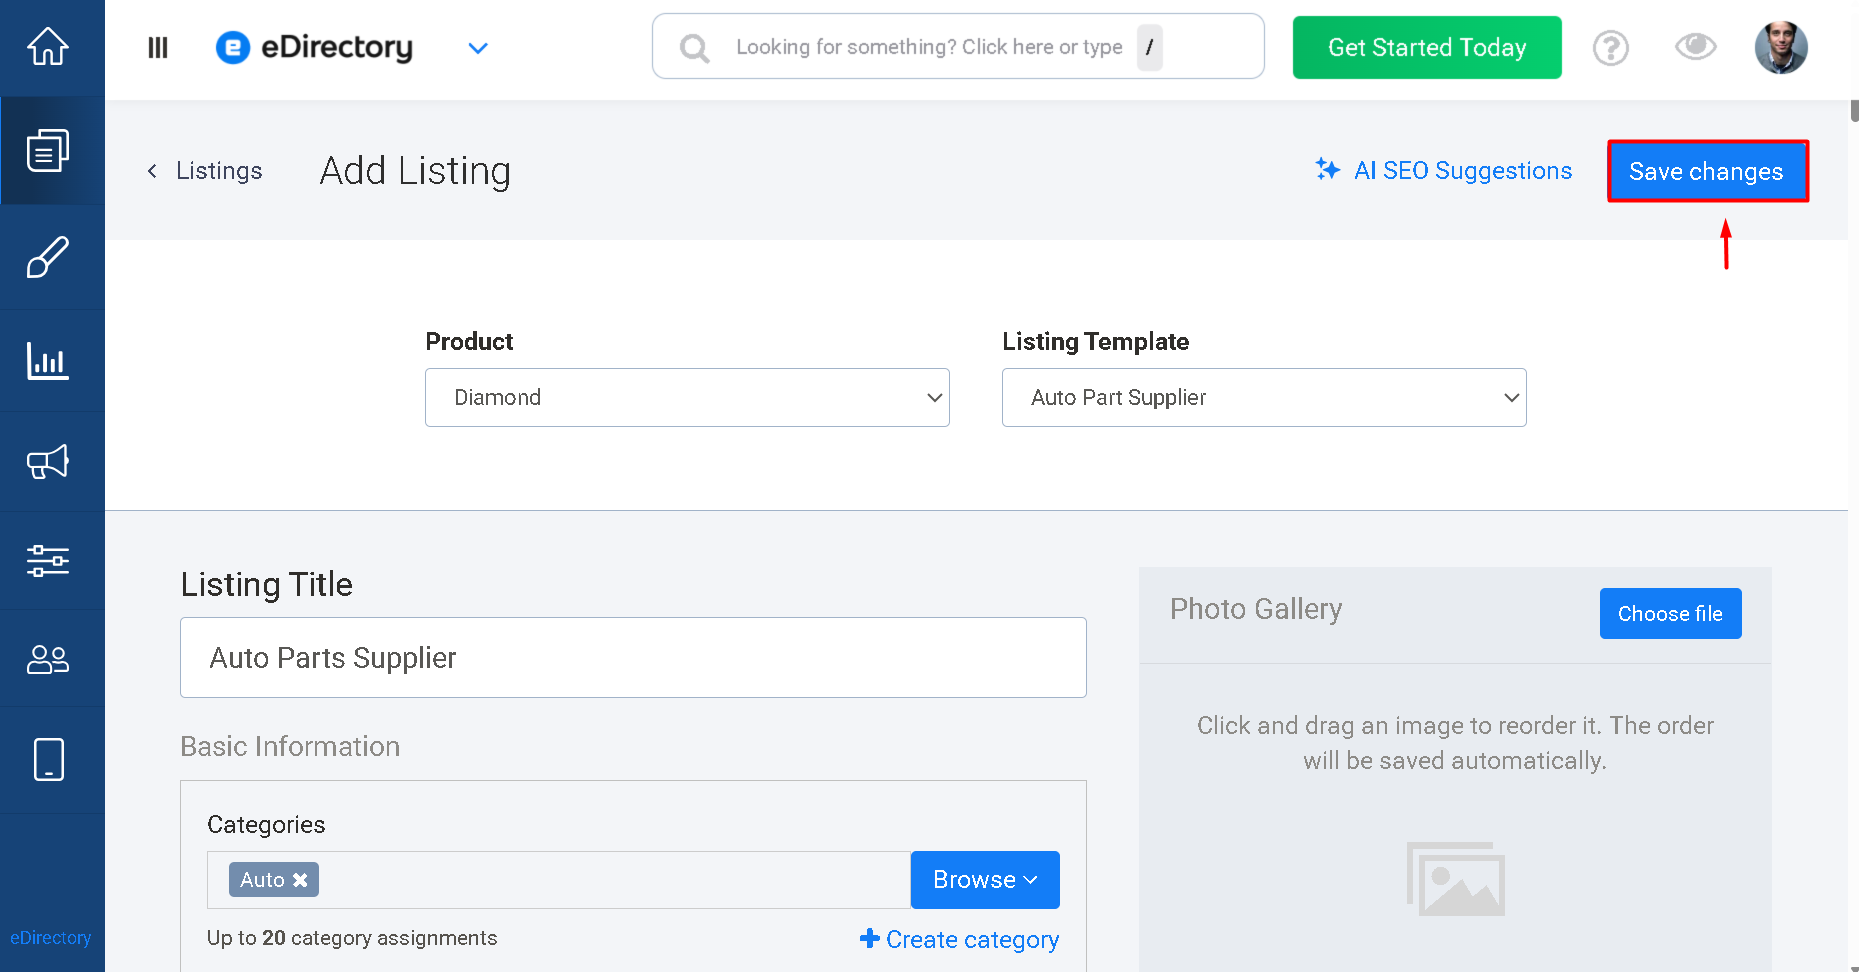
Step 6: View the Description Fields on the Listing
After saving the listing, visit the listing page to see how the new fields are displayed.
The information entered into the Short Description field and the Long Description field will be displayed according to the location where you placed each Description Widget in the listing template.
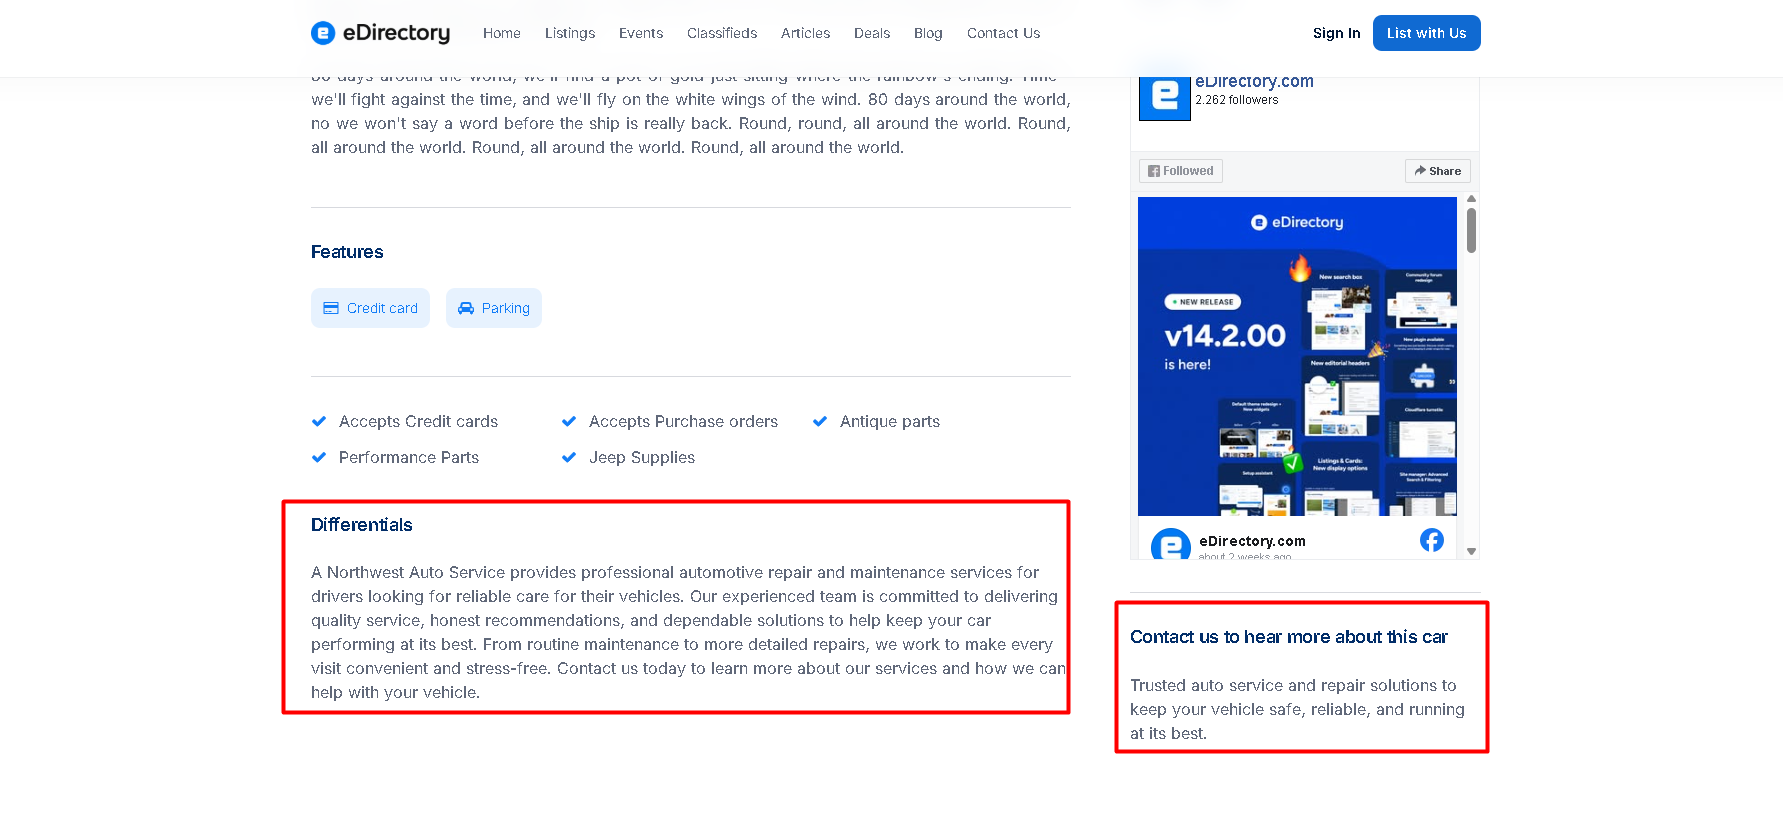
This allows you to customize your listing pages and collect different types of information from sponsors without relying on a single standard description field.
Conclusion
The Description Widget provides a flexible way to add additional text fields to your listing templates.
By using multiple Description Widgets, you can create different fields for different purposes, such as contact information, business details, features, or other information you want sponsors to provide.
You can choose between a Short Description, limited to 140 characters, and a Long Description, which has no character limit, depending on the type of information you want to collect and display.