
Listing Template: Range Widget
Introduction
The Range Widget allows you to display listing qualities using a visual scale of icons. This can be useful for representing information such as a restaurant's average price range, a luxury rating, or other characteristics that can be represented using a range of icons.
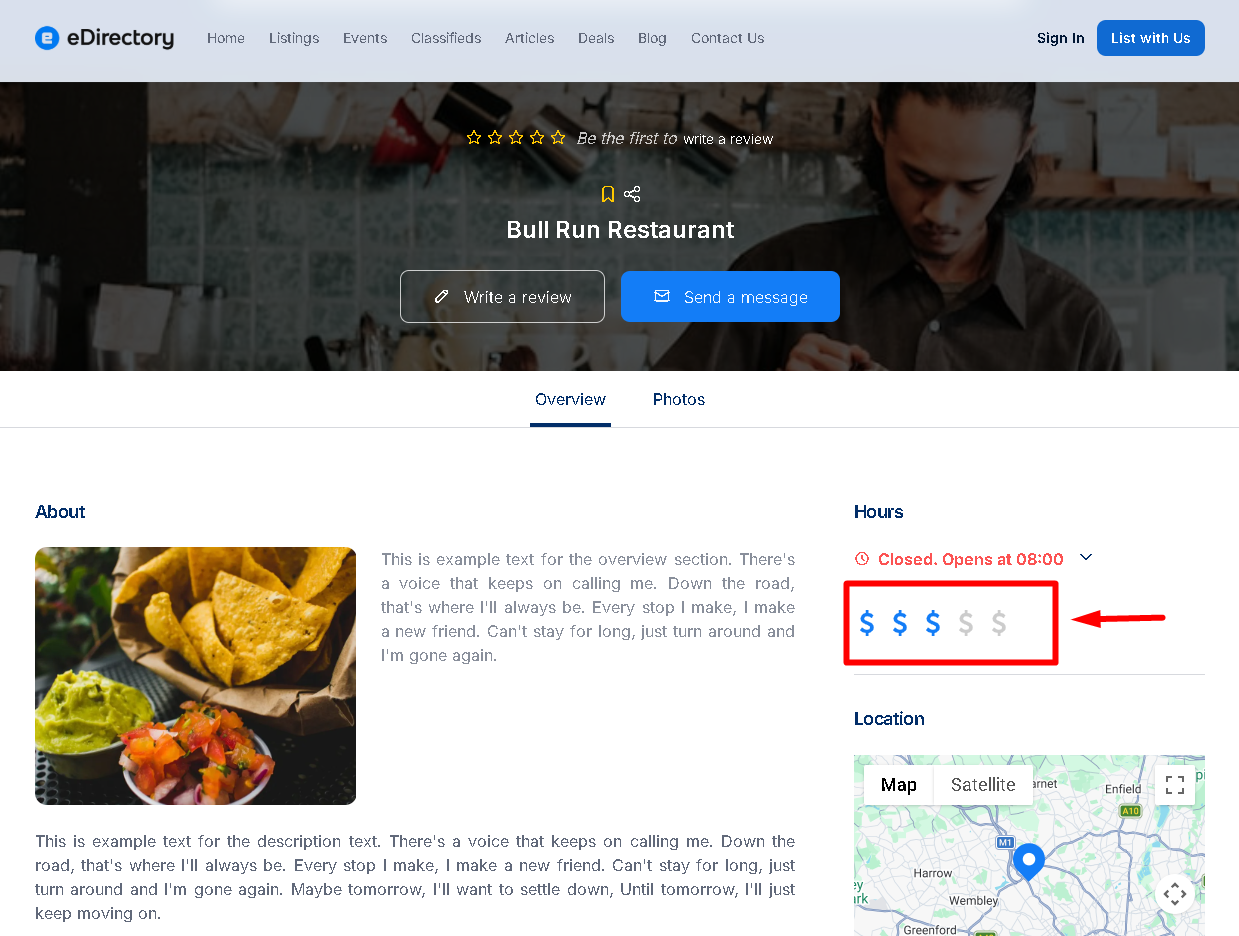
For example, you can use dollar sign icons to indicate a restaurant's average price, with fewer symbols representing a lower price range and more symbols representing a higher price range.
🎥 See the Range Widget in Action
Watch the video below to see how to add and configure the Range Widget in a Listing Template and display the selected value on a listing.
Step 1: Add the Range Widget to Your Listing Template
To create a range field, first access the Listing Template where you want to add the widget.
1.1. Open the Listing Template
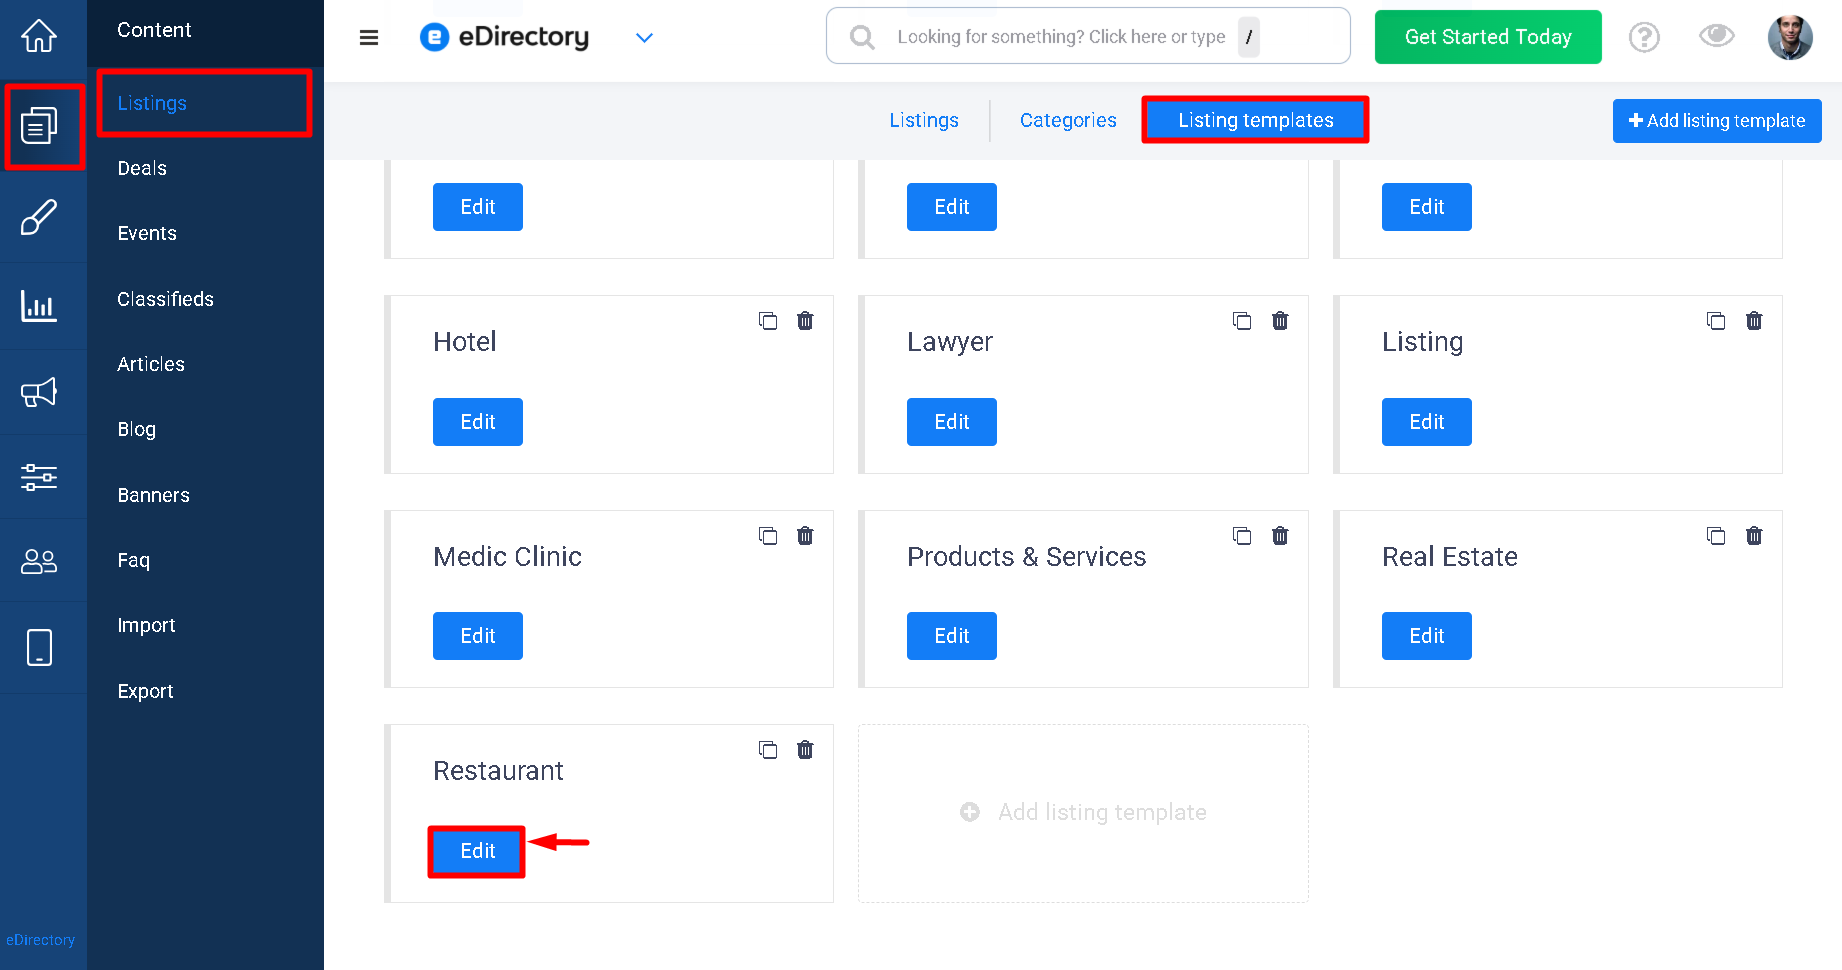
Navigate to Content > Listings > Listing Template.
1.2. Select the Listing Template
Open the Listing Template you want to customize.
1.3. Add a Widget
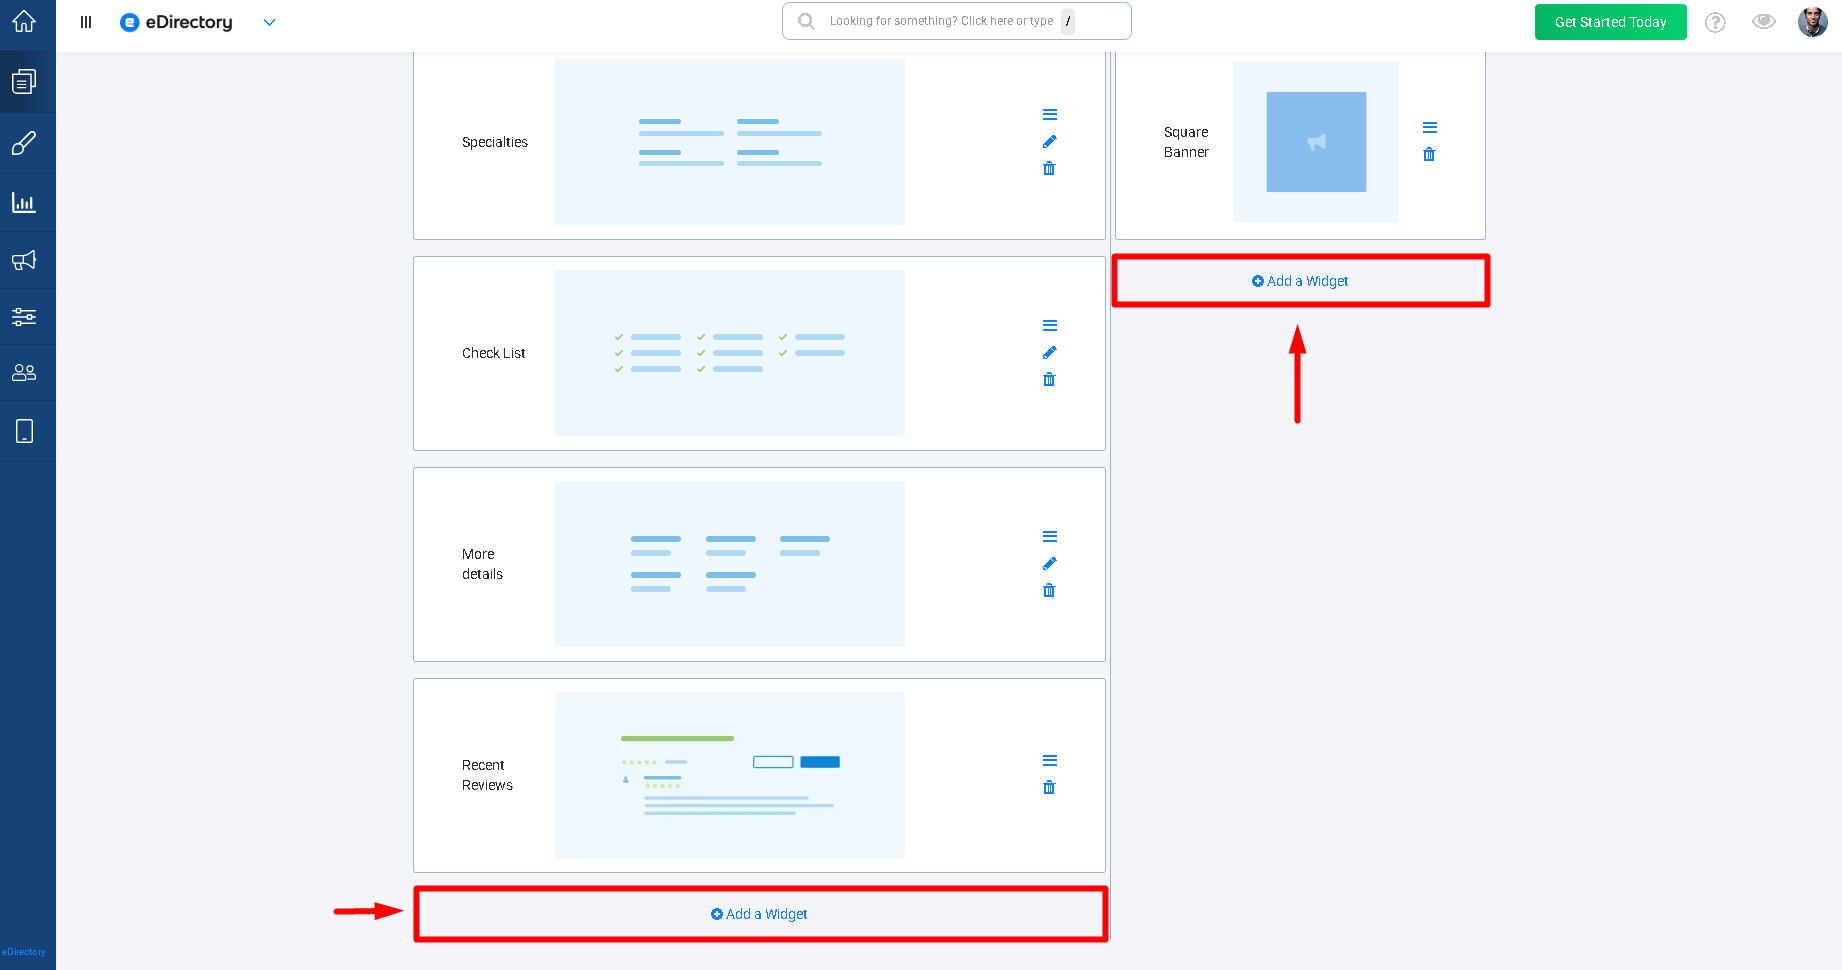
Click Add in the area where you want the widget to appear, such as the sidebar.
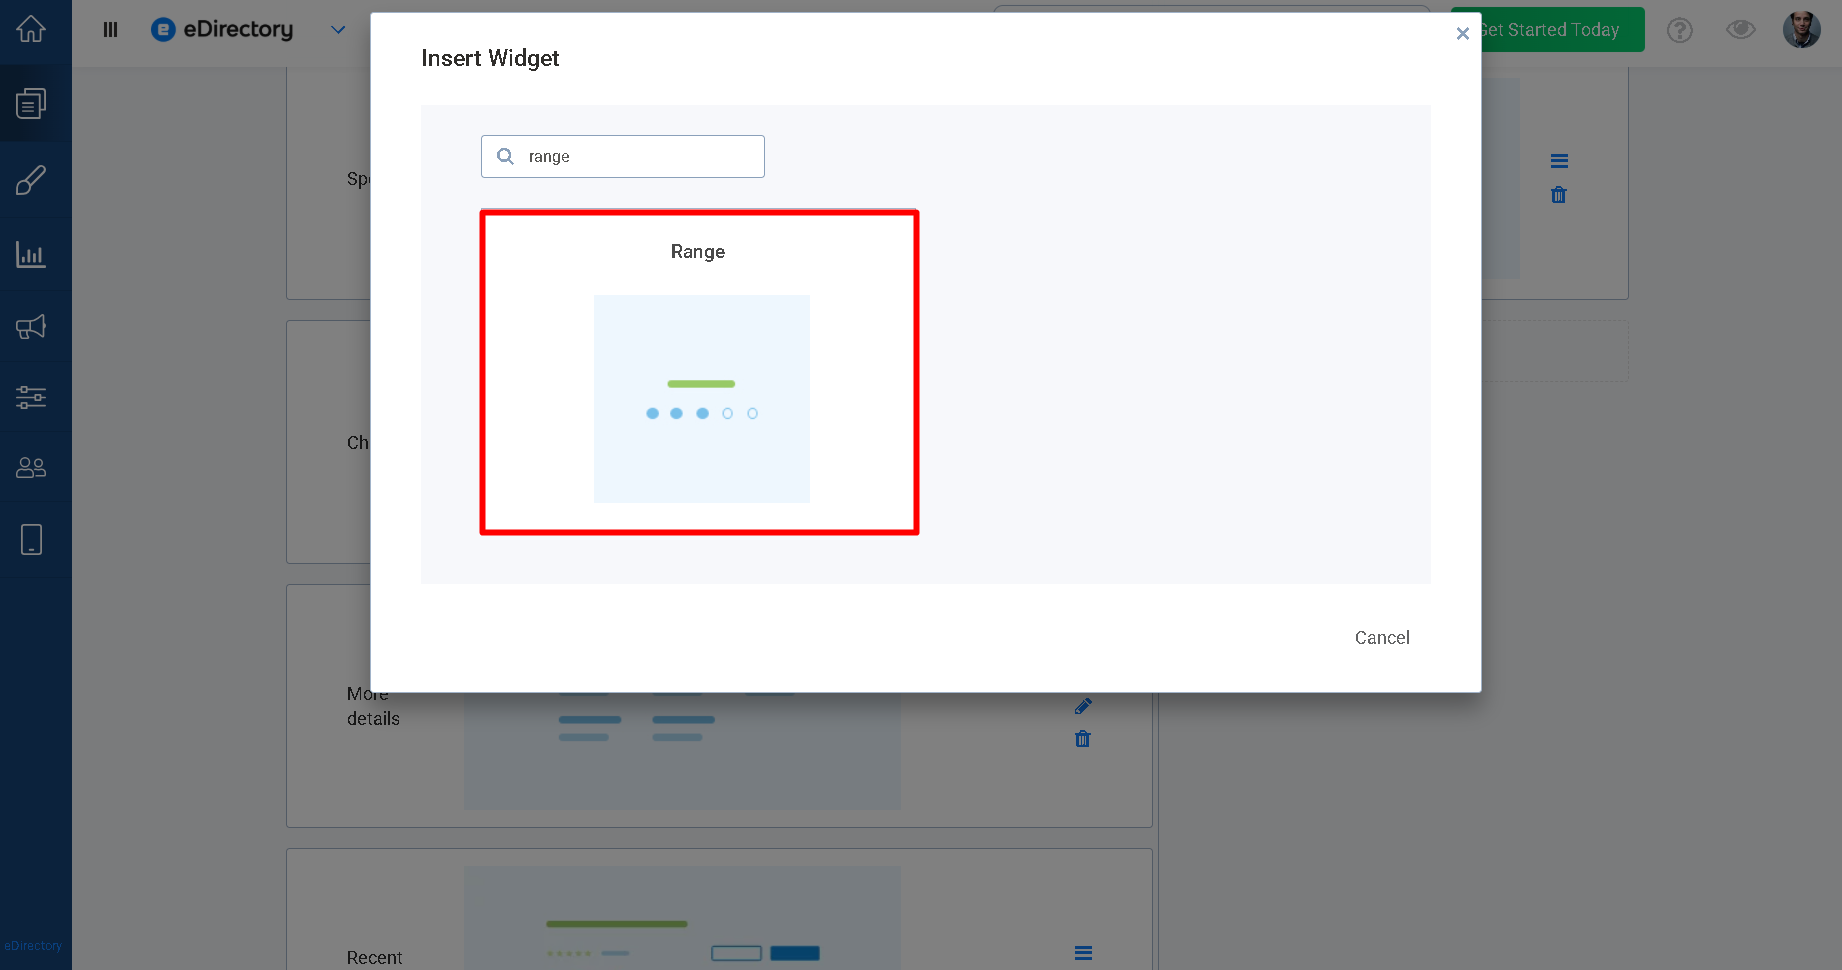
1.4. Select the Range Widget
Search for and select the Range Widget.
The Range Widget can be configured to represent different types of listing information using a range of icons.
Step 2: Configure the Range Widget
After adding the Range Widget, configure the settings according to the type of information you want to display.
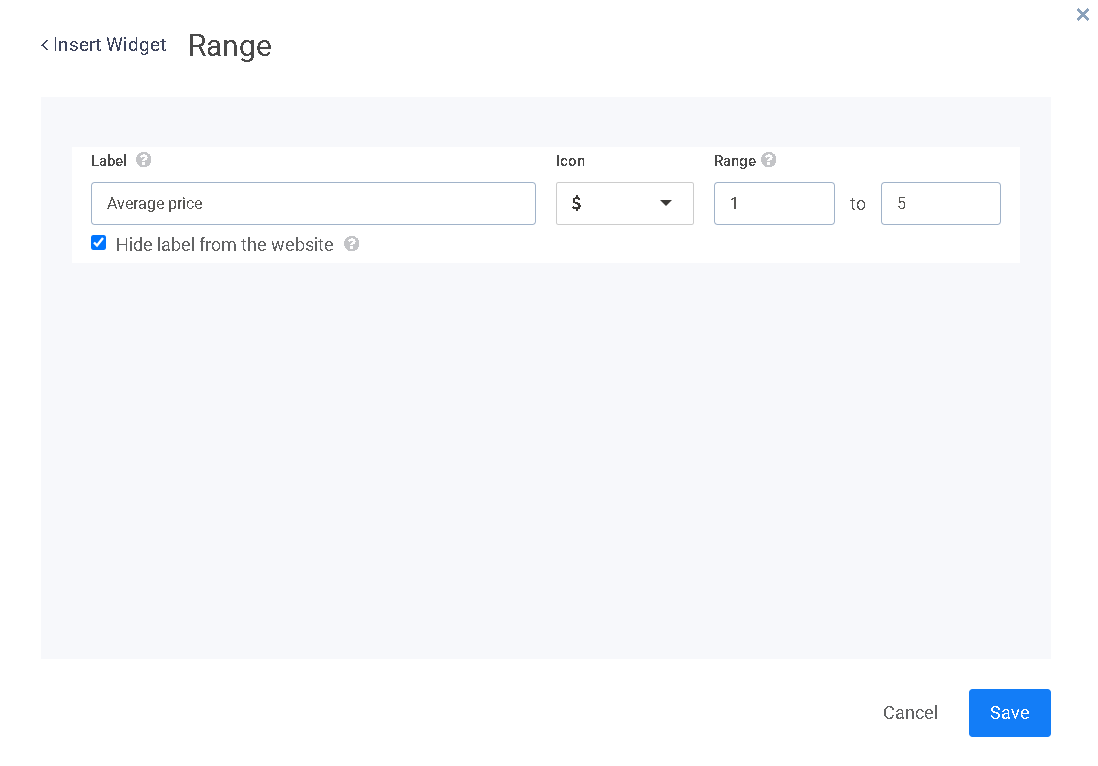
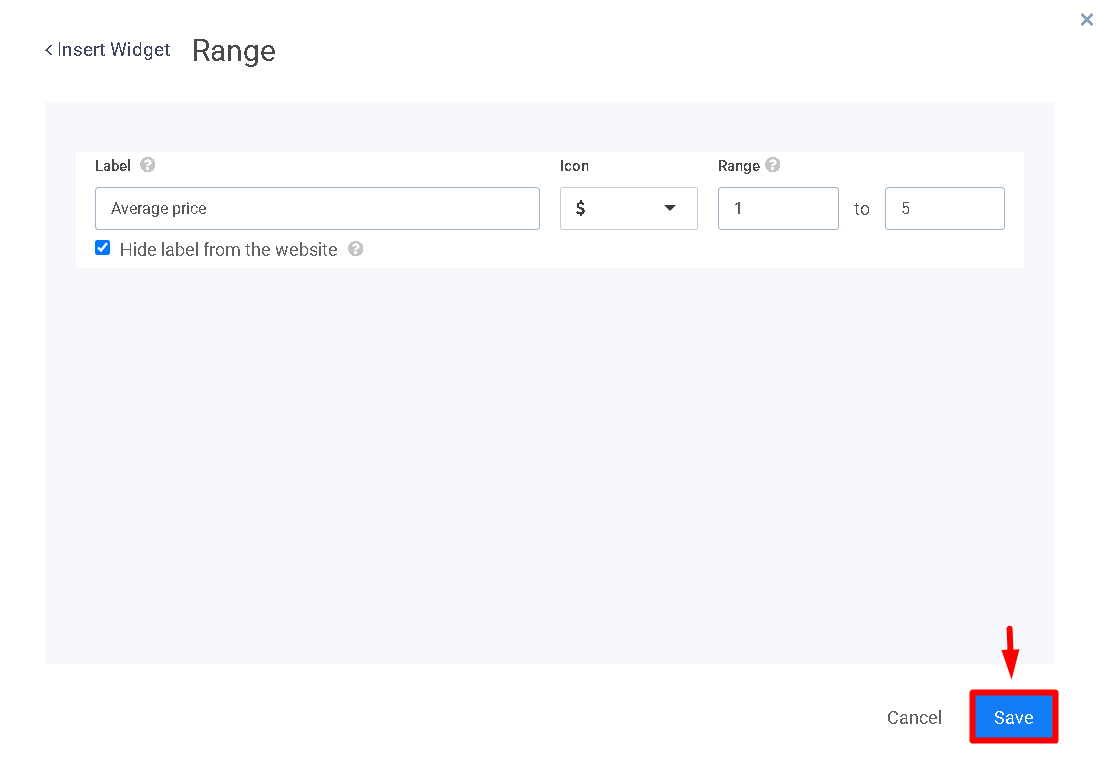
2.1. Add the Field Label
Enter a label that describes the information represented by the range.
For example: Average price
2.2. Hide the Title
It is recommended to enable the option to hide the title when displaying the widget.
When using an icon to represent the information, the visual scale can already make the purpose of the field intuitive to visitors.
2.3. Choose an Icon
Select the icon you want to use to represent the range.
For example, you can use the dollar sign ($) icon to represent a restaurant's average price.
The number of icons selected can represent different levels. For example:
- One dollar sign can represent a lower price range.
- Four dollar signs can represent a higher price range.
You can also use other icons depending on the type of information you want to display.
2.4. Choose a Range
- Use the Range field to define the starting and ending values for your range.
- The Interval setting determines the number of icons available in the range.
Enter the number of icons you want to use, from 1 to 10.
For restaurant pricing, a range from 1 to 5 is typically suitable.
For example, if you set the interval to 5, listing owners can select a value from one to five icons.
Make the Field Optional
- Setting the Interval to 0 makes the field optional.
- When the listing owner selects 0, the Range Widget will not be displayed on the listing.
- This can be useful when the information represented by the widget does not apply to every listing.
Step 3: Save the Widget and Listing Template
3.1. Save the Widget
After configuring the Range Widget, save the widget.
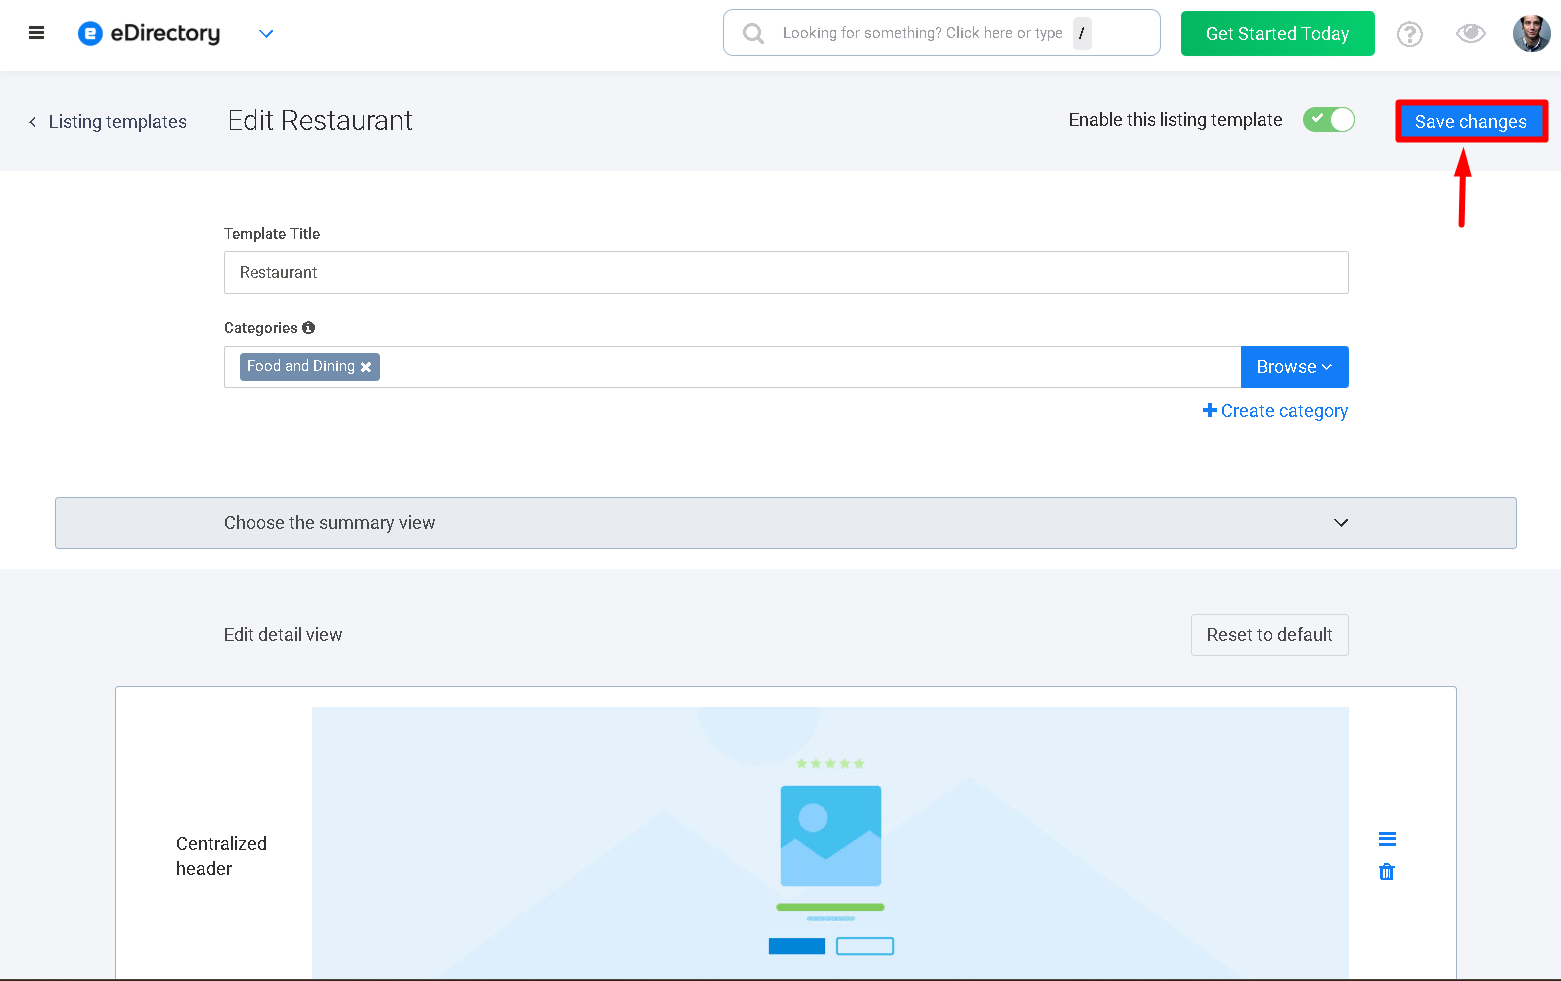
3.2. Save the Listing Template
Save the Listing Template to apply the changes.
The new range field will now be available when creating or editing listings that use this template.
Step 4: Add the Range Value to a Listing
After saving the Listing Template, create or edit a listing using the template you just customized.
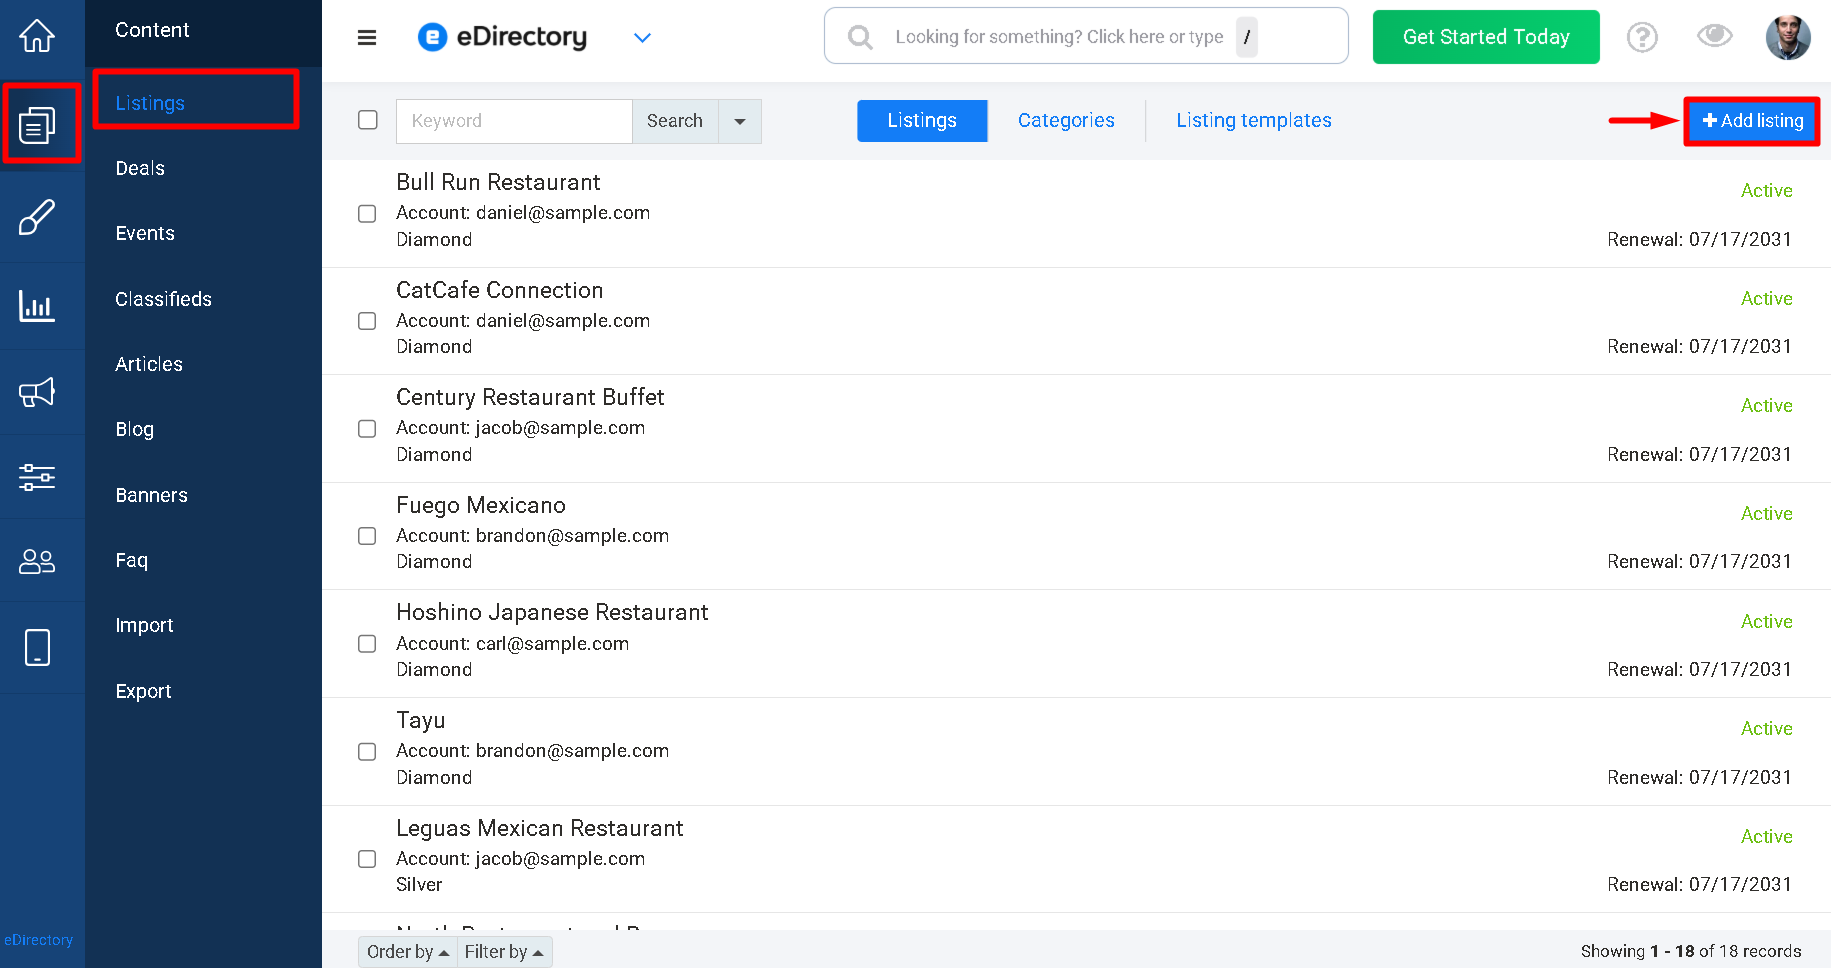
4.1. Open the Listing Entry Form
Go to Content > Listings > Add listing.
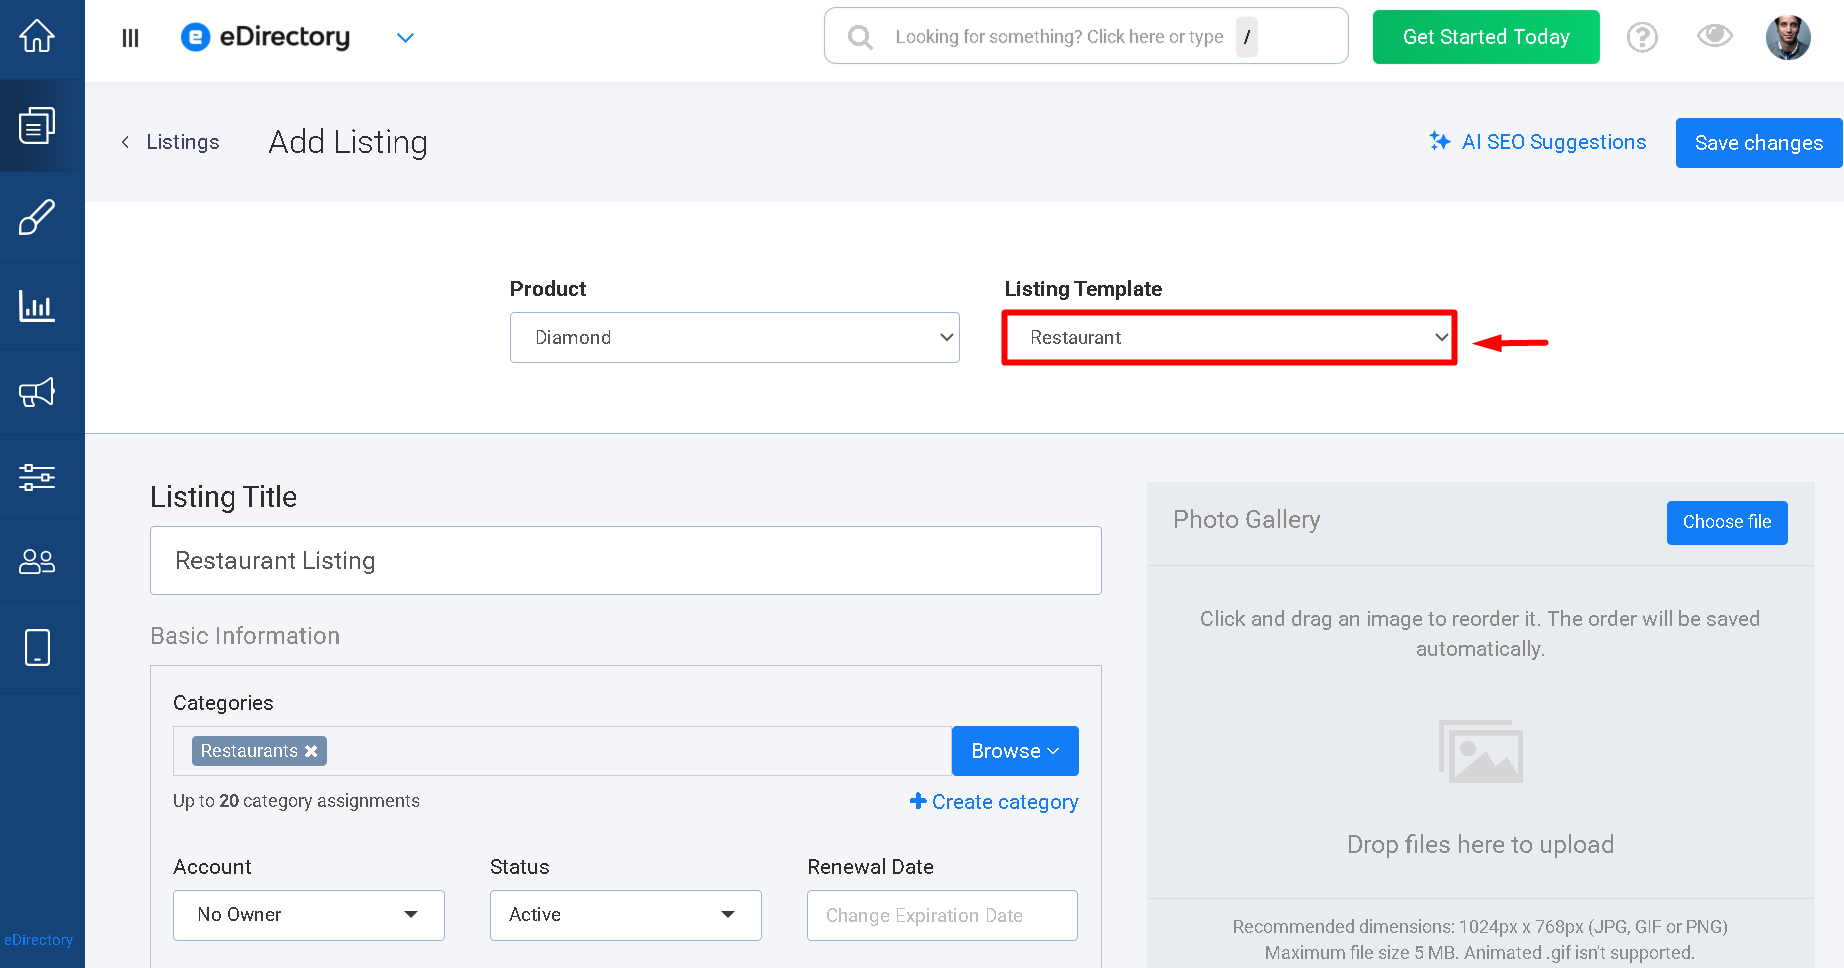
4.2. Select the Listing Template
Select the appropriate Listing Template.
4.3. Select the Range Value
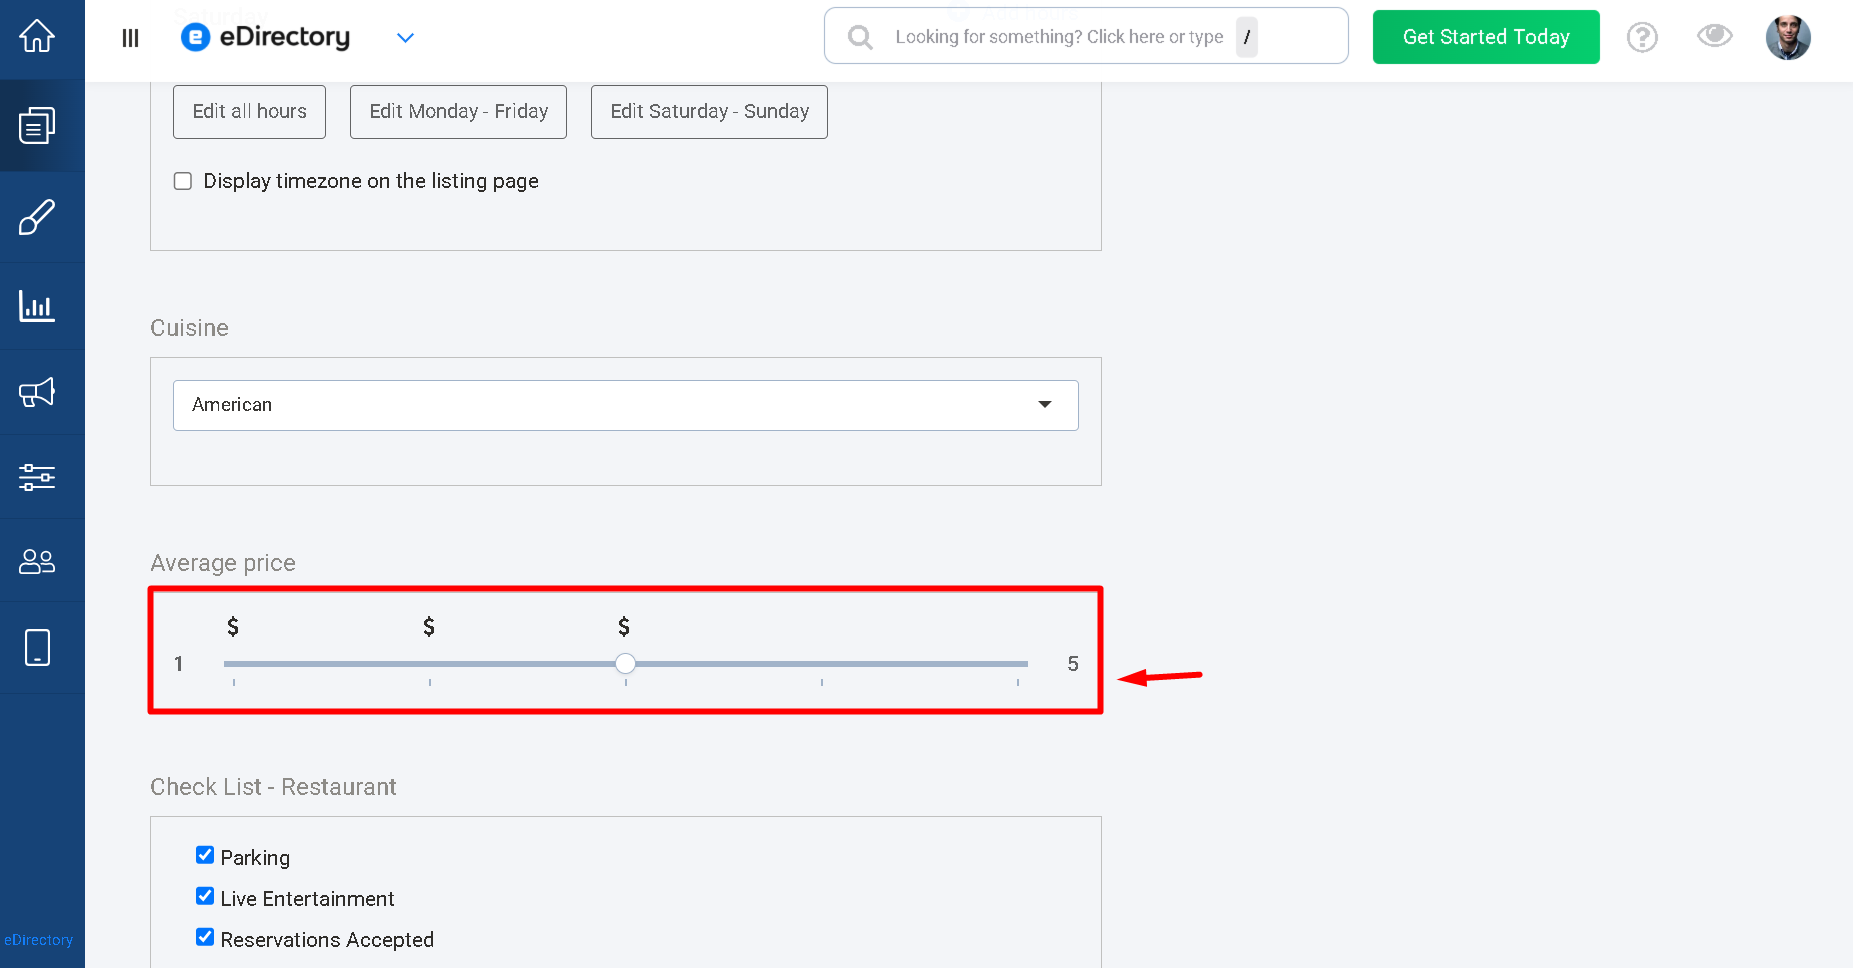
Locate the Average price field, or the label you configured, and select the appropriate value.
For example, you can select three dollar signs to indicate a restaurant with a medium-to-high average price.
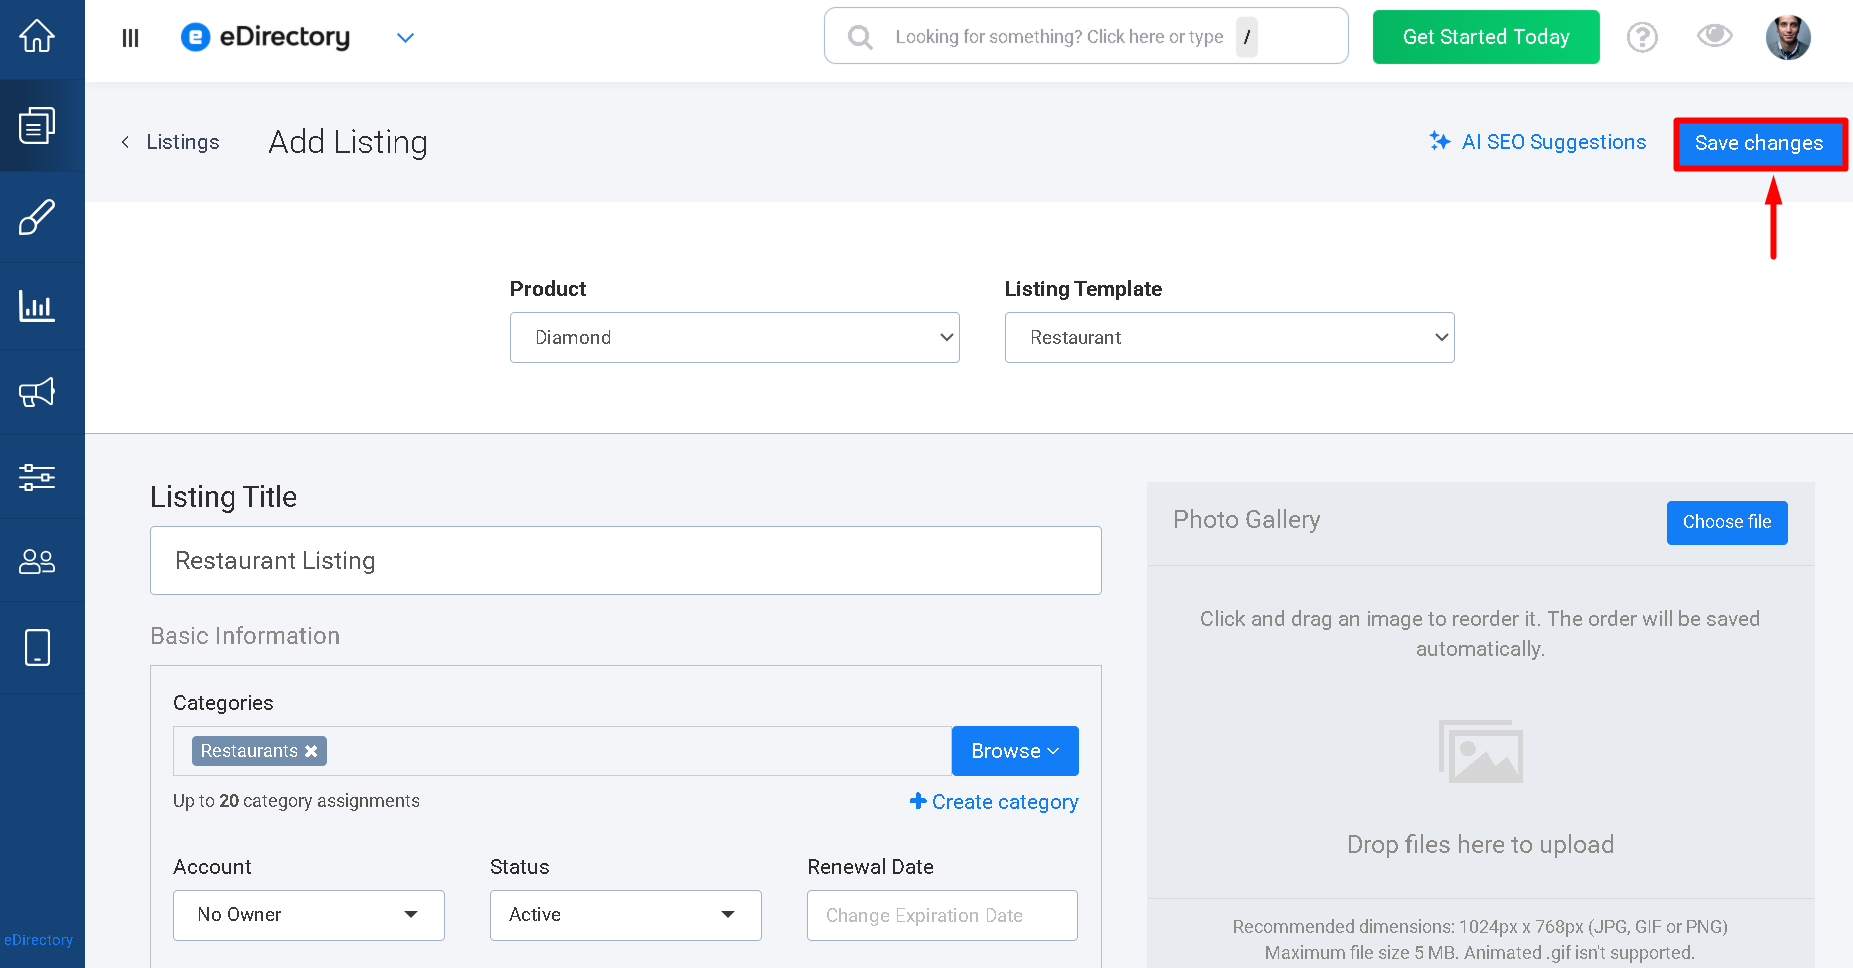
4.4. Save the Listing
Save the listing.
The selected value will then be displayed on the listing using the icons configured in the Range Widget.
Step 5: Use the Range Widget for Other Types of Information
The Range Widget is not limited to pricing information. You can use it to represent different listing qualities depending on your website's needs.
5.1. Use Icons for Ratings
You can use star icons to represent a luxury or quality rating.
5.2. Use Icons for Preferences
You can use sun icons to indicate plant light preferences, such as full sun or shade.
5.3. Use Icons for Pricing
You can use dollar signs to represent an average price range.
5.4. Choose the Appropriate Configuration
You can select different icons and configure the number of intervals according to the type of information you want to collect and display.
Conclusion
The Range Widget provides a visual way to represent listing qualities using a configurable range of icons.
You can configure up to 10 intervals, make the field optional by setting the interval to 0, and choose different icons to match the type of information you want to display.
By using the Range Widget in your Listing Templates, you can provide visitors with an easy-to-understand visual representation of information such as pricing, ratings, preferences, or other listing characteristics.
If you have any questions about the Range Widget, please contact our Support team.