How can Sponsors upgrade a plan in your eDirectory website
Introduction
Many customers may start using a free plan on your eDirectory site, but at some point, they might want to upgrade to a paid plan in order to take advantage of additional features and benefits that the more advanced plans offer.
For educational purposes, let’s consider the example of a user who initially subscribed to a free plan and now wishes to upgrade to a paid plan. Below, we describe the entire process, step by step.
Step-by-step for upgrading plans
1. Subscribe to the new paid plan
- As we can see in the screenshot, the customer has a free plan (Bronze) that appears in their logged-in area, with an ad already linked to the subscription.

- The first step is for the client to access the “Advertise with us” page, where all available plans are listed, and select the paid plan of their choice. In this case, we selected the Gold Plan

- During the process, the sponsor will be asked to log into the existing account, complete the checkout, and make the payment.


- After confirmation, the subscription will be activated automatically, and the customer will see in the account panel that they have the new subscription active.
2. Check the subscription on the panel
- After completing the subscription to the new plan, the customer can confirm if the upgrade was successful by accessing: Billing > Subscriptions.

- There, the status of the new subscription will be displayed, indicating that it is active.


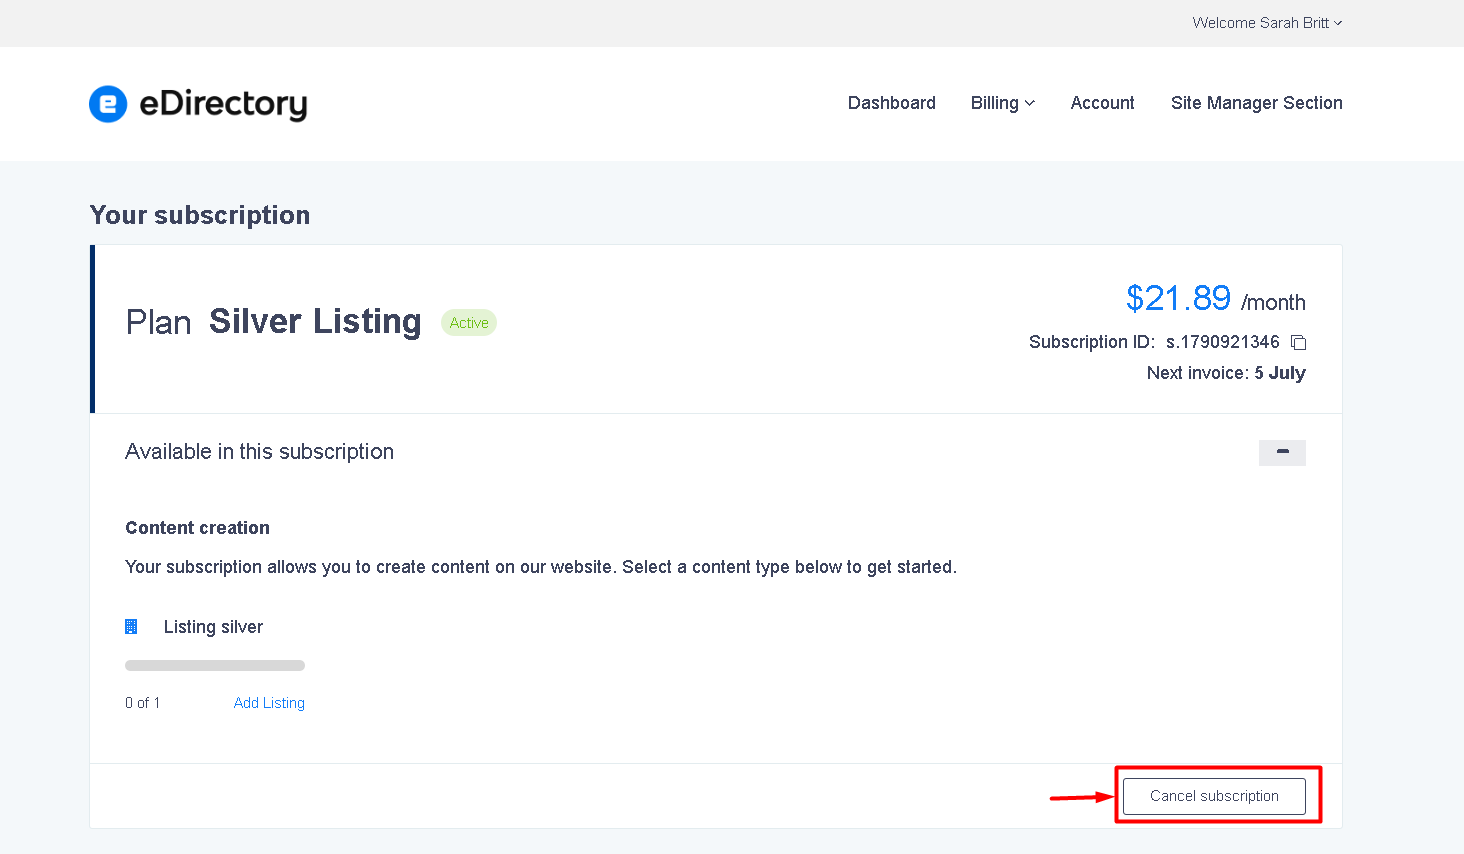
Important: In the example provided, the user is upgrading from a free subscription to a paid subscription. In this scenario, there is no need to cancel the old subscription before proceeding to Step 3.
However, if the user is upgrading from one paid subscription to another paid subscription, the process is slightly different. After the user successfully subscribes to the new plan, they should cancel the old subscription under their dashboard before proceeding to Step 3.
This helps prevent duplicate charges.
If the old subscription is not canceled, it may remain active in your payment gateway account (such as Stripe or PayPal), which could result in the customer being billed for both subscriptions.
3. Coordination with the website administrator
In order for all the client's content (Listings, events, classifieds, articles, etc.) to be transferred correctly to the new subscription, it is necessary to coordinate with the website administrator.
The client must inform the administrator that they have already subscribed to the new plan.
Then, the administrator must:
- Access Activities > Revenue Reports;
- Use the dropdown menu to search for the user's email;

- Identify the old subscription (free) and the new subscription (paid);
- Delete the old subscription.

4. Access Listings
- Go to Content > Listings in the admin area and click to edit the client's listing in question.

- Now it is necessary to change the level of Product to the one that the new plan provides. For example, in the free plan of this example, the user was entitled to the Bronze Listing, but in the Gold plan, he is entitled to the Gold Listing.

- Now, in the administrative panel of the listing form, change the product to the same type of product that the new Plan offers, in this case, Gold Listing.

5. Access the customer account
- The administrator must then access: User Accounts > Sponsor Accounts, locate the customer in question, and click on 'Sign in into this account'.

6. Link the content to the new subscription
- Within the client's account, it is necessary to access each type of content (Listings, Classifieds, Events, Articles, etc).

- In the upper right corner of the screen, there will be the dropdown "Manage" and "Change assigned subscription" button. The administrator should click on it and link each content to the new paid subscription.


- After transferring the ad to the new plan, when accessing the user panel, we will see that the client's listing will have been successfully transferred to the new plan.

Conclusion
With these steps, the upgrade of plans process is successfully completed. The customer now has all the benefits of the paid plan, while retaining the content already created on the site.
This flow ensures a smooth transition, without data loss, and provides a positive experience for the customer who wishes to upgrade to more comprehensive plans.