
How to add a lead form in eDirectory
Introduction
The Lead Form widget allows you to add a contact form to different pages of your eDirectory website. Visitors can use the form to send questions, requests, or messages directly through your website.
You can add the form to pages such as:
- Home page
- About page
- Service pages
- Other pages available in the Page Editor
The widget includes default fields such as Name, Email, Phone Number, Subject, and Message. You can also remove these fields and create custom fields according to your needs.
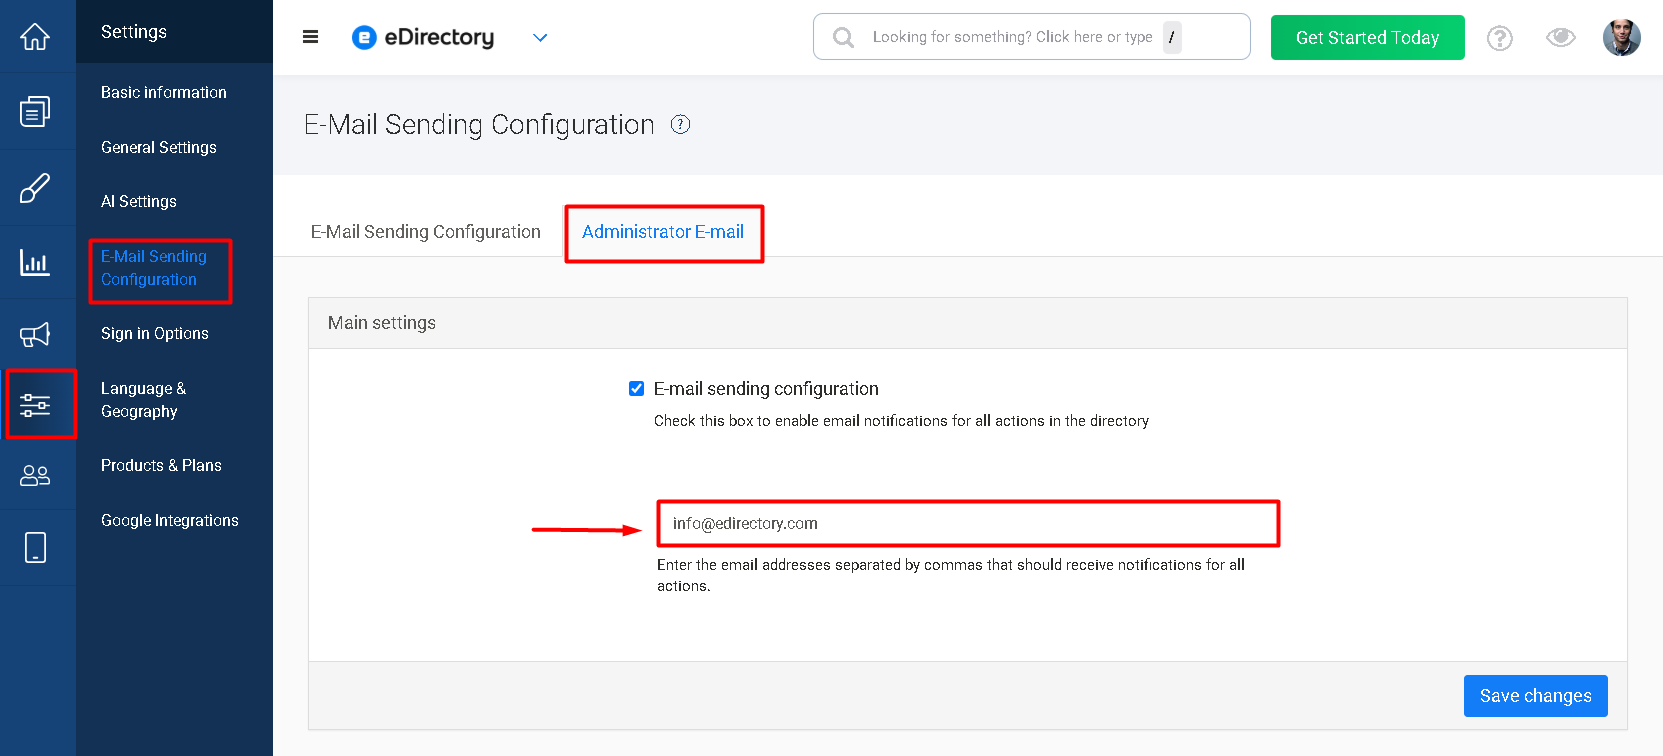
Important: The Lead Form widget requires a properly configured email sending setup to work correctly. Submitted leads are sent to the site manager email configured under Settings > E-mail Sending Configuration > Administrator E-mail.
Before using the widget, make sure that:
- An email address is entered in the Administrator e-mail field.
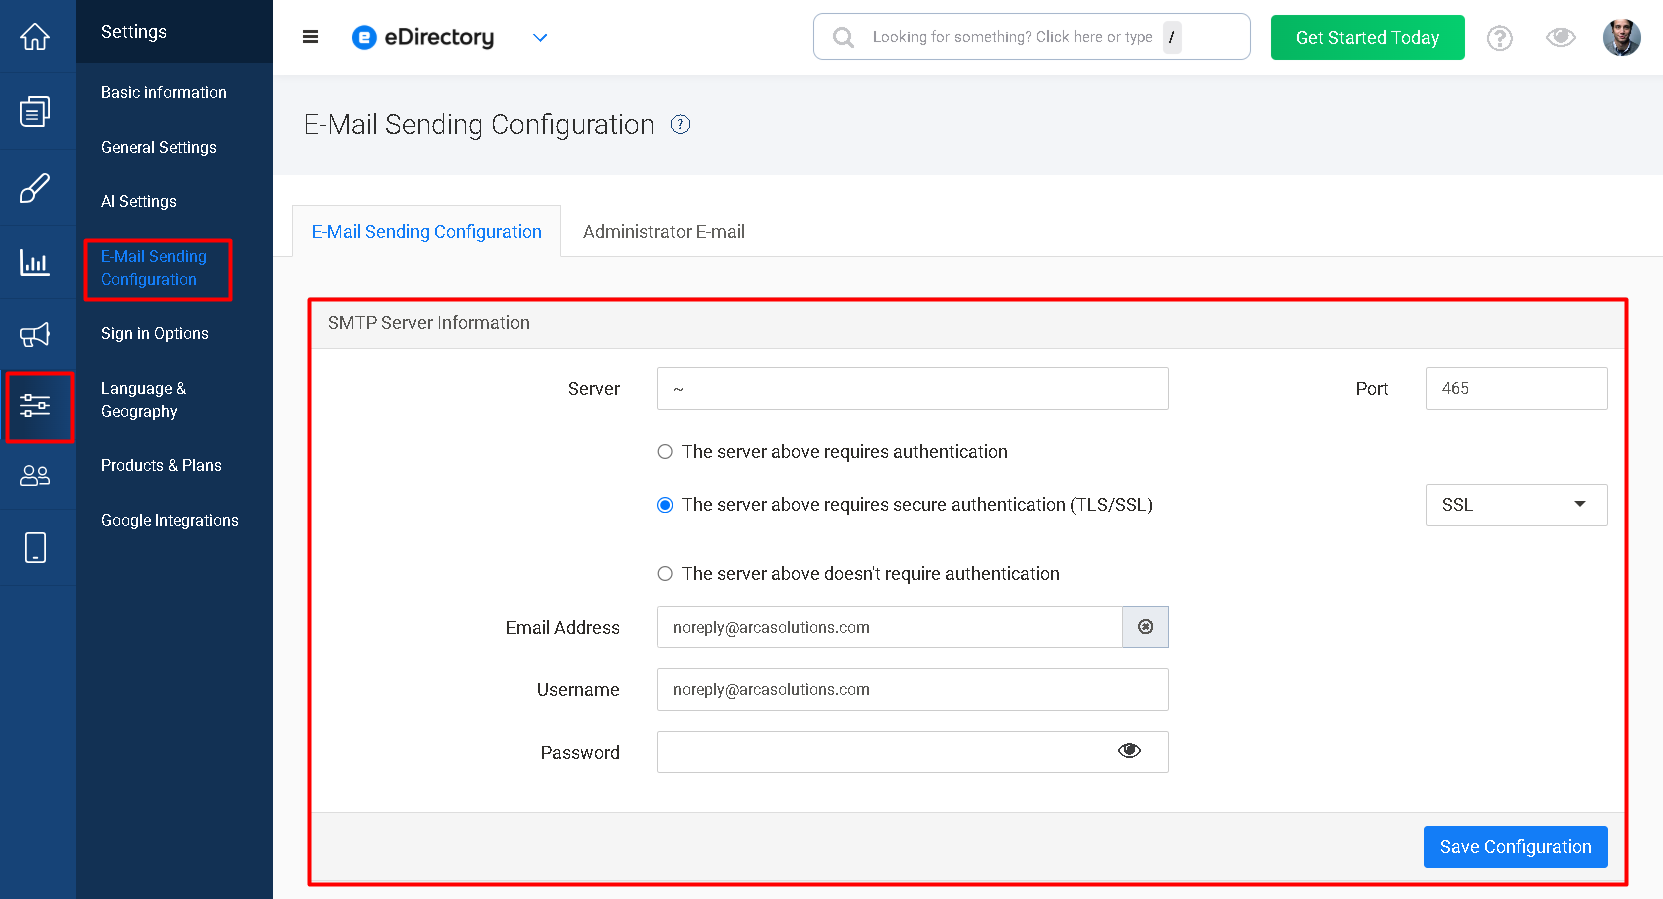
- The website is properly configured to send emails under Settings > E-mail Sending Configuration.
If visitors see the error message “We couldn't deliver your message, please contact the administrator. Sorry for the inconvenience.”,
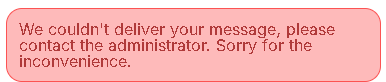
check the email sending configuration. This error may occur if there is no administrator email available to receive the lead or if the website is not configured to send emails.
For instructions on configuring email sending, see: Getting Started #9 - Email Settings
Step 1: Open the Page Editor
1.1. Access the Page Editor
Log in to your eDirectory website’s administration area.
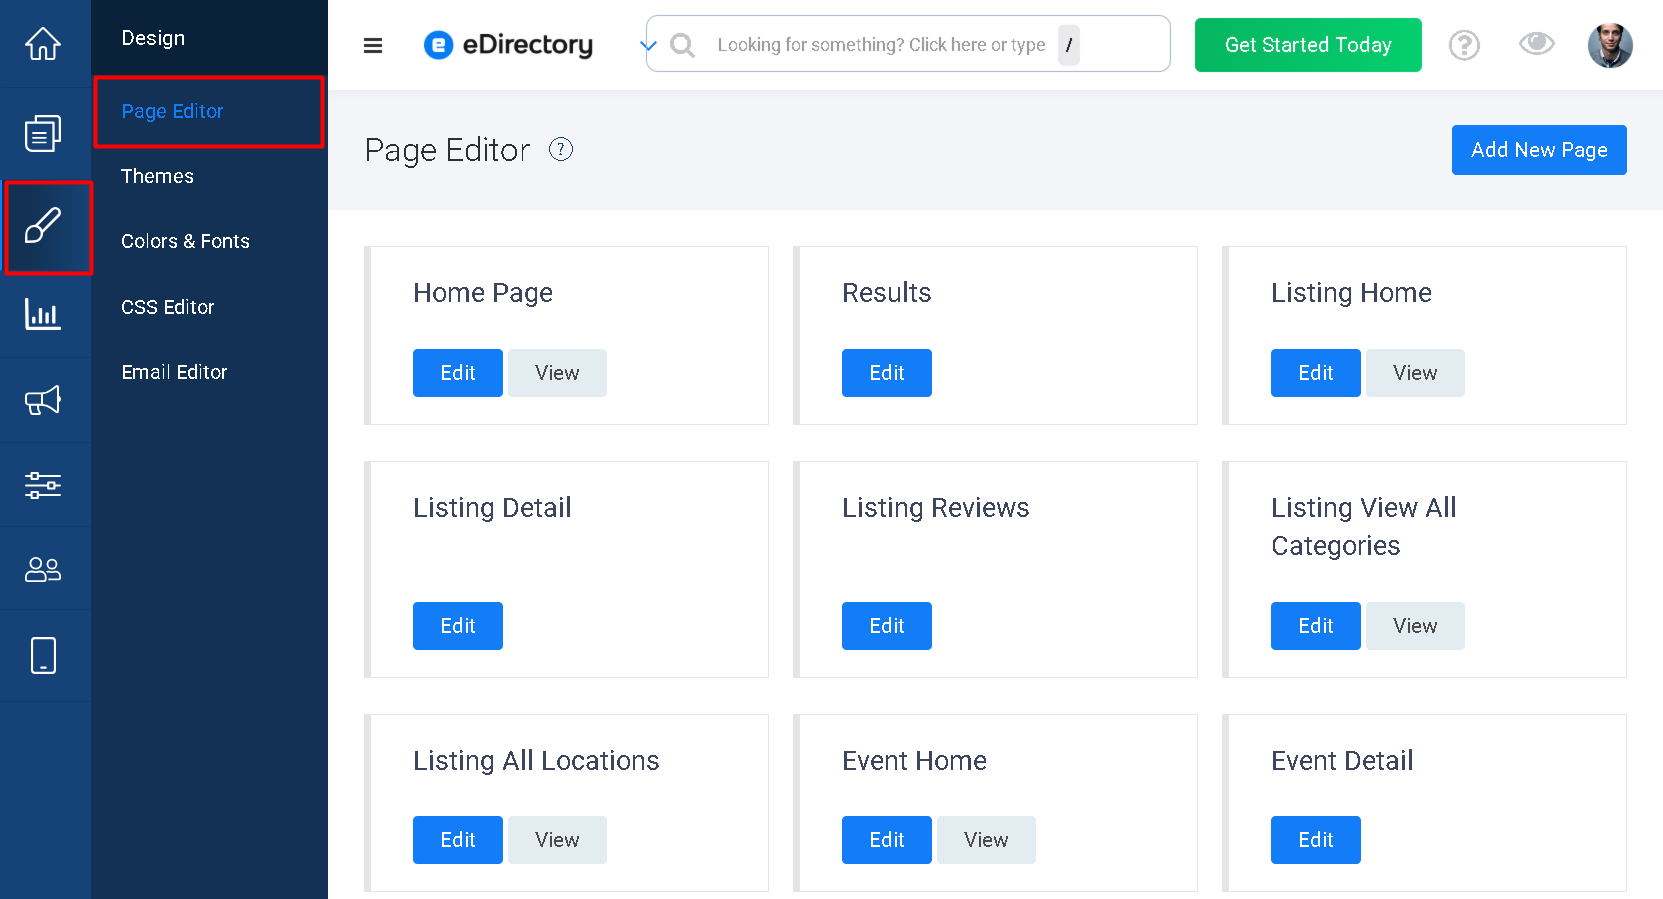
Navigate to Design > Page Editor
1.2. Choose a Page
Select the page where you want to add the lead form.
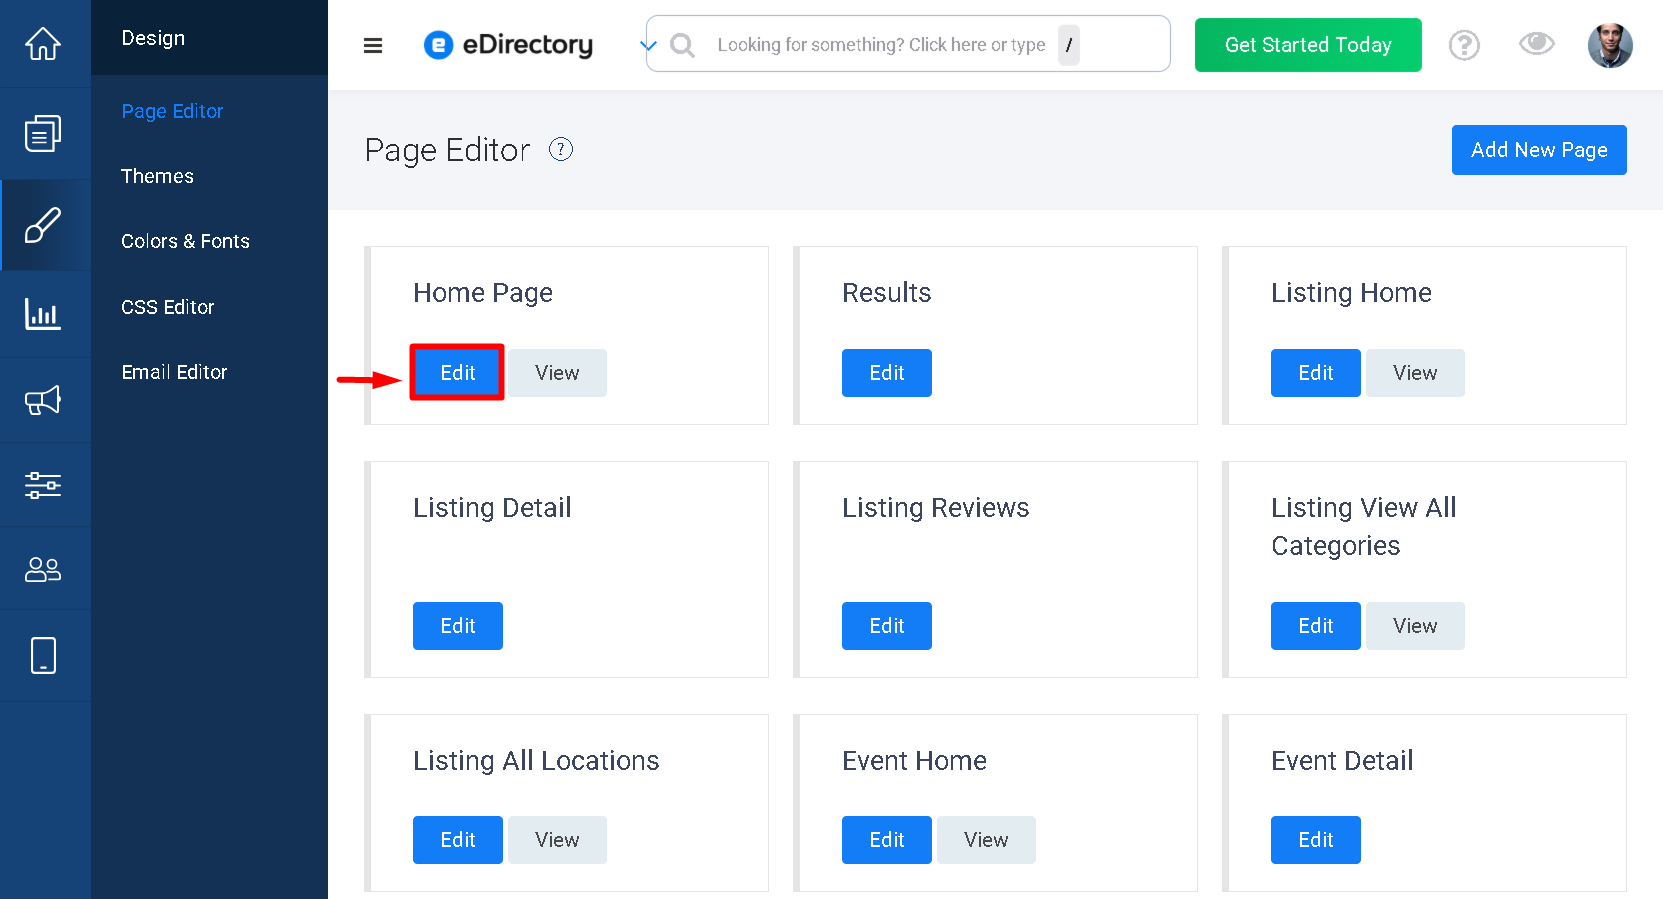
For this example, we will add the form to the Home page.
Click Edit next to the Home page.
Step 2: Add the Lead Form Widget
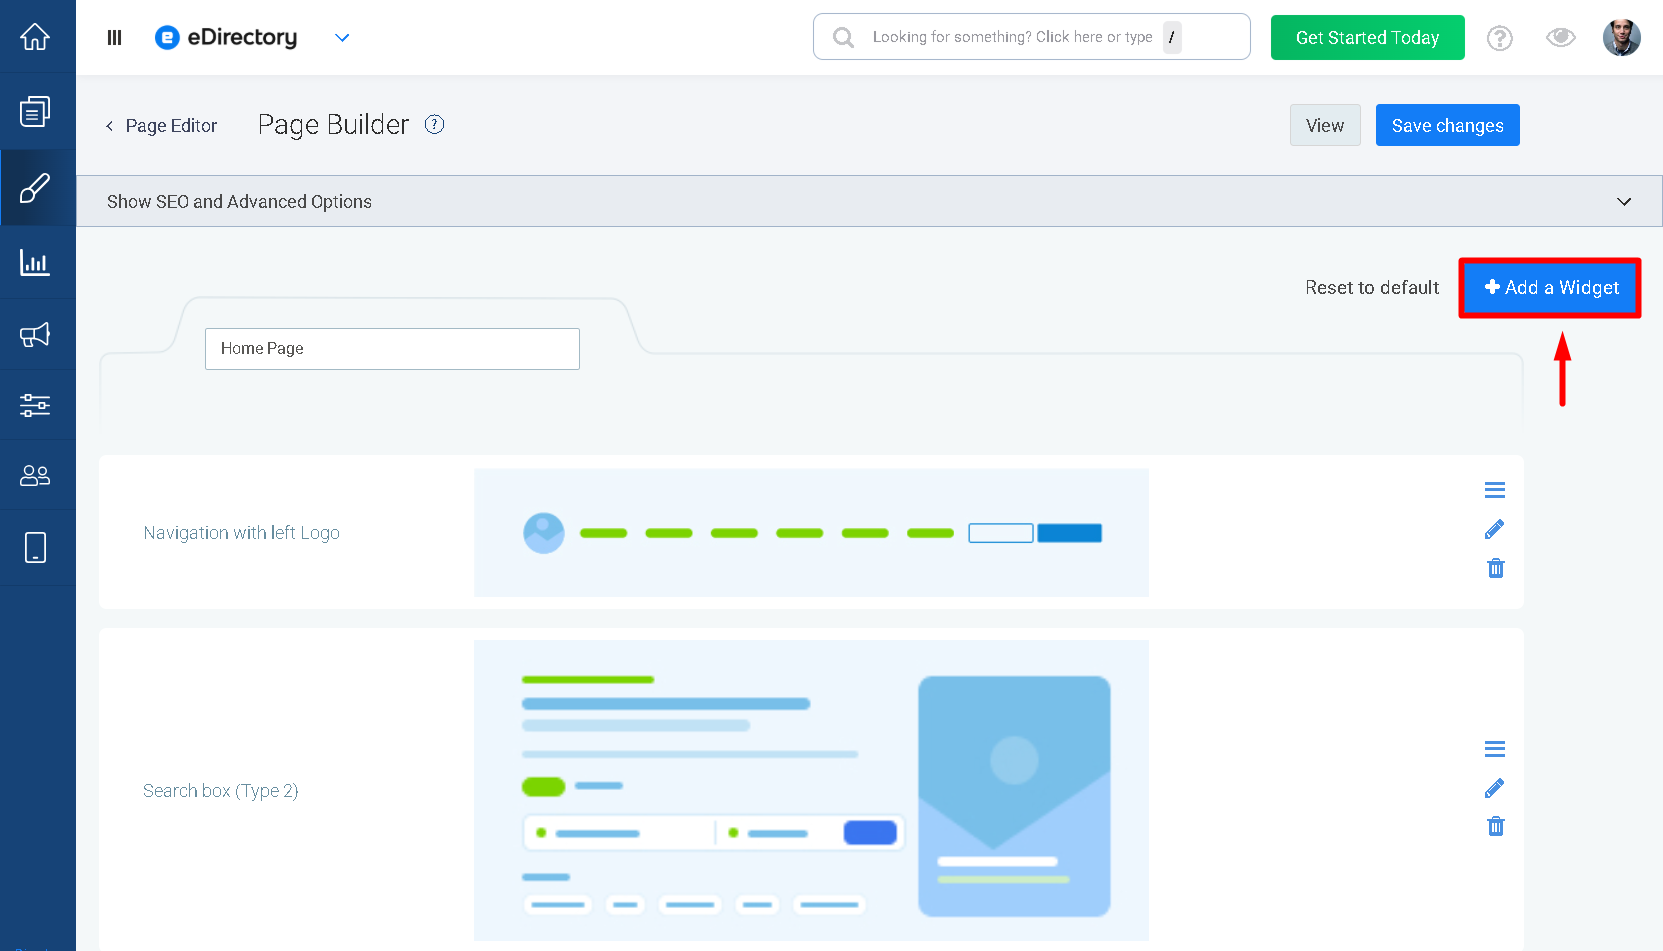
2.1. Click Add a Widget
Inside the Page Editor, click Add a widget.
2.2. Search for the Lead Form Widget
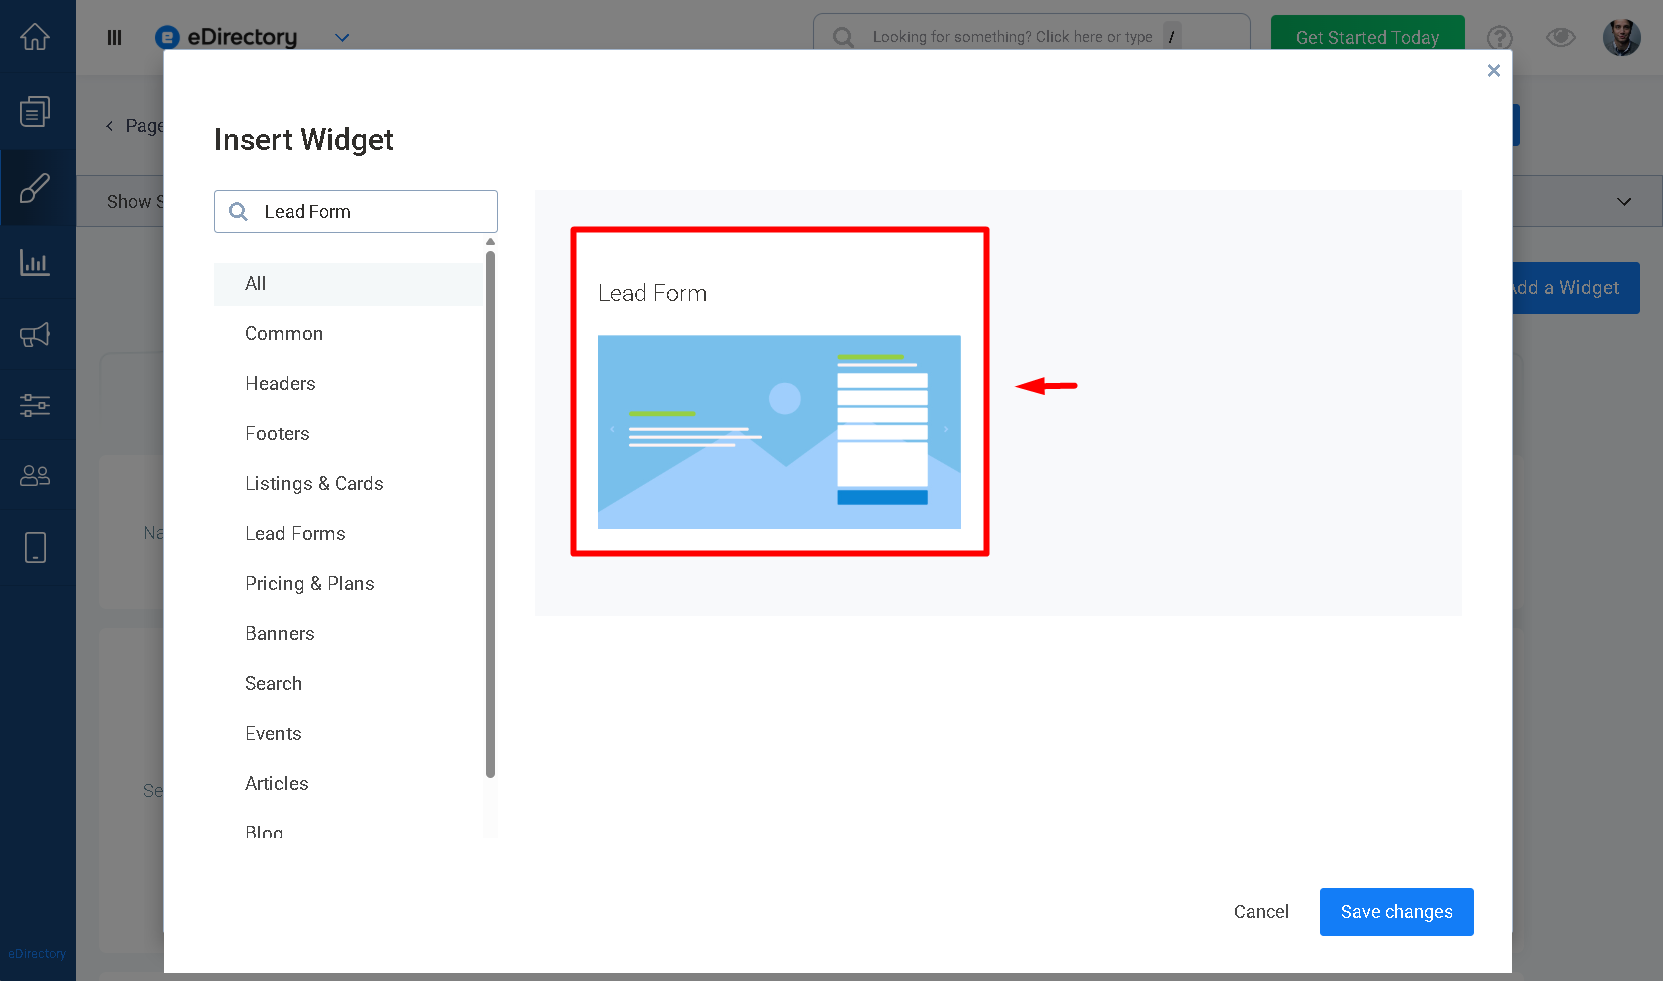
In the widget search field, enter: Lead form
The Lead form widget will appear in the search results.
Click the Lead form widget to add it to the page.
2.3. Add the Widget to the Page
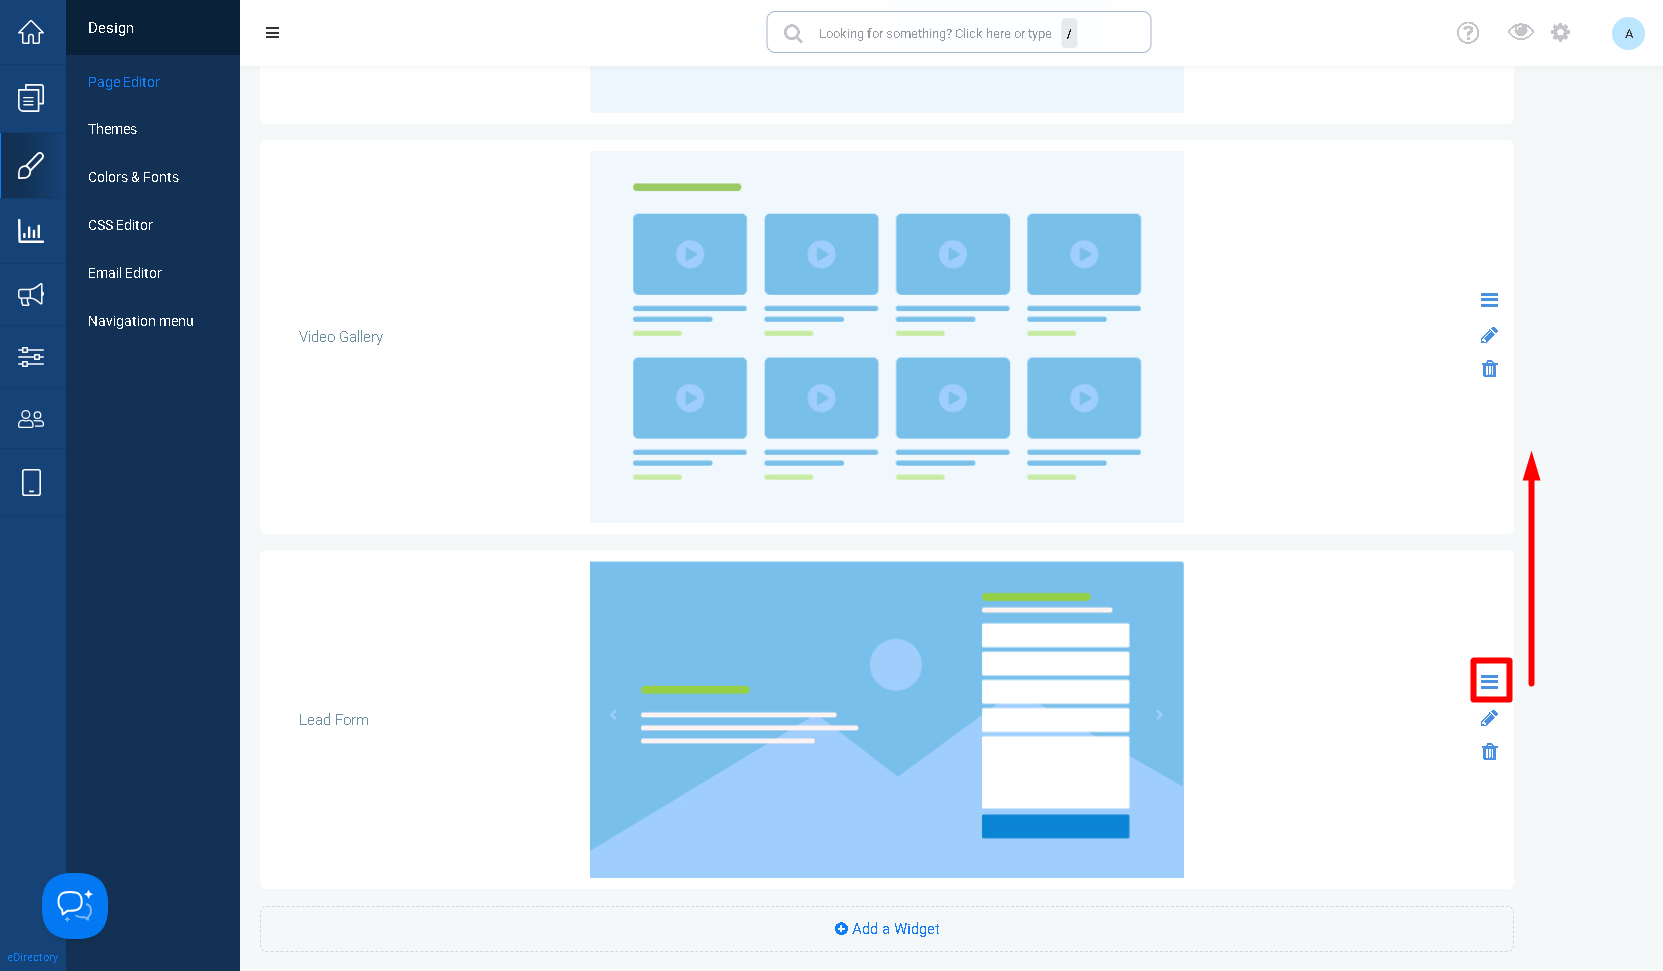
The widget will now be displayed in the bottom of the page.
You can drag and drop the widget in the area you want to see it displayed.
2.4. Open the Widget Settings
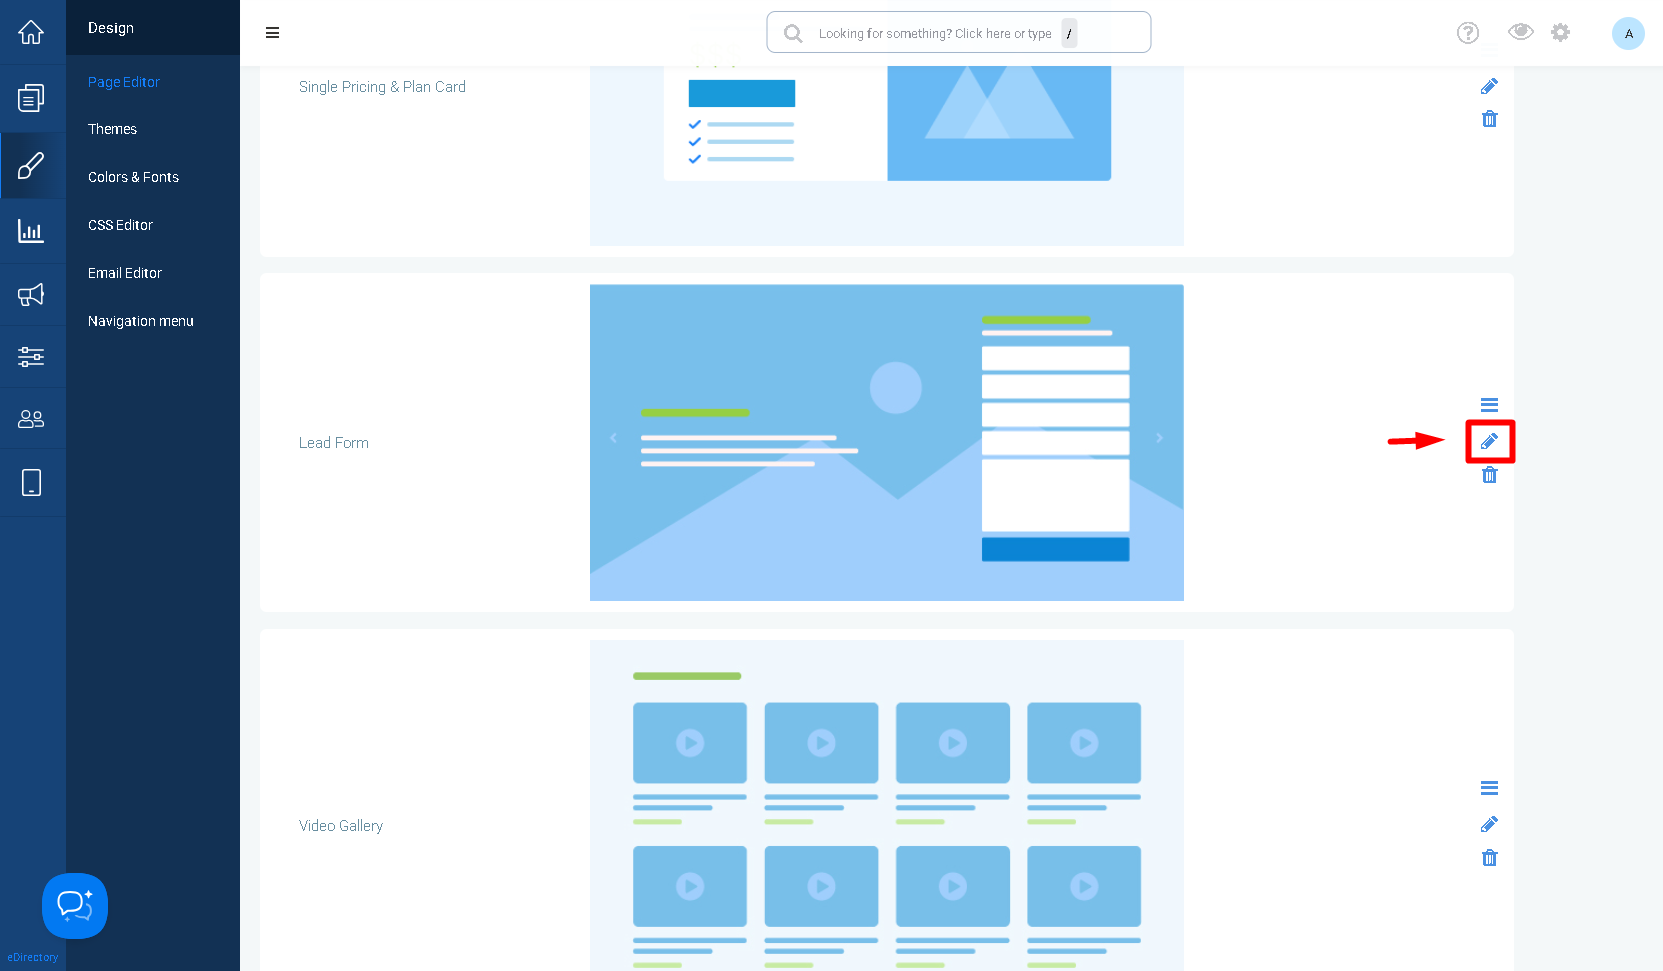
After adding the widget, click the pencil icon to edit its settings.
The widget options allow you to customize the background, text, button, alignment, and form fields.
Step 3: Configure the Lead Form Widget
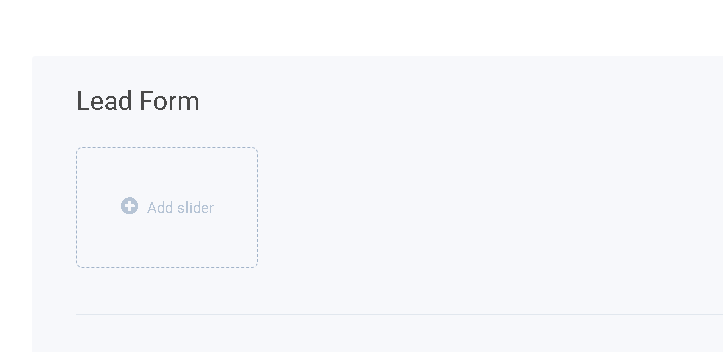
3.1. Add a Background Slider
You can add images as a slider in the background of the lead form.
Click Add slider and select the images you want to display behind the form.
A background slider can be useful for:
- Displaying business images
- Highlighting products or services
- Showing property photos
- Presenting company branding
- Creating a more visual contact section
3.2. Edit the Form Text
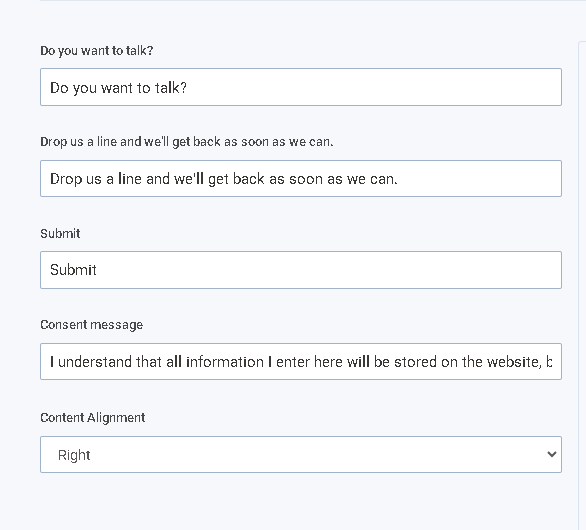
The widget includes default text that can be customized according to the purpose of your form.
You can edit the following fields:
Do you want to talk?
This is the main title displayed above the form.
Drop us a line and we'll get back as soon as we can.
This is the introductory message displayed below the title.
Submit
This is the text displayed on the form submission button.
Consent message
This message can be used to explain how the information submitted through the form will be used or to request the visitor’s consent.
For example:
I agree to have my information used to respond to this request.
3.3. Configure Content Alignment
Use the Content Alignment option to choose how the form content should be aligned on the page.
You can adjust the alignment either to the left or to the right to better match your page design.
Step 4: Manage the Default Form Fields
The Lead Form widget includes the following fields by default:
- Name
- Phone Number
- Subject
- Message
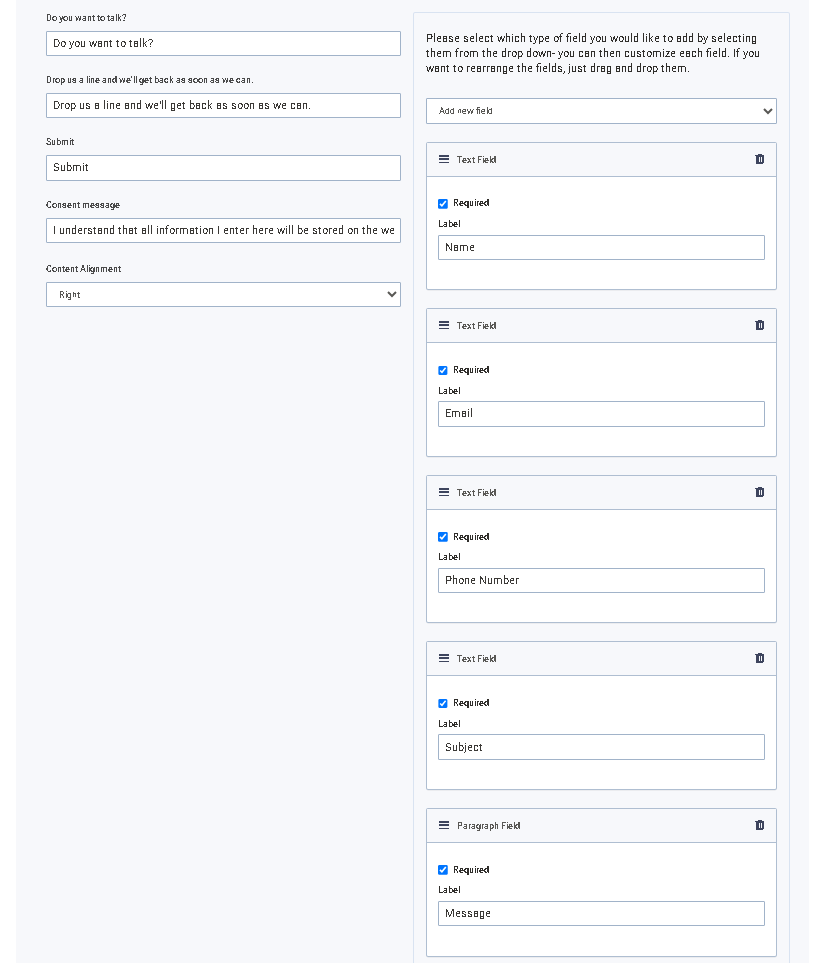
These fields are commonly used to collect the visitor’s contact information and message.
4.1. Remove a Default Field
If you do not need one of the default fields, you can remove it from the form.
For example, if you only want visitors to provide their name, email address, and message, you can remove Phone Number and Subject.
4.2. Create Custom Fields
You can also create your own fields with the labels you want.
At the top of the field settings, click: Add new field
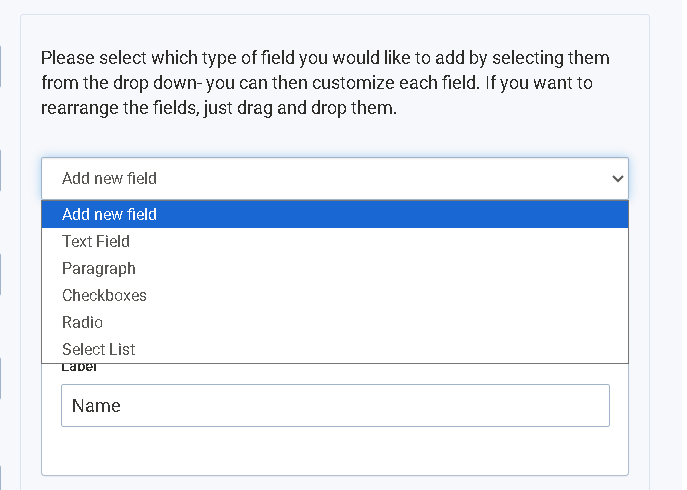
The following field types will be available:
- Text Field
- Paragraph
- Checkboxes
- Radio
- Select List
Choose the field type that best matches the information you want to collect.
Step 5: Add and Configure Custom Fields
5.1. Add a Text Field
Select Text Field to create a field where visitors can enter a short response.
After selecting the field type, configure the field below.
You can add a Label, such as Phone
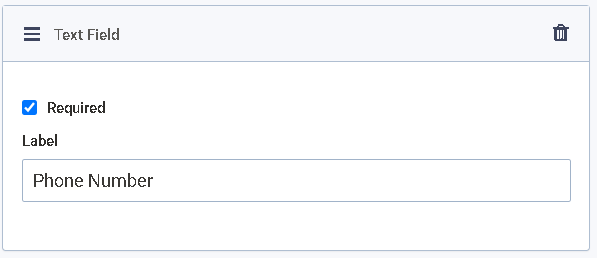
Visitors will then see a text box where they can type their response.
Text fields can be used for:
- Phone numbers
- Company names
- Addresses
- Job titles
- Website URLs
- Short answers
- Contact information
For example:
Label: Company Name
The visitor can enter the name of their company in the field.
5.2. Add a Paragraph Field
Select Paragraph to create a larger text area where visitors can enter a longer response.
You can add a Label, such as Tell us more about your request
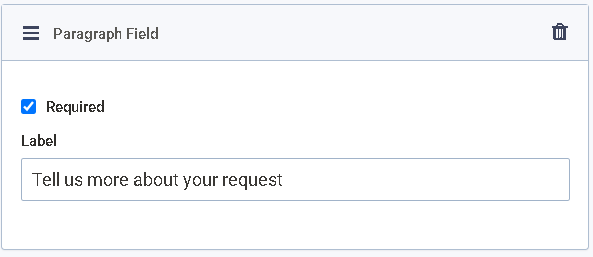
Visitors will be able to type a detailed message into the larger text area.
Paragraph fields can be used for:
- Detailed questions
- Project descriptions
- Message
- Service requests
- Property requirements
- Event details
- Feedback
- Additional information
For example:
Label: Describe the service you need
This allows the visitor to explain their request in more detail.
5.3. Add a Checkboxes Field
Select Checkboxes when visitors should be able to select more than one option.
After selecting this field type, add a label and configure the available options.
For example:
Label: Which services are you interested in?
Options:
- Website Design
- SEO Services
- Social Media Management
- Paid Advertising
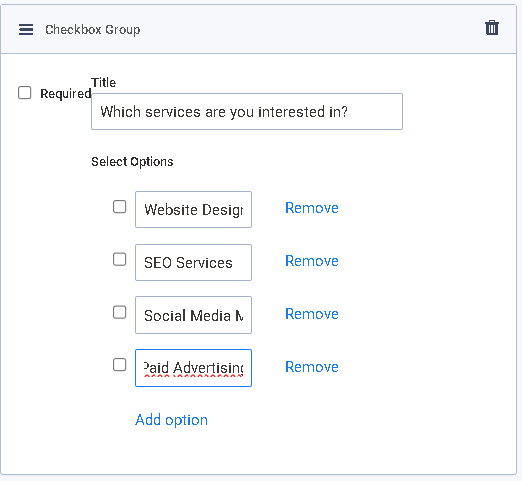
Visitors can select multiple options from the list.
Checkboxes are useful when:
- More than one answer can apply
- Visitors can choose multiple services
- You want to collect several preferences
- You want visitors to agree to multiple statements
For example, a real estate website could use checkboxes to ask:
What type of property are you interested in?
Options:
- Houses
- Apartments
- Commercial Properties
- Land
A visitor could select both Houses and Apartments.
5.4. Add a Radio Field
Select Radio when visitors should select only one option from a list.
Add a label and configure the options that visitors can choose from.
For example:
Label: Preferred contact method
Options:
- Phone
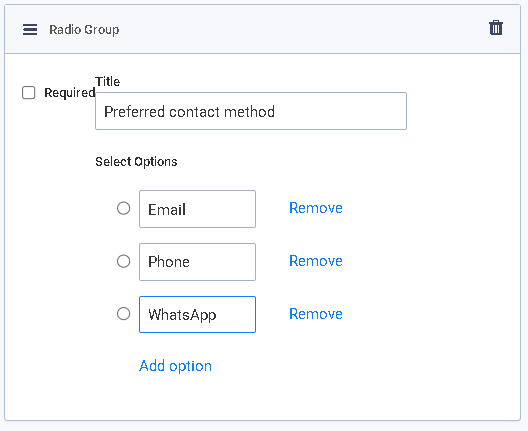
Visitors can select only one option.
Radio buttons are useful when:
- Only one answer is allowed
- You need to choose one preference
- You want visitors to select one category
- The options are mutually exclusive
For example, a service website could ask:
What is your preferred appointment time?
Options:
- Morning
- Afternoon
- Evening
The visitor must select one option.
5.5. Add a Select List Field
Select Select List when you want visitors to choose one option from a dropdown menu.
Add a label and configure the available options.
For example:
Label: Select your location
Options:
- New York
- Boston
- Chicago
- Orlando
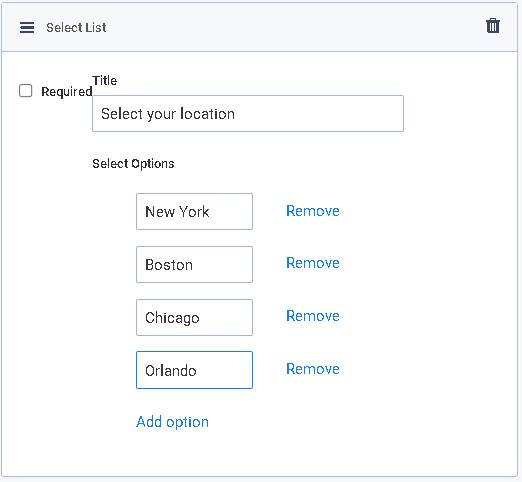
Visitors will click the dropdown menu and select one option.
Select Lists are useful when:
- There are many options to choose from
- You want to save space on the form
- Visitors should select one item
- You want to organize options in a dropdown menu
For example, a real estate website could use a Select List for:
Property Type
Options:
- House
- Apartment
- Commercial Property
- Land
- Office
Step 6: Save the Lead Form
After configuring the background, text, alignment, and form fields, save the widget settings.
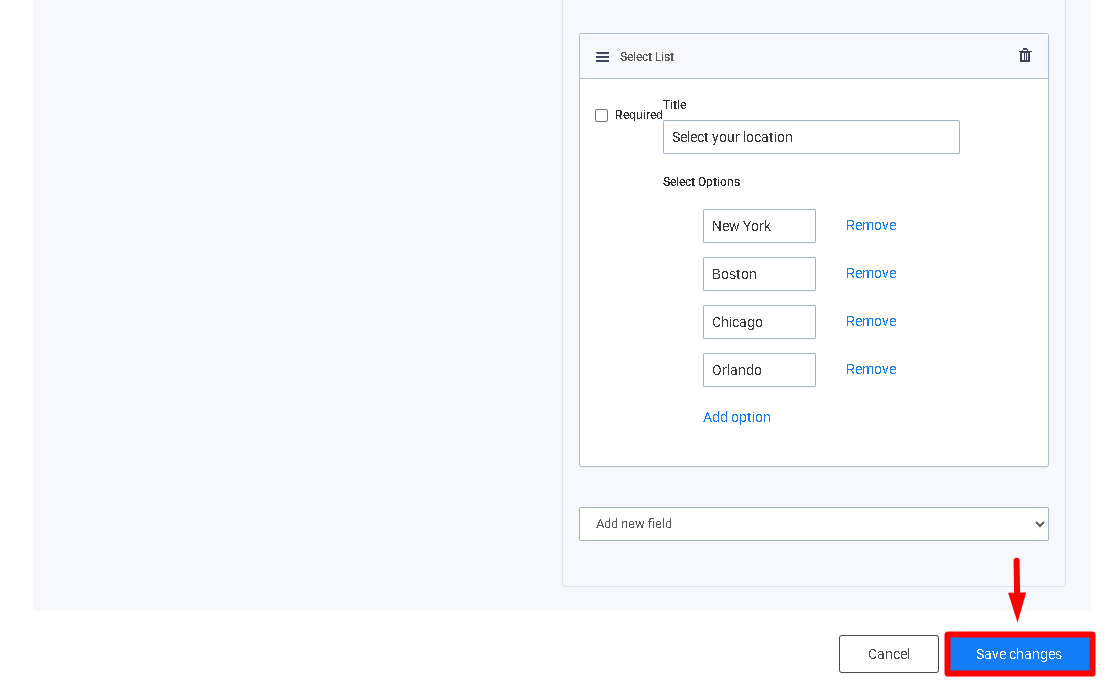
Make sure to review the form and confirm that:
- The title and introductory message are correct
- The submit button has the desired label
- The consent message is accurate
- The form fields are relevant
- Unnecessary fields have been removed
- Custom fields have the correct labels
- Checkbox, radio, and dropdown options are configured correctly
- The background slider contains the desired images
Finally, save the page in the Page Editor to publish the changes.
Step 7: Test the Lead Form
Open the page where you added the form and test it as a visitor.

Check that:
- The form is displayed correctly.
- All fields are visible and properly labeled.
- Custom fields work as expected.
- Checkbox fields allow multiple selections.
- Radio fields allow only one selection.
- Select List fields display the available options.
- The submit button displays the correct text.
- The consent message is displayed correctly.
- The form can be submitted successfully.
Step 8: View Submitted Leads
The site manager can view leads submitted through the Lead Form widget directly from the administration area.
8.1. Open the Leads Section
Log in to the site manager area and navigate to Activity > Leads
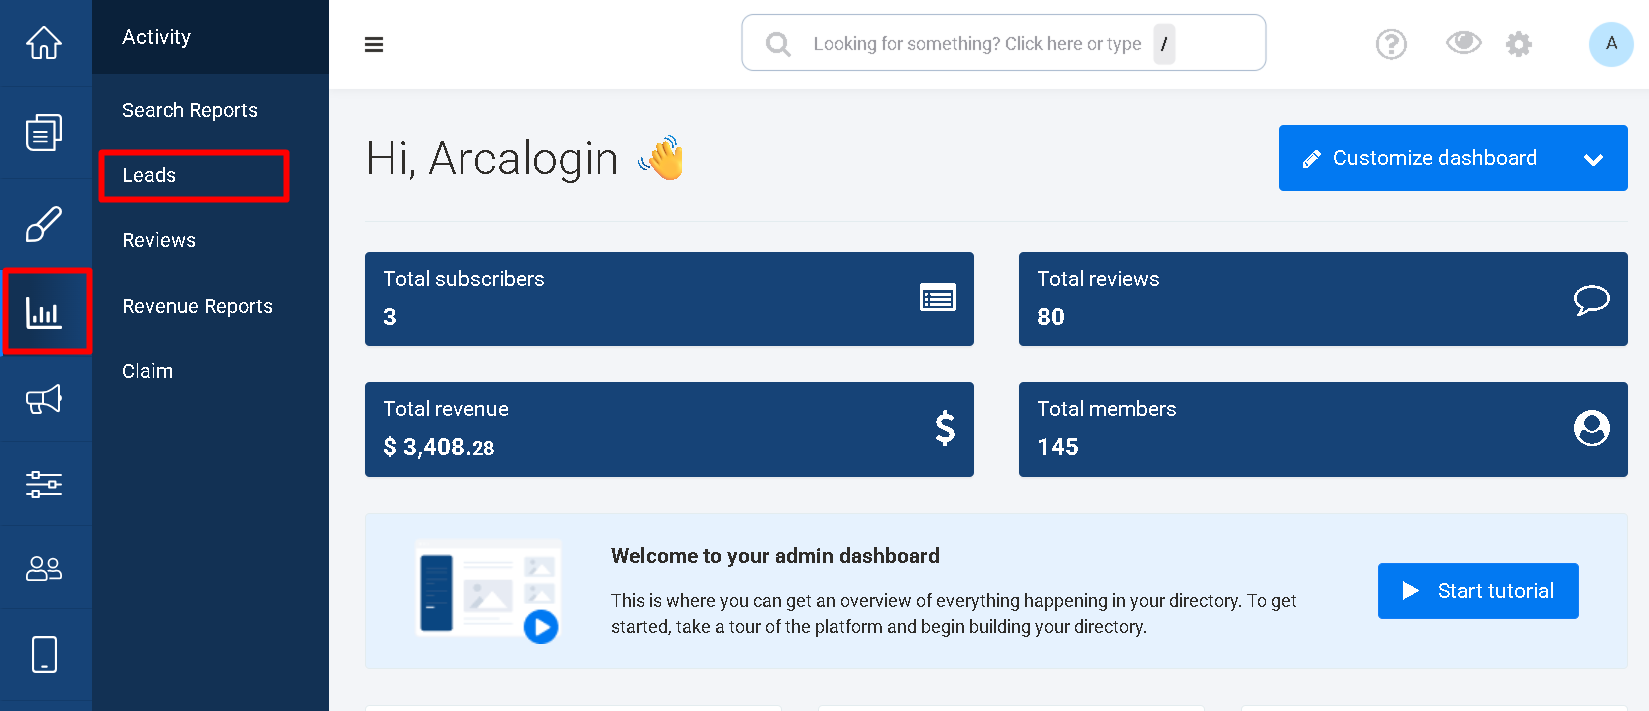
8.2. Review Submitted Leads
The Leads section displays the information submitted by visitors through the Lead Form widget.
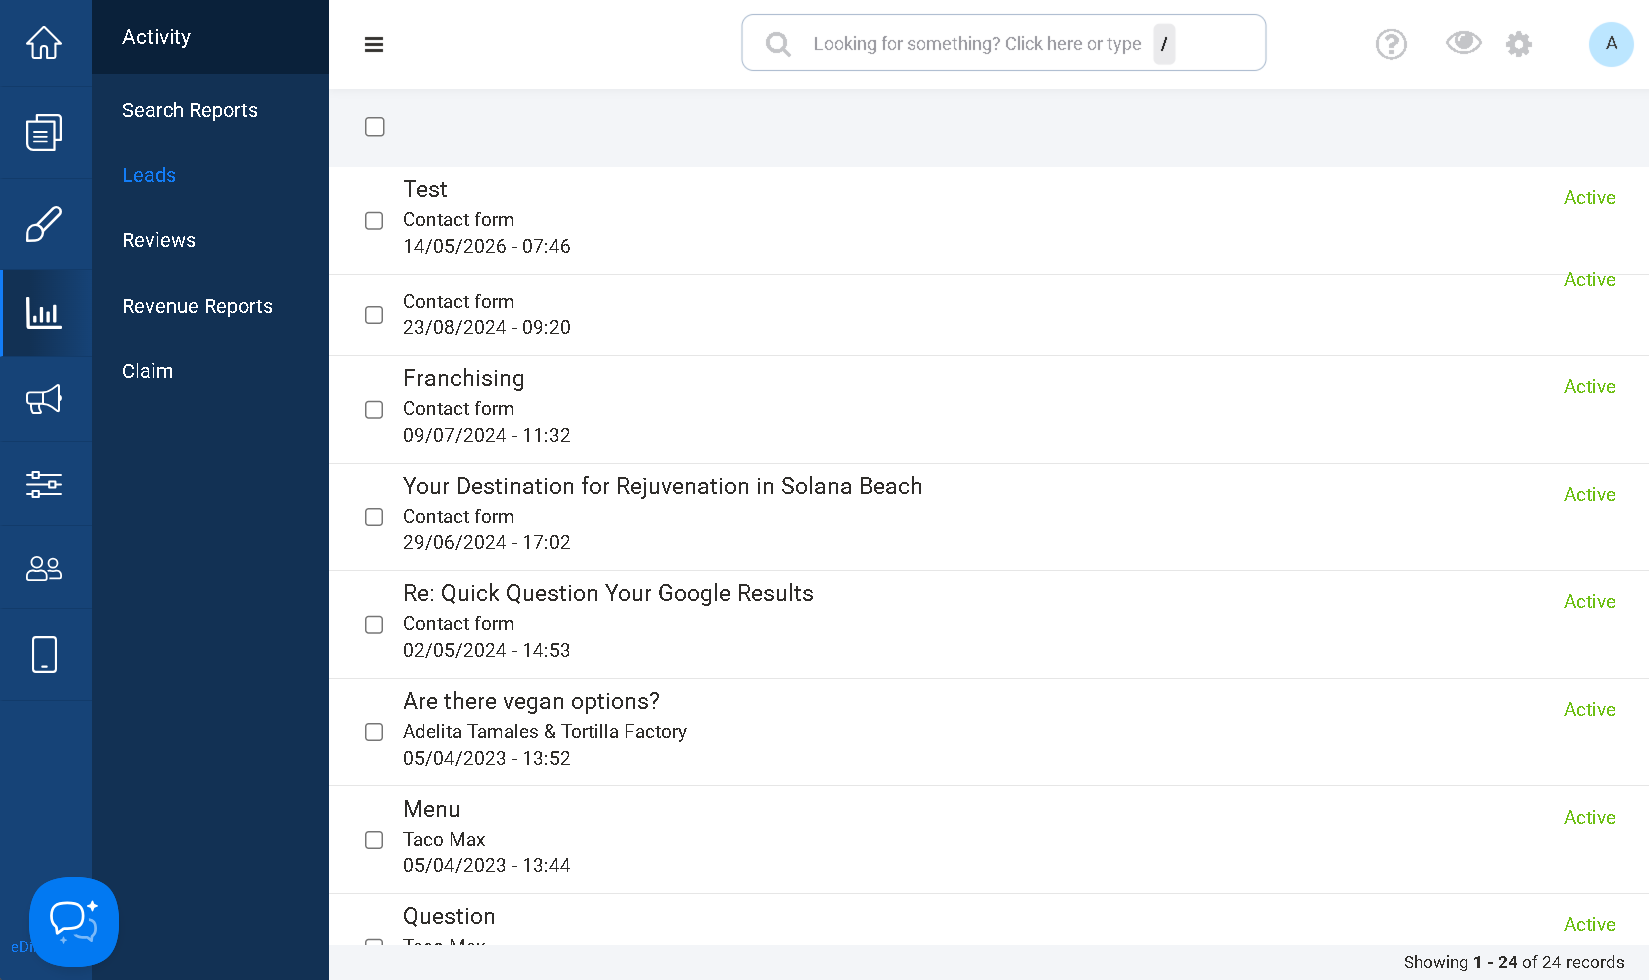
Depending on the fields configured in the form, each lead may include information such as:
- Name
- Phone Number
- Subject
- Message
- Custom field responses
The site manager can use this information to follow up with visitors and respond to their requests.
Understanding the Field Types
| Field Type | How It Works | Example Use |
|---|---|---|
| Text Field | Visitors enter a short response in a text box. | Phone number, company name, address |
| Paragraph | Visitors enter a longer response in a large text area. | Detailed questions, project description, feedback |
| Checkboxes | Visitors can select multiple options. | Services of interest, property types, preferences |
| Radio | Visitors can select only one option. | Preferred contact method, appointment time |
| Select List | Visitors select one option from a dropdown menu. | City, property type, department |
Troubleshooting
The Form Displays “Could Not Submit the Form”
If visitors see the error message “We couldn't deliver your message, please contact the administrator. Sorry for the inconvenience.” when submitting the Lead Form, check the website’s email sending configuration.
This error may occur for the following reasons:
1. The Administrator Email Is Missing
The Lead Form sends submitted leads to the email address configured under: Settings > Email Sending Configuration > Administrator email
Make sure that a valid email address is entered in the Administrator email field.
Without an administrator email, the system does not have an email address to receive the submitted lead.
2. Email Sending Is Not Configured
The website must also be configured to send emails correctly.
Navigate to: Settings > Email Sending Configuration
Review the email sending settings and make sure the website has a valid email sending configuration.
For instructions, see: Getting Started #9 - Email Settings
3. Test the Form Again
After updating the email settings:
- Open the page containing the Lead Form widget.
- Enter test information into the form.
- Click Submit.
- Check whether the lead is received at the configured administrator email.
- Go to Activity > Leads in the site manager area to confirm that the lead was recorded.
The Lead Was Submitted but I Cannot Find It
Submitted leads can be viewed in the site manager area.
Navigate to: Activity > Leads
If the lead is not displayed, confirm that:
- The form was submitted successfully.
- The visitor did not receive the “Could not submit the form” error.
- The Lead Form widget is correctly added to the page.
- The website’s email sending configuration is complete.
- The form was tested after saving the widget and page changes.
The Lead Is Not Being Sent to the Expected Email Address
The Lead Form sends leads to the email address configured under: Settings > Email Sending Configuration > Administrator email
If the lead is being sent to the wrong address, update the Administrator email field and save the changes.
Then submit a new test lead to confirm that it is being sent to the correct recipient.
The Custom Field Does Not Display Correctly
If a custom field is not displayed as expected, check the field configuration in the Lead Form widget.
Make sure that:
- The correct field type was selected.
- The field has a label.
- Checkbox, radio, or select list options were added.
- The widget settings were saved.
- The page changes were saved in the Page Editor.
After making changes, refresh the page and test the form again.
Checkbox, Radio, and Select List Fields Behave Differently
Make sure that the correct field type is being used for the intended purpose:
- Checkboxes: Visitors can select multiple options.
- Radio: Visitors can select only one option.
- Select List: Visitors select one option from a dropdown menu.
If visitors need to select more than one answer, use Checkboxes instead of Radio or Select List.
Conclusion
The Lead Form widget allows you to create customized contact forms on your eDirectory pages. You can add a background slider, edit the form’s text and button, change the content alignment, and manage the default fields.
You can also create custom fields using:
- Text Field
- Paragraph
- Checkboxes
- Radio
- Select List
By choosing the appropriate field type, you can collect the exact information your visitors need to provide, whether they are requesting a service, asking a question, submitting feedback, or contacting a business.
Remember: The website must have a valid Administrator email and a properly configured email sending setup for the Lead Form widget to send submissions successfully. Submitted leads can be reviewed under Activity > Leads in the site manager area.