How to Add and Manage Categories in eDirectory
Introduction
Categories are used to organize content throughout your directory, making it easier for visitors to browse and find relevant Listings, Events, Classifieds, Articles, and Blog Posts.
As your directory grows, properly managing categories becomes increasingly important. Categories help structure your content, improve navigation, and provide a better experience for your visitors.
This guide covers everything you need to know about creating, editing, organizing, and deleting categories in eDirectory.
Understanding Category Levels
For most modules in eDirectory, categories can be organized into multiple levels:
●Parent Category (Level 1)
৹ Child Category (Level 2)
৹ Child Category (Level 3)
৹ Child Category (Level 4)
৹ Child Category (Level 5)
For example:
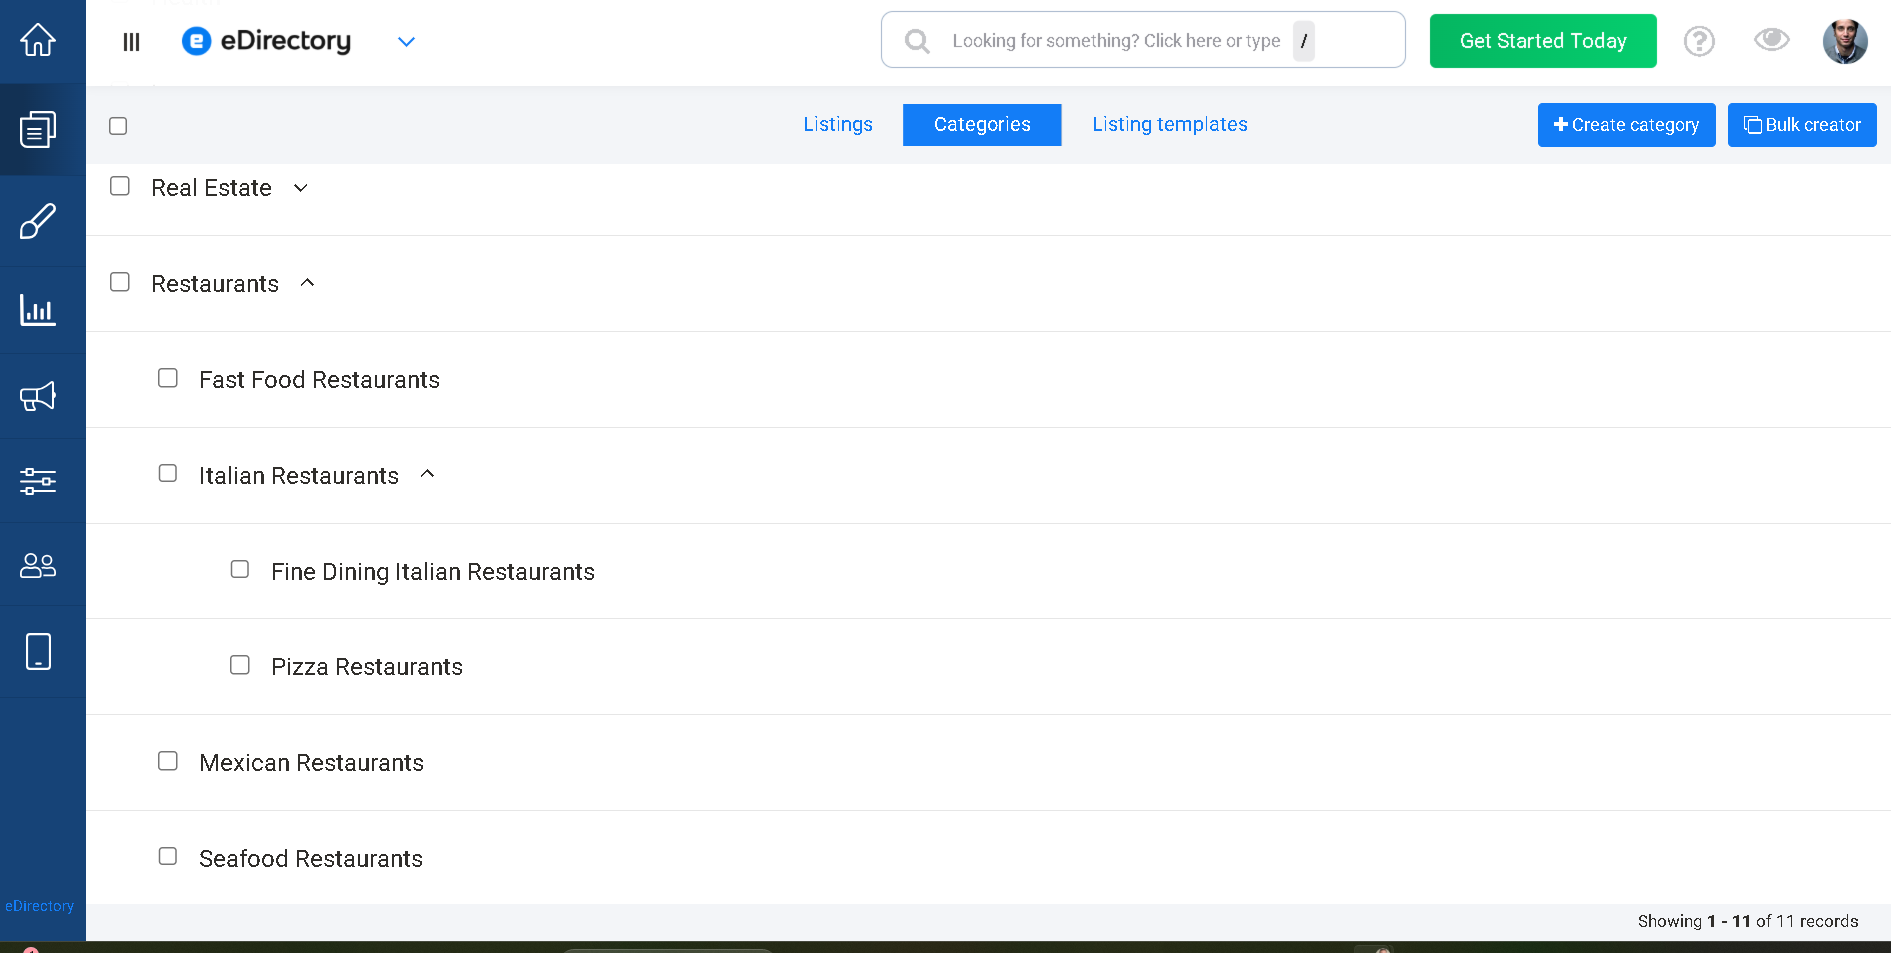
Restaurants (Parent Category Level 1)
- Fast Food Restaurants (Child Category Level 2)
- Italian Restaurants (Child Category Level 2)
- Fine Dining Italian Restaurants (Child Category Level 3)
- Pizza Restaurants (Child Category Level 3)
- Mexican Restaurants (Child Category Level 2)
- Seafood Restaurants (Child Category Level 2)
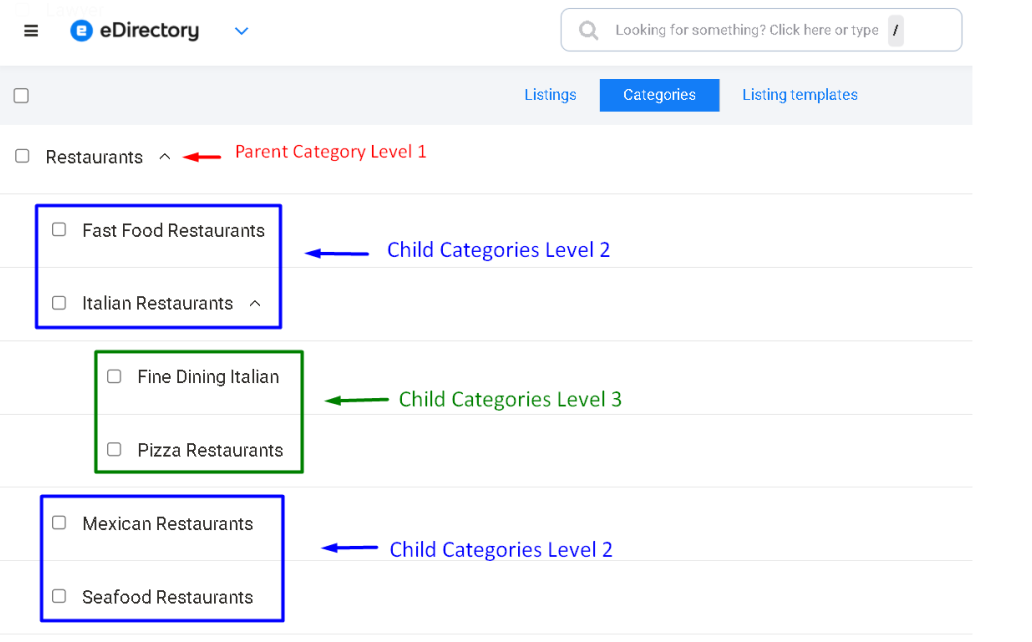
This structure allows visitors to start with a broad category, such as Restaurants, and then narrow their search to more specific categories, such as Italian Restaurants or Pizza Restaurants.
Notice: the Blog Module supports only one category level and does not allow subcategories.
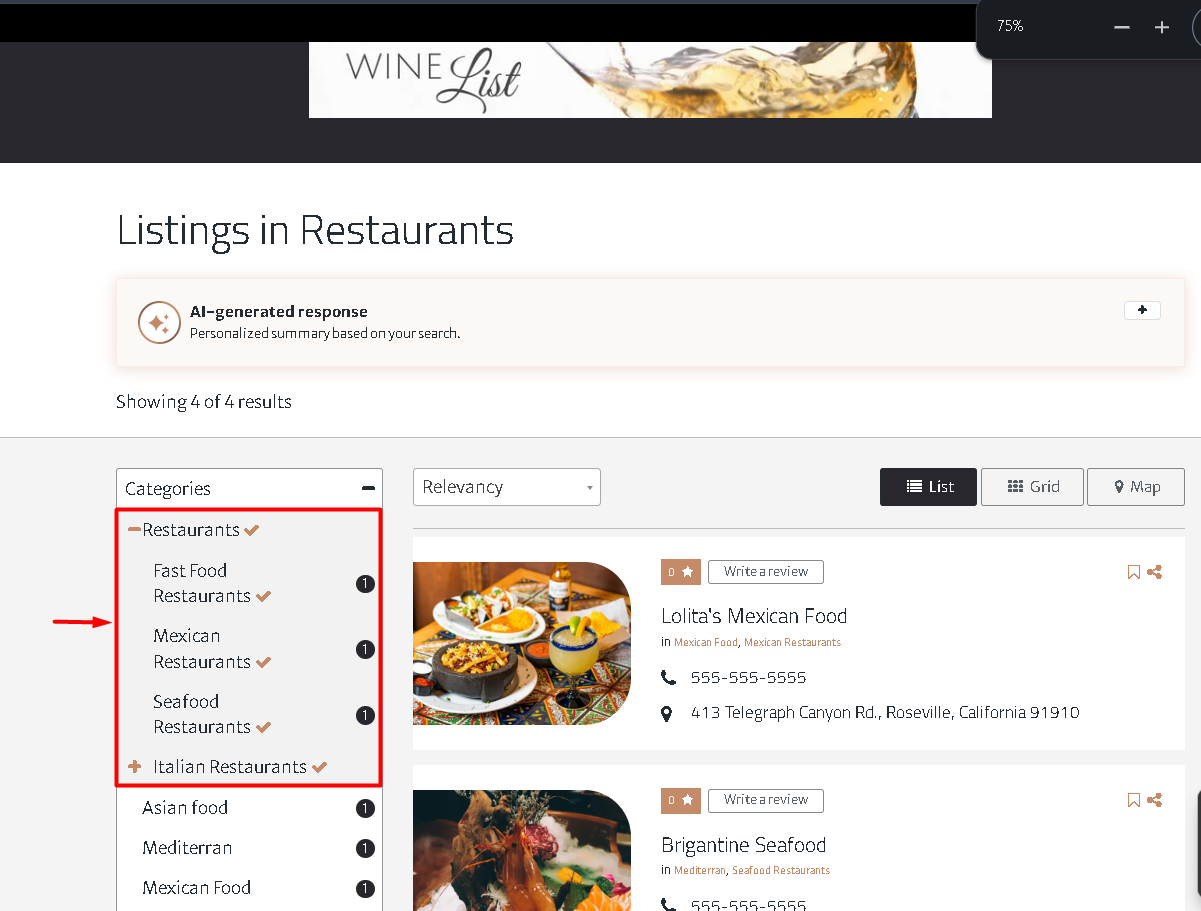
Important Note: Category Inheritance: When assigning a listing to a subcategory, eDirectory automatically associates that listing with all parent categories above it in the category hierarchy.
For example, consider the following category structure:
Restaurants (Parent Category - Level 1)
Italian Restaurants (Child Category - Level 2)
Pizza Restaurants (Child Category - Level 3)
If you assign a listing directly to Pizza Restaurants, only Pizza Restaurants will be displayed on the listing page.
However, behind the scenes, the listing is automatically associated with all previous category levels:
- Restaurants
- Italian Restaurants
- Pizza Restaurants
As a result, visitors can find the listing when browsing or searching within any of these categories.
For example:
- A visitor browsing Restaurants will find the listing.
- A visitor browsing Italian Restaurants will find the listing.
- A visitor browsing Pizza Restaurants will find the listing.
This behavior helps ensure that listings remain discoverable throughout the entire category hierarchy without requiring you to manually assign every parent category.
Important: Although only the deepest category level assigned to the listing is displayed publicly on the listing page, the listing remains searchable and accessible through all parent categories in the hierarchy.
Before You Begin: Understanding Category Visibility
One of the most common misunderstandings in eDirectory is assuming that creating a category automatically makes it visible on the public website.
Creating a category alone does NOT make it appear on your homepage, category widgets, or category sections of your website.
For a category to be displayed publicly, both of the following conditions must be met:
Condition 1: The Category Must Be Featured
When editing a category, there is a Featured checkbox.
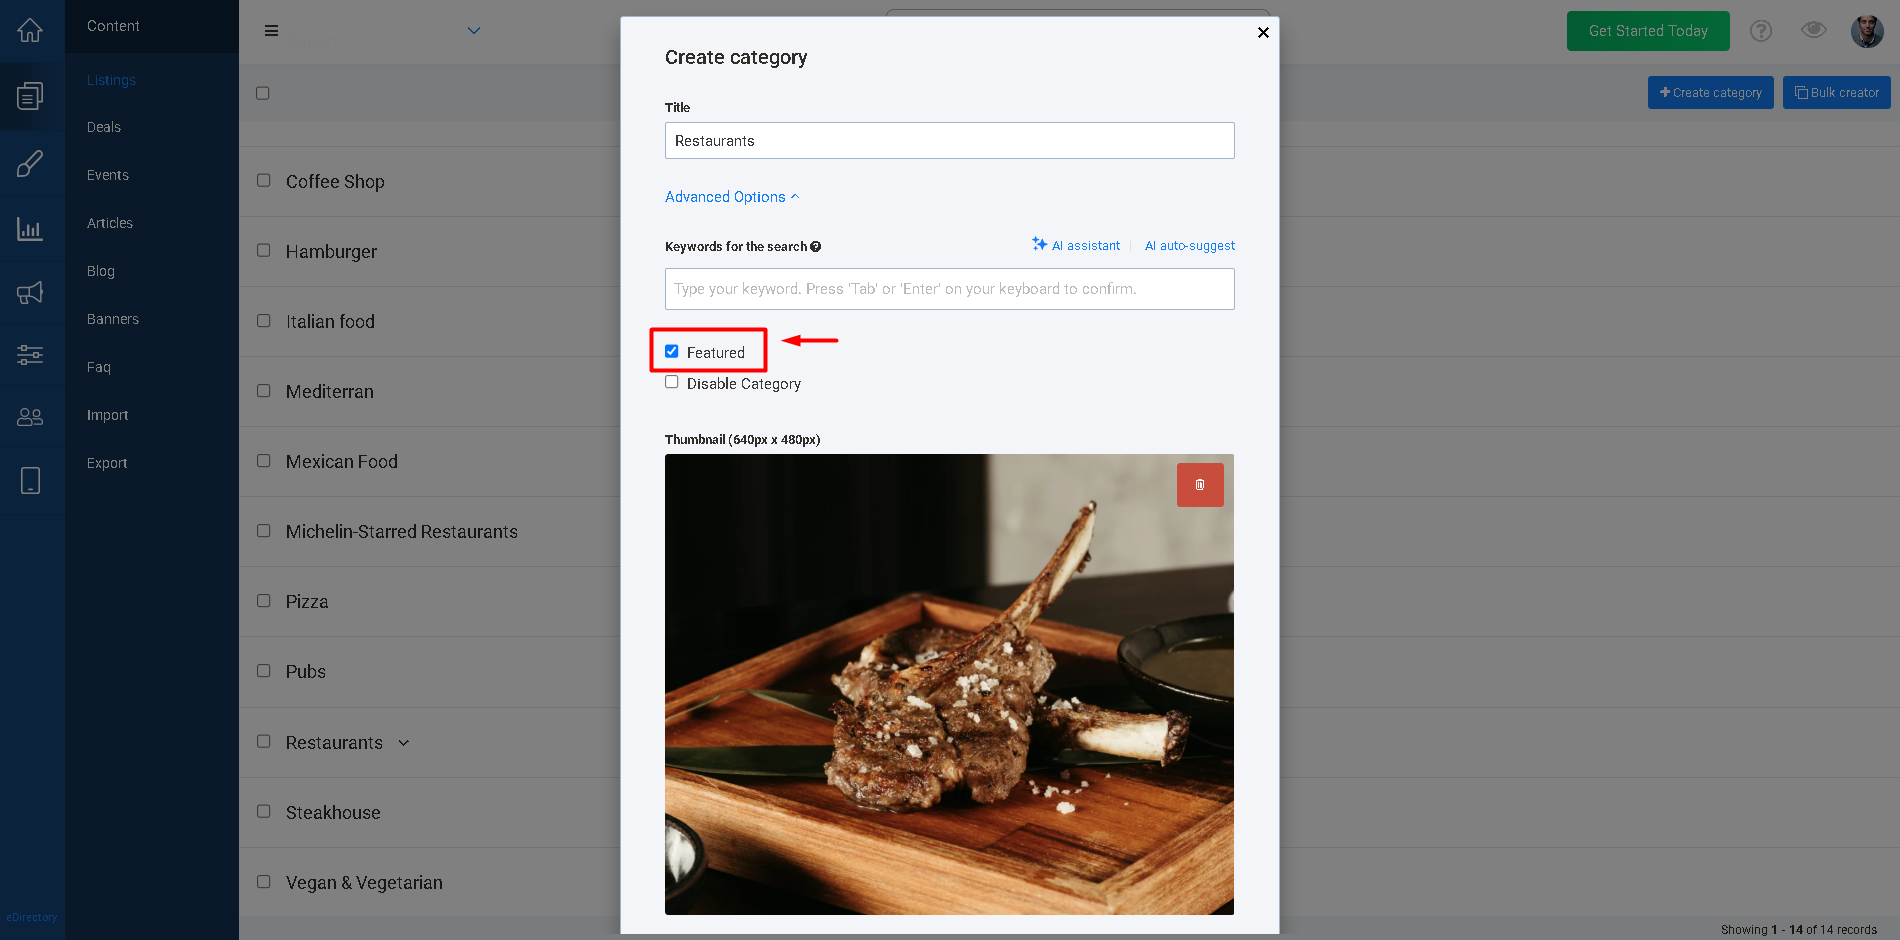
This option tells eDirectory that the category is eligible to be displayed in category sections and widgets throughout the website.
If the category is not marked as Featured, it will remain available internally and can still be assigned to content, but it may not appear in category widgets or homepage category blocks.
Condition 2: The Category Must Be Assigned to an Active Item
The category must also be associated with at least one active item in the corresponding module.
For example:
Example A
You create a category called: Restaurants
You mark it as Featured.
However, no active listings are assigned to this category.
Result: The category will not appear publicly because there is no active content associated with it.
Example B
You create a category called:
Restaurants
You assign 20 active listings to it.
However, the Featured option is not checked.
Result: The category may not appear in category widgets or homepage category sections because it is not marked as Featured.
Example C
You create a category called:
Restaurants
You mark it as Featured.
You assign active listings to it.
Result: The category becomes eligible to appear in category widgets, homepage category sections, and other public category displays.
Important Note: A category can exist in your Site Manager and be assigned to listings without appearing on the homepage. One way this can happen is if the category is not marked as Featured. Categories may also not appear if they are not associated with active content.
If you create a category and cannot find it on the public site, first verify:
✓ The category is marked as Featured.
✓ The category has at least one active item assigned to it.
This resolves most category visibility questions.
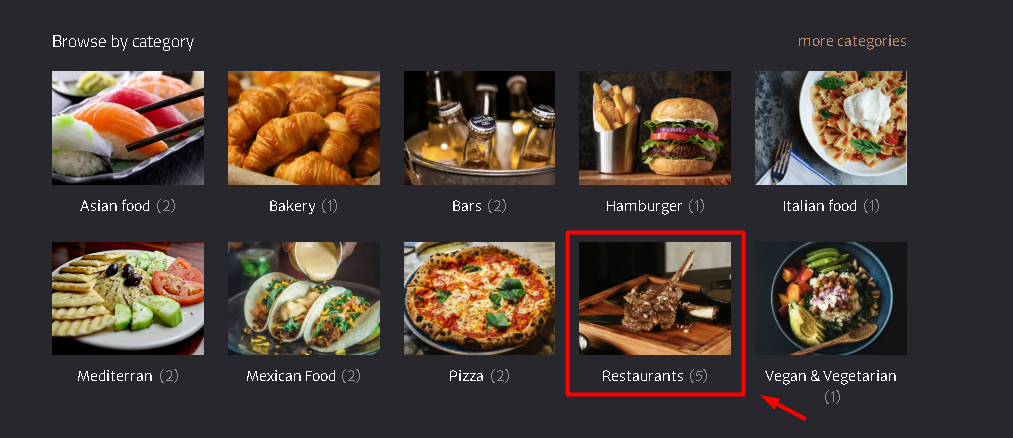
Understanding Parent Categories and Subcategories
Another important concept to understand is the difference between Parent Categories and Subcategories (Child Categories) when displaying categories on your website.
By default, eDirectory's Featured Category widgets are designed to display only Parent Categories.
For example:
- Restaurants
- Italian Restaurants
- Pizza Restaurants
- Fine Dining Italian Restaurants
- Mexican Restaurants
- Seafood Restaurants
- Fast Food Restaurants
- Italian Restaurants
In this example:
Parent Category
- Restaurants
Child Categories Level 2
- Italian Restaurants
- Mexican Restaurants
- Seafood Restaurants
- Fast Food Restaurants
Child Categories Level 3
- Pizza Restaurants
- Fine Dining Italian Restaurants
If you add a Featured Categories widget to your homepage, visitors will initially see only the Restaurants category.
The subcategories will not be displayed directly on the homepage widget.
What Happens When a Visitor Clicks a Parent Category?
When a visitor clicks on the Restaurant category, they are taken to the search results page for that category.
On that results page, eDirectory displays the available subcategories associated with Restaurants, allowing visitors to further refine their search.
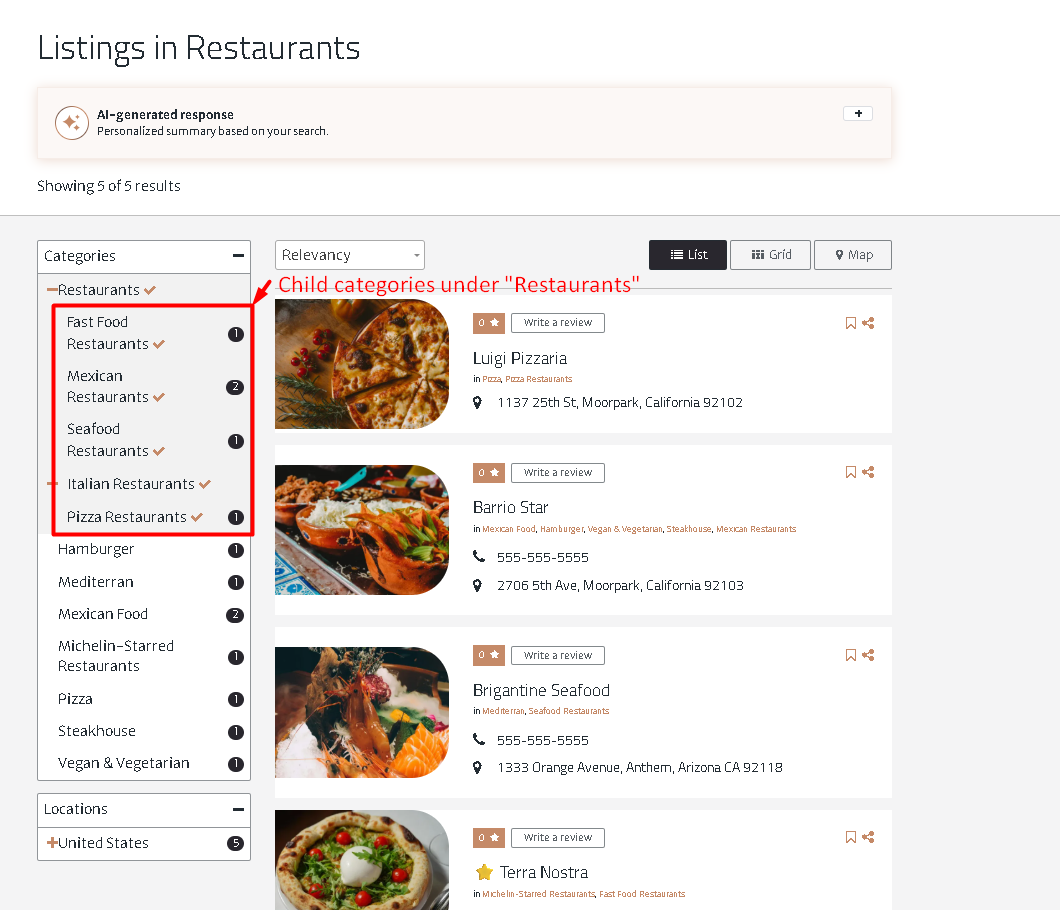
For example:
Visitor clicks:
- Restaurants
Search Results Page displays:
- Fast Food Restaurants
- Mexican Restaurants
- Seafood Restaurants
- Italian Restaurants
- Pizza Restaurants
The visitor can then click one of these subcategories to narrow their search even further.
For example: Restaurants→ Pizza Restaurants

This category structure helps keep the homepage clean and organized while still allowing visitors to drill down into more specific categories.
Why Aren't My Subcategories Showing on the Homepage?
This is one of the most common questions from Site Managers.
This is an expected behavior.
Featured Category widgets are designed to display Parent Categories only. Subcategories become visible after a visitor selects a parent category and reaches the search results page.
Therefore, if you create:
- Restaurants
- Italian Restaurants
- Mexican Restaurants
You should expect to see only Restaurants in the Featured Categories widget.
The subcategories will appear later when users browse into that category.
Understanding Featured Category Widgets
eDirectory includes several built-in category widgets that allow you to display your categories using different layouts and designs.
Changing a category widget does not change, remove, or delete your categories. The widget only controls how the categories are displayed to visitors.
Changing the Category Widget Layout
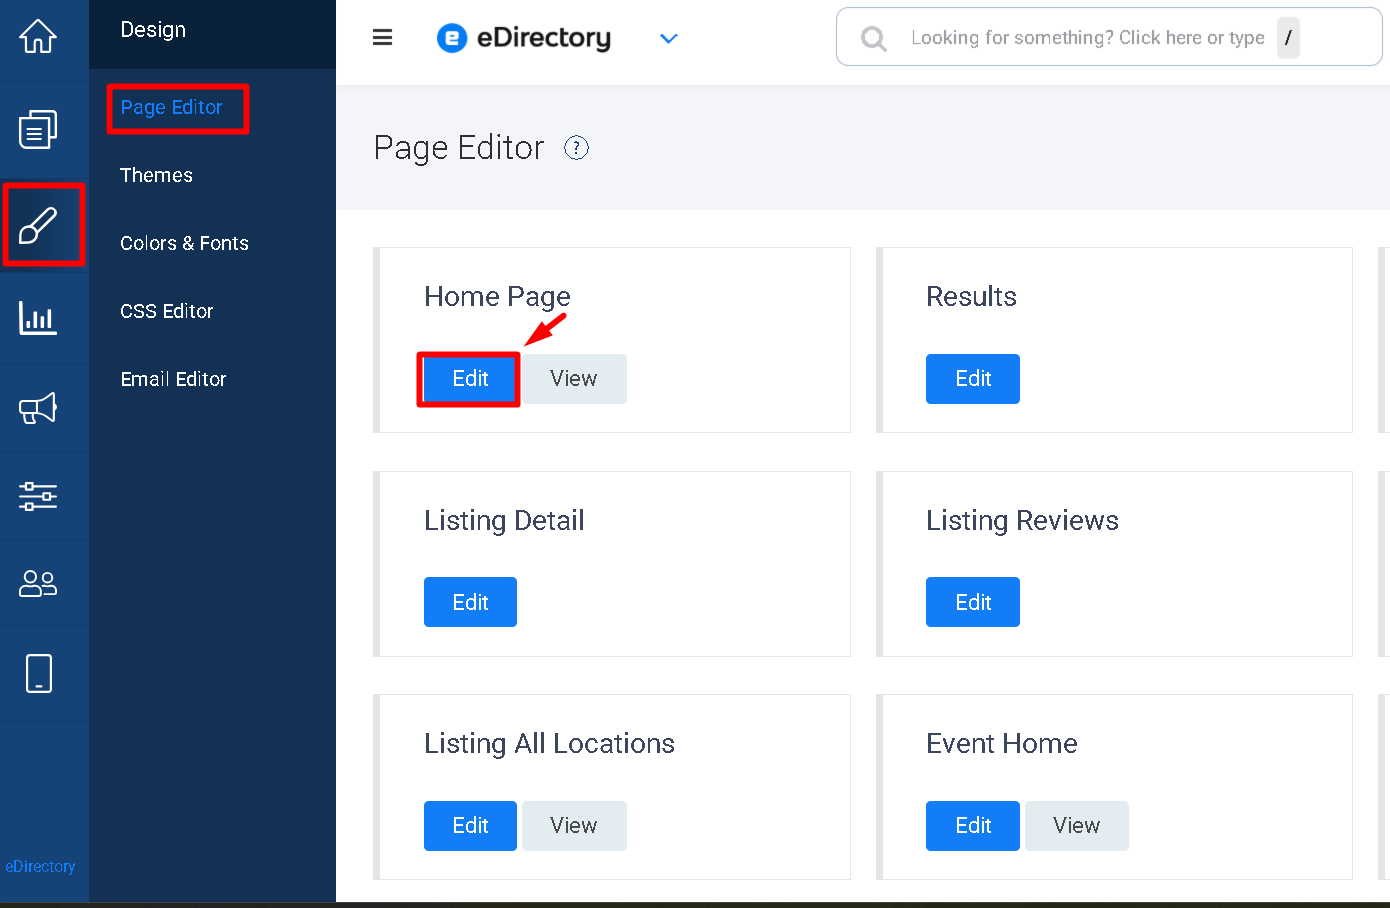
To change the design of your category section:
Step 1
Navigate to Design → Page Editor
Step 2
Open the page where the category widget is currently displayed.
For this example, select Home Page
Step 3
Locate the existing category widget.
Most websites already include a category widget on the homepage by default.
If you do not like the current design, you can remove the widget.

Important Note: Deleting a category widget does NOT delete your categories. The widget is only responsible for displaying categories that already exist in your directory. Your categories remain safely stored under Content Manager → Listings / Events / Classifieds / Articles / Blogs → Categories
Step 4
Click Add a Widget in the upper-right corner of the Page Editor.
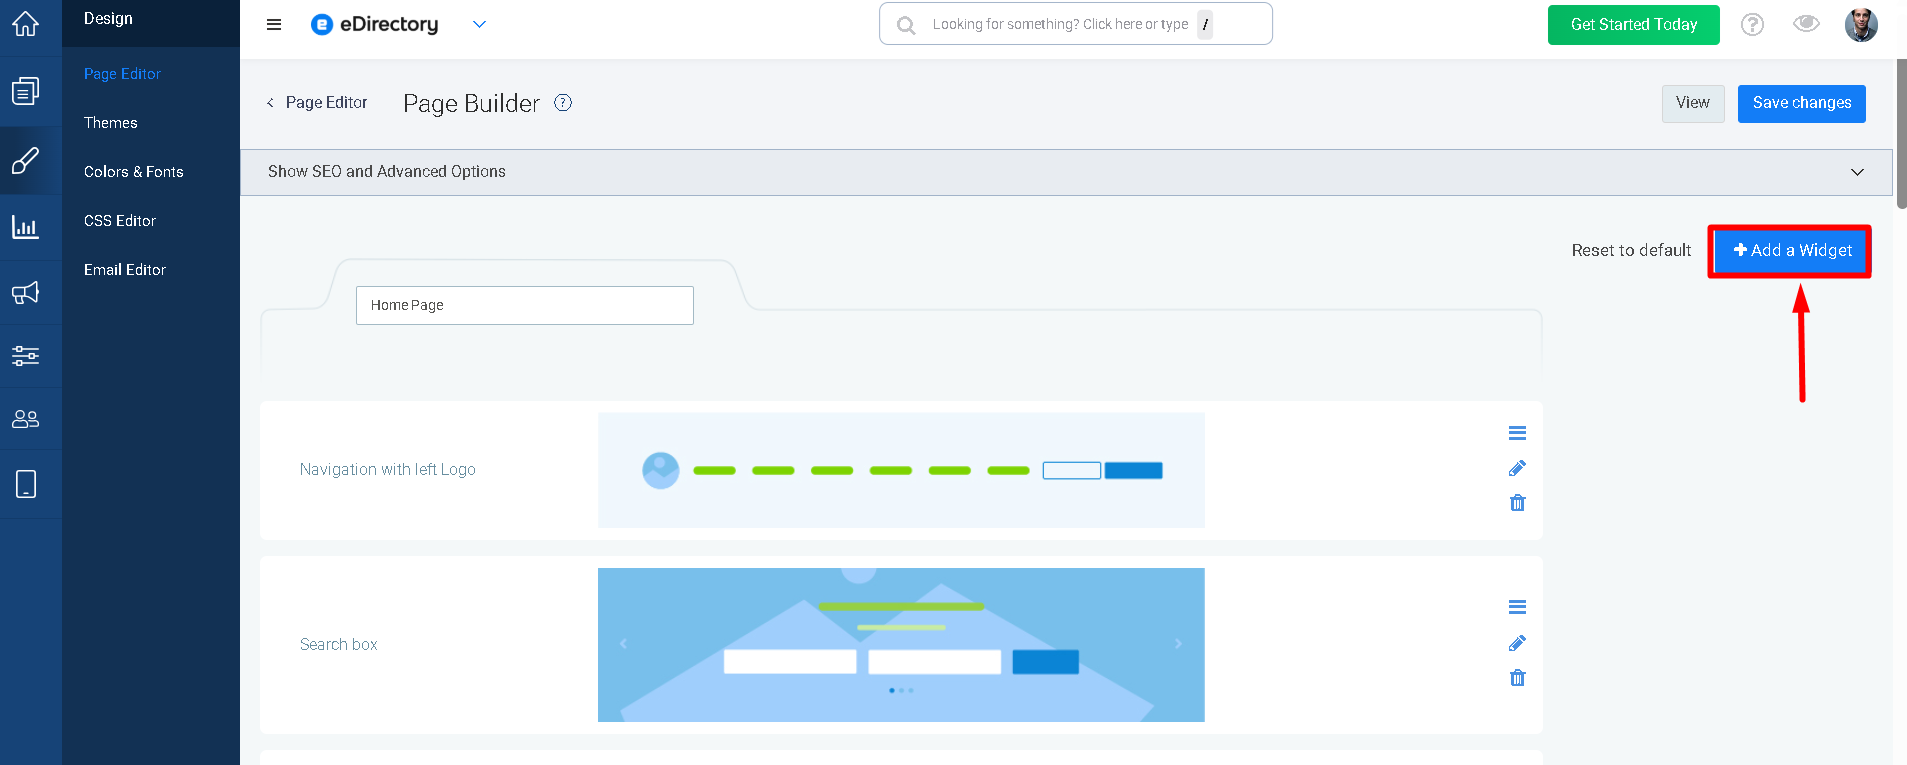
Step 5
Search for Categories
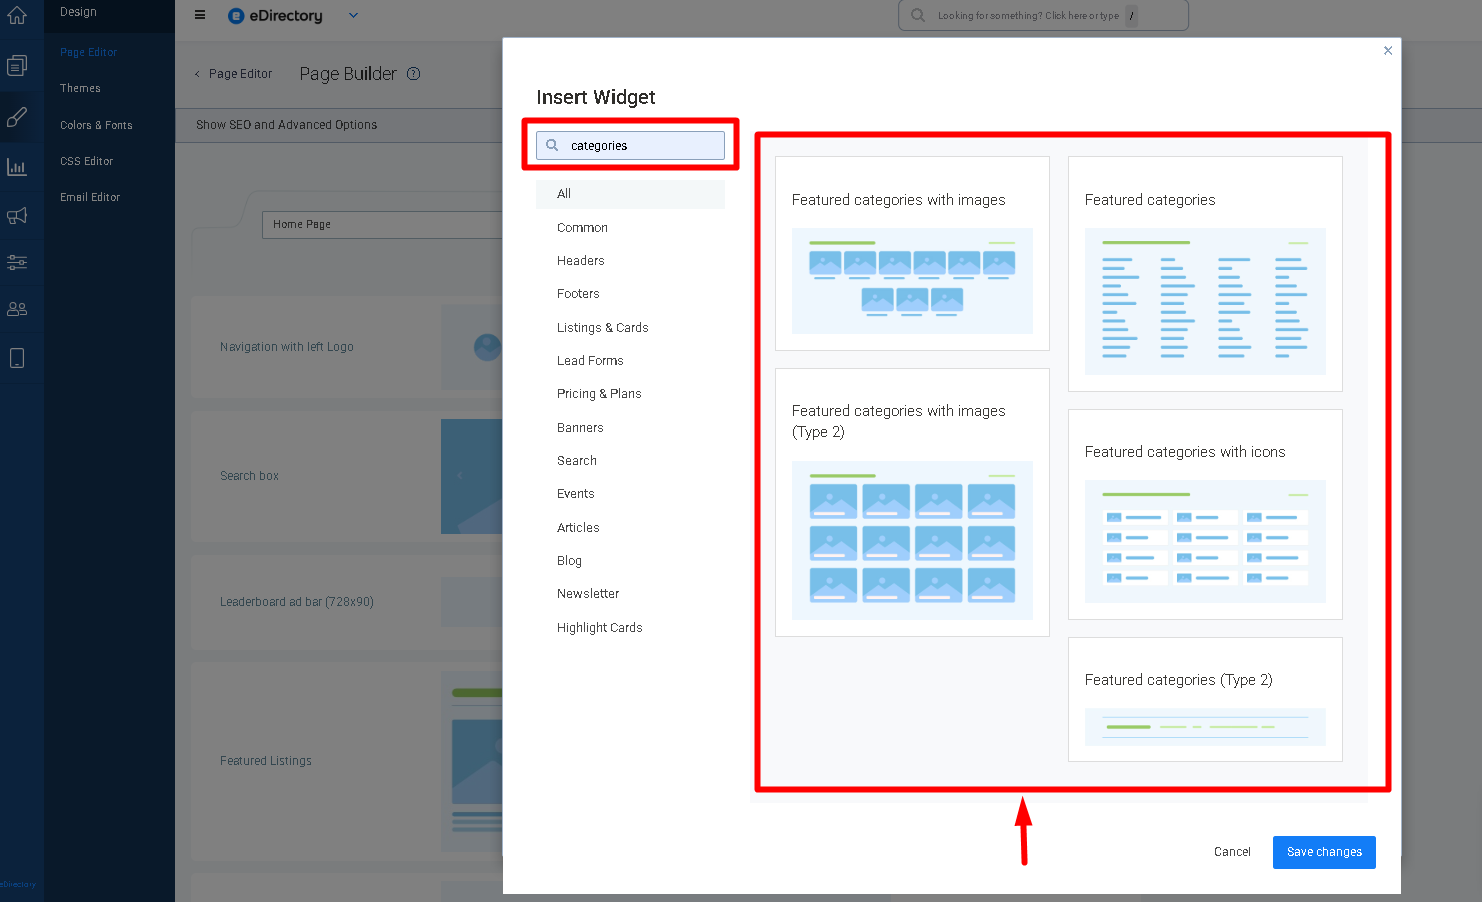
You will see several category widget options available.
Each widget displays the same categories but uses a different layout and design.
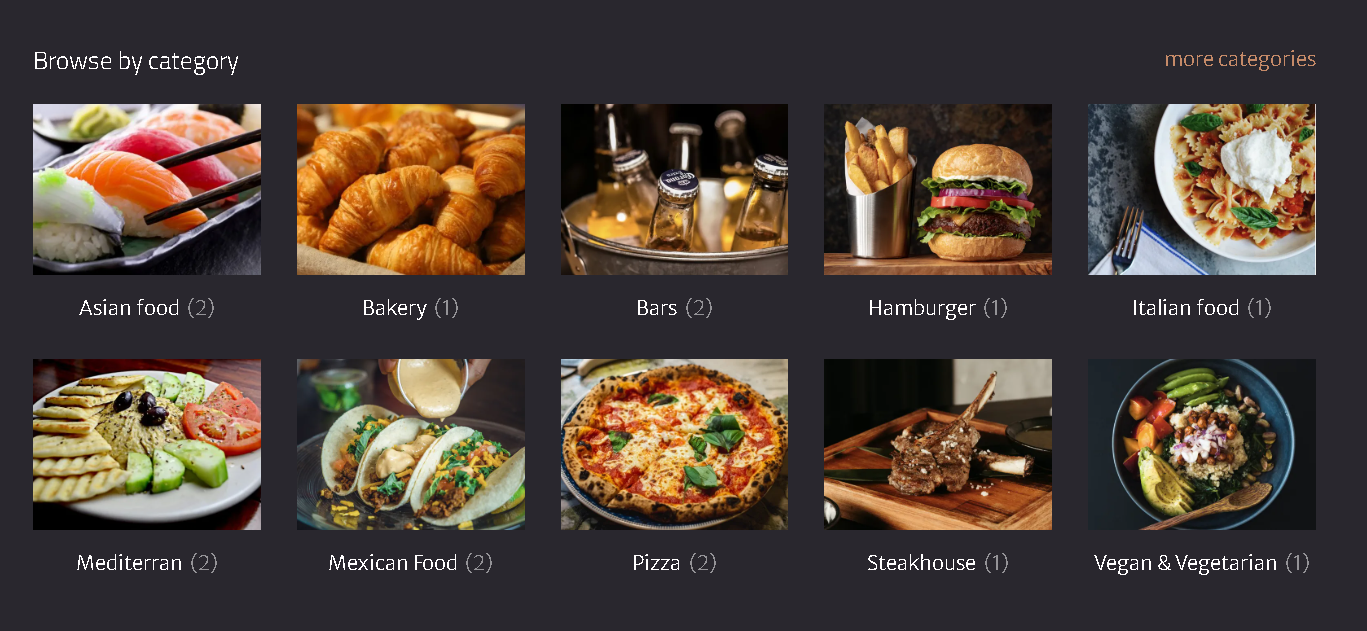
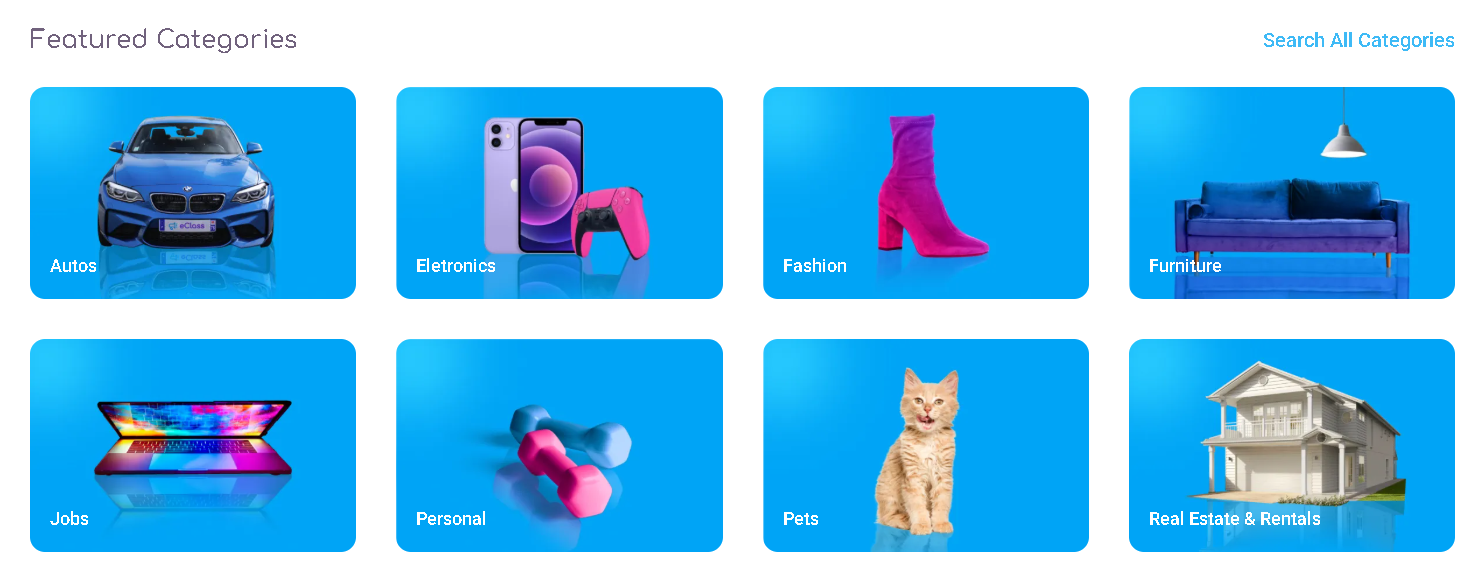
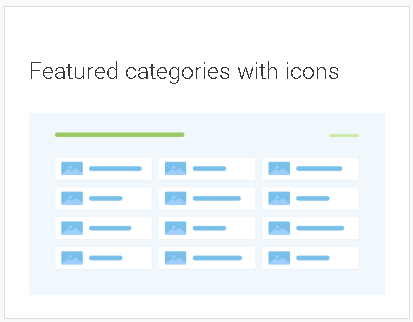
Featured Categories with Images
This widget displays categories as image thumbnails.
Each category appears as:
- A square image thumbnail
- The category name displayed below the image
Example Layout
|
Widget |
Frontend |
|
|
|
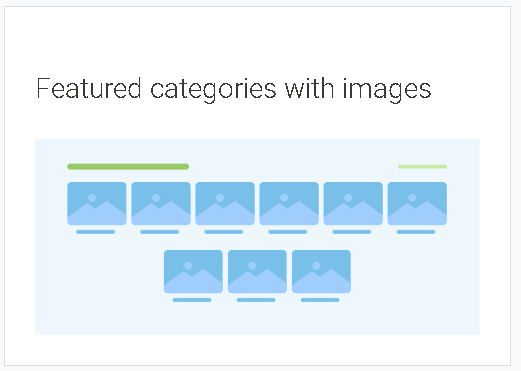
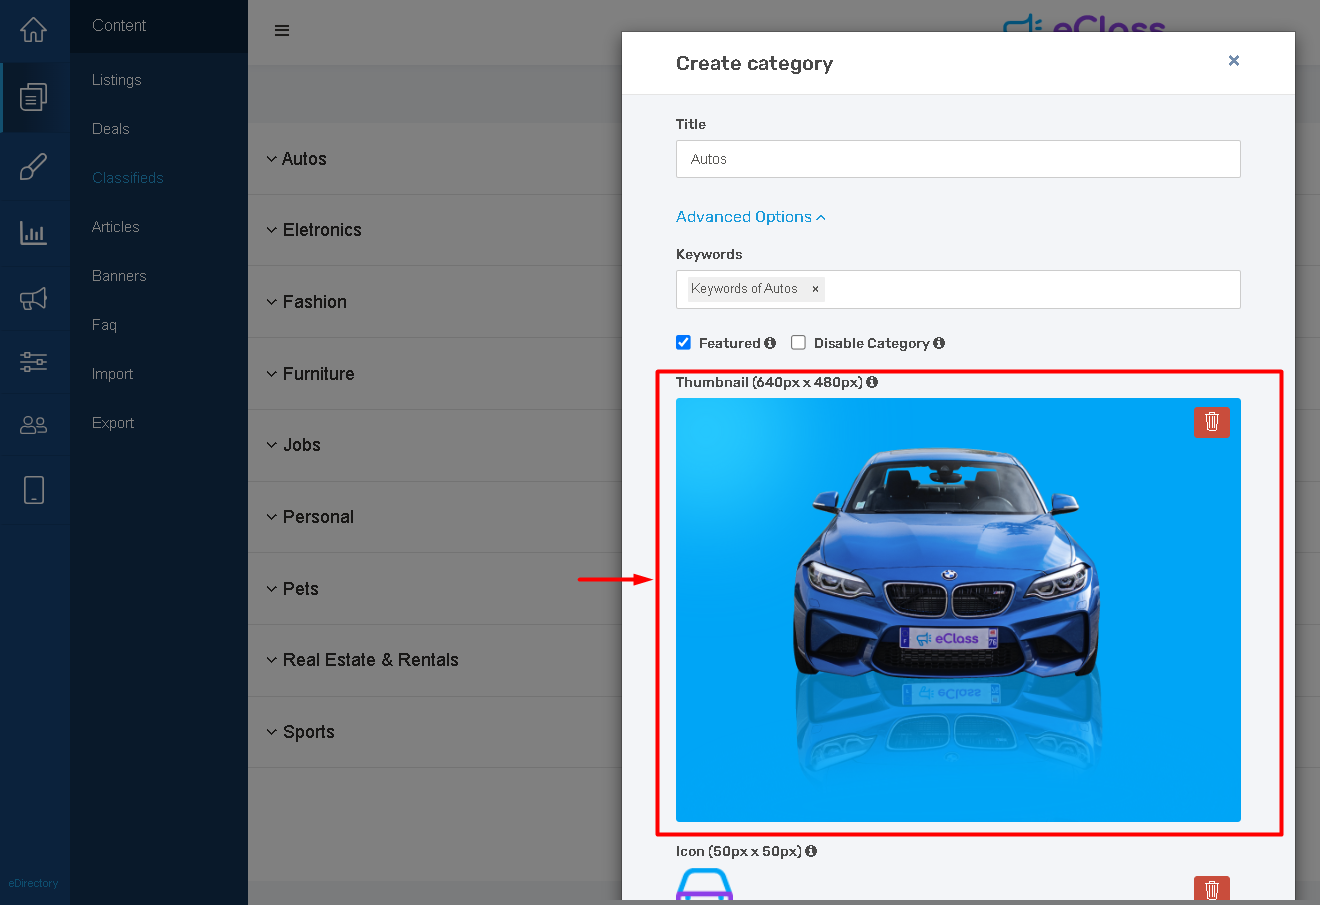
Uploading Category Images
To add category images, navigate to Content Manager → Listings → Categories
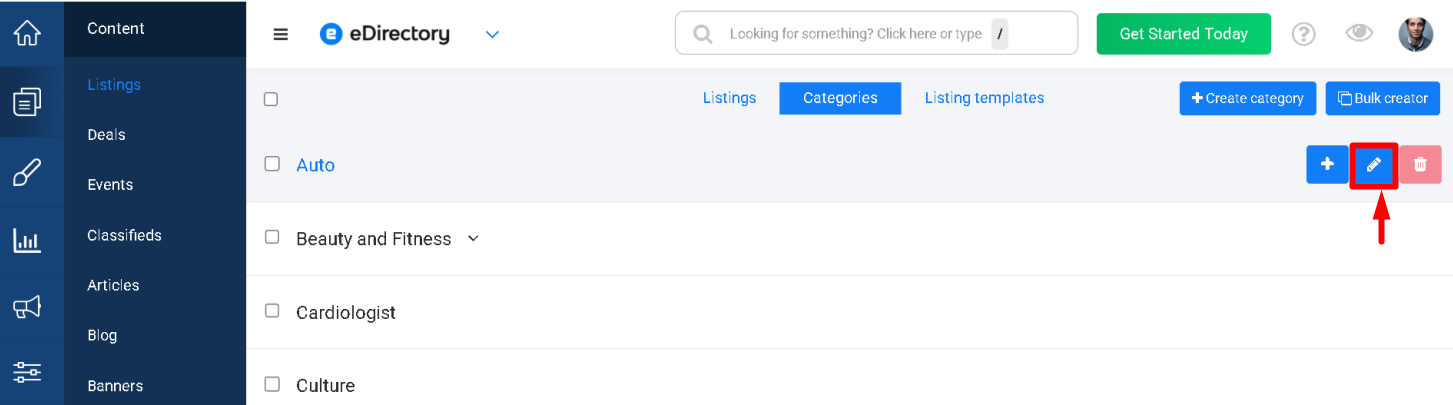
Hover over the desired category and click the pencil icon to edit the category.
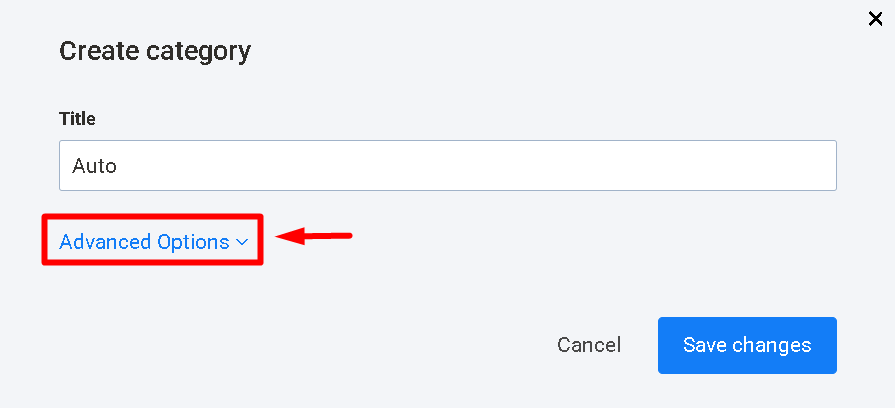
Click Advanced Options
Upload an image under: Thumbnail (640px x 480px)
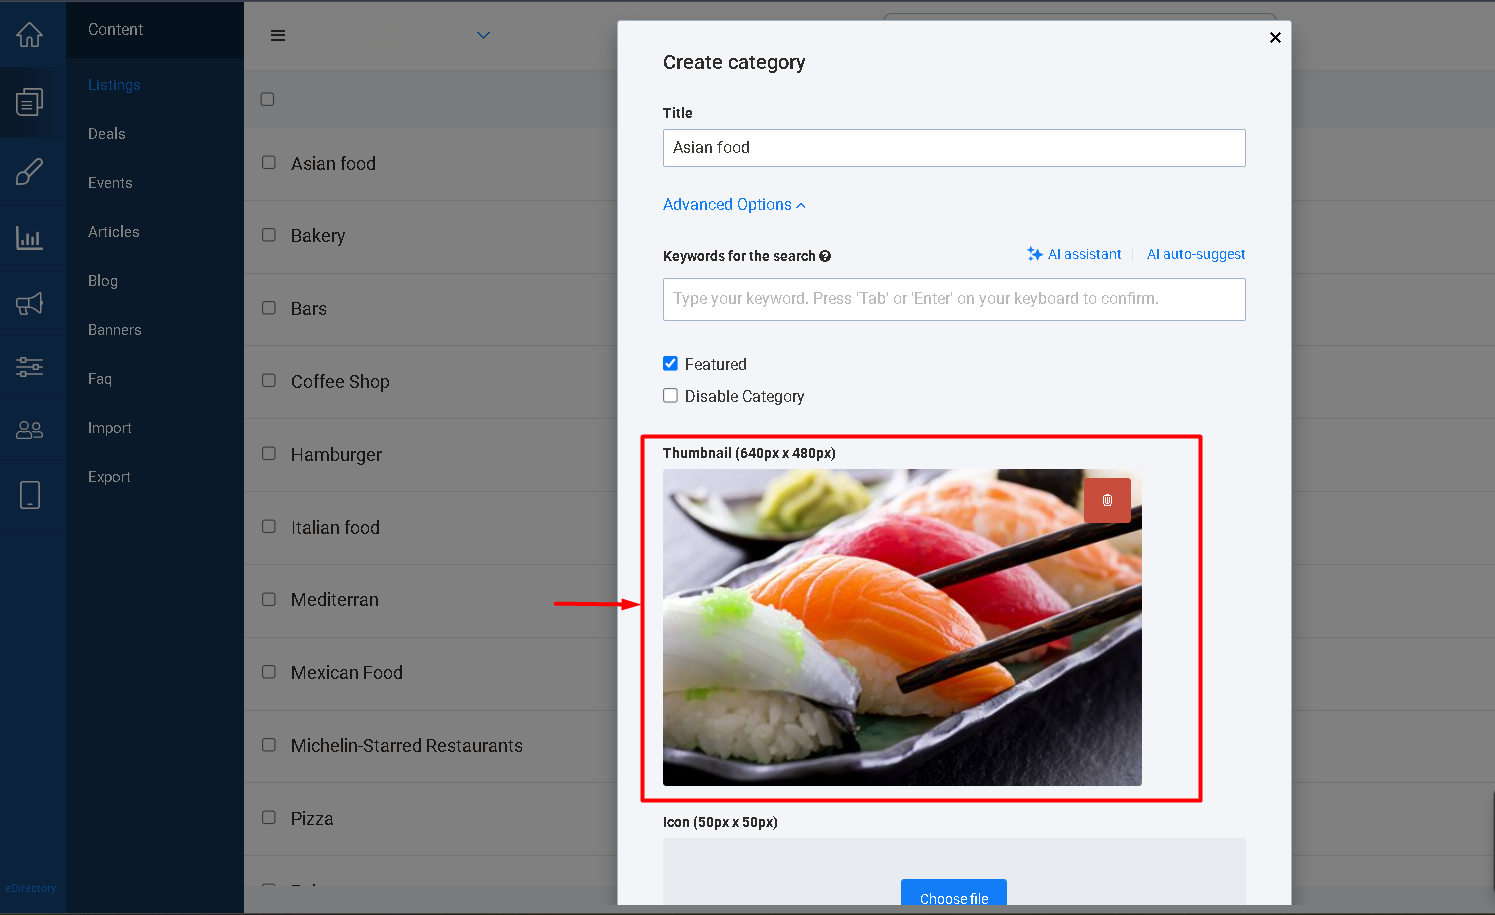
This image will be used by the widget when displaying the category.
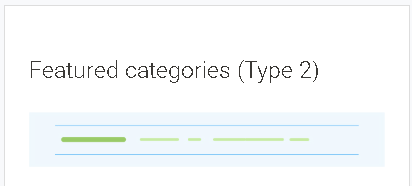
Featured Categories with Images - Type 2
This widget functions similarly to the previous widget.
The same Thumbnail image is used.
The primary difference is the placement of the category title.
Type 1
Category name appears below the image.
Type 2
Category name appears inside the image overlay.
|
Widget |
Frontend |
|
|
|
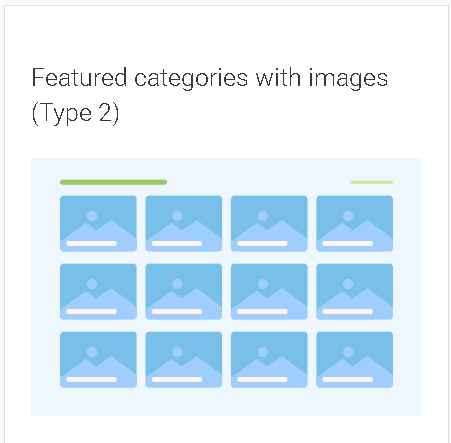
This design often provides a more modern visual appearance.
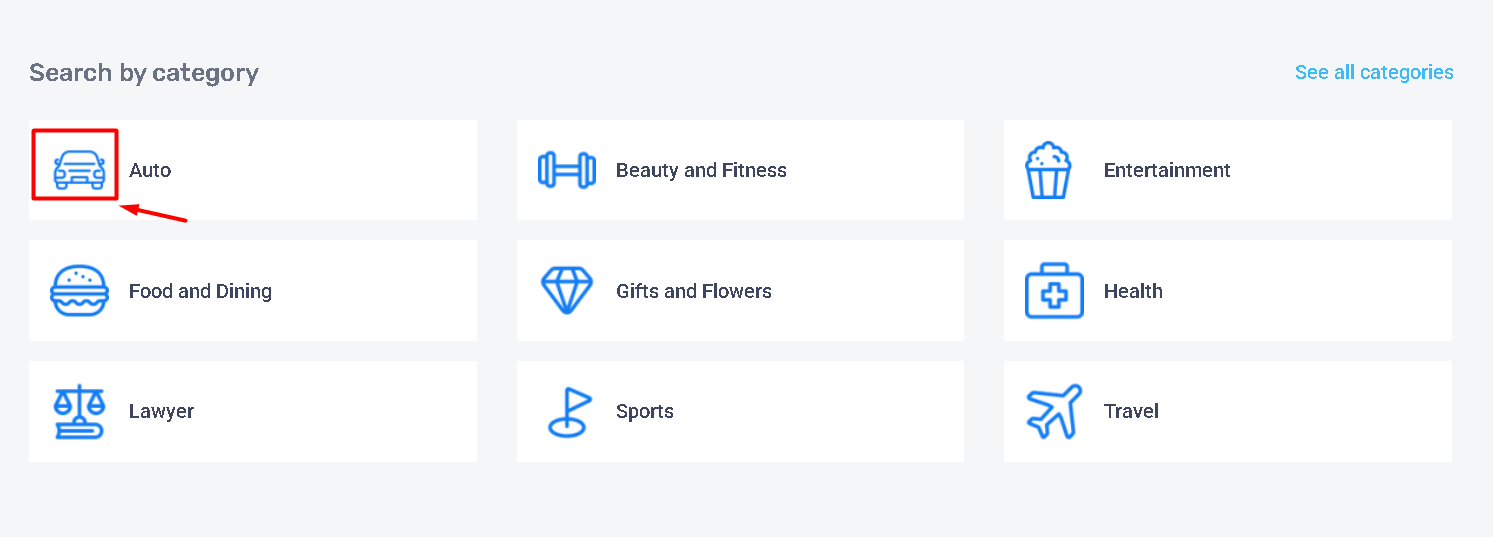
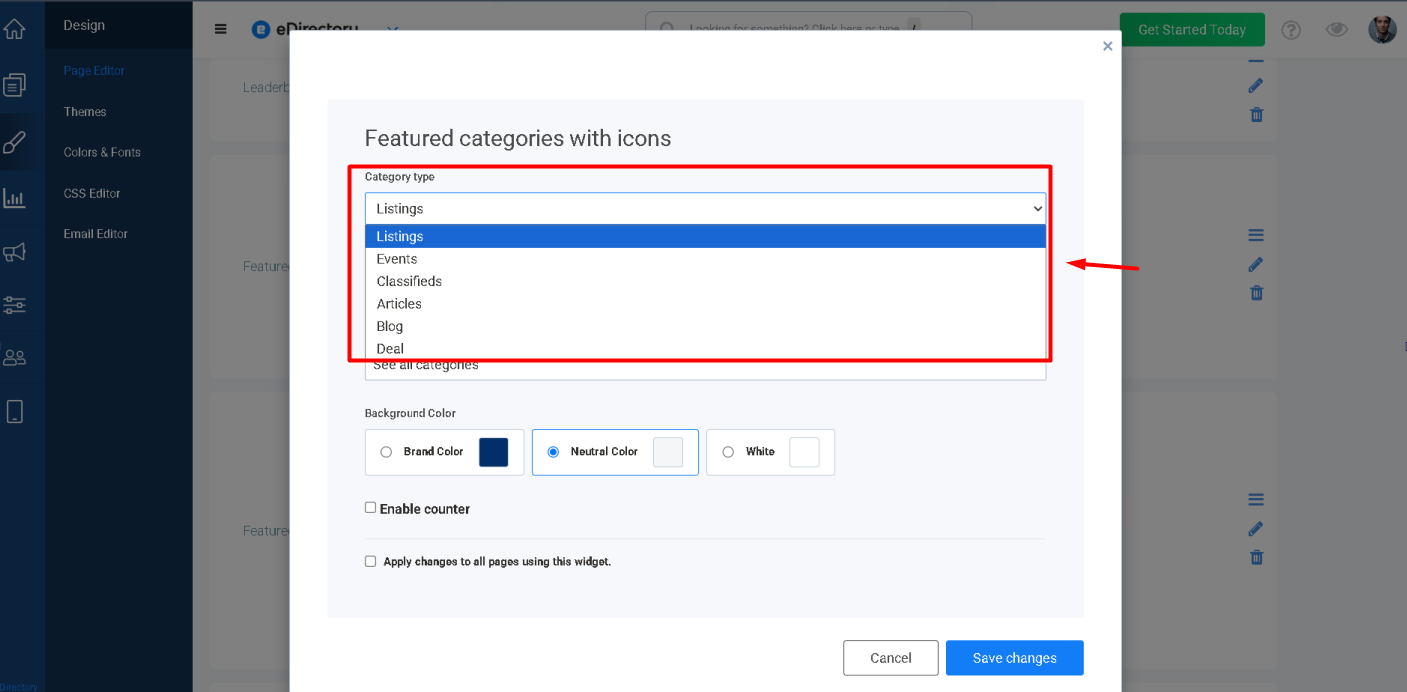
Featured Categories with Icons
This widget displays categories in a rectangular layout using icons instead of large thumbnail images.
Each category displays:
- An icon on the left
- The category name beside the icon
Uploading Category Icons
Navigate to Content Manager → Listings → Categories
Edit the category.

Select Advanced Options

Upload an image under Icon (50px x 50px)
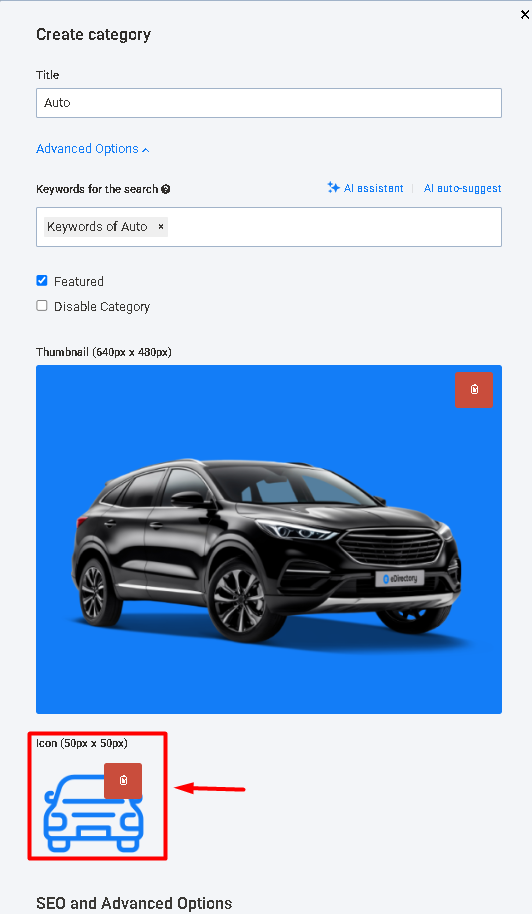
This icon will be displayed by the widget.
|
Widget |
Frontend |
|
|
|
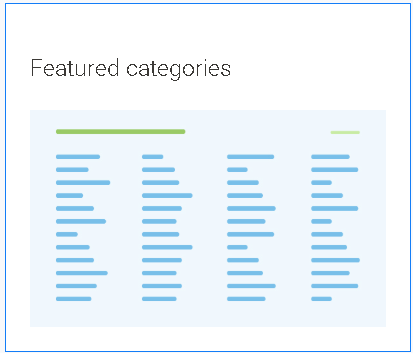
Featured Categories
This widget displays categories in a simple text-based list format.
Only category names are displayed.
No images or icons are used.
This layout works well for directories that prefer a clean and minimal design.
Example
- Restaurants
- Hotels
- Shopping
- Automotive
|
Widget |
Frontend |
|
|
|
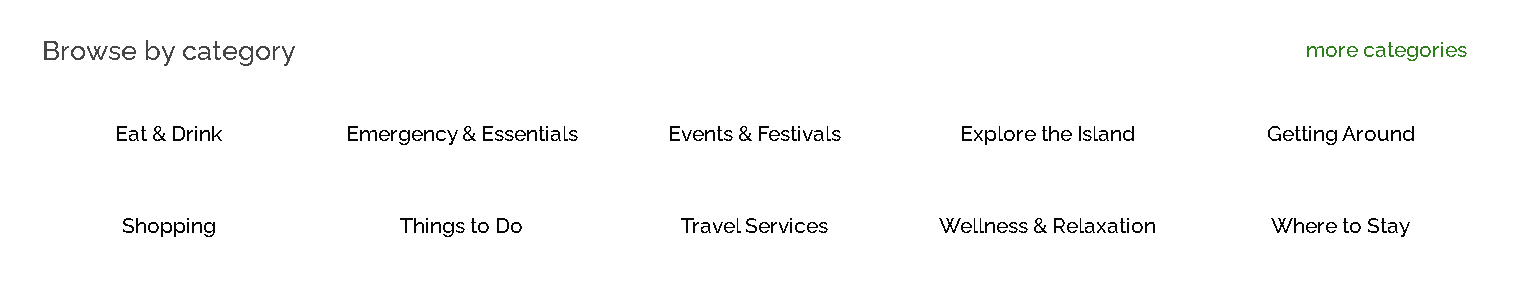
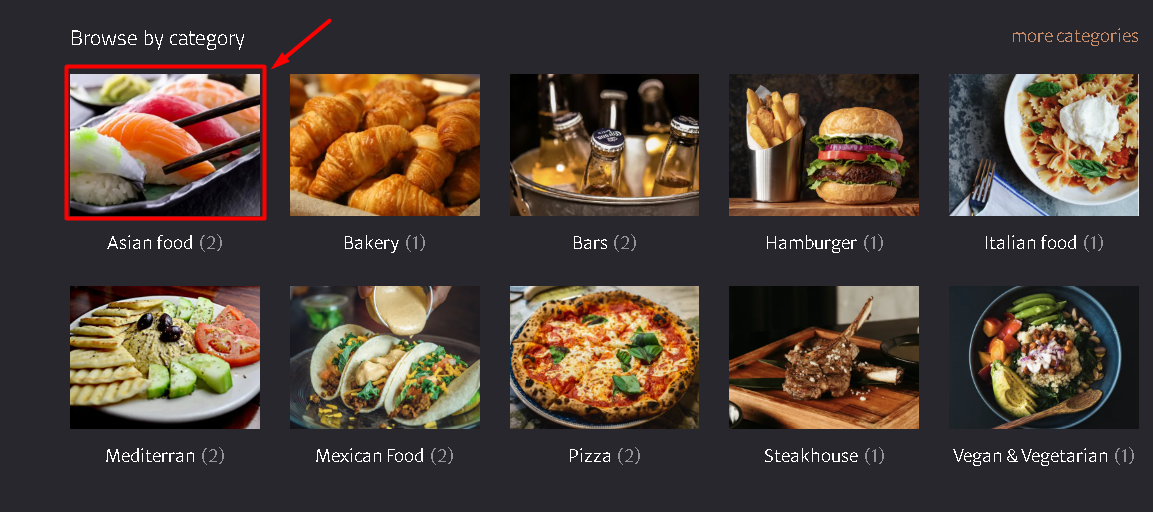
Featured Categories - Type 2
This widget displays categories inside a carousel.
Visitors can scroll horizontally through the categories.
Like the standard Featured Categories widget, only category names are displayed.
This widget does not support thumbnails or icons.
Example
←Asian Food | Bakery | Bars | Hamburger | Italian →
|
Widget |
Frontend |
|
|
|

Which Categories Do These Widgets Display?
The widget will only display categories that meet the visibility requirements explained earlier in this article (for example, categories marked as Featured and associated with active content).
For example:
- Listing Categories
- Event Categories
- Classified Categories
- Article Categories
- Blog Categories
When configuring the widget, you can choose which module's categories should be displayed.
This means you can have:
- One widget displaying Listing categories.
- Another widget displaying Event categories.
- Another widget displaying Blog categories.
on the same page if desired.
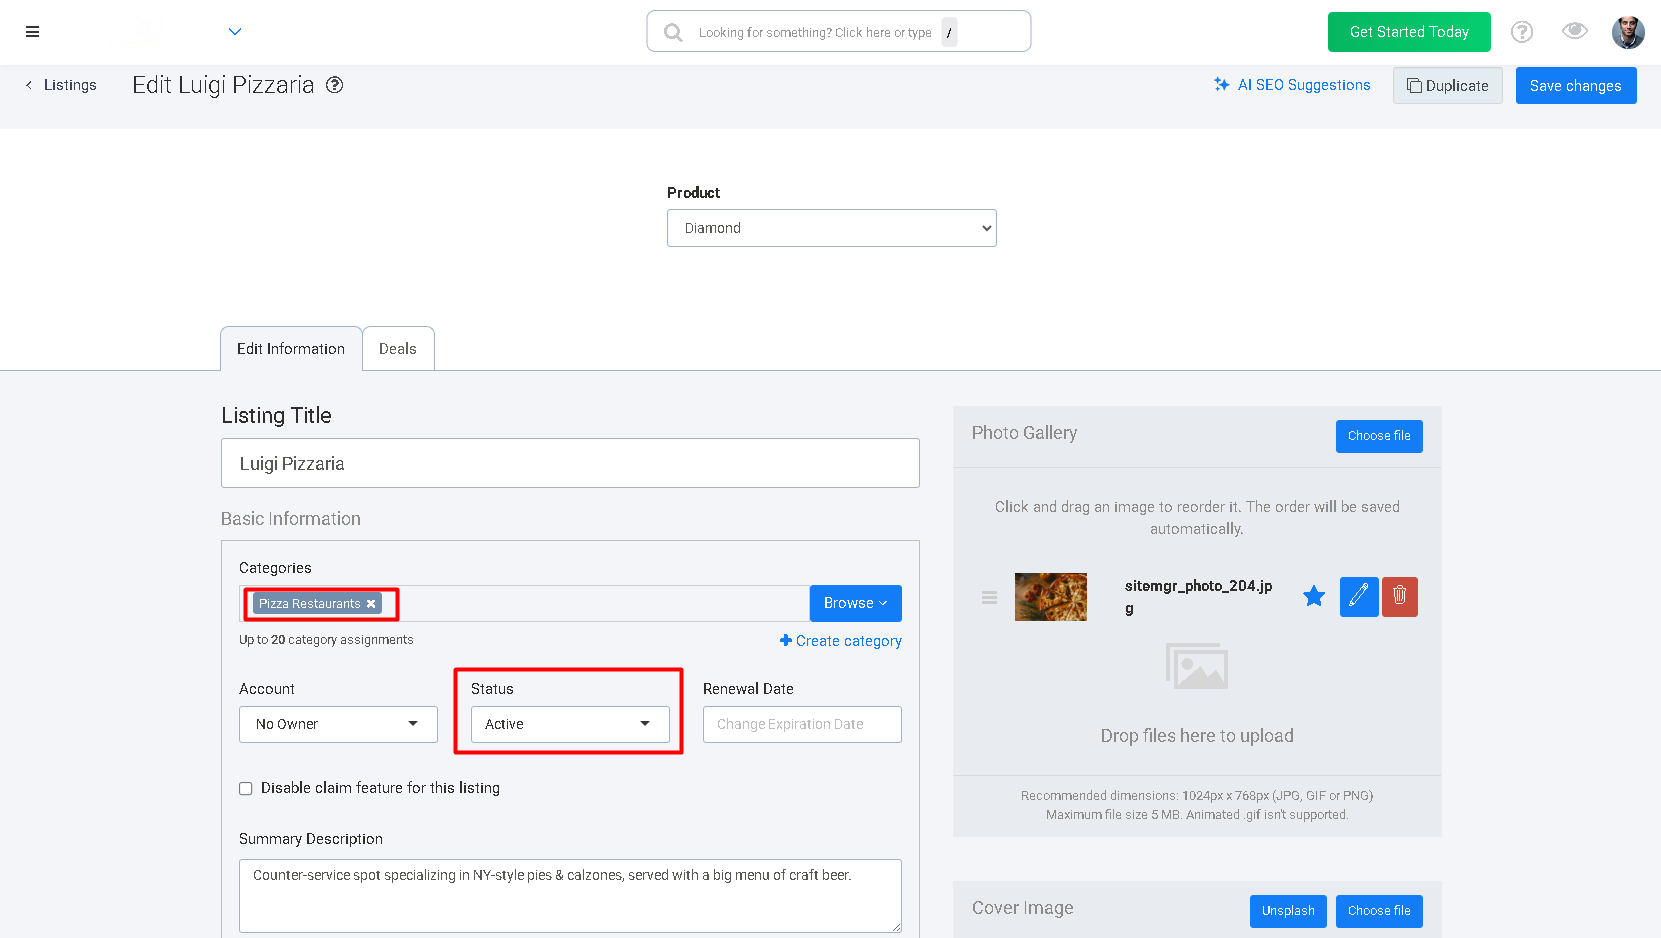
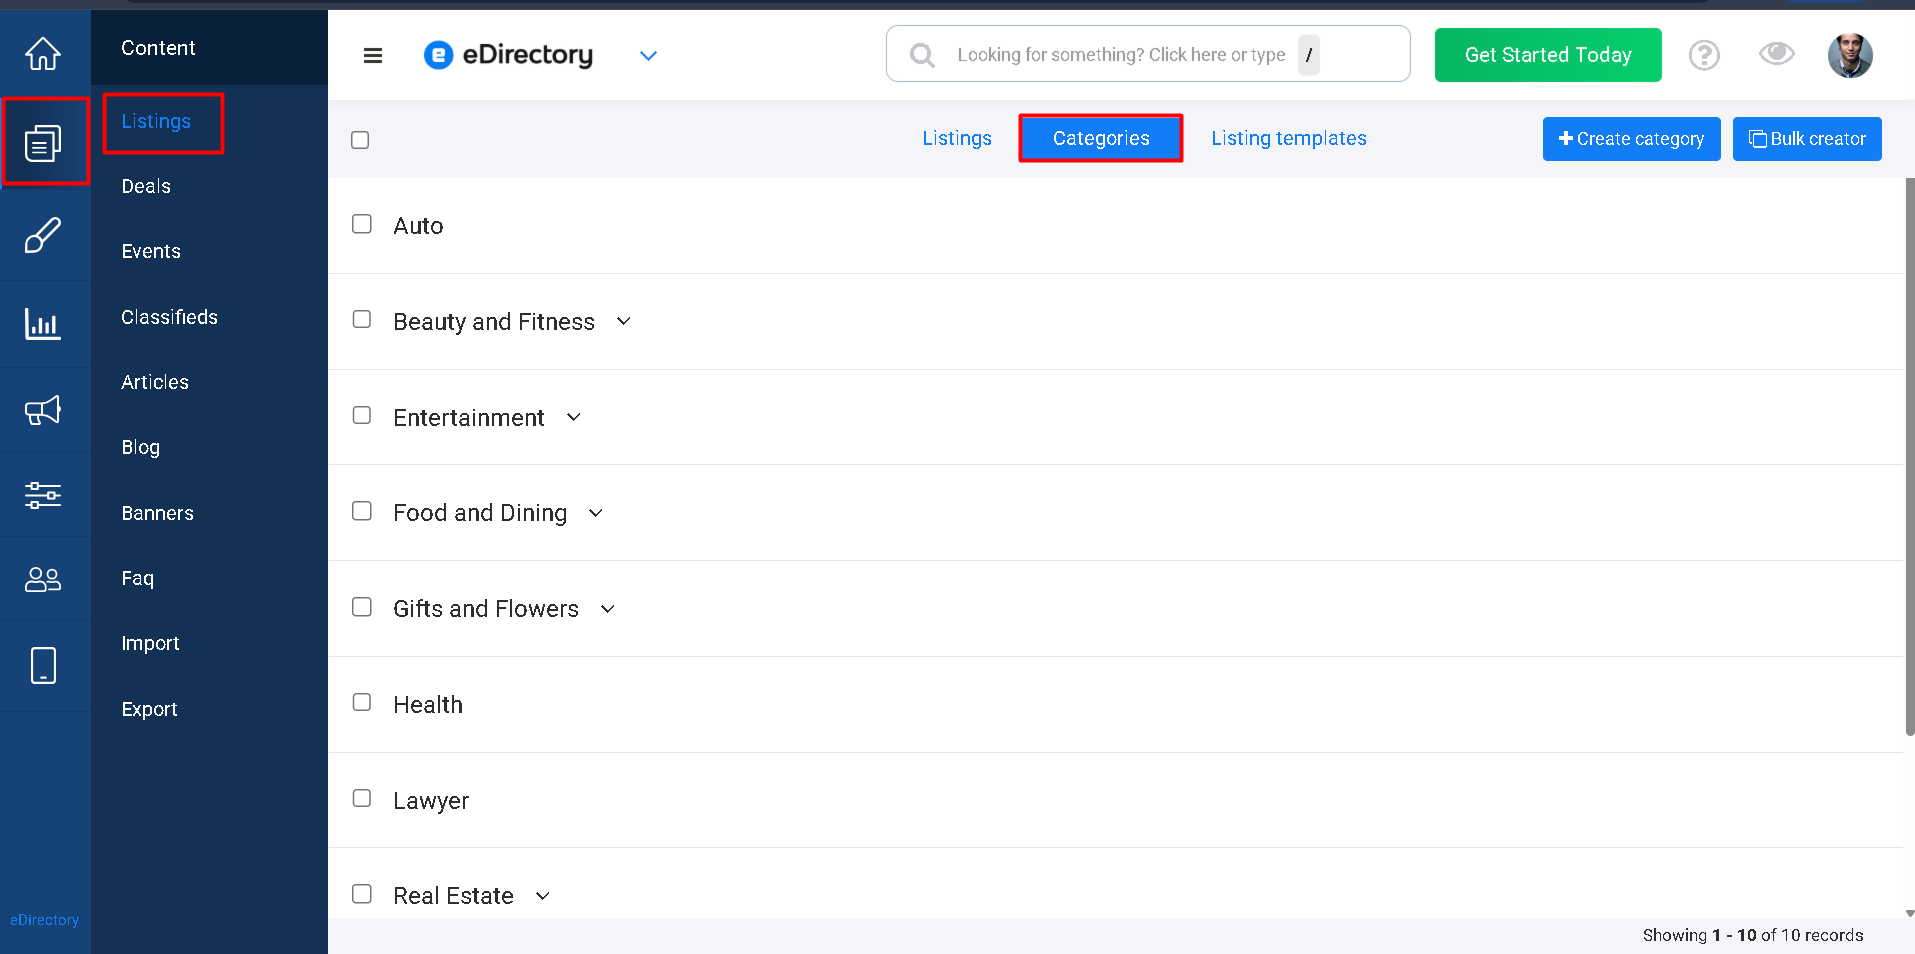
How to Create a Category
Categories can be created in several different ways.
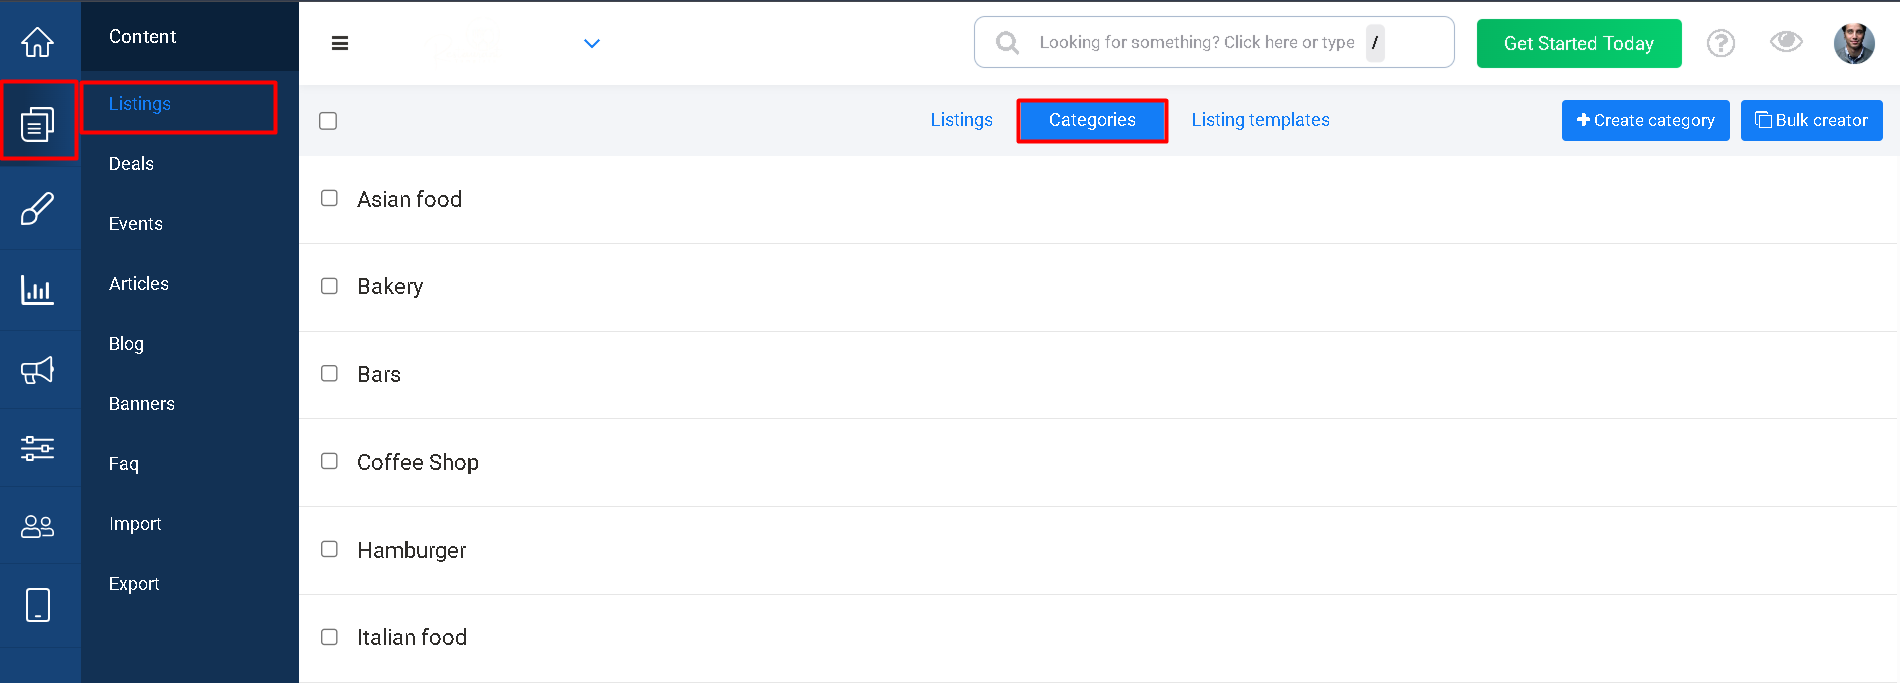
Method 1: Create Categories from the Categories Manager
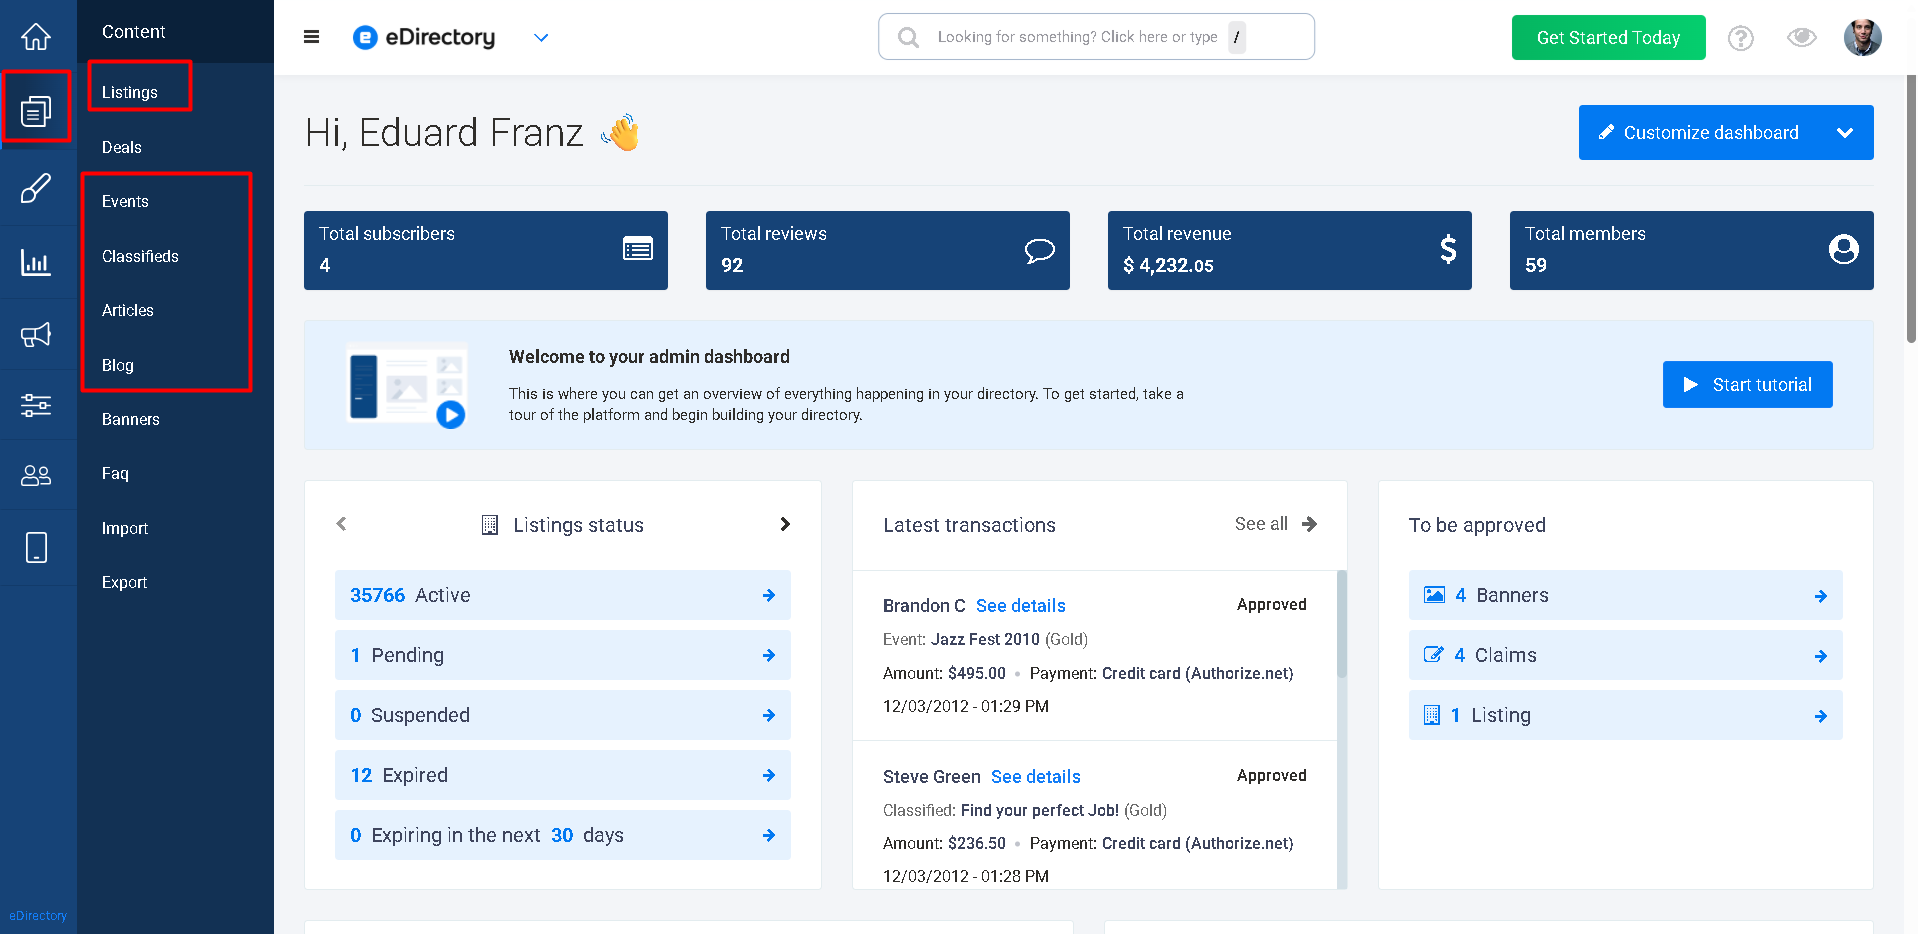
This method is available for Listings, Events, Classifieds, Articles, and Blogs.
Step 1
Log in to your Site Manager.
Step 2
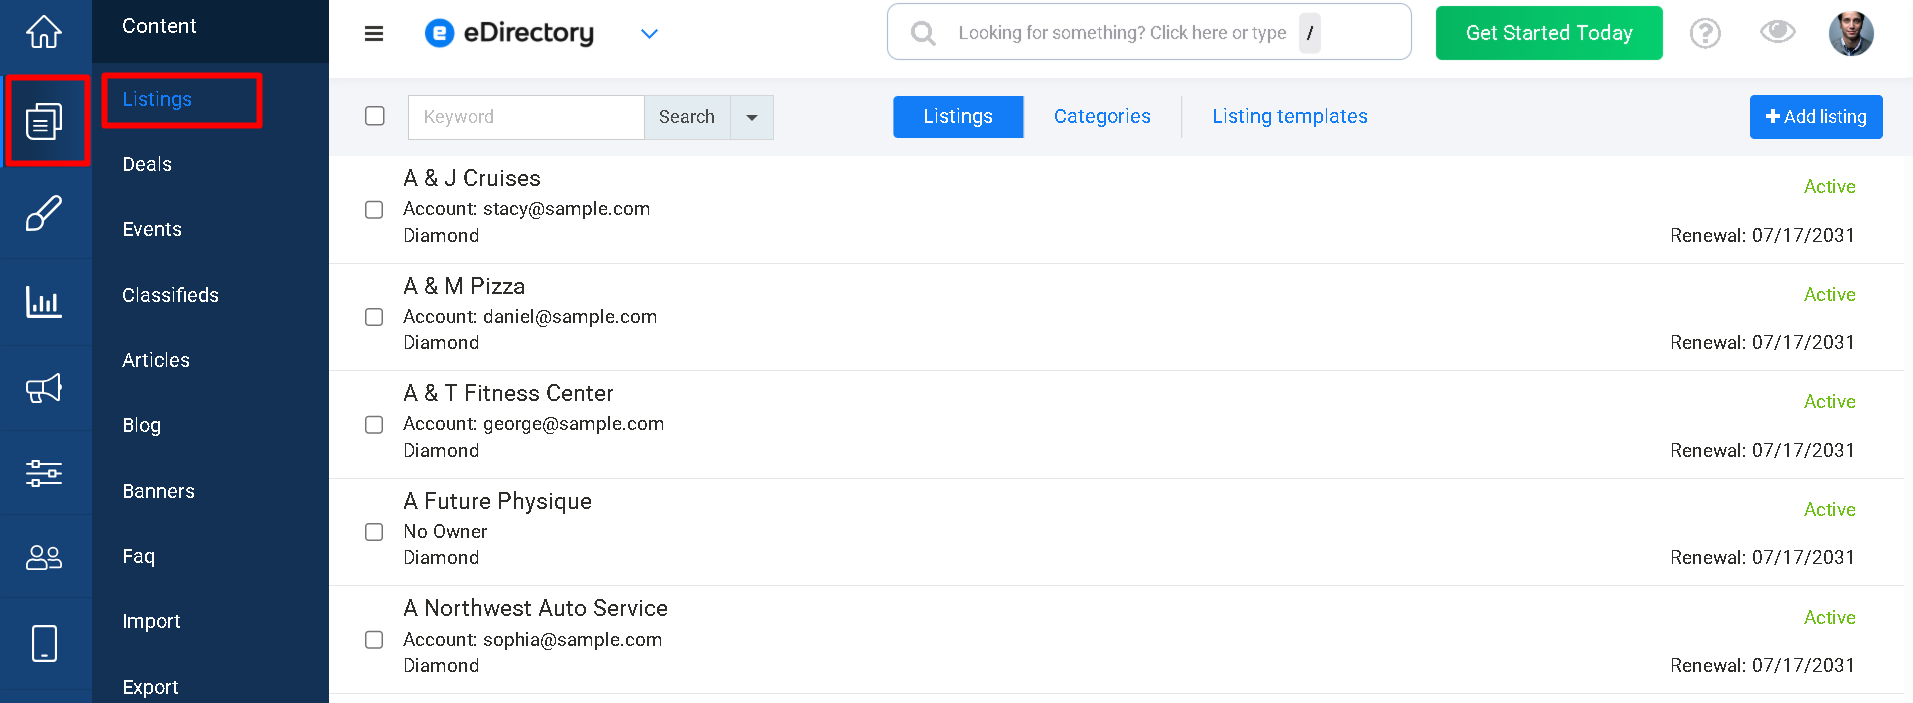
Navigate to Content Manager → Select Module:Listings/Events/Classifieds/Articles/Blog → Categories
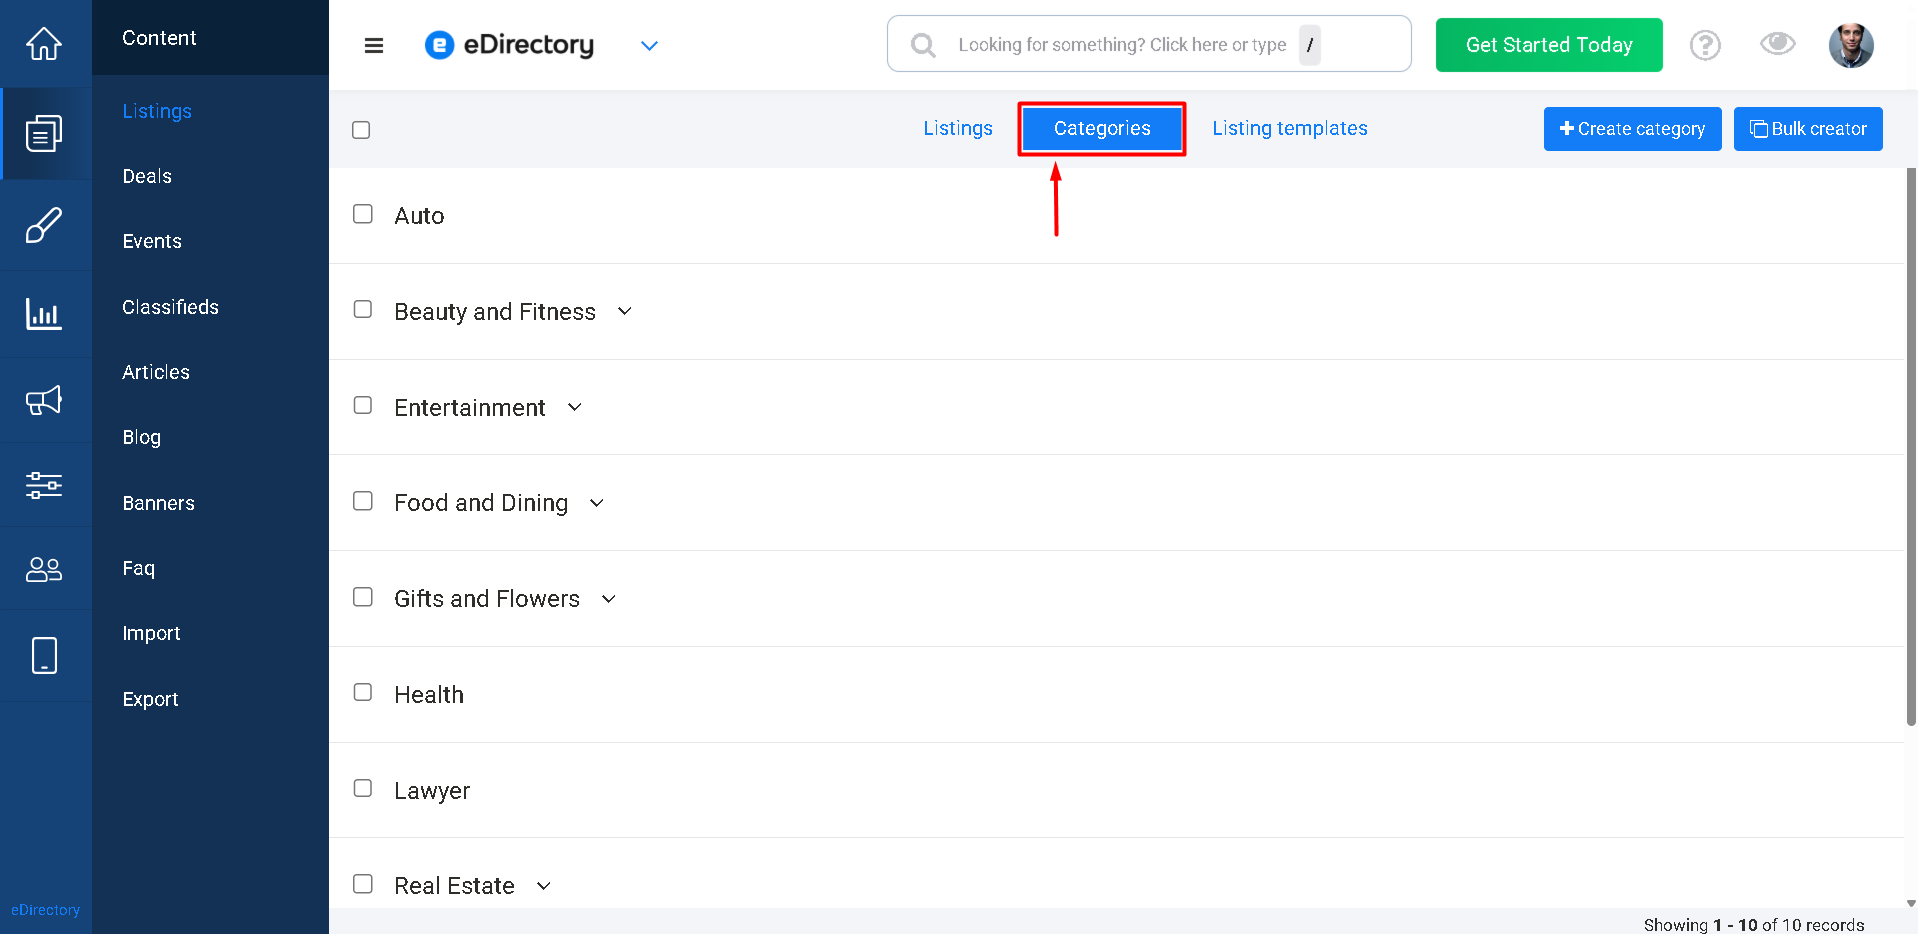
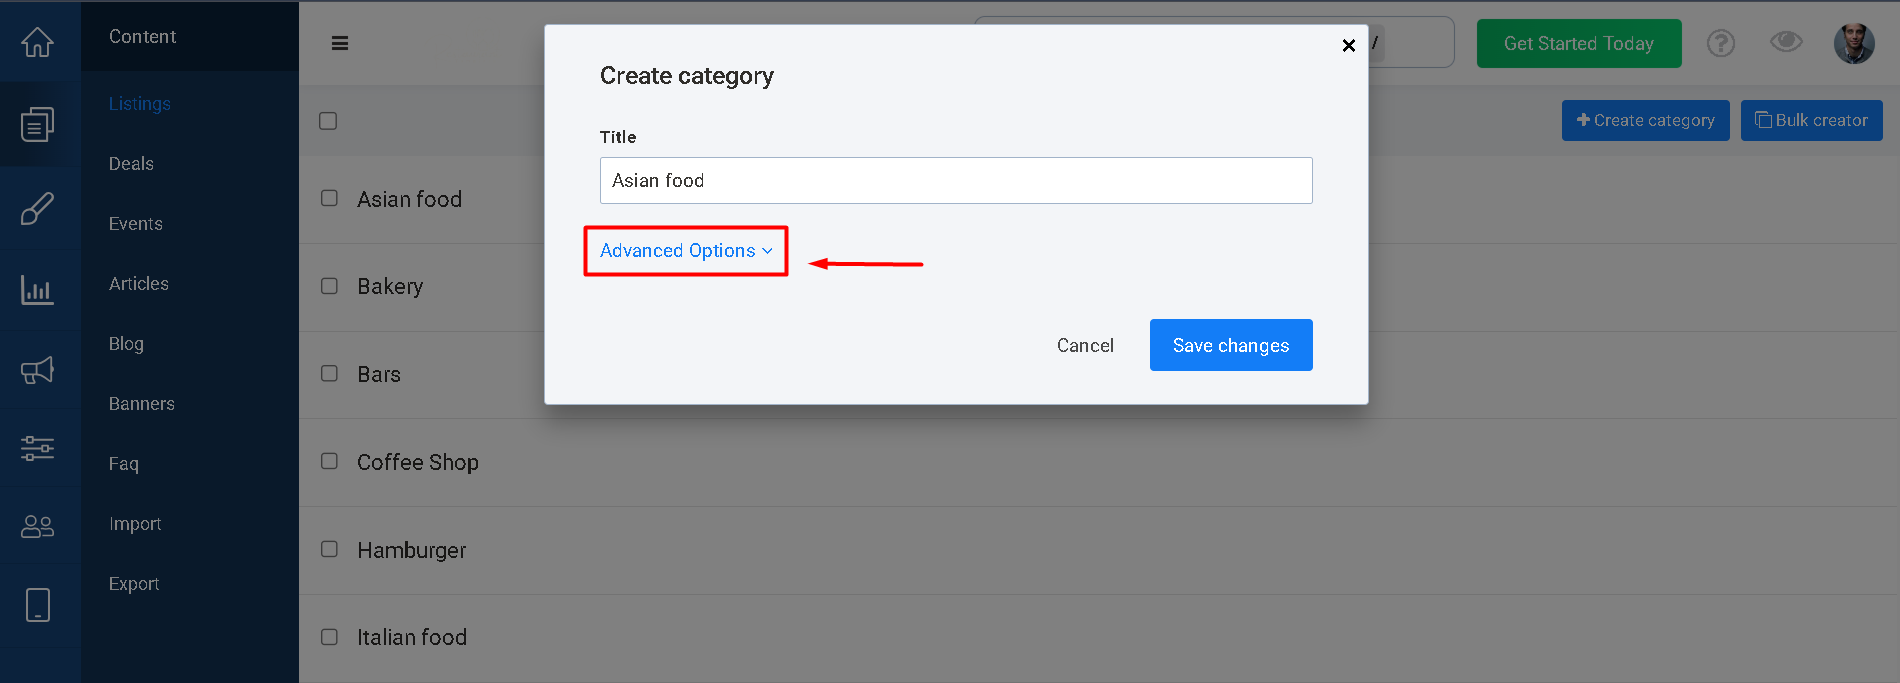
Step 3
Click + Create Category
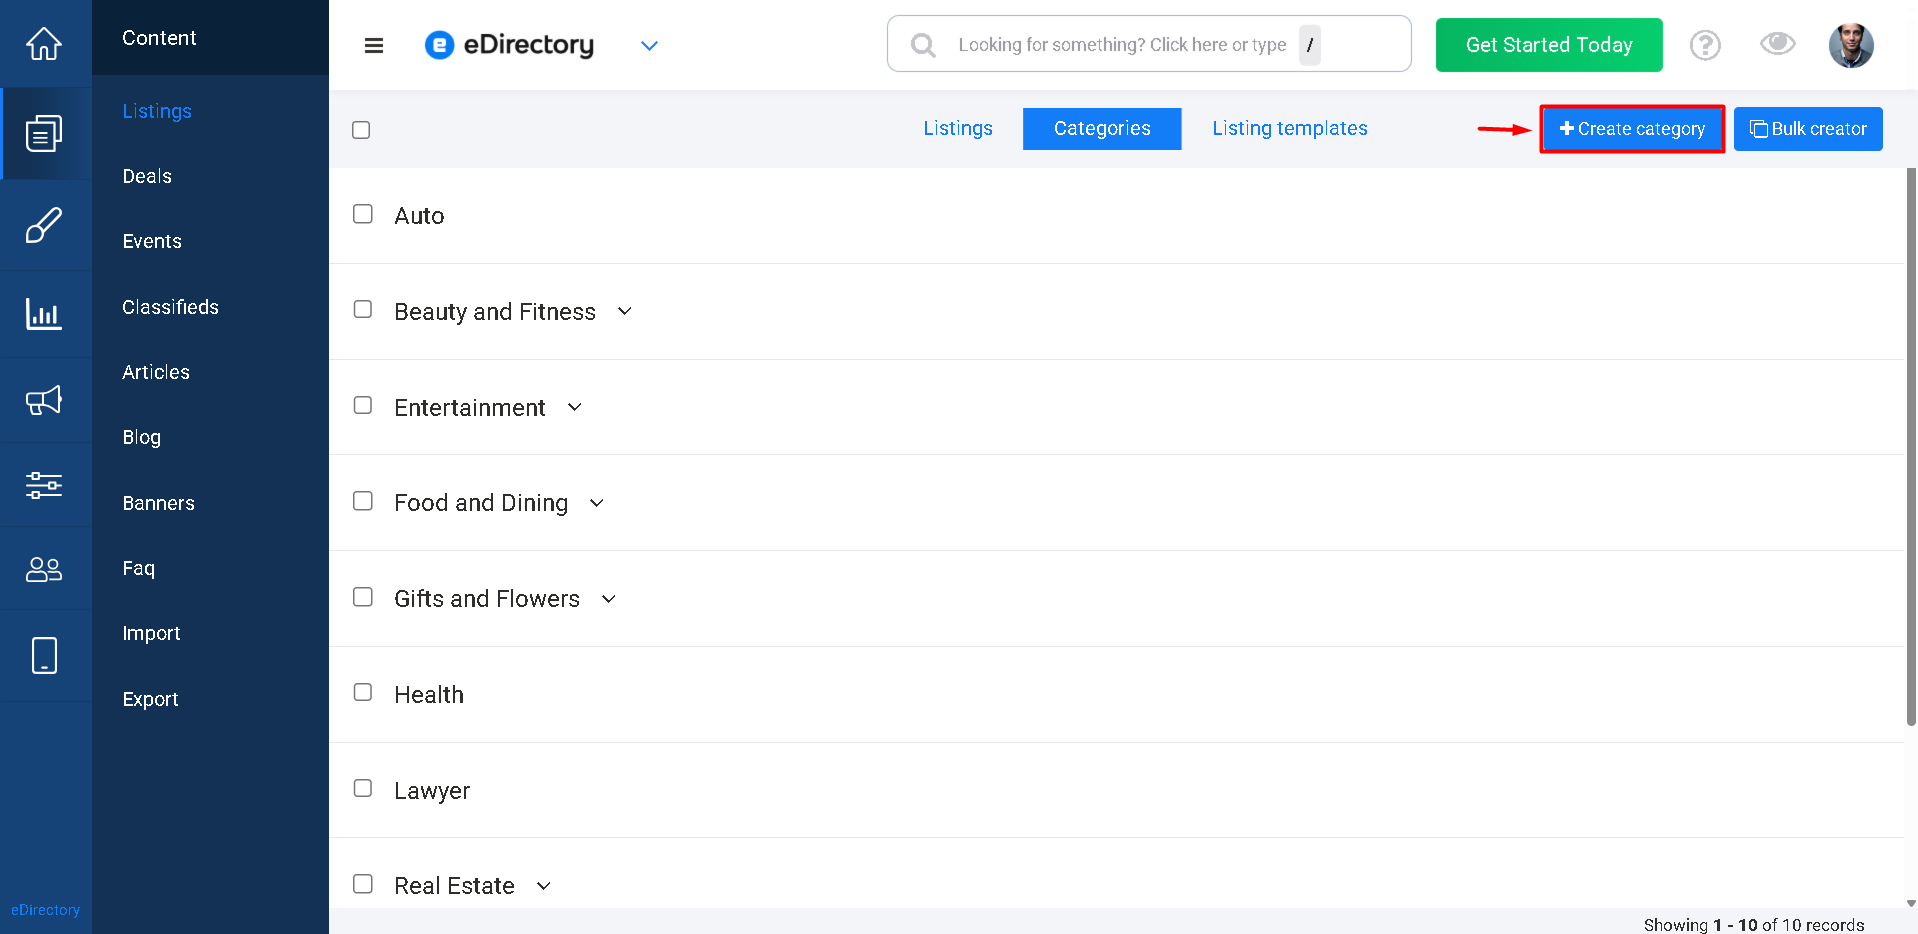
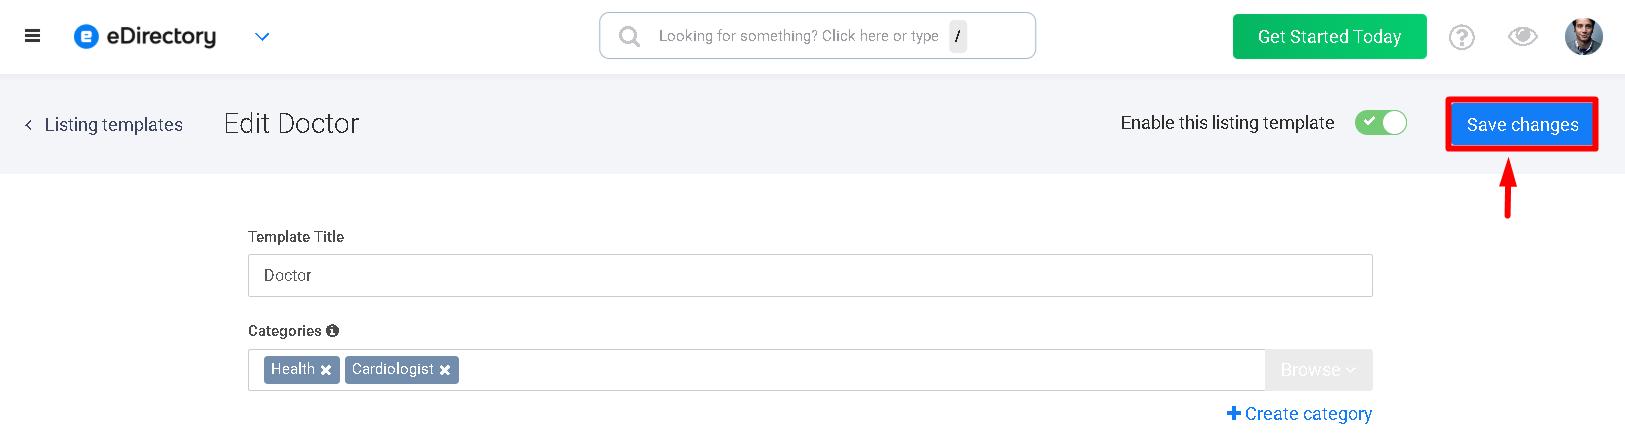
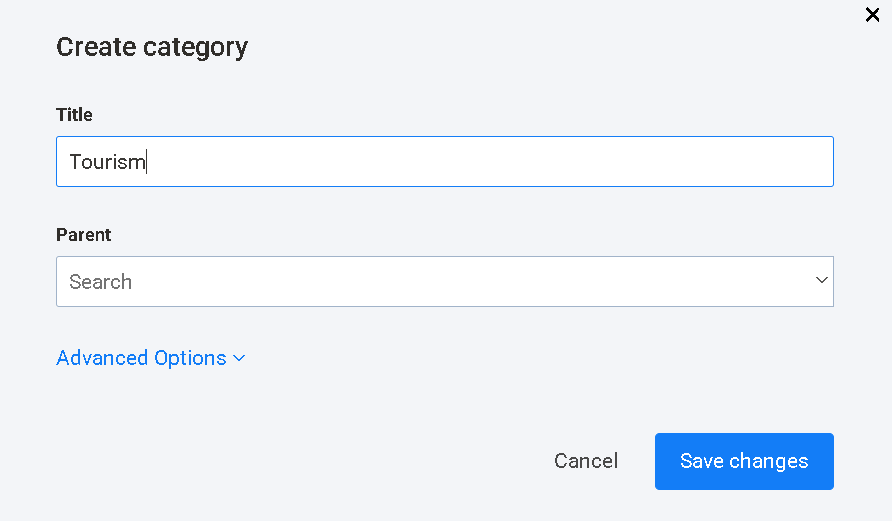
Step 4
Enter the category title. Example: Culture

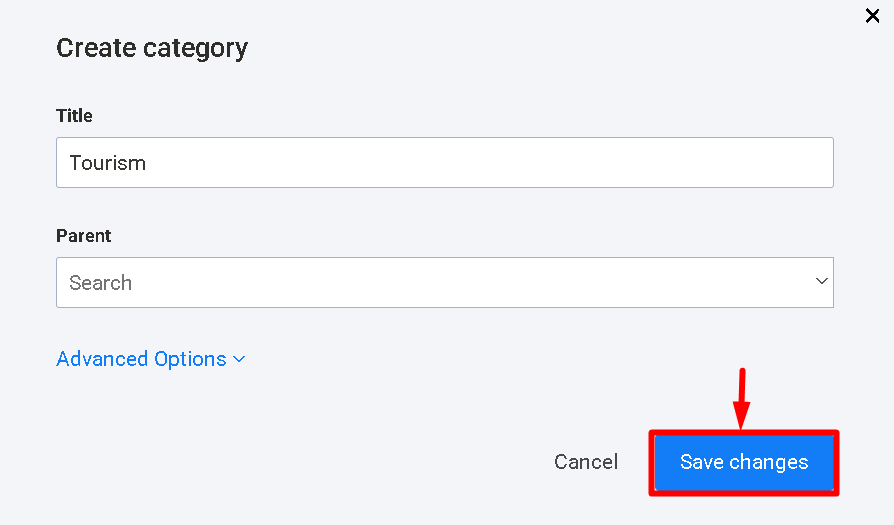
Step 5
Click Save Changes.
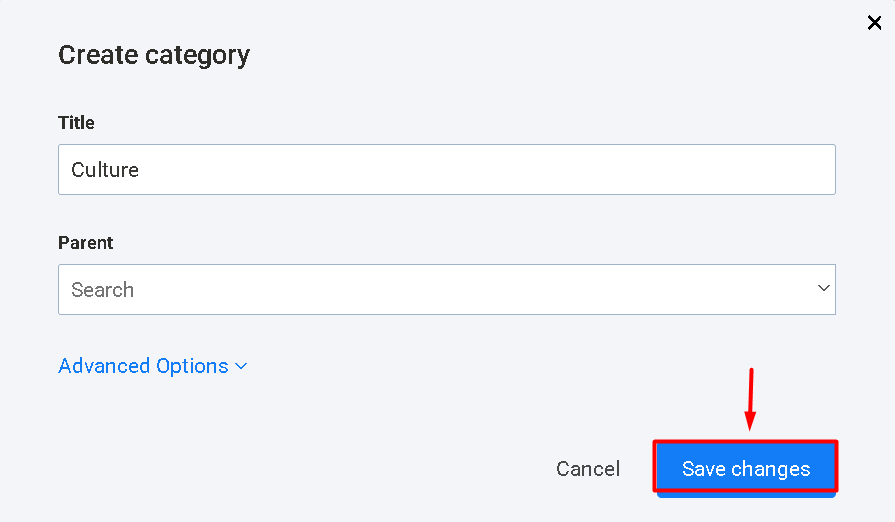
The category will now be available for assignment to content.
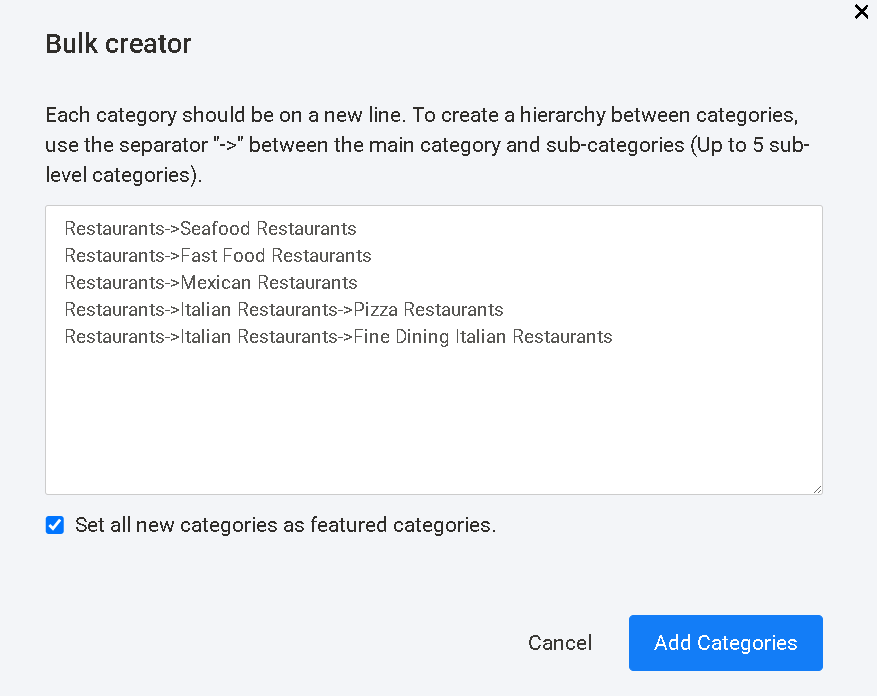
Method 2: Creating Categories in Bulk Using the Bulk Creator
If you need to create multiple categories at once, eDirectory provides the Bulk Creator tool, which allows you to quickly add multiple categories and subcategories.
Step 1
Navigate to Content Manager → Select Module (Listings / Events / Classifieds / Articles / Blog) → Categories → Bulk Creator
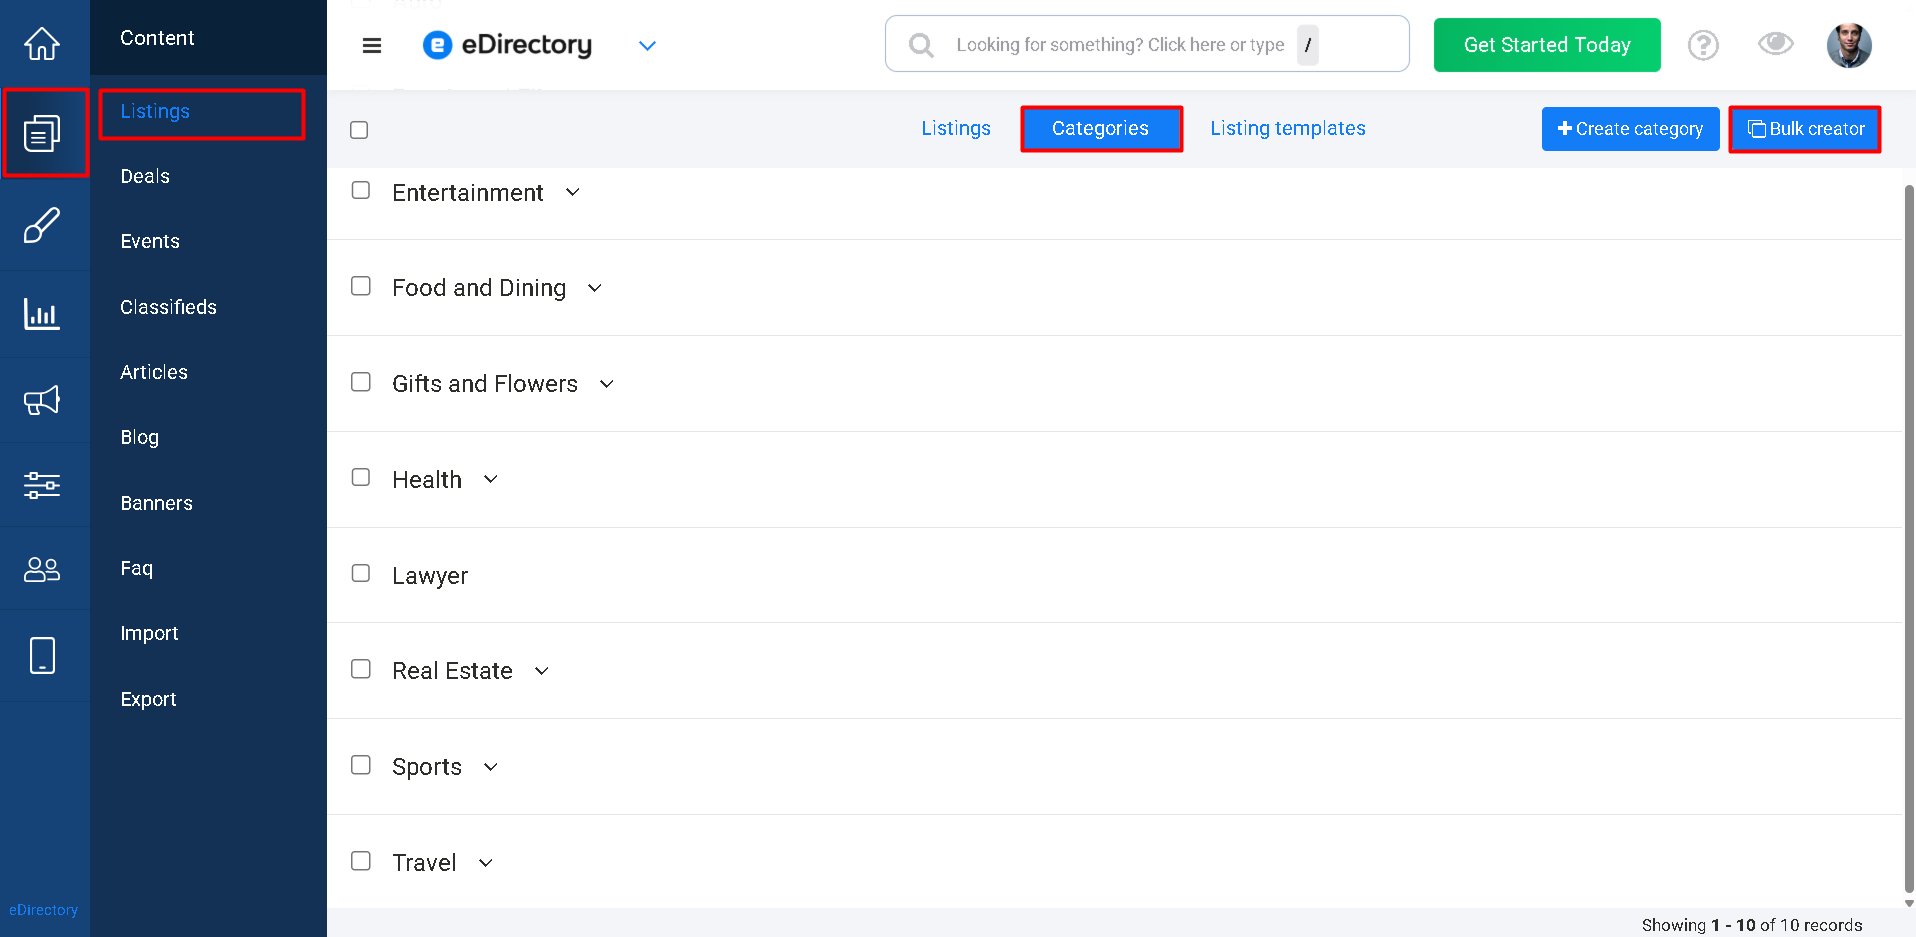
Step 2
A pop-up window will open where you can enter the categories you want to create.
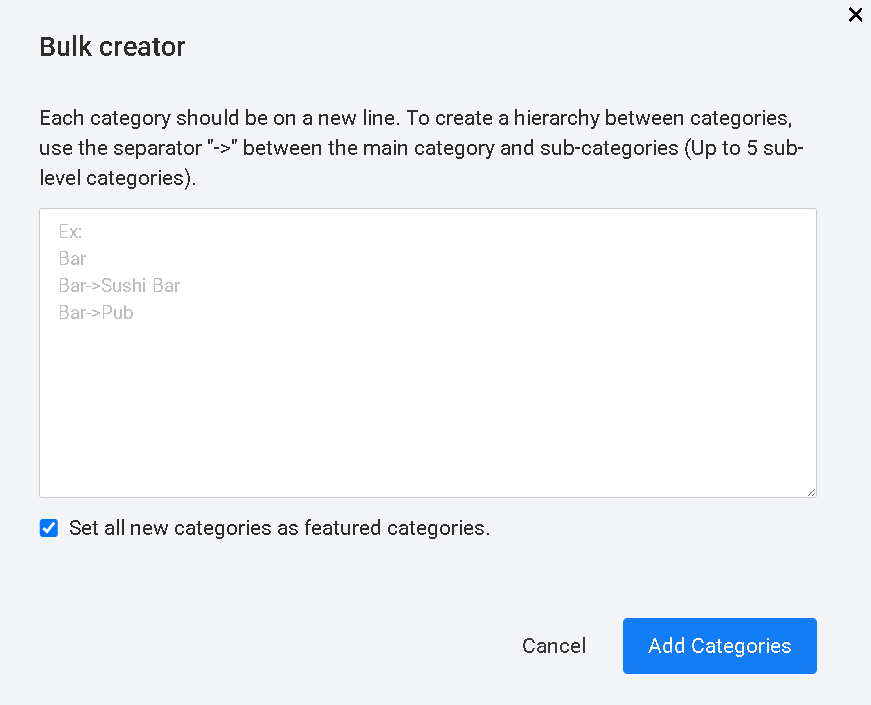
Creating Parent Categories Only
If you want to create only parent categories (Level 1), simply enter one category per line:
- Restaurants
- Hotels
- Shopping
- Automotive
- Healthcare
Each line will be created as an independent top-level category.
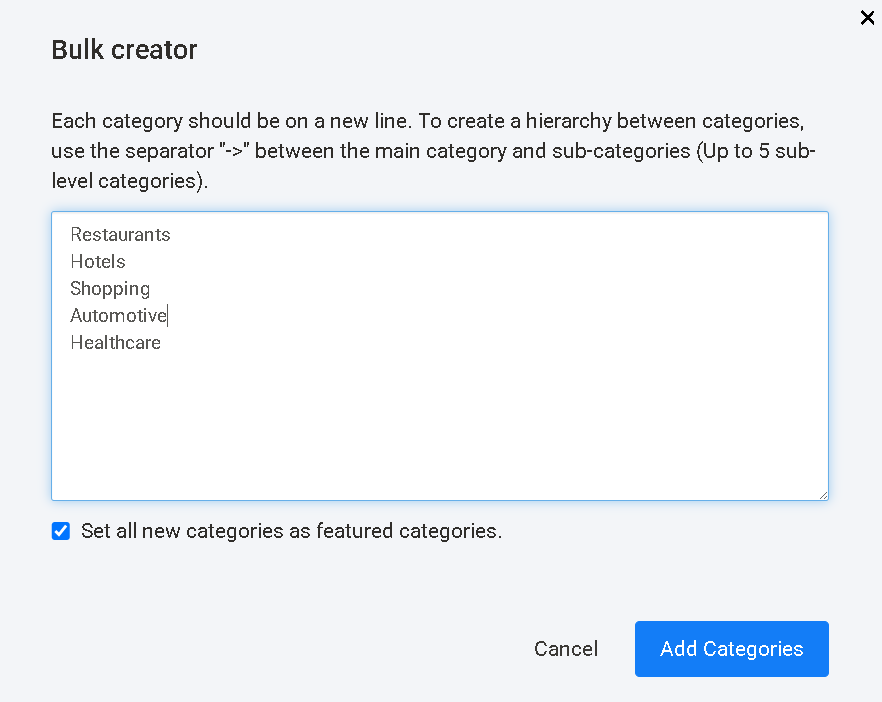
Creating Categories and Subcategories
If you want to create parent categories and subcategories at the same time, use the following structure:
Parent Category -> Subcategory
To create multiple category levels, continue using the -> symbol to represent each level of the hierarchy.
Using the example from this article, the structure would look like this:
Restaurants->Seafood Restaurants
Restaurants->Fast Food Restaurants
Restaurants->Mexican Restaurants
Restaurants->Italian Restaurants->Pizza Restaurants
Restaurants->Italian Restaurants->Fine Dining Italian Restaurants
After clicking Add Categories, eDirectory will automatically create the following structure:
Restaurants (Parent Category Level 1)
- Fast Food Restaurants (Child Category Level 2)
- Italian Restaurants (Child Category Level 2)
- Fine Dining Italian Restaurants (Child Category Level 3)
- Pizza Restaurants (Child Category Level 3)
- Mexican Restaurants (Child Category Level 2)
- Seafood Restaurants (Child Category Level 2)
Option: Set All New Categories as Featured
At the bottom of the Bulk Creator window, you will find the option: "Set all new categories as featured categories"
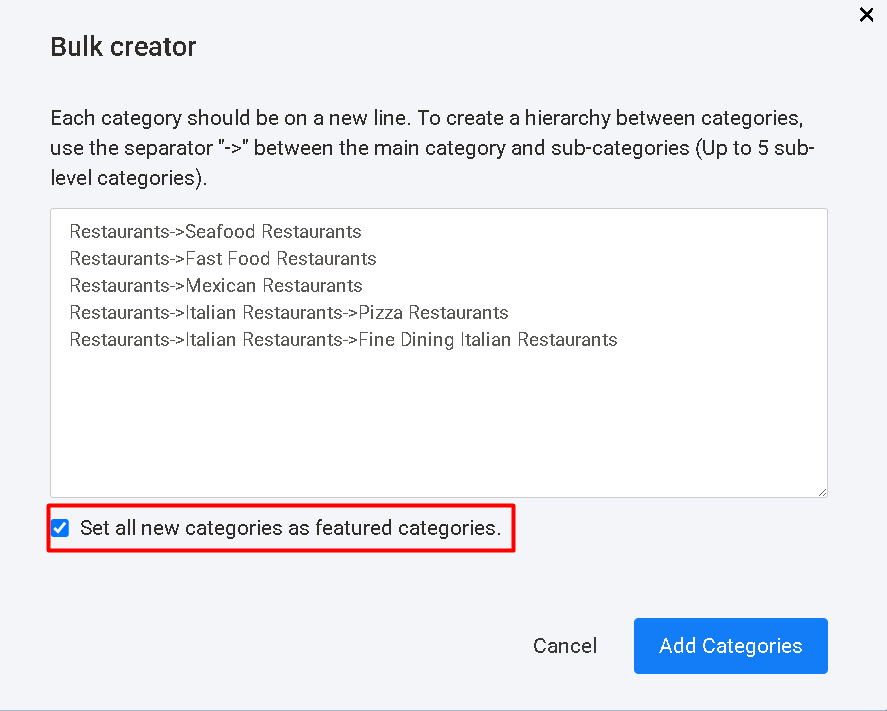
When this option is enabled, all newly created parent categories will automatically be marked as Featured.
This means they will be eligible to appear in category widgets, homepage category sections, and other public category displays, provided they also have active content assigned to them.
Important: Enabling this option does not guarantee that the category will immediately appear on your website. In addition to being marked as Featured, the category must also have at least one active item assigned to it in order to become eligible for public display.
Creating Categories Through Listing Templates
This method is available only for Listings.
Step 1
Navigate to Content Manager → Listings → Listing Templates
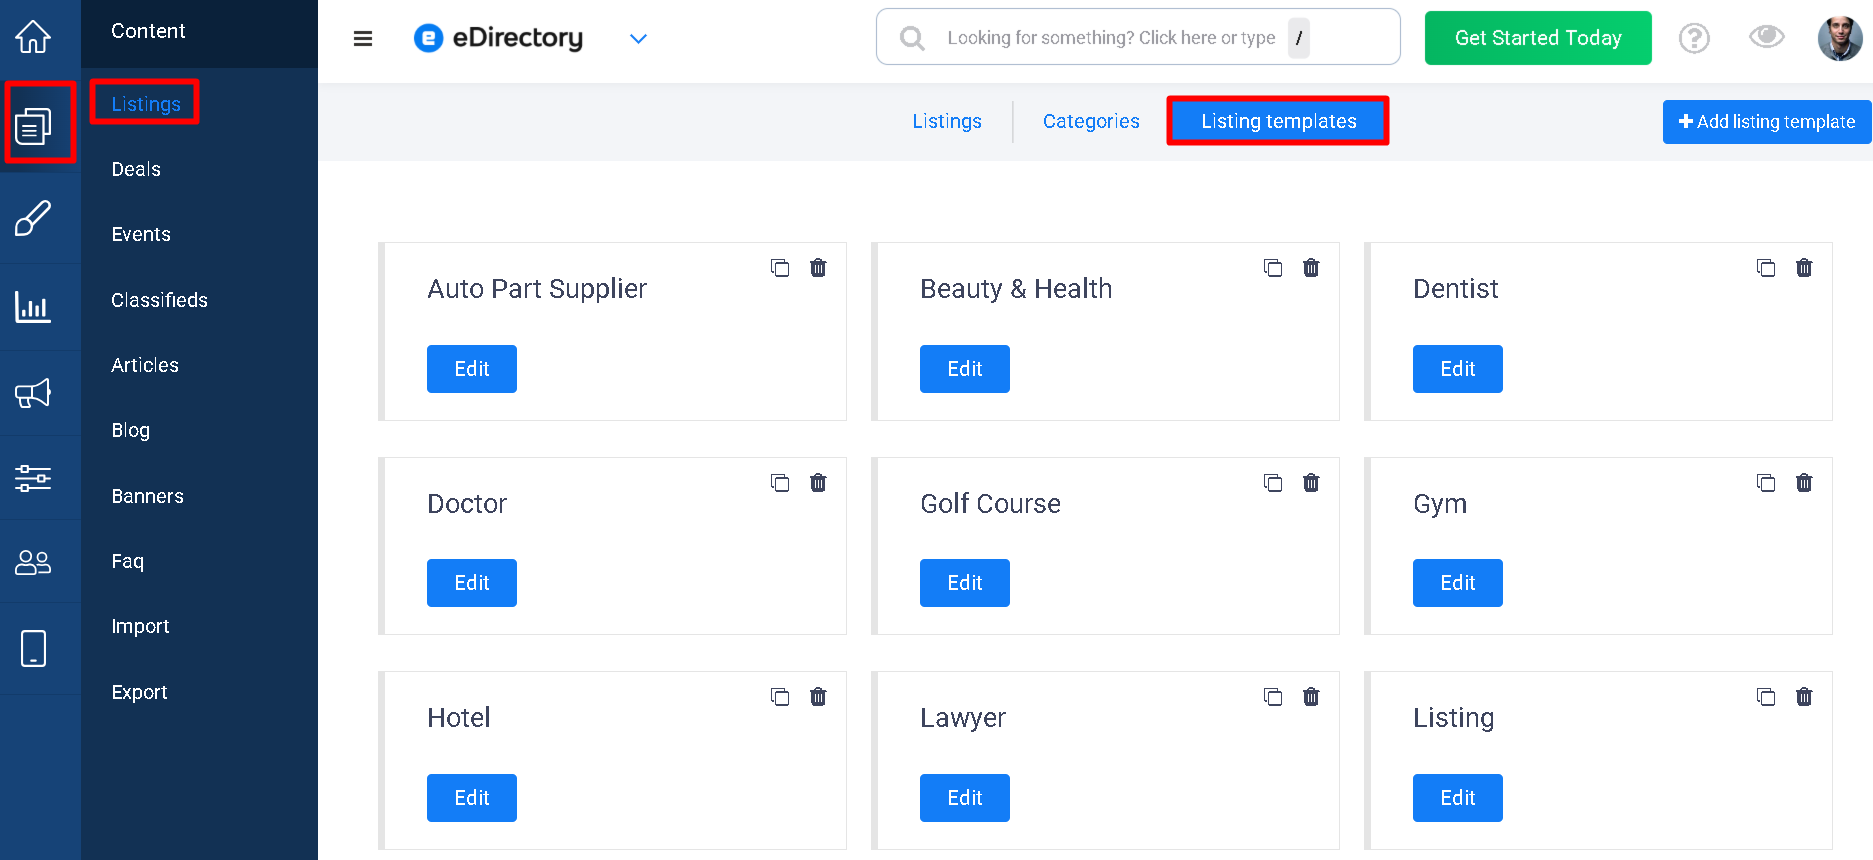
Step 2
Create a new template or edit an existing one.
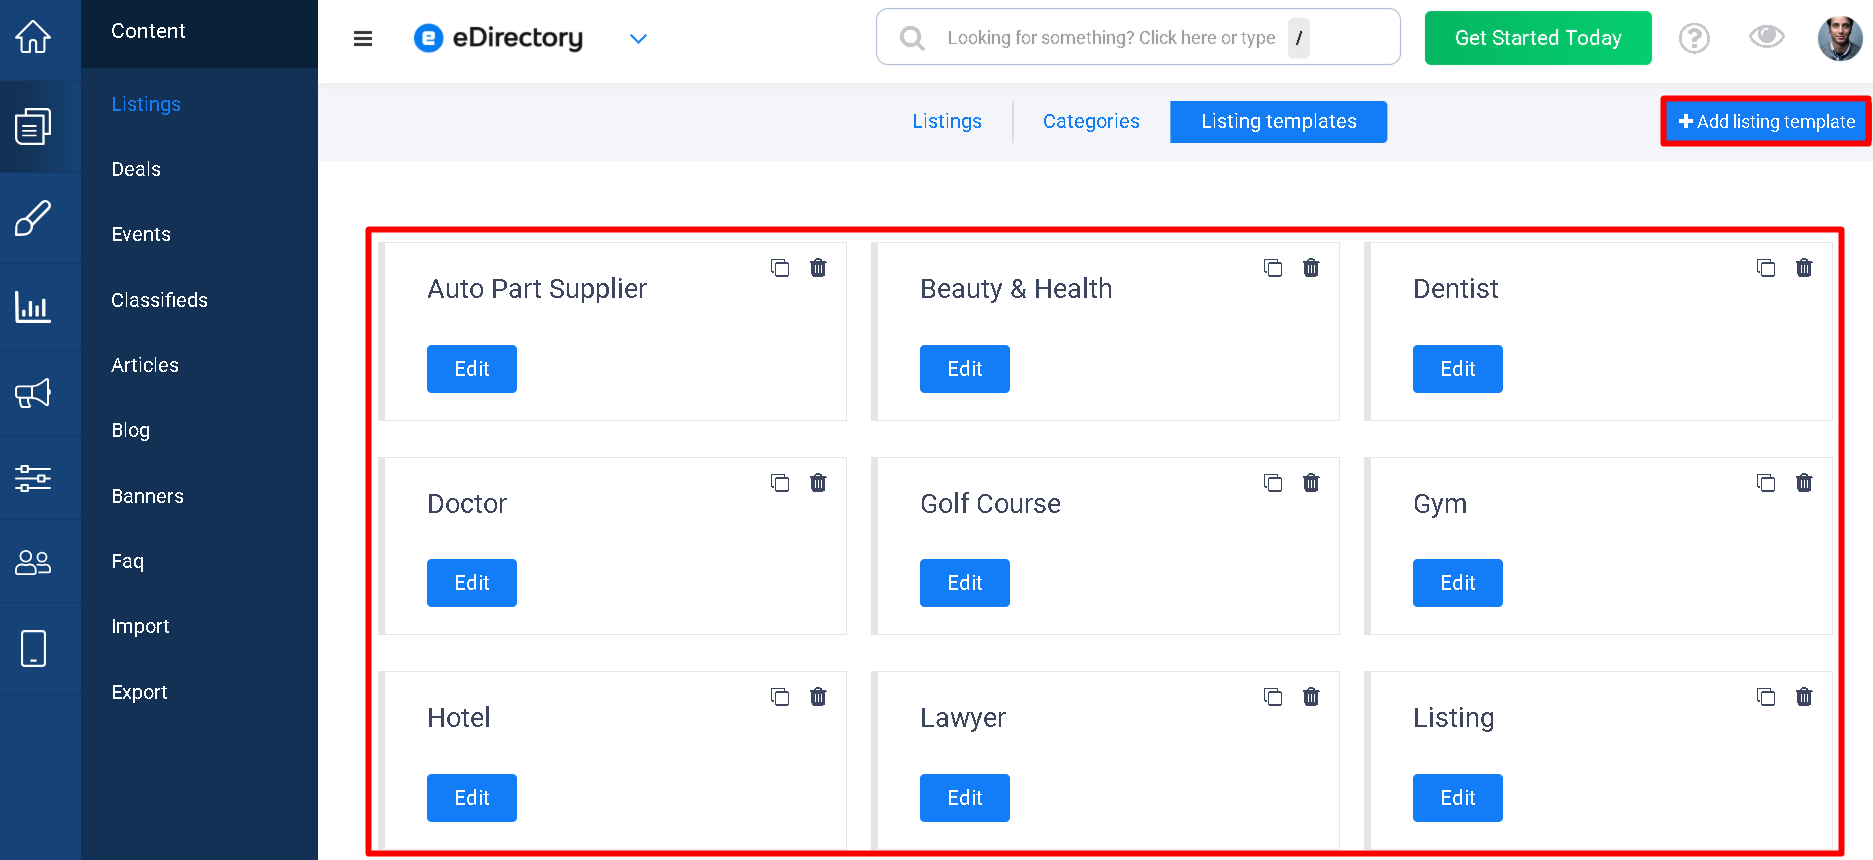
Step 3
Click + Create Category
Step 4
Enter the category name.
Step 5
Save the category.
Step 6
The category will be both created and assigned to the template automatically.
Step 7
Save the template.
Note: Categories assigned to a Listing Template help determine which categories are available when creating listings using that template. Understanding how Listing Templates and their assigned categories work can help you better organize your directory and streamline the listing submission process.
To learn more about Listing Templates, how categories assigned to templates work, and how templates affect listing creation and management, please refer to the following article: Listing Templates: Designing Powerful and Flexible Listing Pages in eDirectory
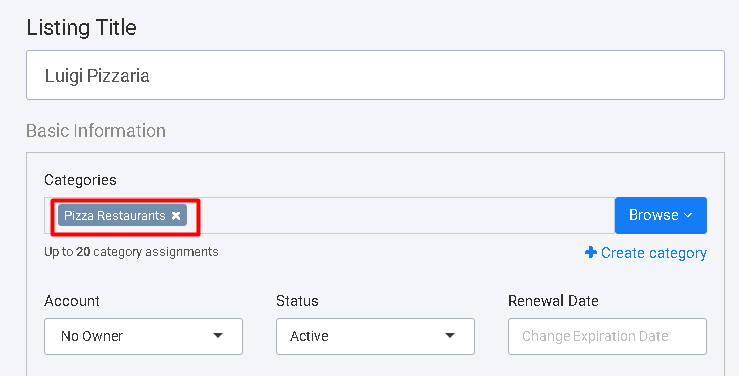
Creating Categories While Editing a Listing
You can also create categories directly while editing a listing.
Step 1
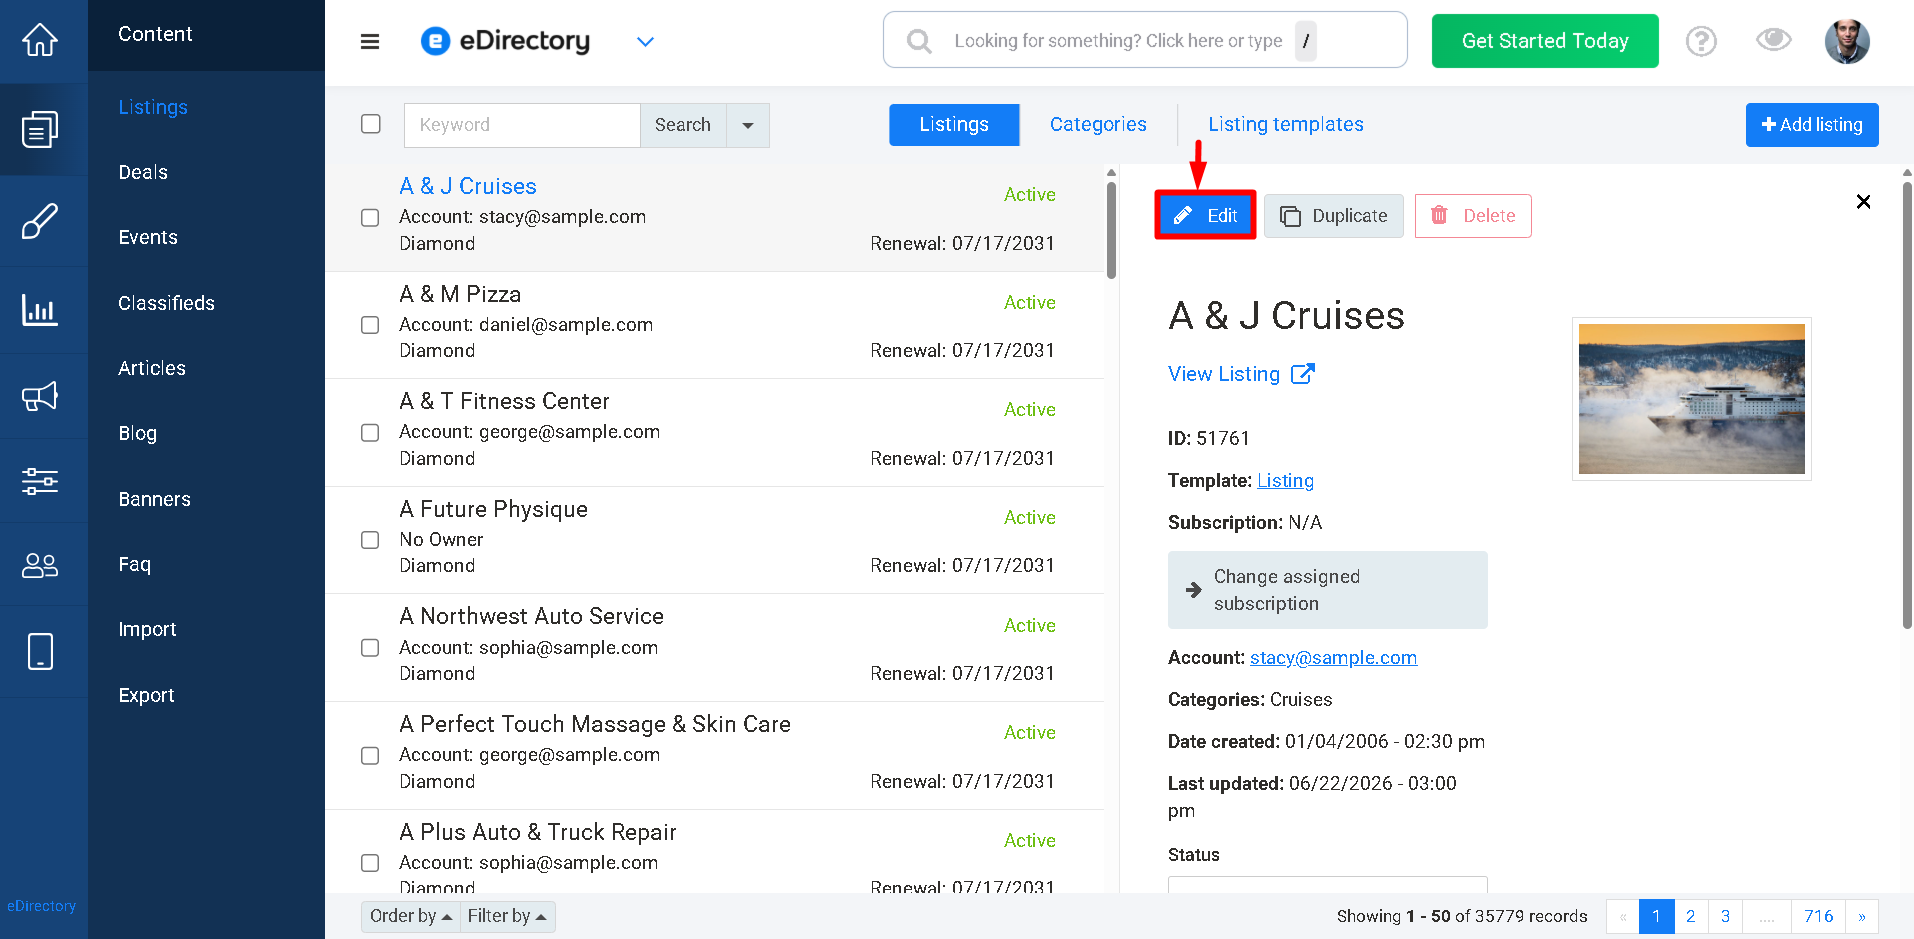
Navigate to Content → Listings
Step 2
Edit the desired listing.
Step 3
Click + Create Category
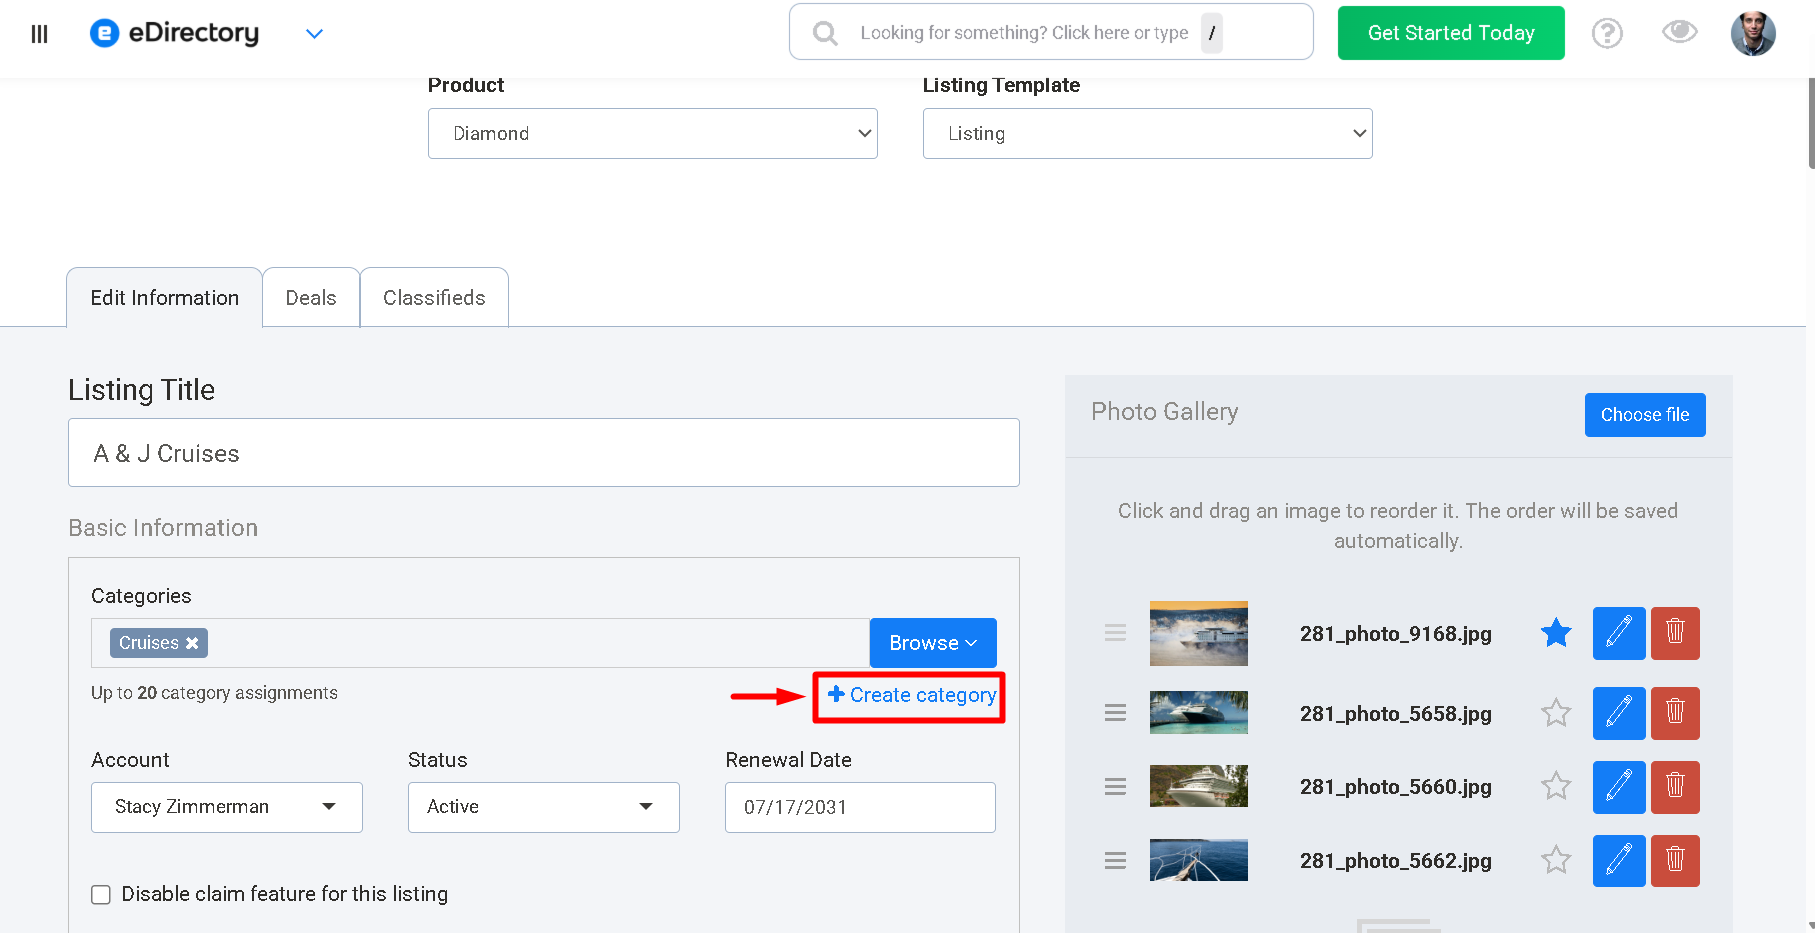
Step 4
Enter the category name.
Step 5
Save the category.
Step 6
Save the listing.
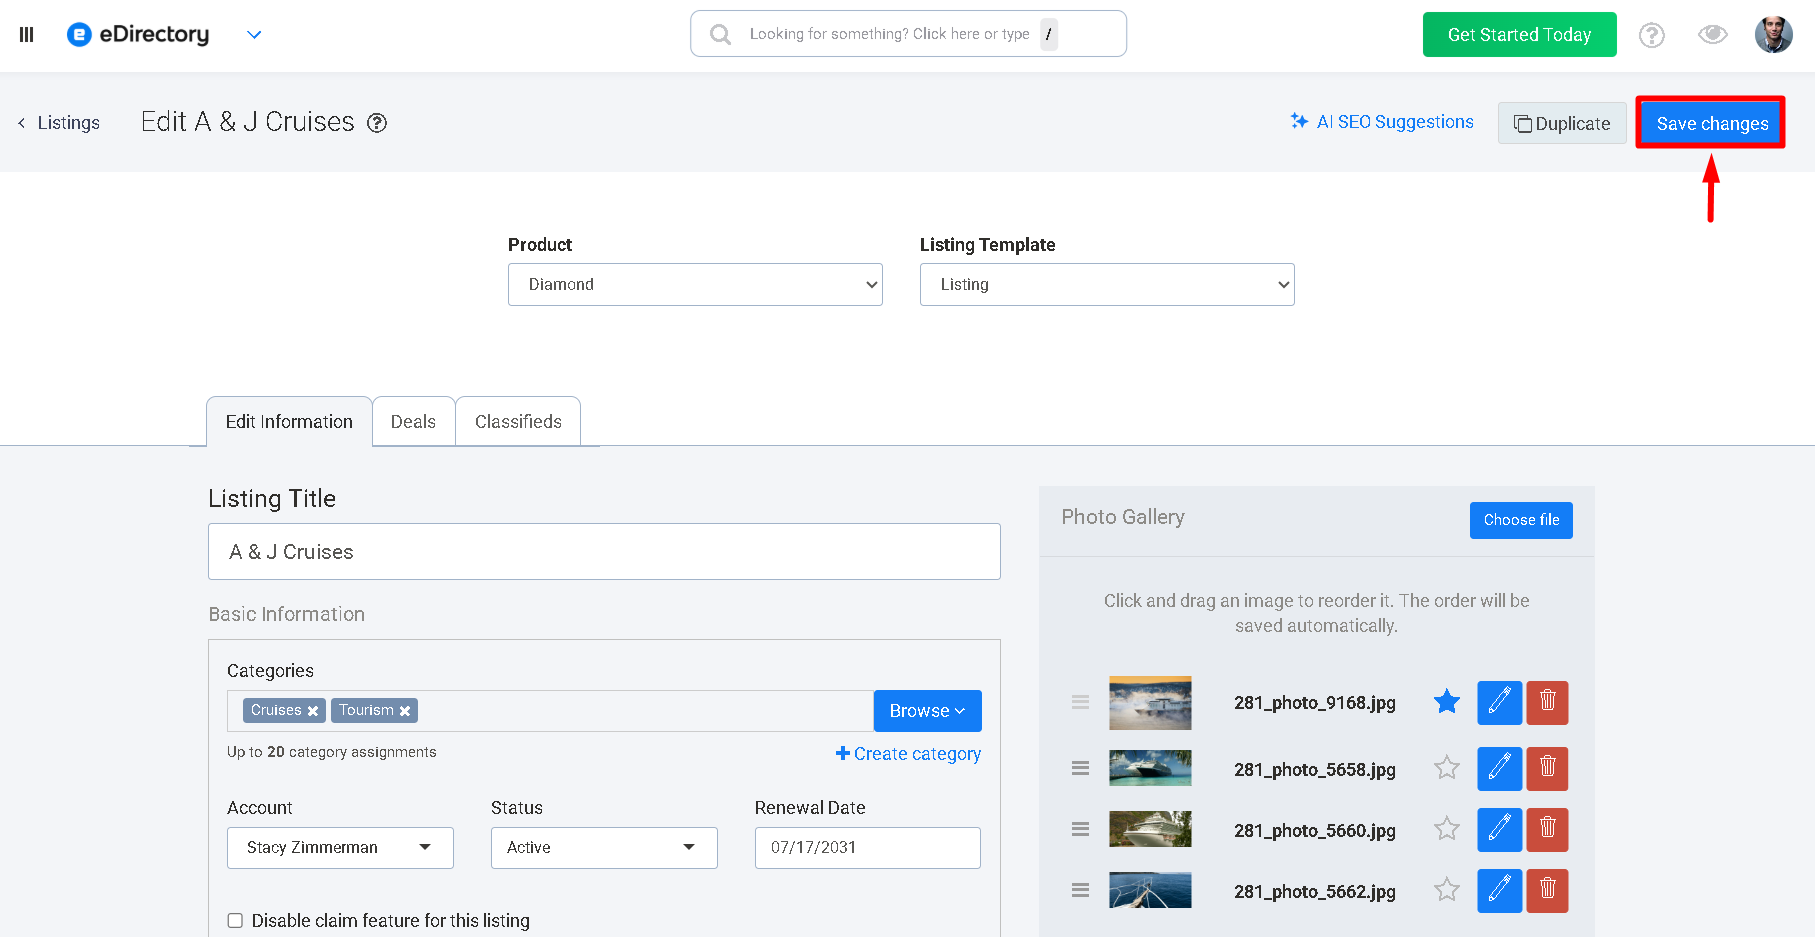
The new category will automatically become available throughout the system.
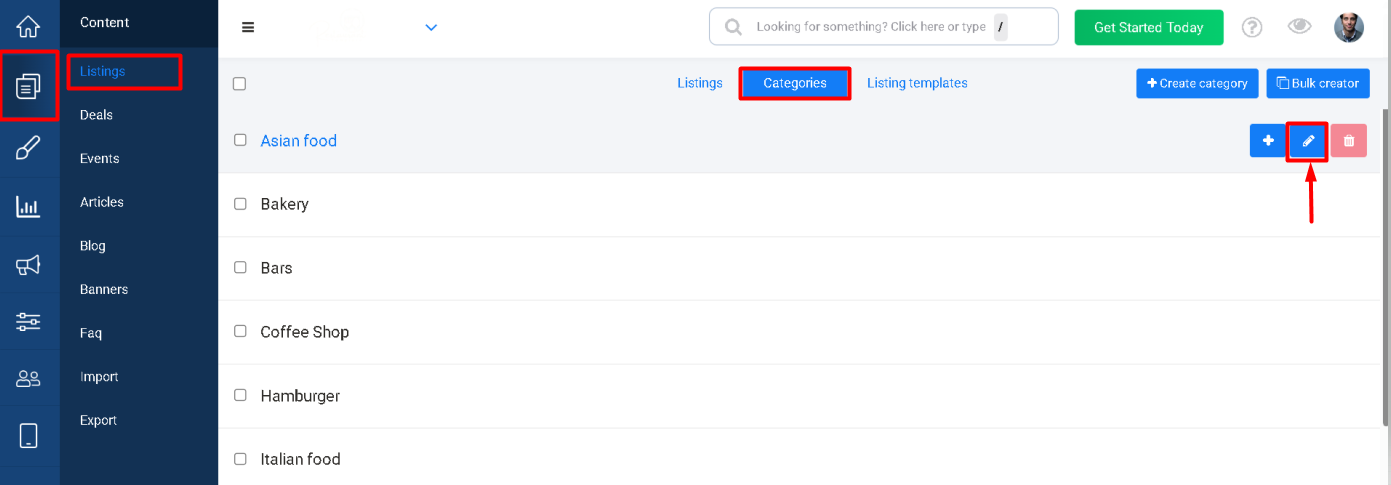
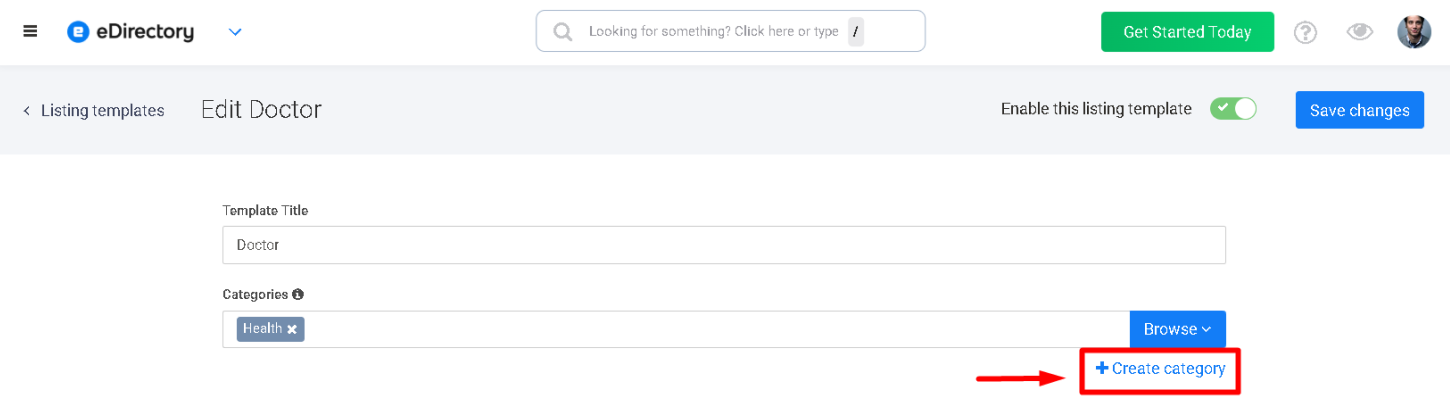
Editing a Category
To modify an existing category:
Step 1
Navigate to Content Manager → Select Module:Listings/Events/Classifieds/Articles/Blog → Categories
Step 2
Locate the category and click the pencil icon.
Step 3
Click Advanced Options.
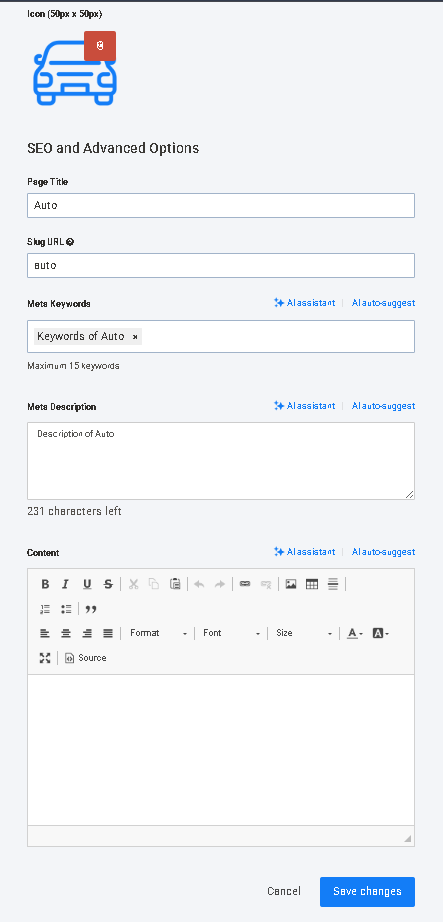
From here you can:
- Add category images
- Add descriptive content
- Configure SEO settings
- Mark the category as Featured
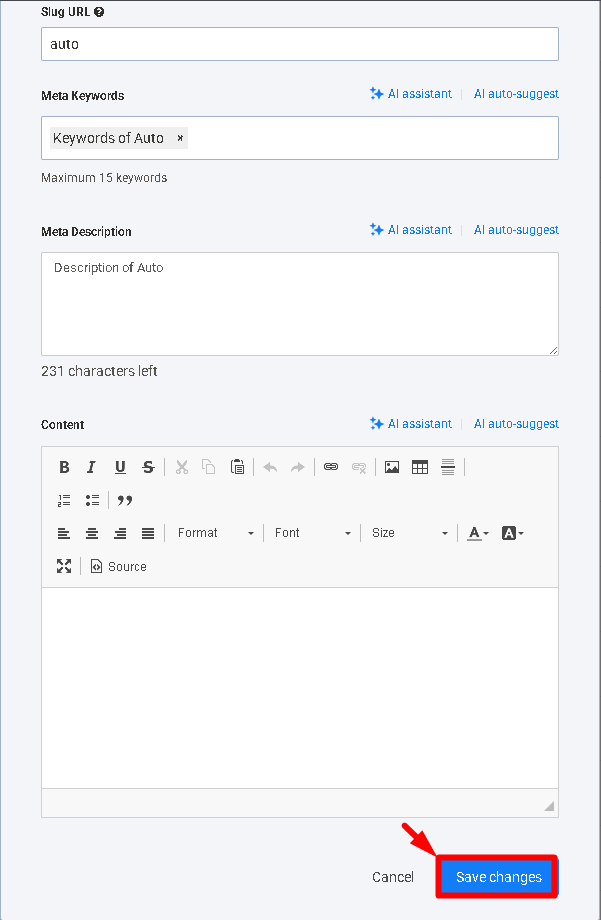
Step 4
Save your changes.
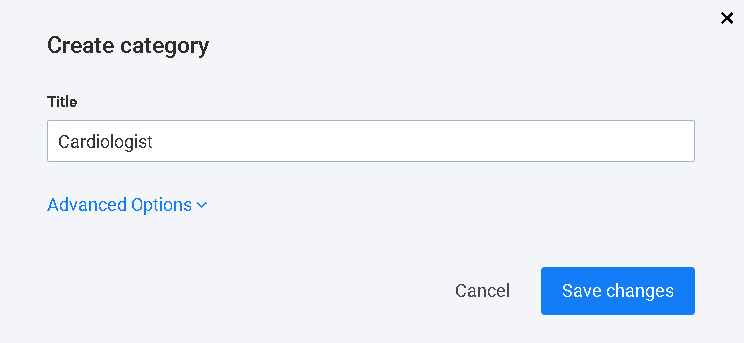
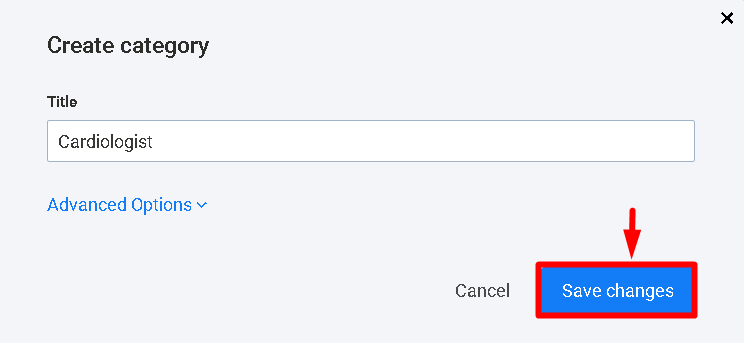
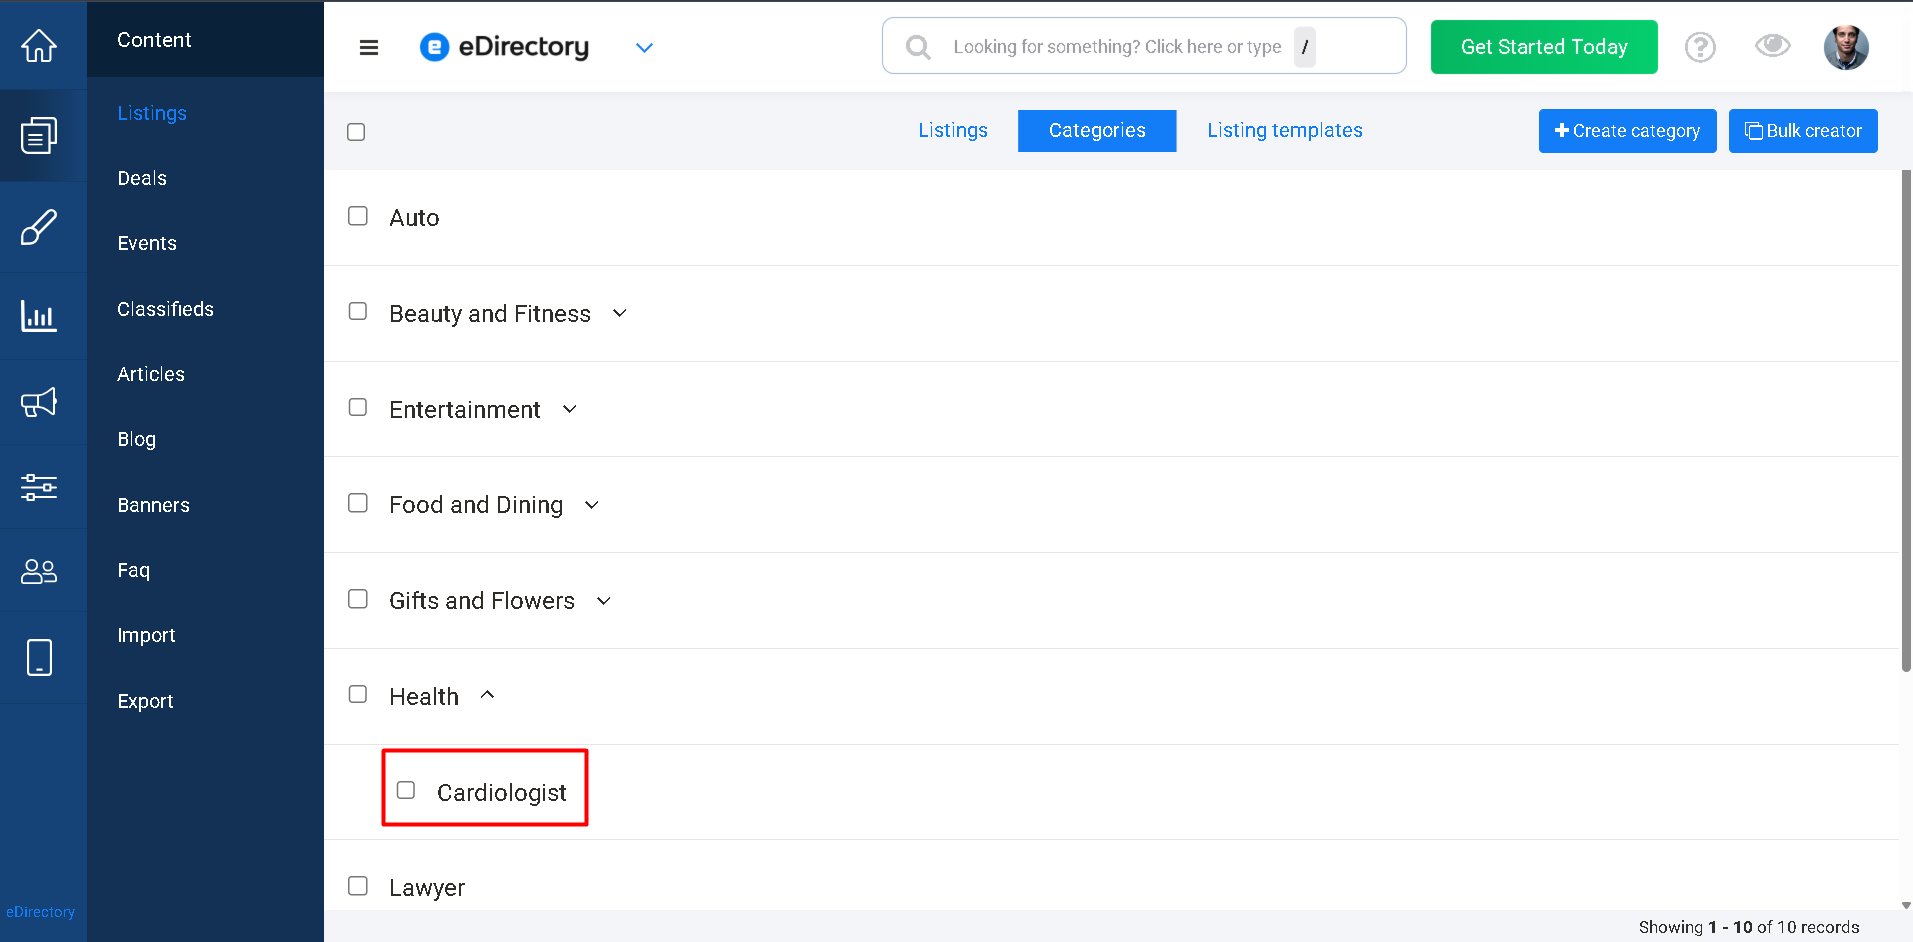
Creating a Subcategory
Subcategories help organize content into more specific groups.
Step 1
Navigate to Content → Select Module:Listings/Events/Classifieds/Articles/Blog → Categories
Step 2
Locate the parent category.
Step 3
Click the + icon.
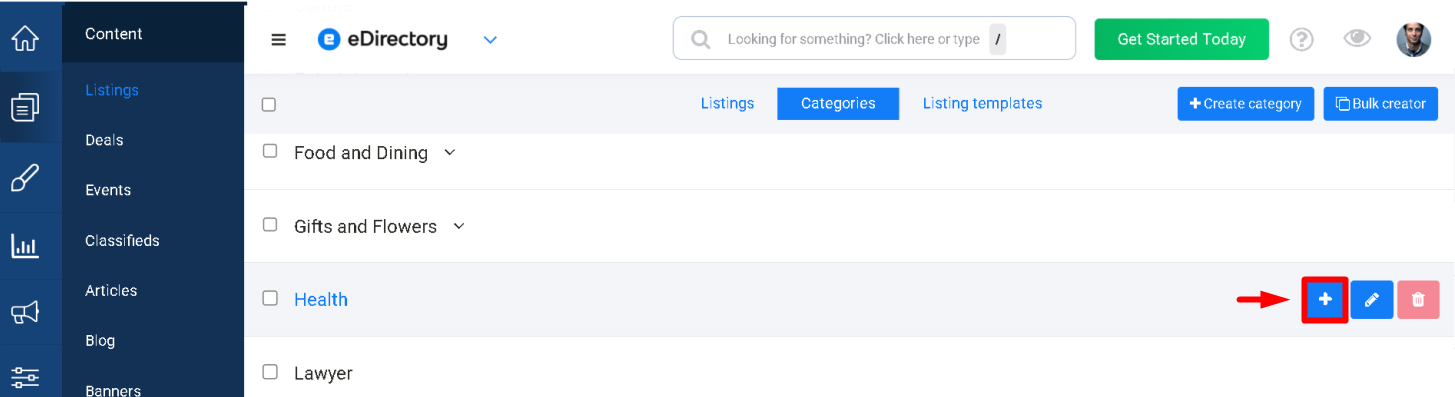
Step 4
Enter the subcategory name.
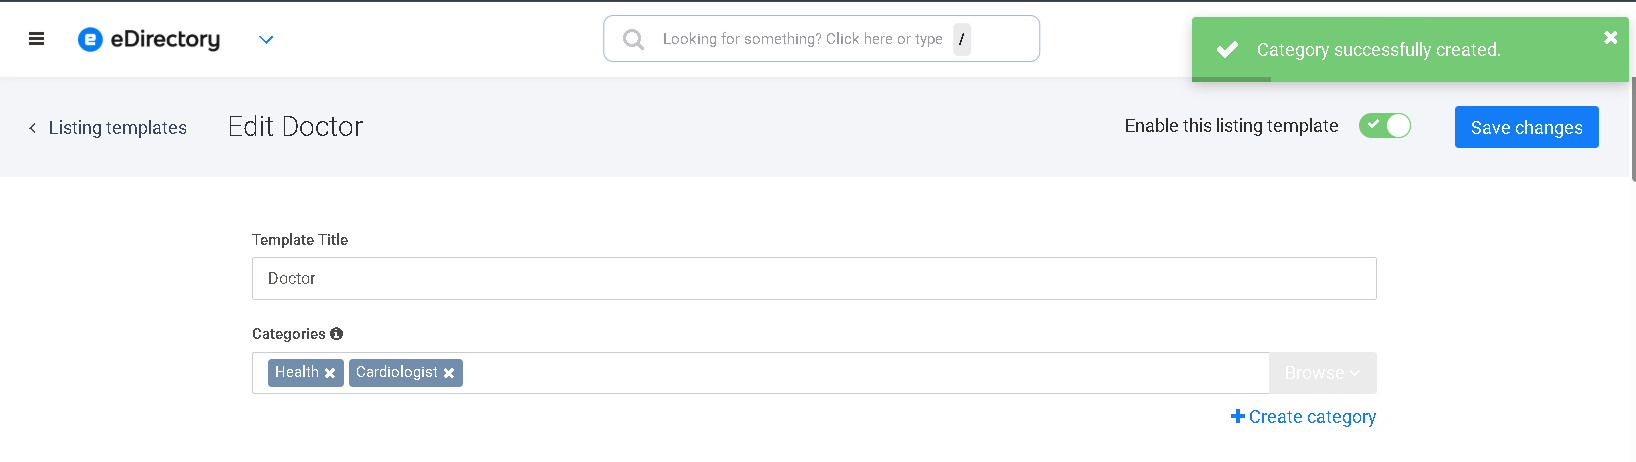
Example:
Parent Category: Health
Subcategory: Cardiologist
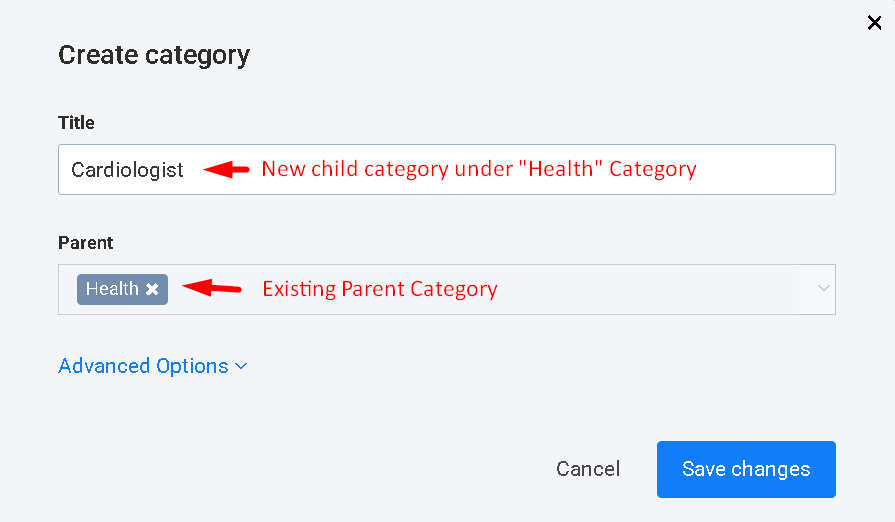
Step 5
Save the subcategory, and it will appear underneath the parent category.
Important Note: Once a subcategory is created, it cannot be moved to a different parent category or category level. If a different structure is needed, you must create a new category and reassign the content.
Deleting a Category
If a category is no longer needed, it can be removed.
Step 1
Navigate to Content → Select Module:Listings/Events/Classifieds/Articles/Blog → Categories
Step 2
Locate the category.
Step 3
Click the trash can icon.

Important Note: If a category is assigned to listings, events, articles, classifieds, or blog posts, deleting the category will remove those associations. Before deleting a category, make sure any content assigned to it has been reviewed and reassigned if necessary.
Frequently Asked Questions (FAQ)
Why is my category not showing on the homepage or public site?
The most common reasons are:
- The category is not marked as Featured.
- The category is not assigned to any active content.
- The content assigned to the category is inactive or expired.
For a category to be eligible for display in category sections, it should generally:
- Be marked as Featured.
- Have at least one active item assigned to it.
For example, if you create a category called Restaurants but no active listings are assigned to it, visitors may not see it on the website even though the category exists in the Site Manager.
Review the listings, events, articles, or other content assigned to the category and confirm that they are active.
Does creating a category automatically make it visible on my website?
No.
Creating a category only adds it to your site's category structure. It does not automatically appear on the homepage, category widgets, or other public areas of the website.
To make a category eligible for display:
- Enable the Featured option in the category settings.
- Assign at least one active item to the category.
Think of categories as containers. Creating the container alone does not automatically display it to visitors.
What is the difference between a Featured category and a non-Featured category?
A Featured category is eligible to appear in category widgets, homepage category sections, and other public category displays.
A non-Featured category can still be used to organize content, but it may not appear in those featured category areas.
For example:
- Featured Category: Restaurants
- Non-Featured Category: Internal Vendors
Both categories can contain listings, but only the Featured category is intended to be displayed prominently throughout the site.
Can I create a category without assigning any listings or content to it?
Yes.
You can create categories in advance and assign content later.
However, categories without active content may not appear publicly, even if they are marked as Featured.
Many Site Managers create their category structure first and then populate it with listings afterward.
Can I assign multiple categories to the same listing?
Yes.
A listing can belong to multiple categories, allowing it to appear in more than one area of your directory.
For example, a dental clinic could be assigned to:
- Healthcare
- Dentists
- Cosmetic Dentistry
This helps visitors find the listing through different browsing paths.
Can I move a subcategory to another parent category?
No.
Once a subcategory has been created, eDirectory does not allow it to be moved to a different parent category or category level.
If you need a different structure, you must:
- Create a new category under the desired parent.
- Reassign the content.
- Delete the old category if it is no longer needed.
Can I rename a category?
Yes.
Navigate to Content Manager → Module → Categories
Click the pencil icon next to the category and update the title.
After saving, the new name will be reflected throughout the site wherever that category appears.
Can I delete a category without deleting the listings assigned to it?
Yes.
Deleting a category does not automatically delete the listings themselves.
However, removing a category may affect how visitors find those listings, especially if that category was their primary method of navigation.
Before deleting a category, review any associated content and reassign it if necessary.
Can deleted categories be restored?
No.
Once a category is deleted, it cannot be restored automatically through the Site Manager.
If a category is removed by mistake, it will need to be recreated manually.
For this reason, we recommend reviewing category assignments carefully before deleting any category.
How many category levels can I create?
For Listings, Events, Classifieds, and Articles, eDirectory supports up to five category levels:
- Parent Category Level 1
- Child Category Level 2
- Child Category Level 3
- Child Category Level 4
- Child Category Level 5
The Blog Module supports only one category level and does not allow subcategories.
Why do I see duplicate categories?
Duplicate categories are often created during imports when category names are not identical.
For example:
- Restaurant
- Restaurants
Although they appear similar, eDirectory treats them as separate categories because the names are different.
Even a single character difference causes eDirectory to treat them as separate categories.
To avoid duplicates, ensure category names are standardized before importing content.
Why is my category showing but the listing is not?
A category can appear publicly because it is marked as Featured and has active content assigned to it. However, if a specific listing is not appearing, verify that:
- The listing is active.
- The listing has not expired.
- The listing is assigned to the category.
Conclusion
Categories are one of the most important organizational tools in eDirectory. Properly structured categories make it easier for visitors to navigate your directory and find relevant content.
Remember that creating a category does not automatically make it visible on your website. To display publicly, a category must typically be marked as Featured and be associated with active content. If a category is not appearing where expected, these should be the first settings you verify.
Remember that creating a category does not automatically make it visible on your website. To display publicly, a category must typically be marked as Featured and be associated with active content. If a category is not appearing where expected, these should be the first settings you verify.
Understanding category hierarchy, category inheritance, and featured category widgets will help you build a well-organized directory and avoid the most common category-related issues.