
Setting Up Awards & Badges for Listings
Introduction
Awards & Badges allow you to highlight listings by displaying visual badges that recognize achievements, certifications, sponsorships, or any other distinction you want to showcase.
Badges help listings stand out from competitors, increase credibility, and draw more attention from visitors browsing your directory.
As the Site Manager, you can:
- Upload your own badge images.
- Assign badges manually to listings.
- Allow listing owners to select specific badges themselves (optional).
This guide will walk you through creating badges, enabling the feature for your listing levels, and assigning badges to listings.
Step 1: Enable Listing Badges
Before badges can be assigned, the Listing Badges feature must be enabled for the appropriate listing level.
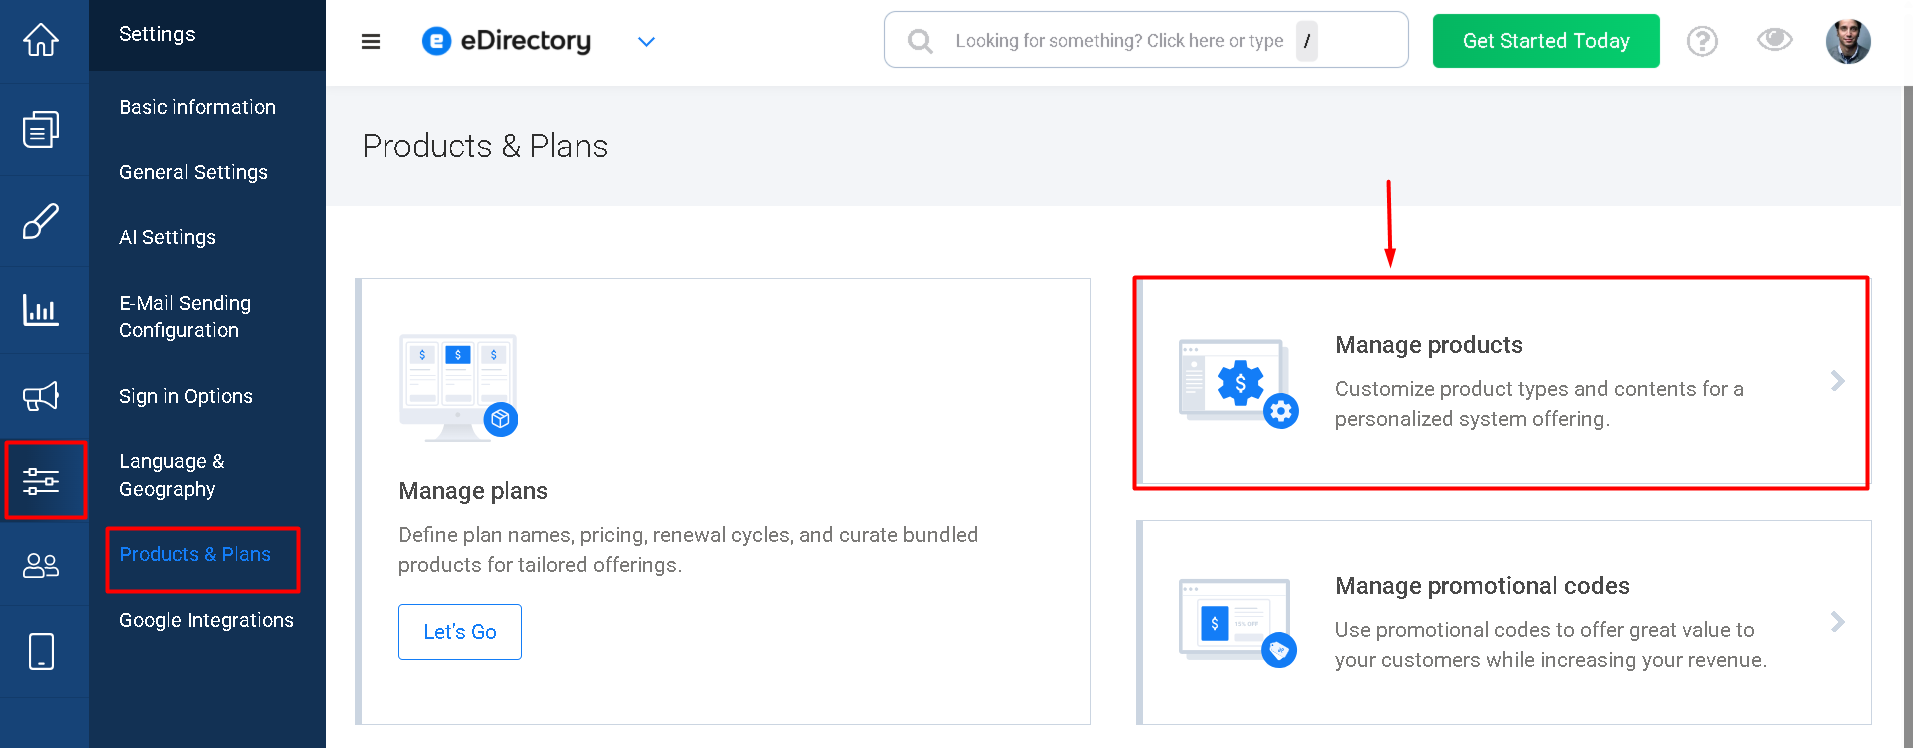
1.1. Navigate to Manage Products
From your Site Manager, navigate to Settings → Products & Plans → Manage Products
1.2. Edit the Desired Product
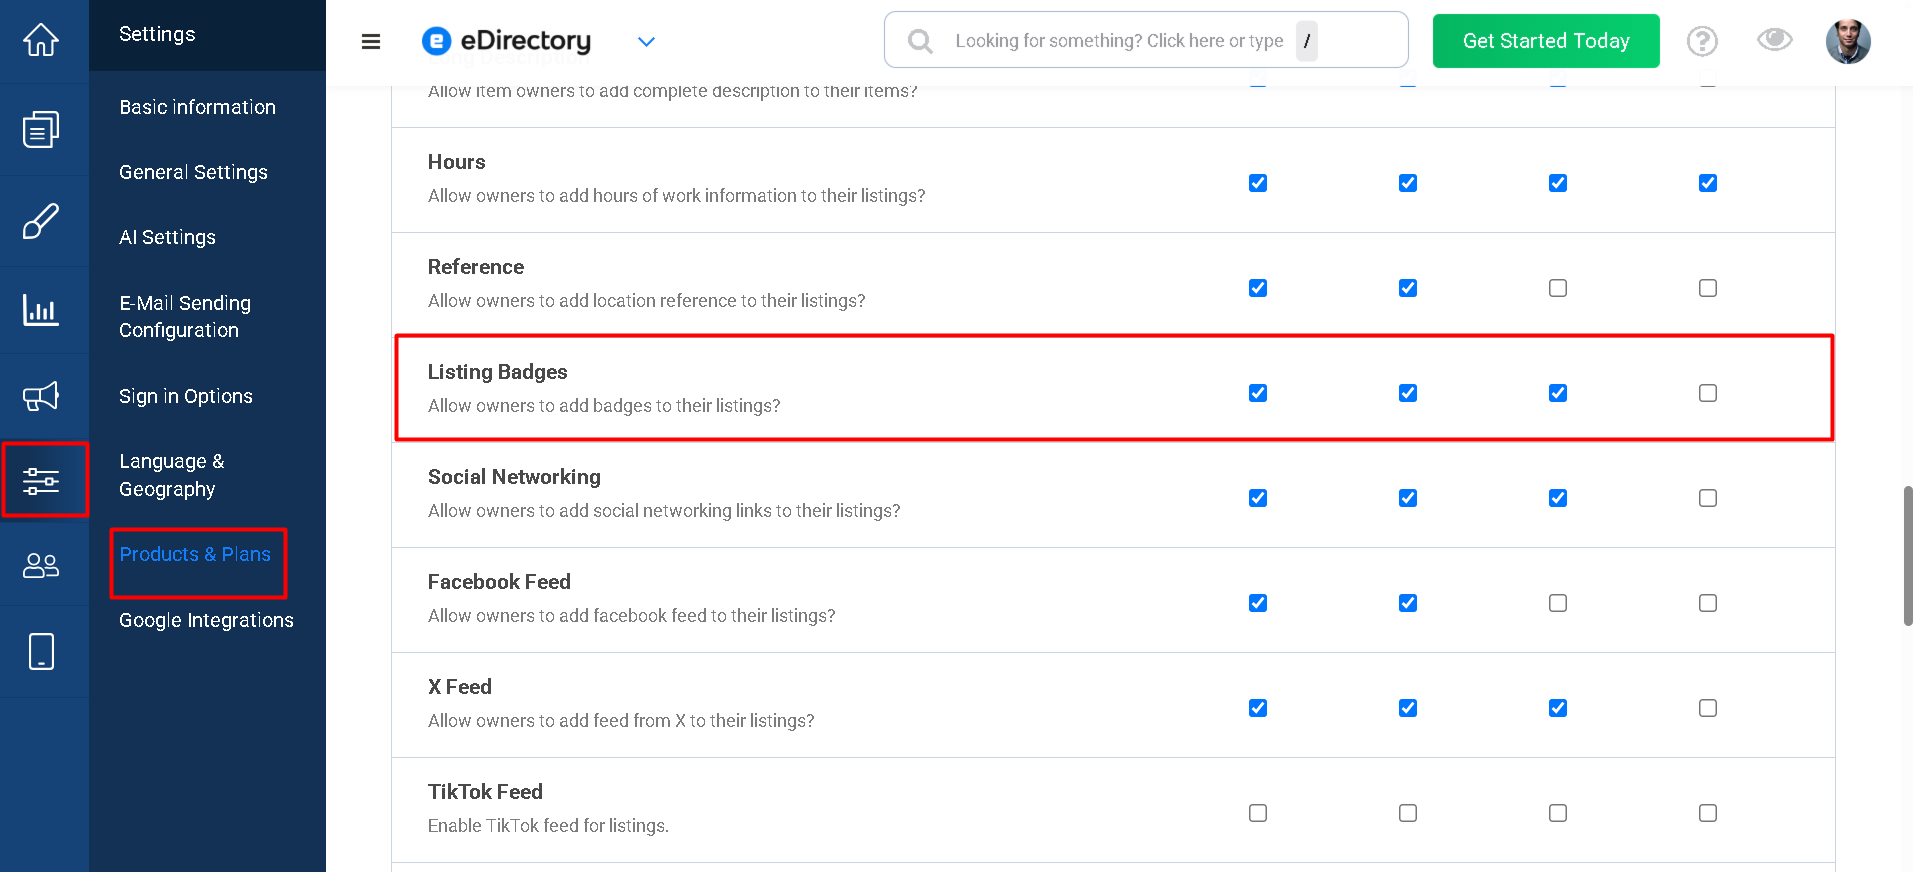
Select the Listing Product you want to allow badges for.
1.3. Enable Listing Badges
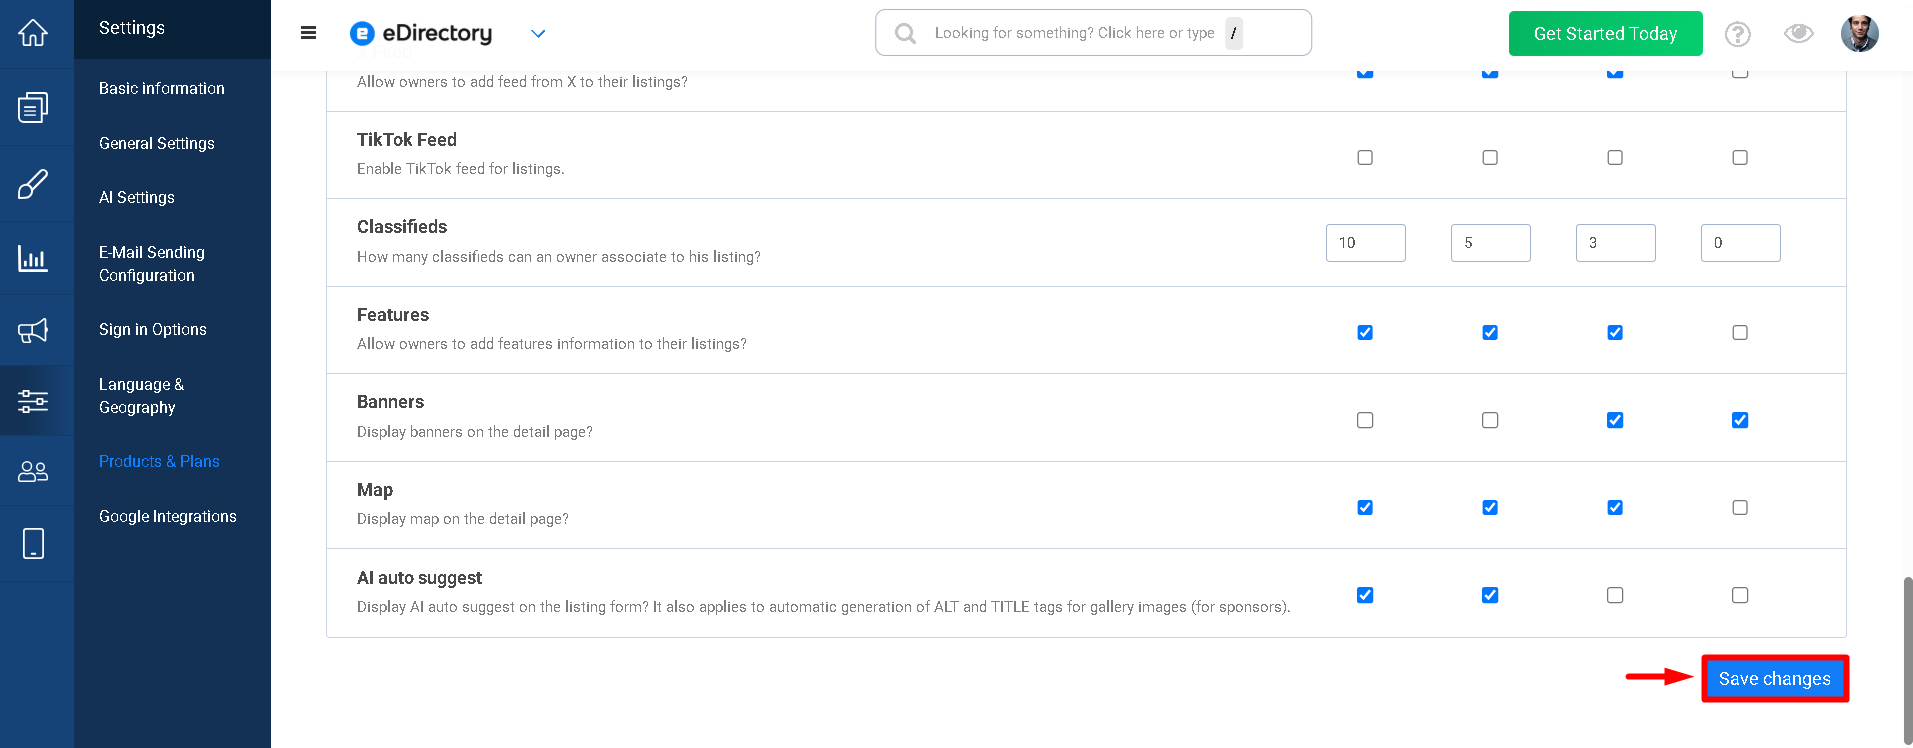
Once enabled, click Save Changes to apply the configuration. Listings assigned to this product will now support Awards & Badges, allowing badges to be assigned and displayed on their listing pages.
Step 2: Create a Badge
Now you'll create the badges that can be assigned to listings.
2.1. Navigate to Awards & Badges
Go to Promote → Awards & Badges
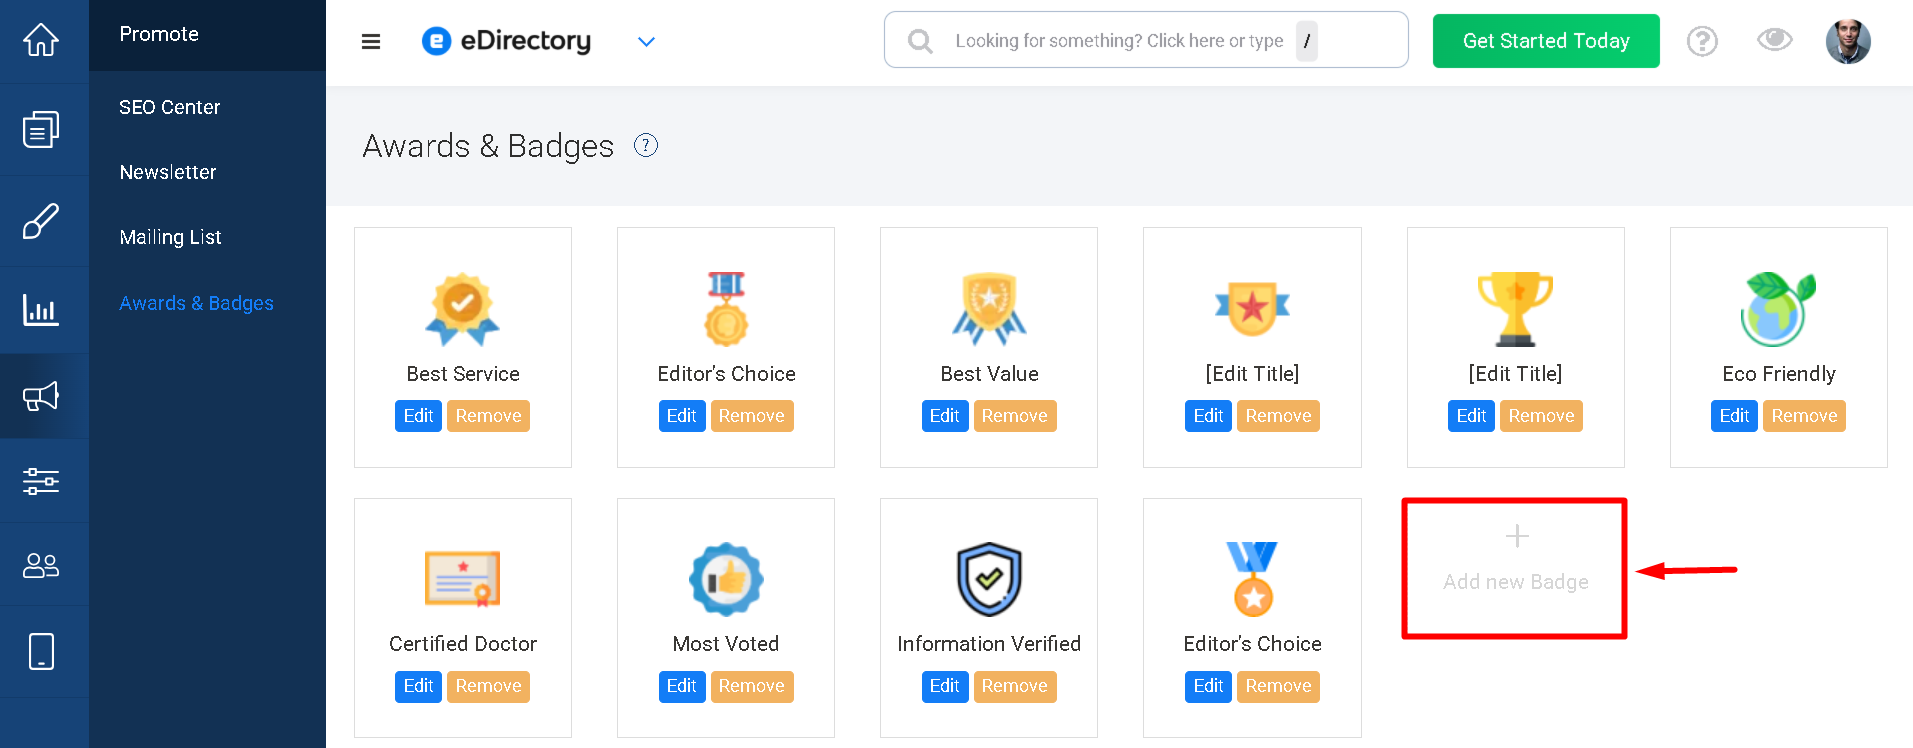
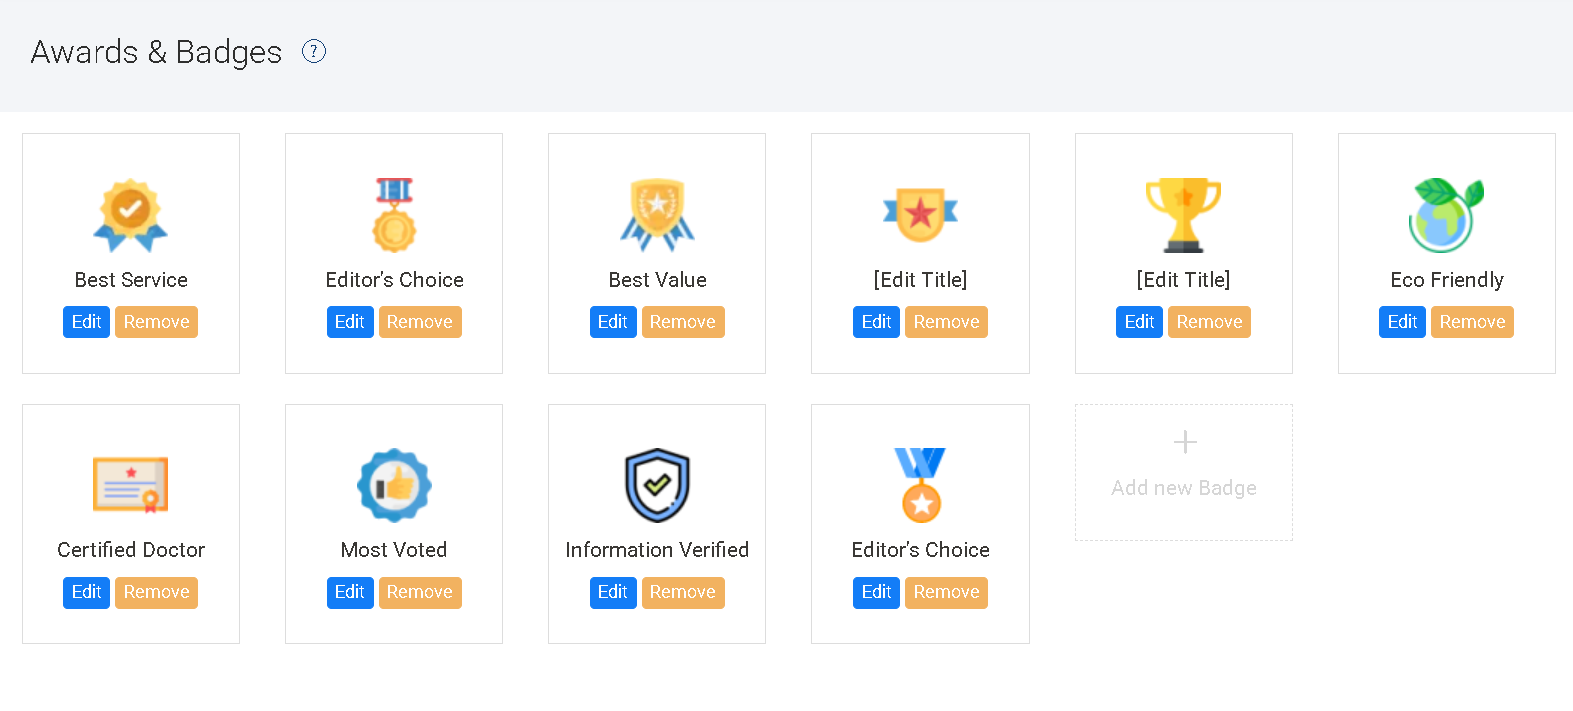
2.2. Click "Add New Badge"
Click the Add New Badge button.
2.3. Configure the Badge
Complete the following information:
Badge Name
Enter a descriptive name for the badge.
Examples:
- Best Restaurant 2026
- Certified Business
- Featured Partner
- Top Rated
Badge Image
Upload the image that will represent this badge on your website.
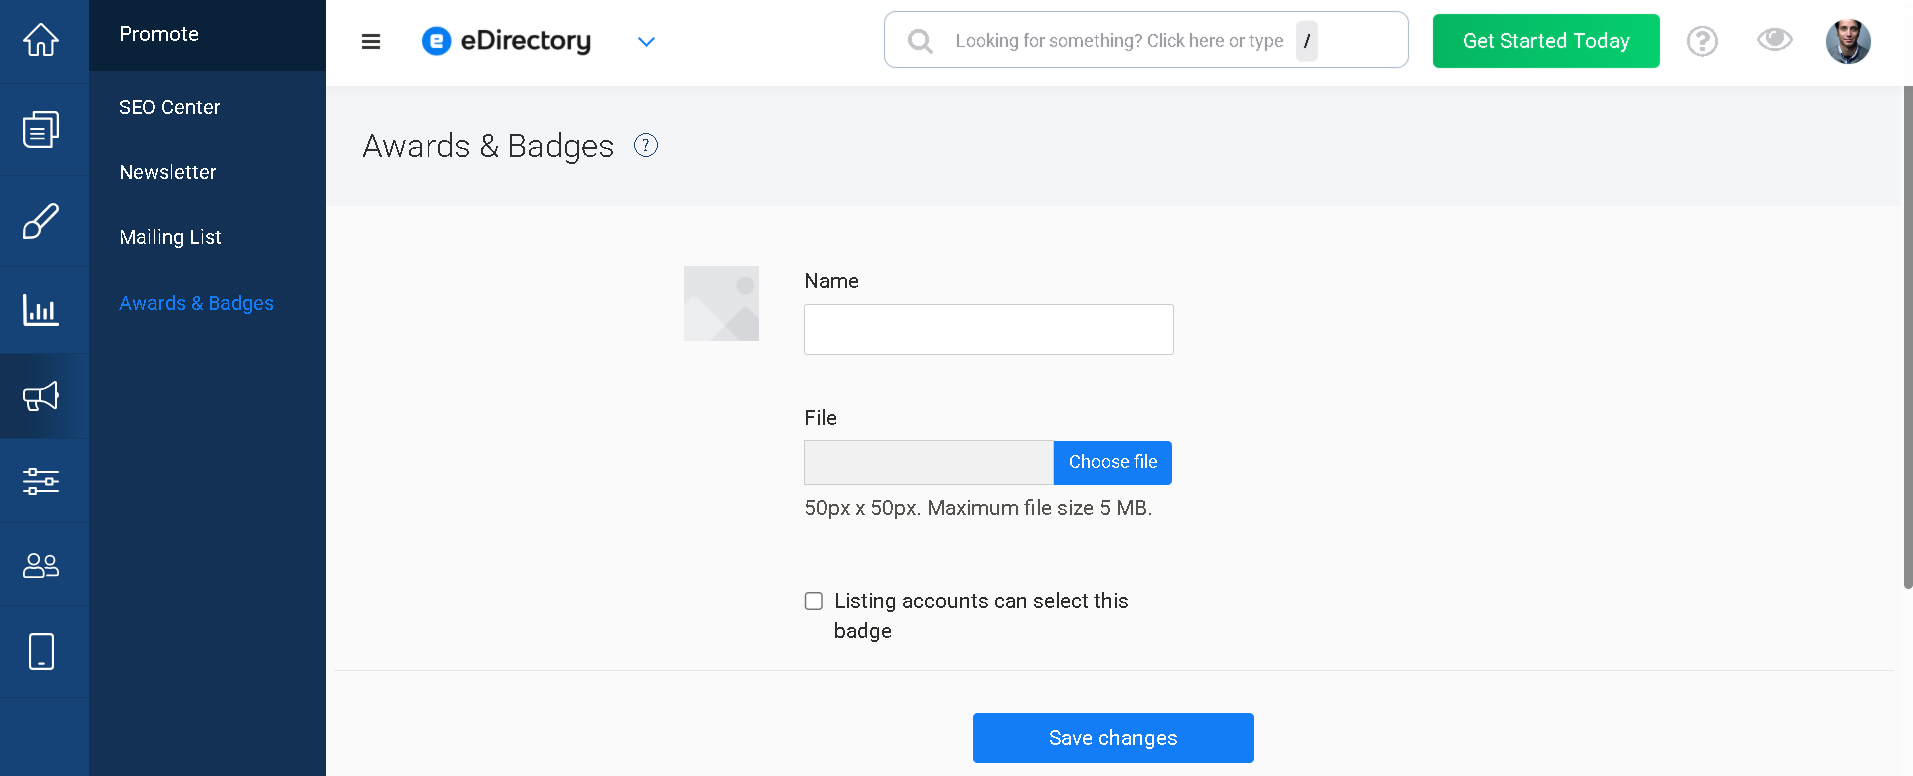
Notice: if you want listing owners to be able to choose this badge themselves when editing their listing, enable: Listing accounts can select this badge.
If this option remains disabled, only Site Managers will be able to assign this badge.
2.4. Save the Badge
- Click Save Changes.
- Your badge is now available to be assigned to listings.
Step 3: Assign a Badge to a Listing
After creating the badge, you can assign it to any listing.
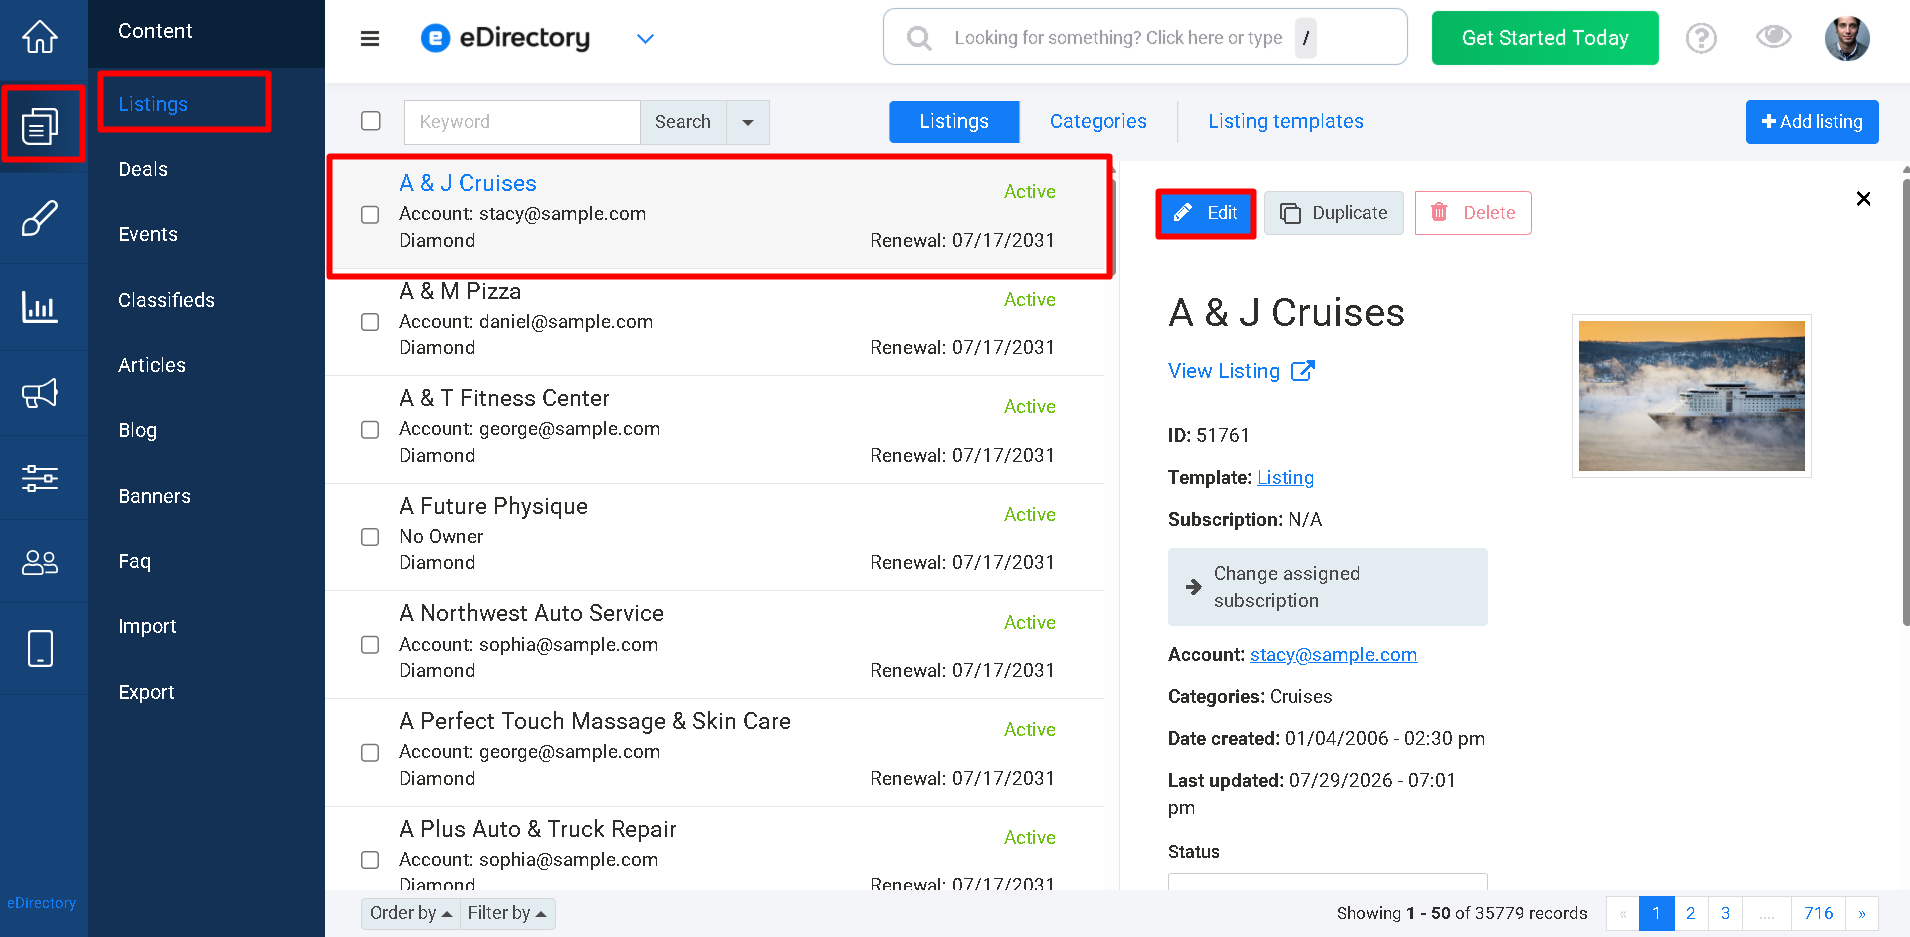
3.1. Navigate to Listings
Go to Content → Listings
3.2. Edit the Listing
Locate the listing that should receive the badge and click Edit.
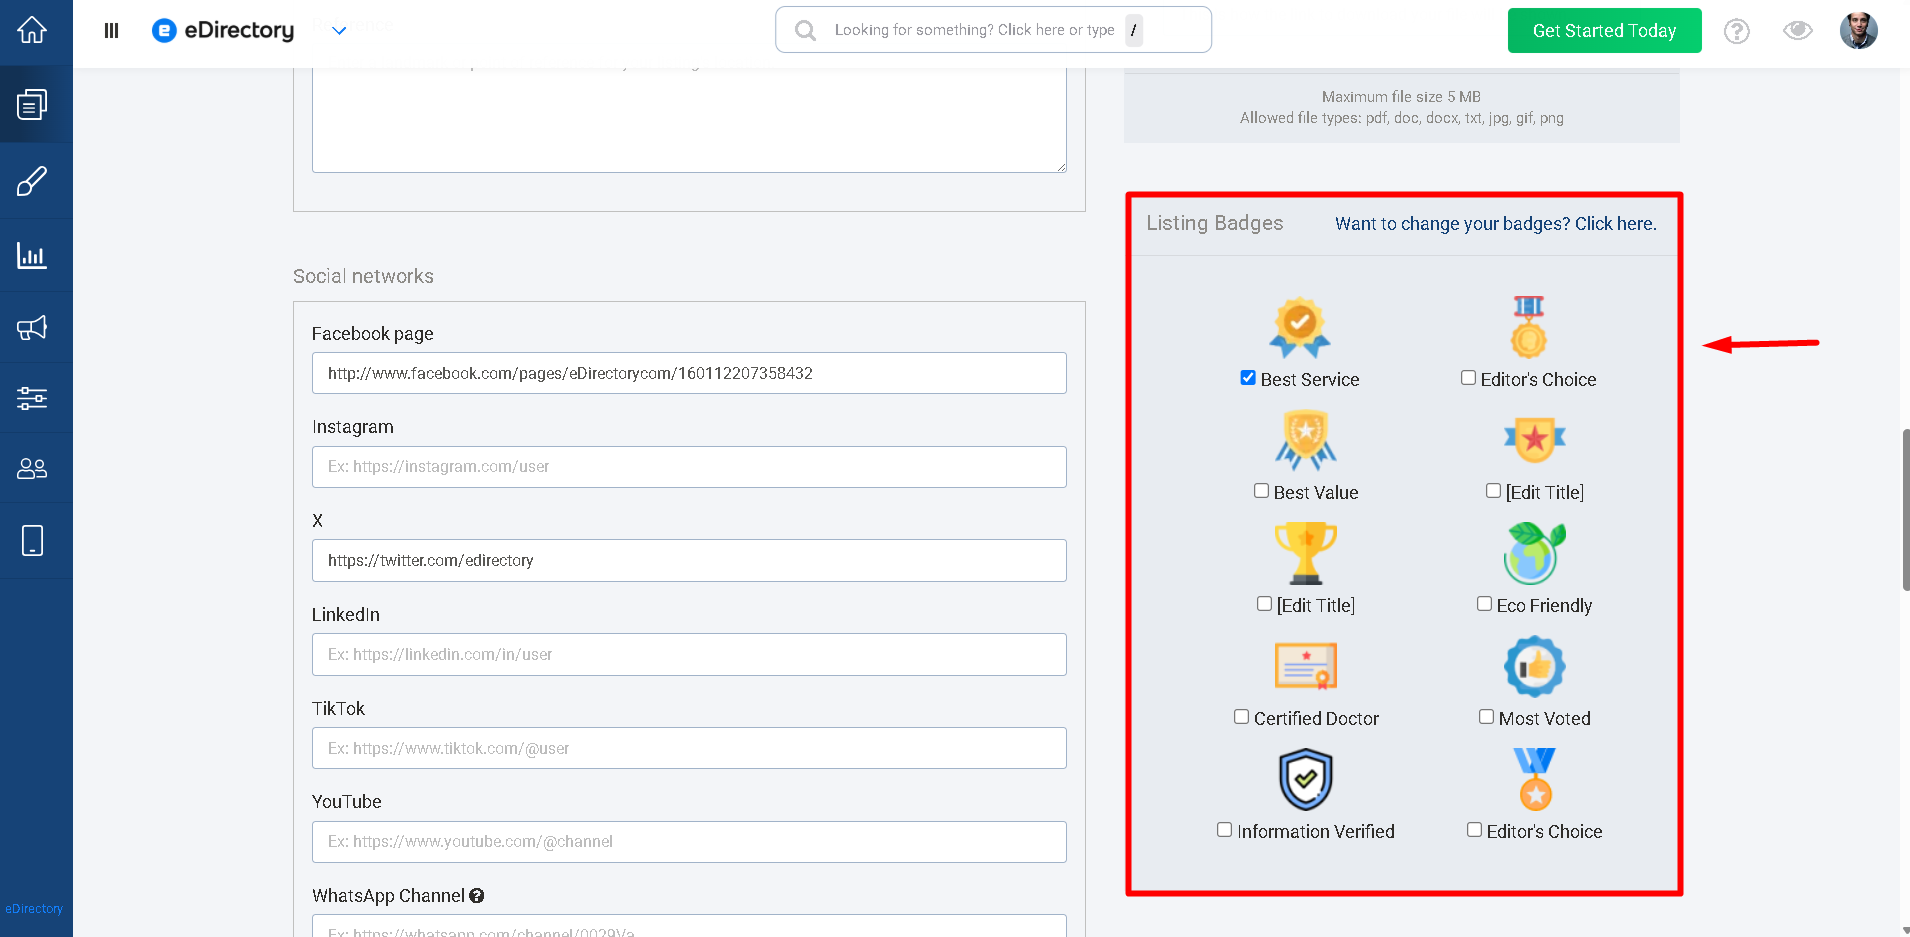
3.3. Select the Badge
- Scroll down to the Listing Badges section.
- Choose the badge you want to assign.
3.4. Save Your Changes
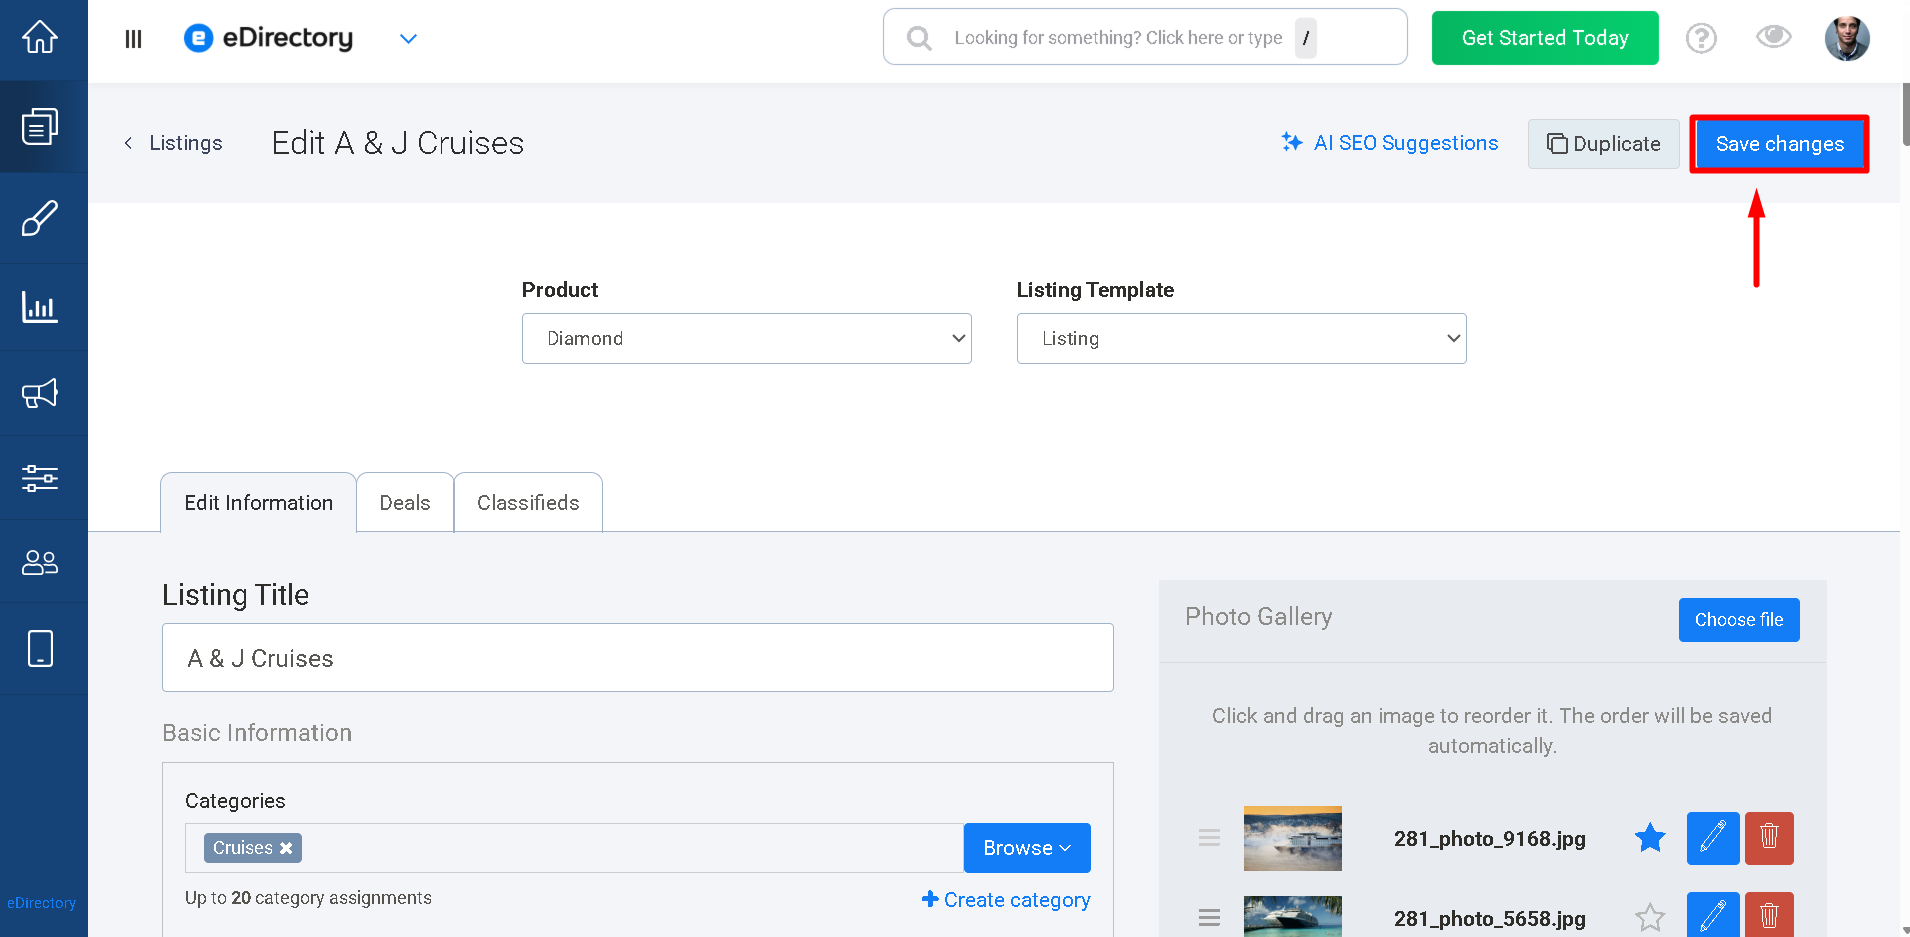
- Click Save Changes at the top of the page.
- The badge has now been assigned to the listing.
Verifying the Feature
- After assigning a badge, visit the listing on your website.
- You should see the badge displayed within the listing page.
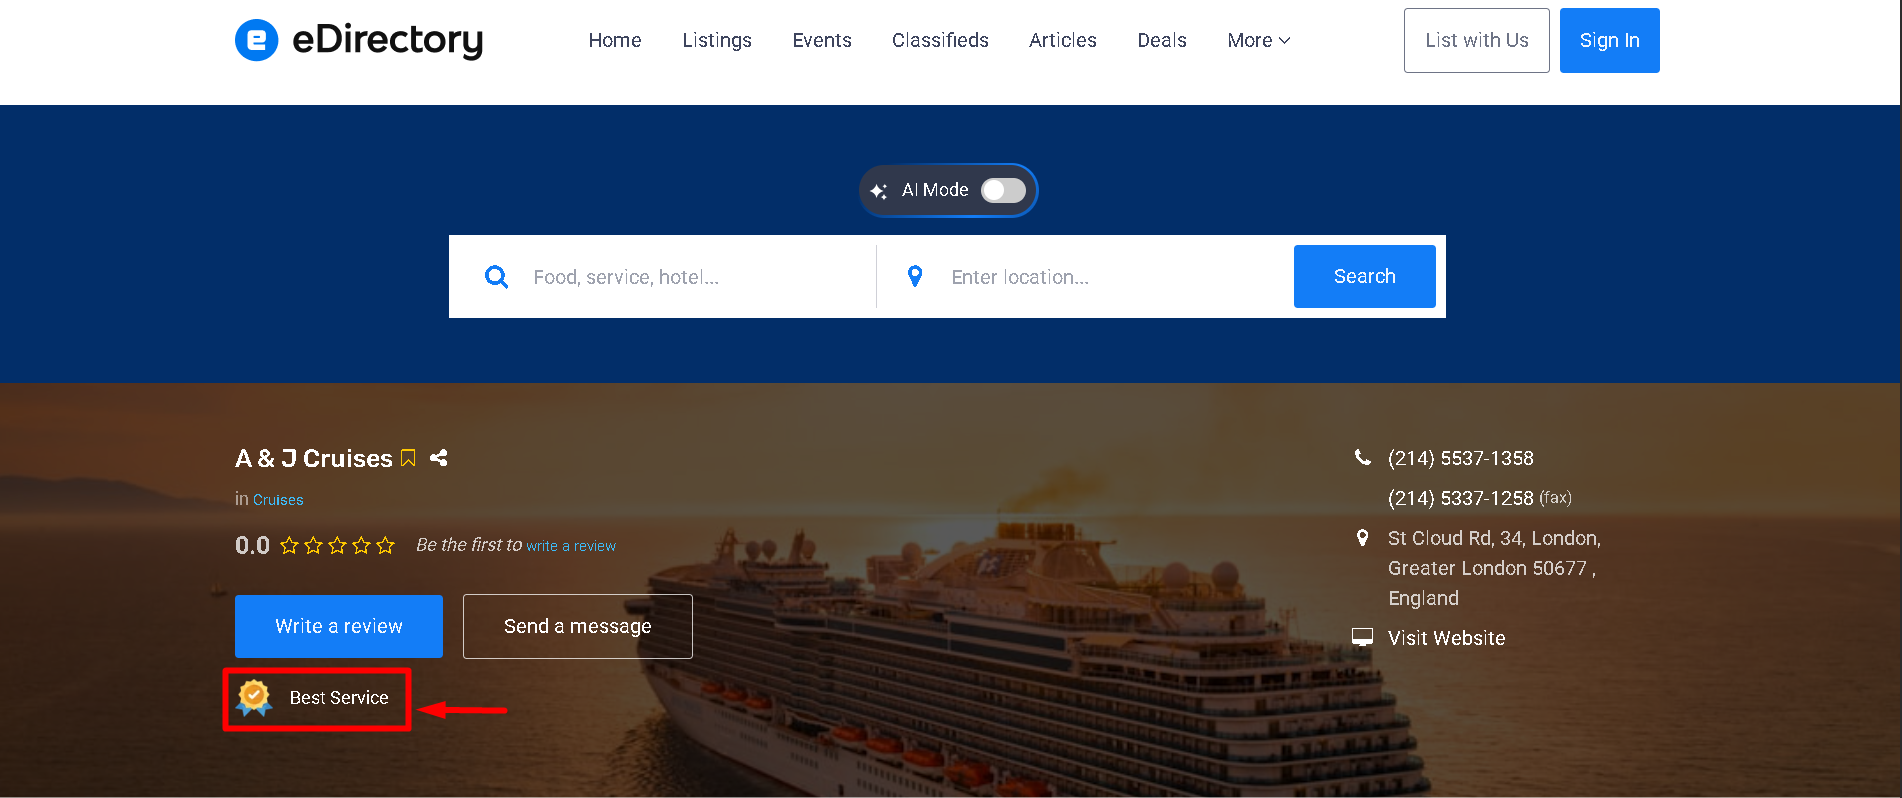
- If the badge is visible, the configuration has been completed successfully.
Troubleshooting
I don't see the Listing Badges section when editing a listing.
Verify that:
- Listing Badges are enabled for the Listing.
- You saved the listing level after enabling Listing Badges in step 1.
The badge does not appear on the website.
Verify that:
- A badge has actually been assigned to the listing.
- The badge was saved successfully.
- The listing is Active.
- Your browser cache has been cleared after making the changes.
Listing owners cannot select badges.
Make sure the badge was created with the option: Listing accounts can select this badge enabled. If this option is disabled, only Site Managers can assign that badge (Step 2).
Conclusion
Congratulations! You have successfully configured Awards & Badges on your eDirectory website.
Badges provide an excellent way to recognize featured businesses, highlight achievements, and make listings more attractive to visitors.
Whether you assign badges manually or allow listing owners to select them, this feature helps increase engagement and gives businesses additional visibility throughout your directory.
If you need any assistance, please contact our support team at support@edirectory.com.