
Listing Template: Call to Action Widget
Introduction
The Call to Action (CTA) Button Widget allows you to add an interactive button to listing detail pages. This button can guide visitors toward a specific action, such as contacting a business, making a reservation, accessing an external system, or submitting an offer.
The destination URL can be configured individually for each listing, allowing different listings to use different links and conversion goals.
🎥 See the Call to Action Button Widget in Action
Watch the video below to see how to add and configure the Call to Action Button Widget in a Listing Template and set a specific destination URL for each listing.
Step 1: Add the Call to Action Button Widget to Your Listing Template
To add a Call to Action button to your listings, first access the Listing Template where you want the button to appear.
1.1. Open the Listing Template
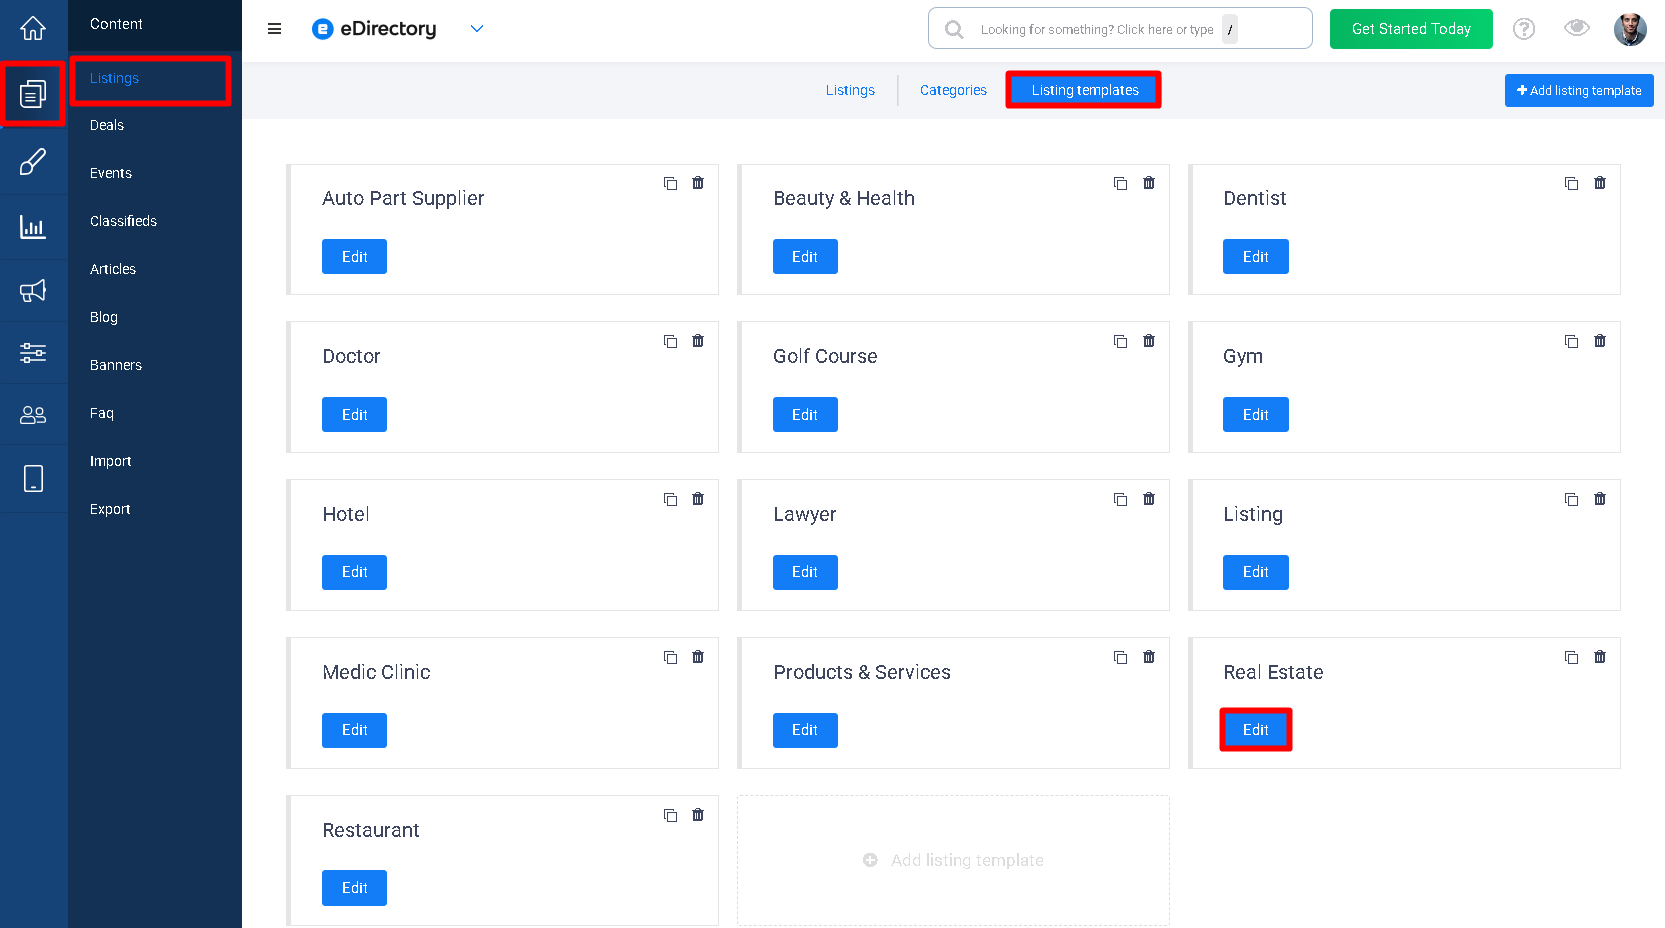
Navigate to Content > Listings > Listing Templates> Open the Listing Template you want to customize.
1.2. Add a Widget
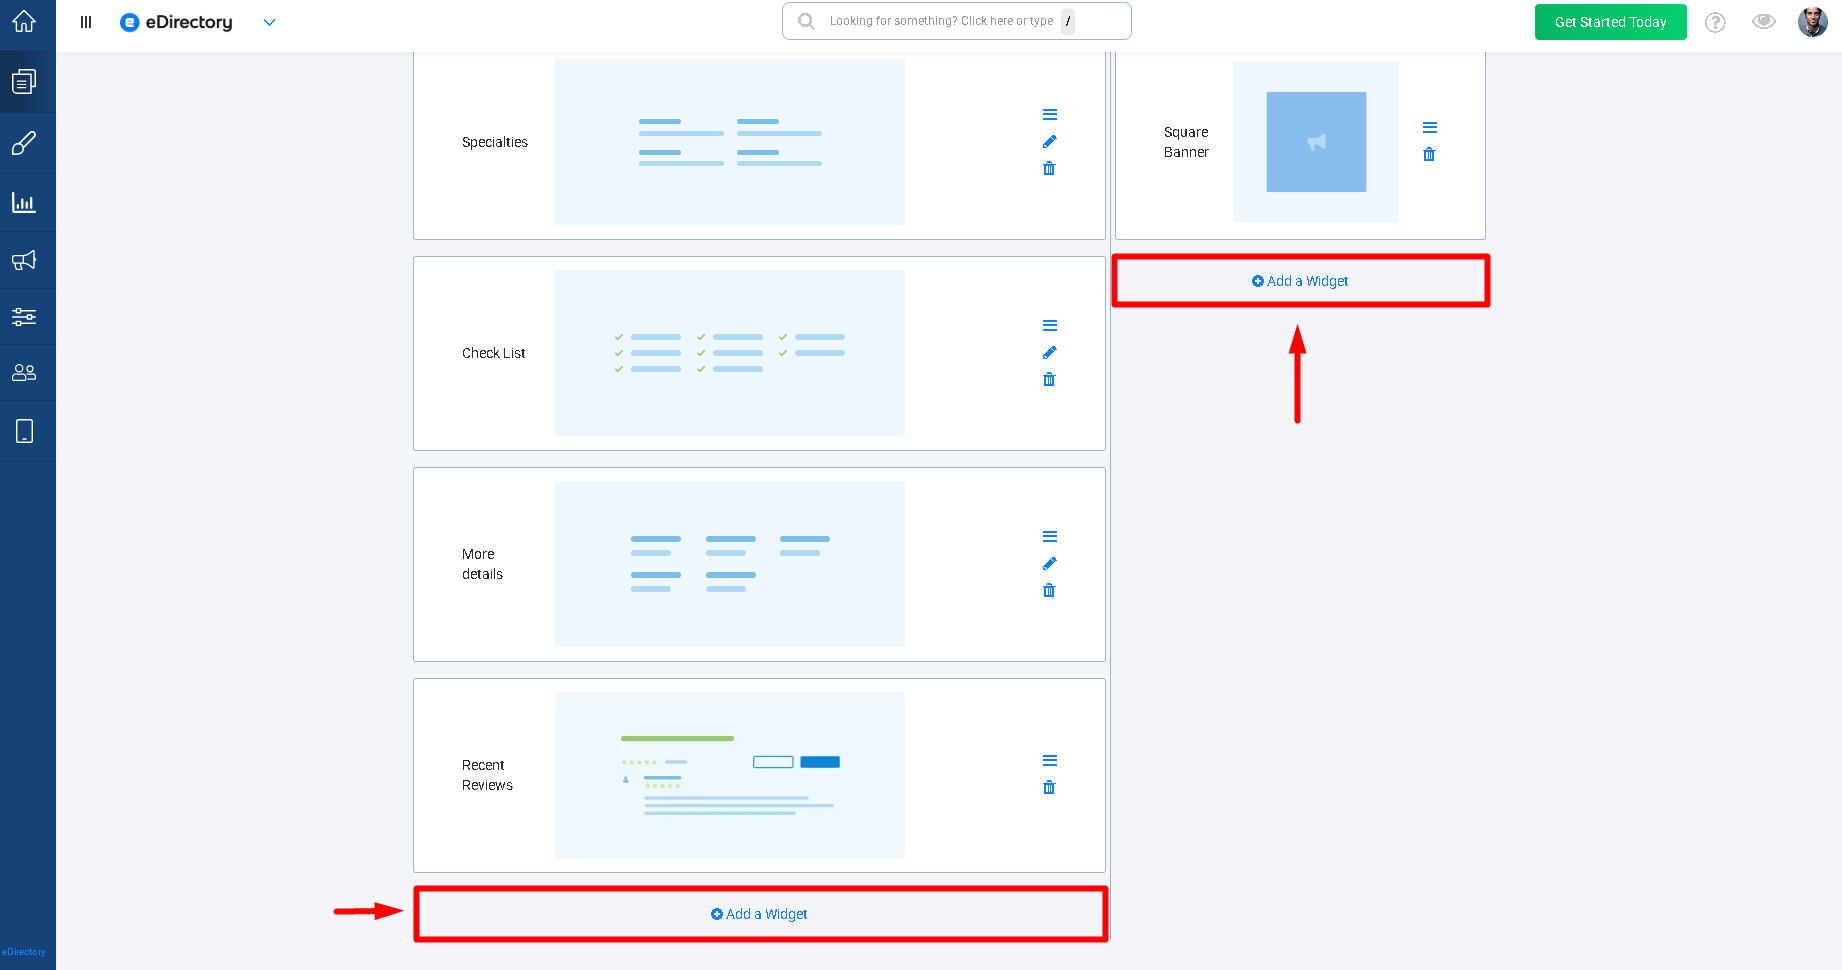
Click Add in the area where you want the button to appear.
1.3. Select the Call to Action Button Widget
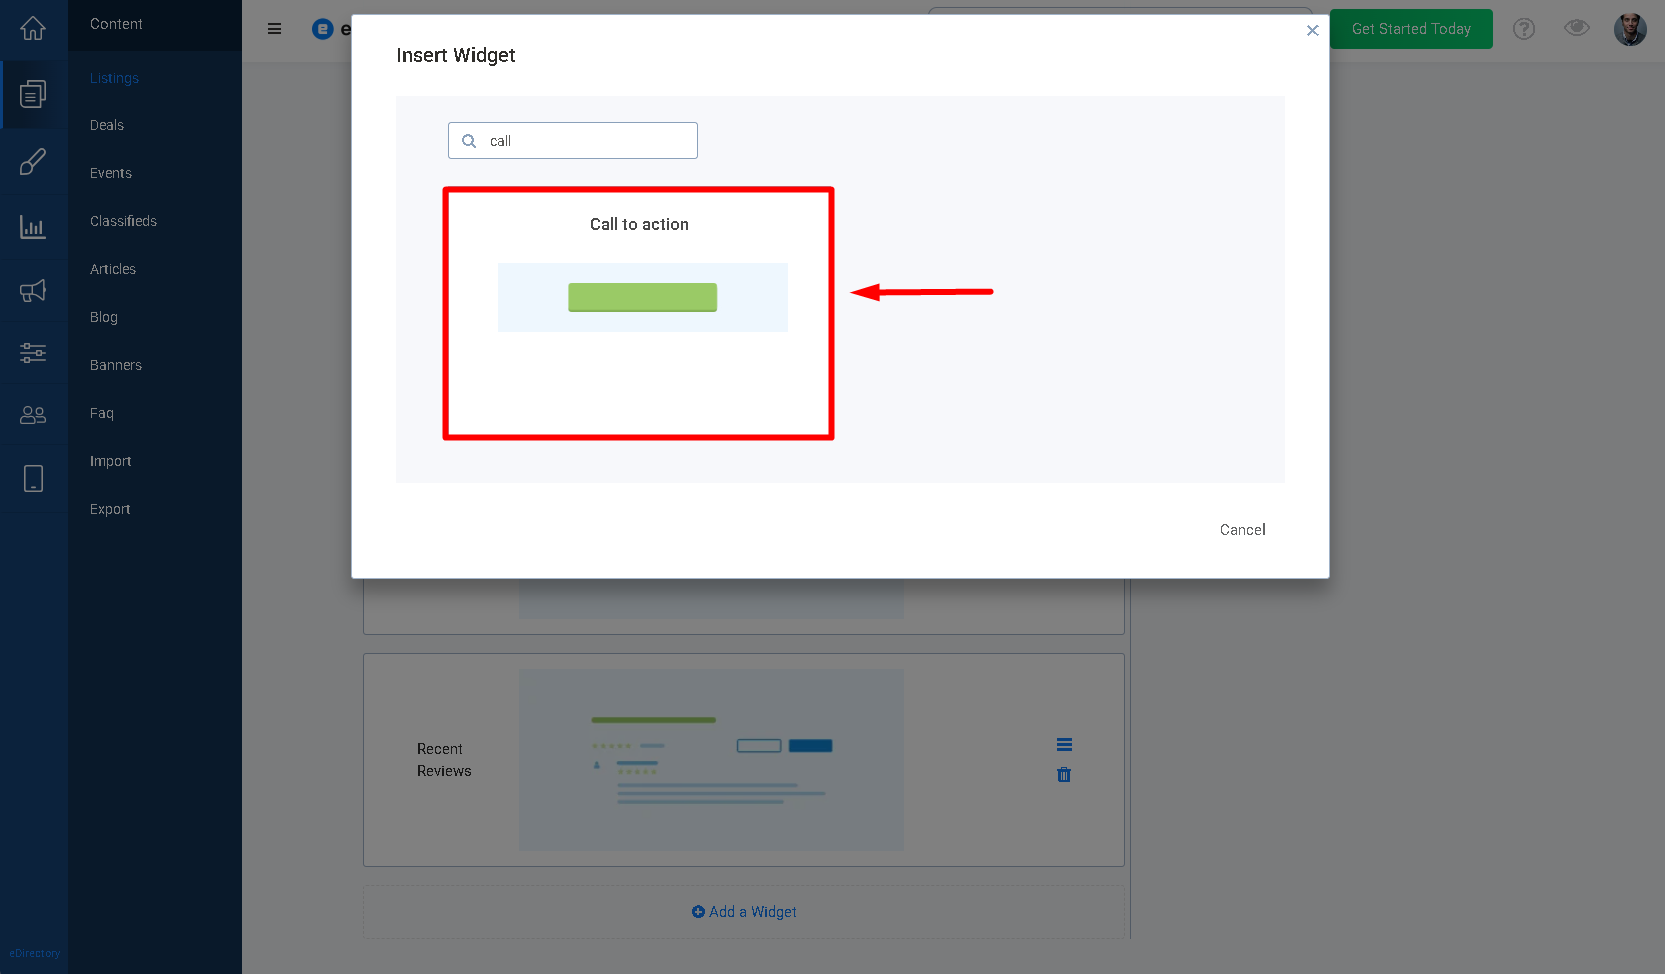
Search for and select the Call to Action button.
The widget allows you to create a button that directs visitors to a specific URL configured for each listing.
Step 2: Configure the Call to Action Button Widget
After adding the widget, configure its settings according to the action you want visitors to take.
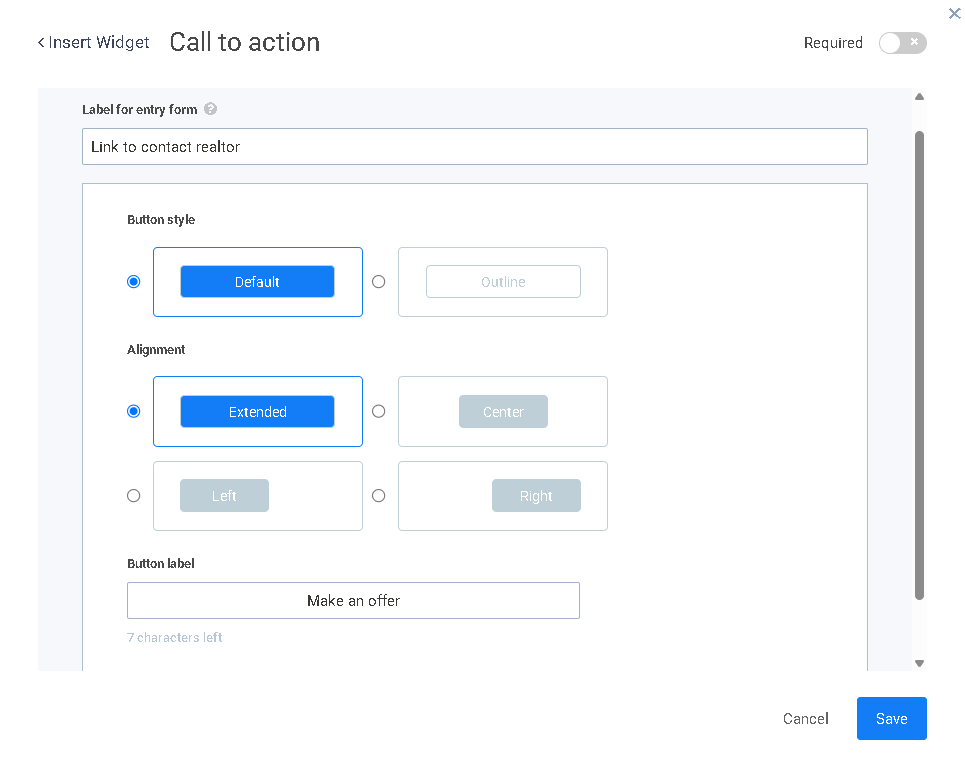
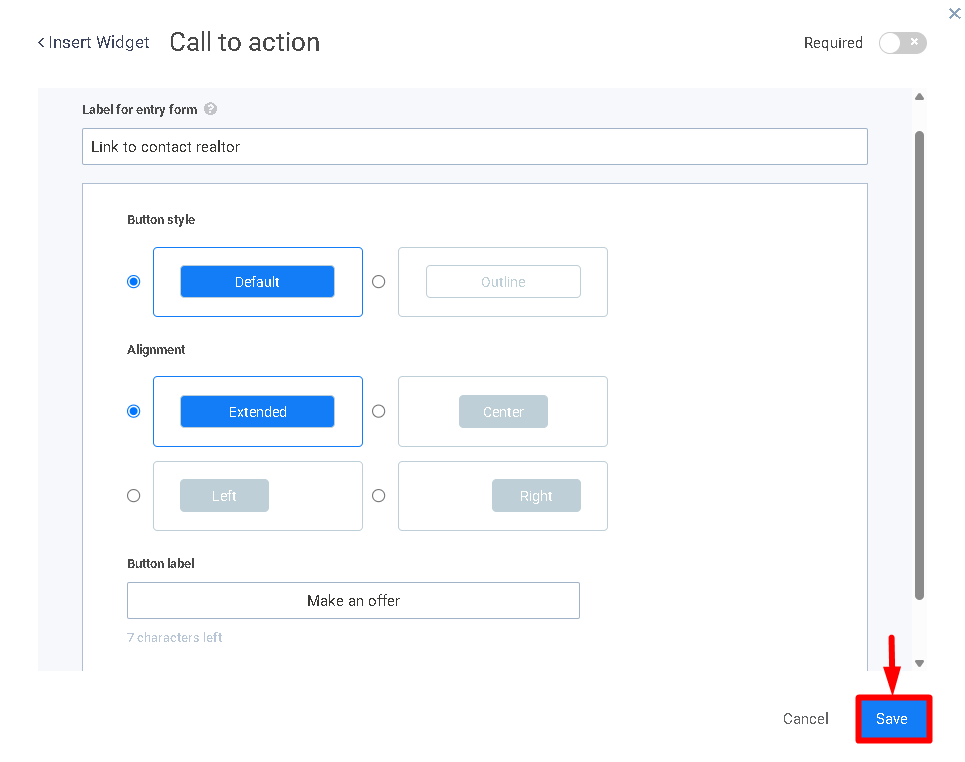
2.1. Add a Widget Name
Create a name to identify the widget on the listing entry form.
For example: Link to contact realtor
This name helps listing owners identify the purpose of the field when creating or editing a listing.
2.2. Choose the Button Style
Choose the visual style you want to use for the button.
You can select between:
- Standard filled button
- Outlined button
Choose the option that best fits your website's design.
2.3. Set the Button Alignment
Configure how the button should be aligned on the listing detail page.
The available options include:
- Extended
- Centered
- Left
- Right
2.4. Required
You can choose whether this field should be mandatory for sponsors to complete. Enable the "Required" toggle to make the field required, or disable it to make the field optional.
2.5. Define the Button Label
Enter the text that visitors will see on the button.
For example: Make an offer
The button label should clearly indicate the action that will take place when visitors click it.
Step 3: Save the Widget and Listing Template
3.1. Save the Widget
After configuring the button style, alignment, and label, save the widget.
3.2. Save the Listing Template
Save the Listing Template to apply the changes.
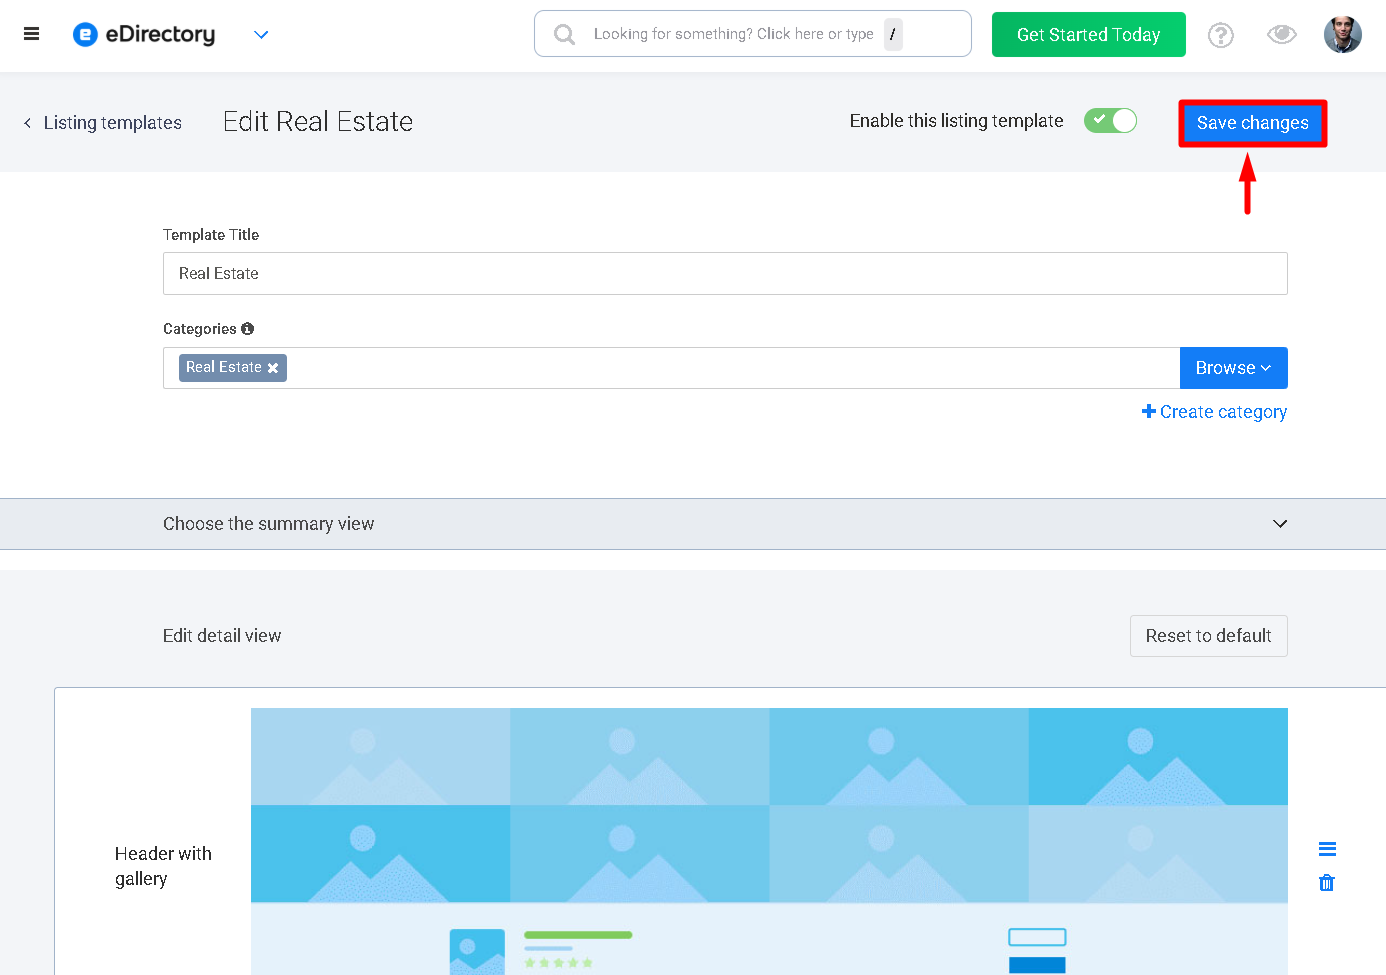
The new Call to Action field will now be available on the listing entry form for listings using this template.
Step 4: Add the Call to Action URL to a Listing
After configuring the Listing Template, you can define the destination URL for each listing.
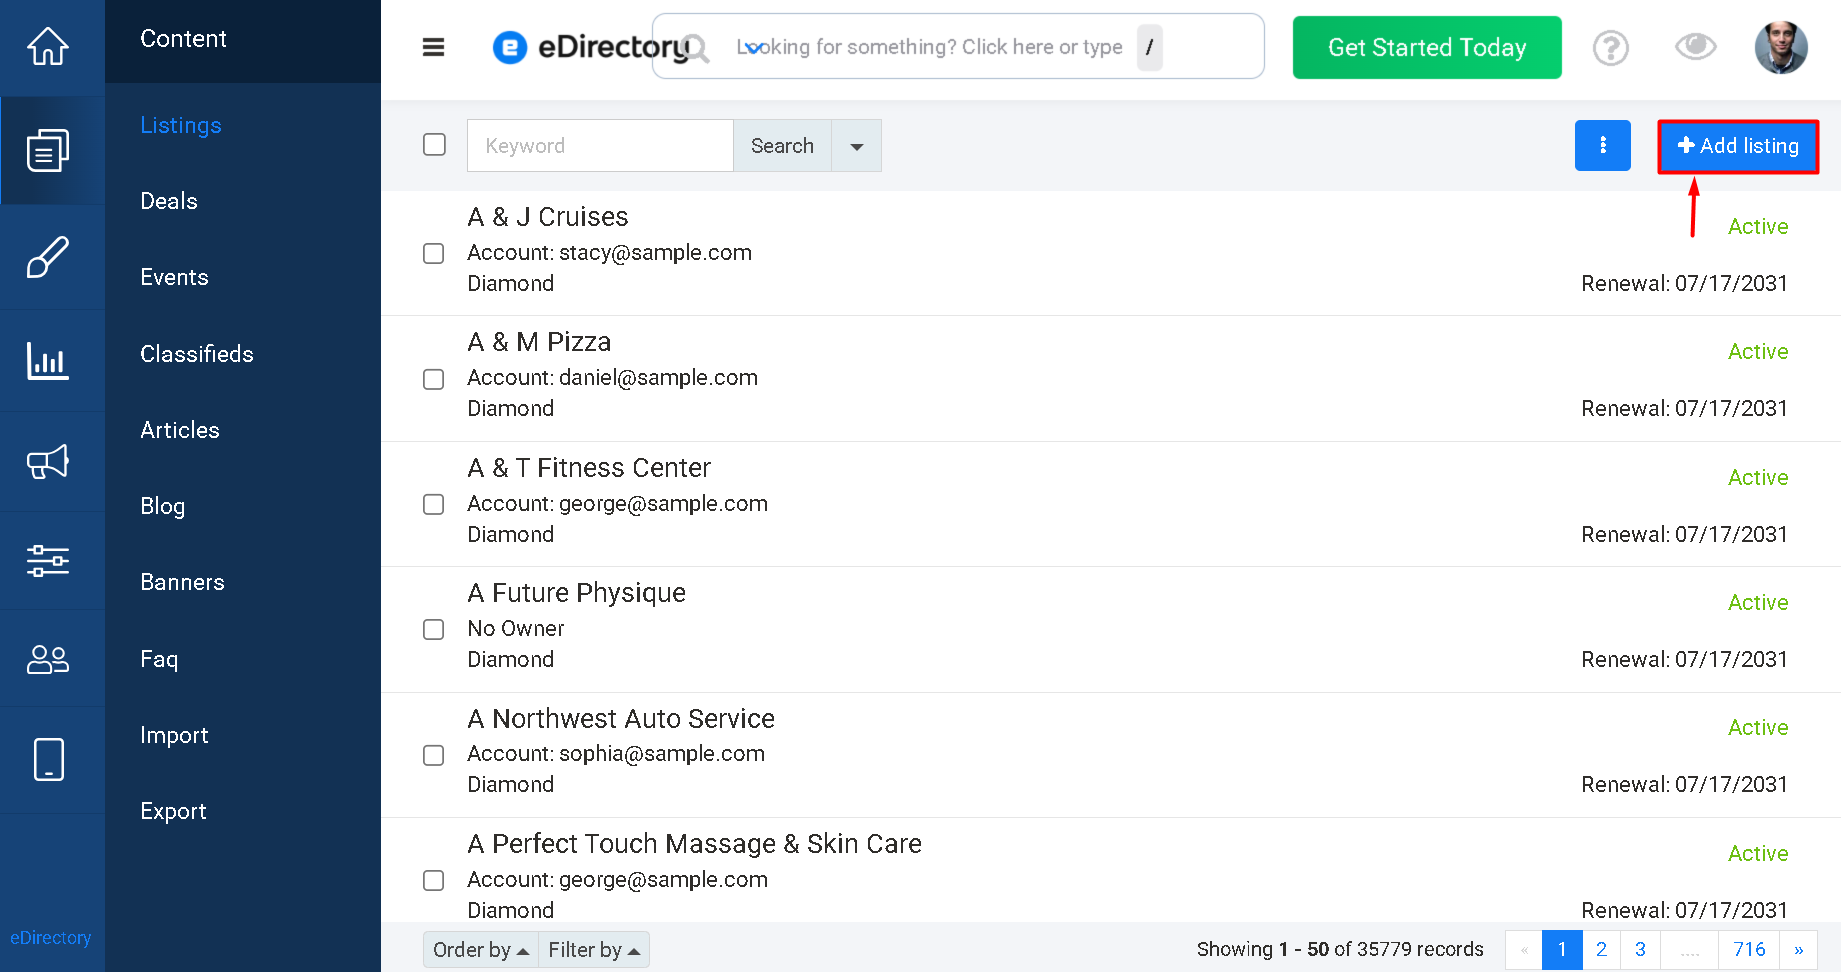
4.1. Open the Listing Entry Form
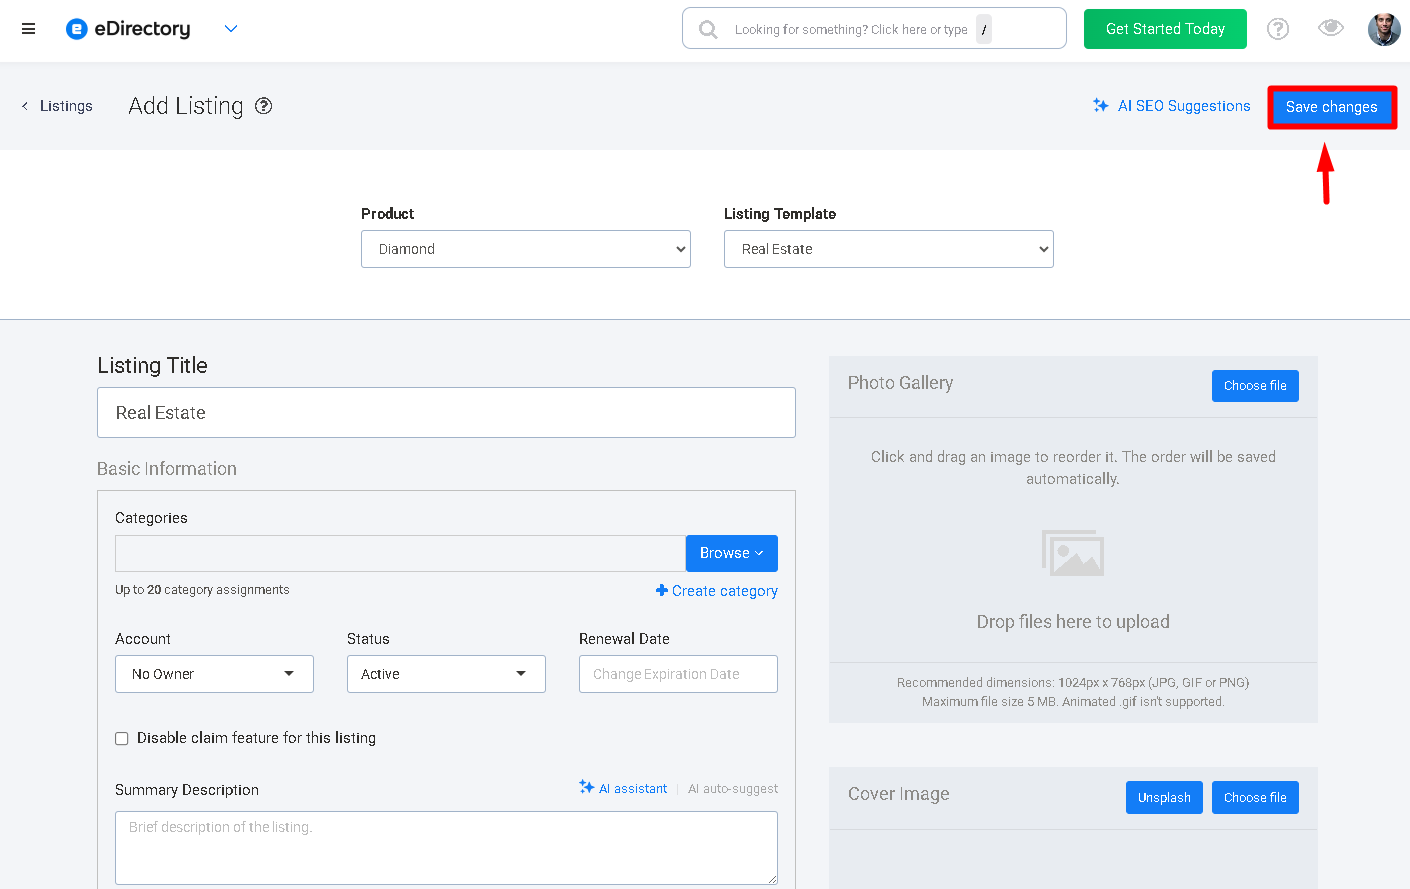
Open the listing entry form under Content → Listings → Add listing.
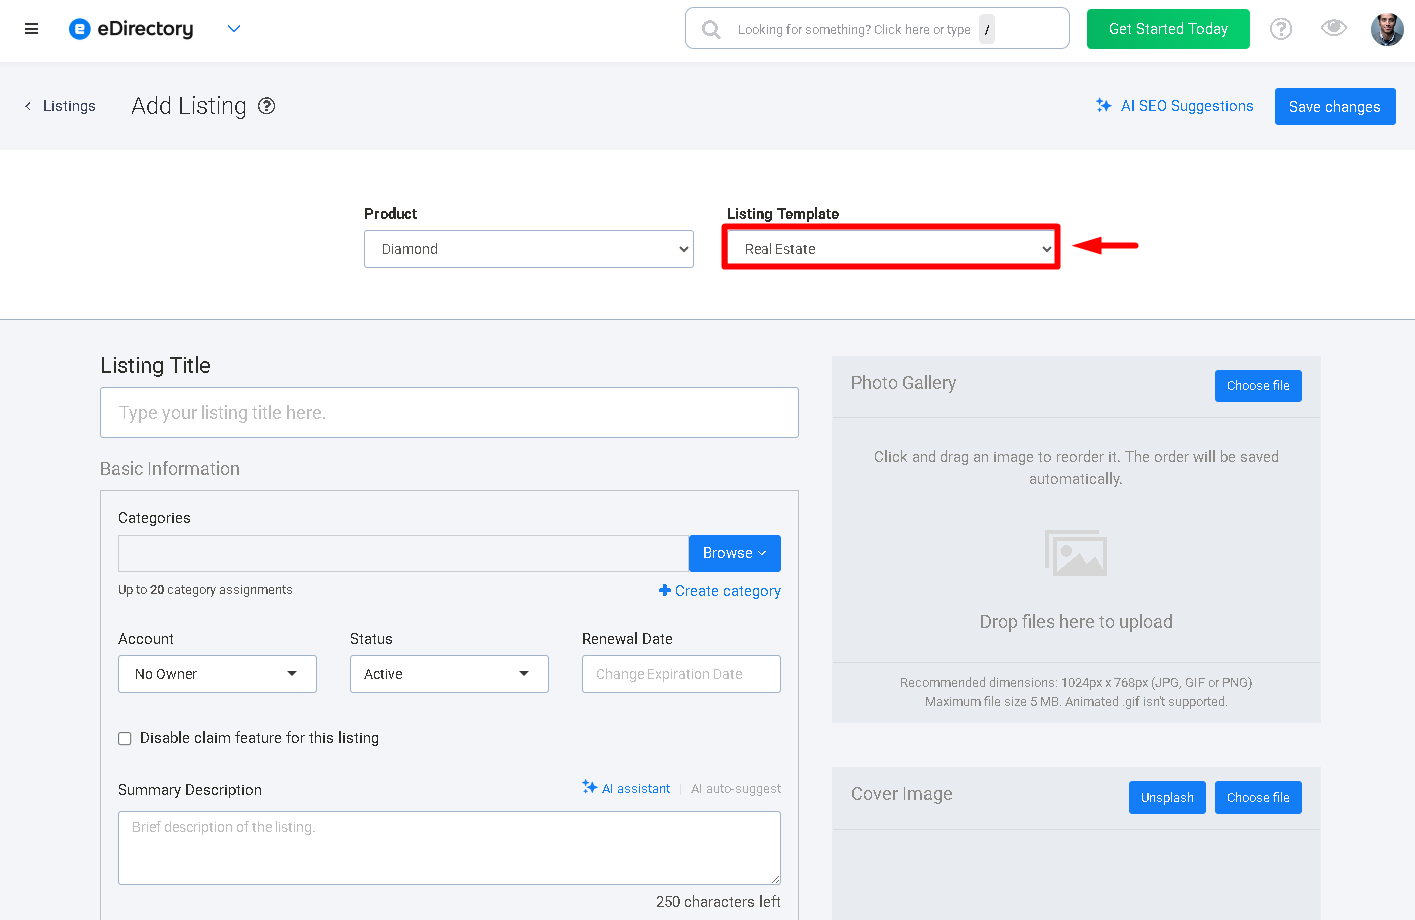
4.2. Select the Listing Template
Select the listing template containing your new Call to Action Widget.
4.3. Locate the Call to Action Field
Locate the Call to Action field on the listing entry form.
The field will use the widget name you configured previously.
4.3. Enter the Destination URL
Enter the URL where visitors should be directed when they click the button.
For example, the URL can direct visitors to:
- A booking system
- A contact form
- An external webpage
- An appointment scheduling system
- Another page related to the listing
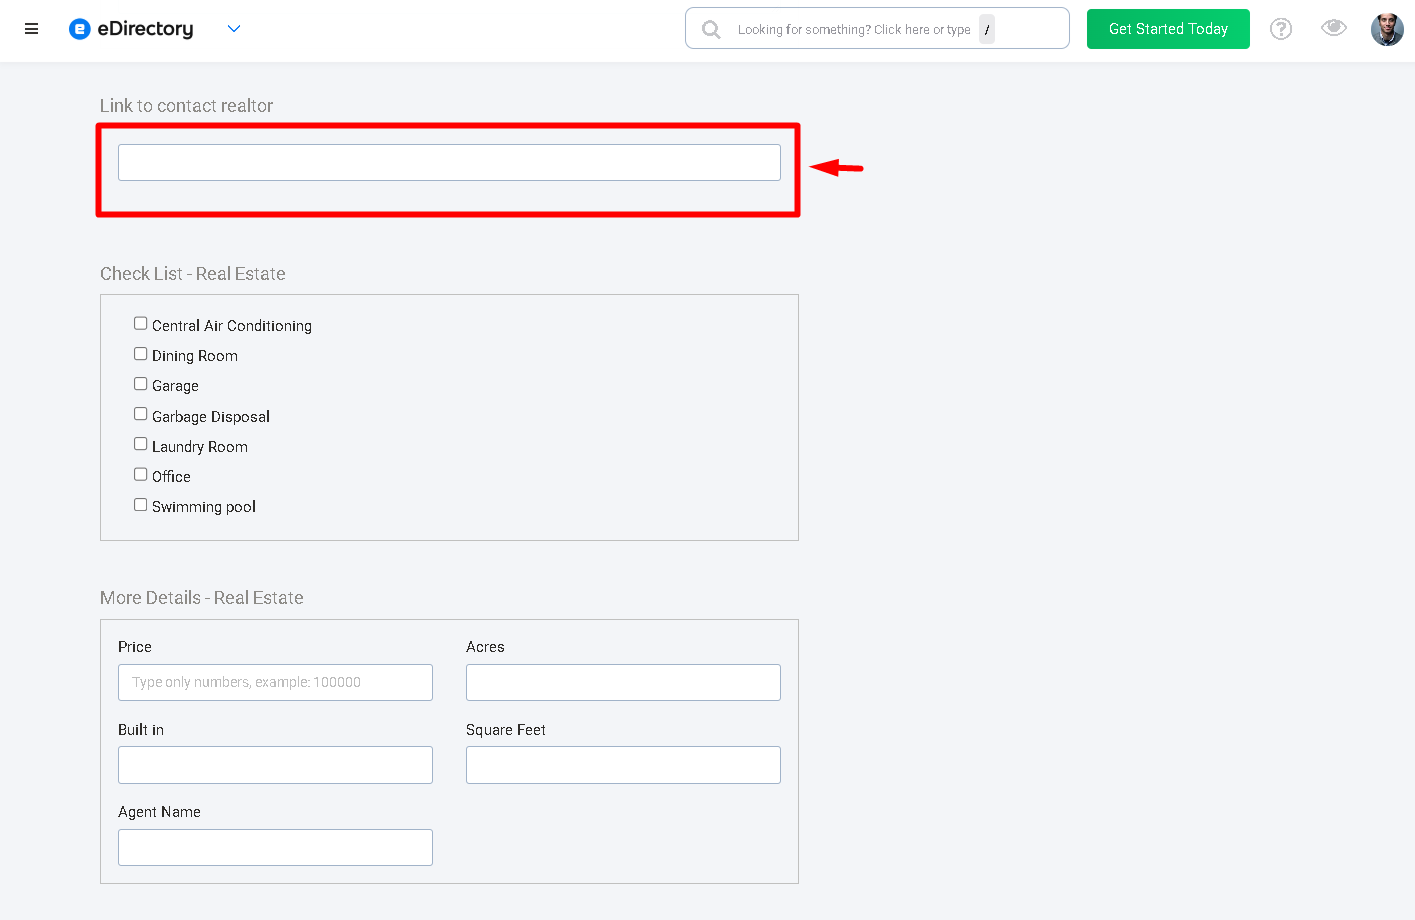
The URL can be different for each listing, allowing each button to direct visitors to the appropriate destination.
4.4. Save the Listing
After entering the destination URL, save the listing.
The Call to Action button will now be available on the listing detail page.
Step 5: View the Call to Action Button on the Listing
After saving the listing, open its detail page to view the button.
The button will be displayed according to the style, alignment, and label configured in the Listing Template.
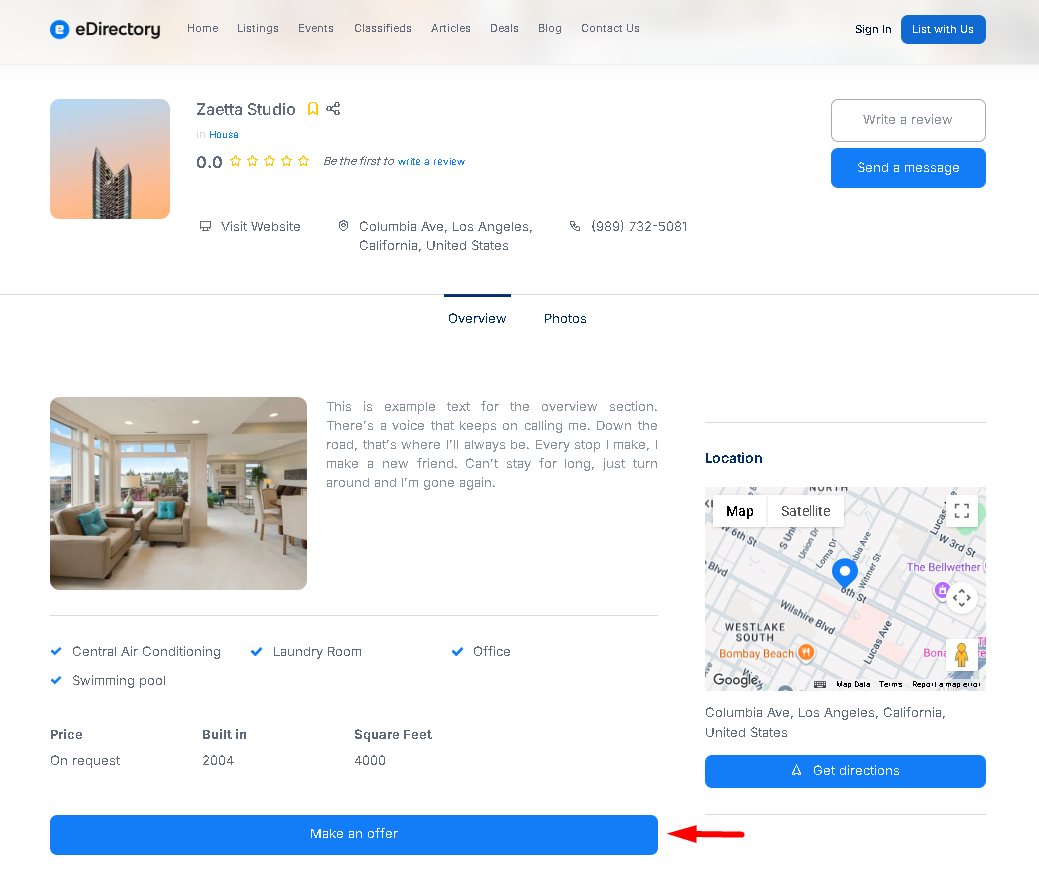
When visitors click the button, they will be directed to the URL configured for that listing.
Note: If you want to add a Call to Action button to a Page, refer to How to Add a Call to Action (CTA) Button to a Page
Conclusion
The Call to Action Button Widget allows you to add interactive actions to listing detail pages and direct visitors to specific destinations.
You can customize the button style and alignment, define the text displayed to visitors, and allow each listing to have its own destination URL.
This makes the widget useful for different conversion goals, such as contacting a business, making reservations, scheduling appointments, submitting offers, or directing visitors to other relevant resources.