
How to Set Up Conversion Tracking with Google Tag Manager
Introduction
Conversion tracking allows you to measure when visitors complete an important action on your website, such as completing a payment.
In this setup, Google Tag Manager will detect when a customer reaches the eDirectory payment confirmation page and use that page view to trigger the conversion tag.
Follow the steps below to configure conversion tracking for completed Advertise With Us payments.
1. Integrate eDirectory with Google Tag Manager
Before creating the conversion in Google Ads, Google Tag Manager must be installed and connected to your eDirectory website.
1.1. Follow the instructions in How to Configure Google Tag Manager to connect Google Tag Manager to your eDirectory website.
1.2. Once Google Tag Manager is successfully connected, continue to Step 2.
2. Create a Conversion in Google Ads
2.1. Log in to your Google Ads account.
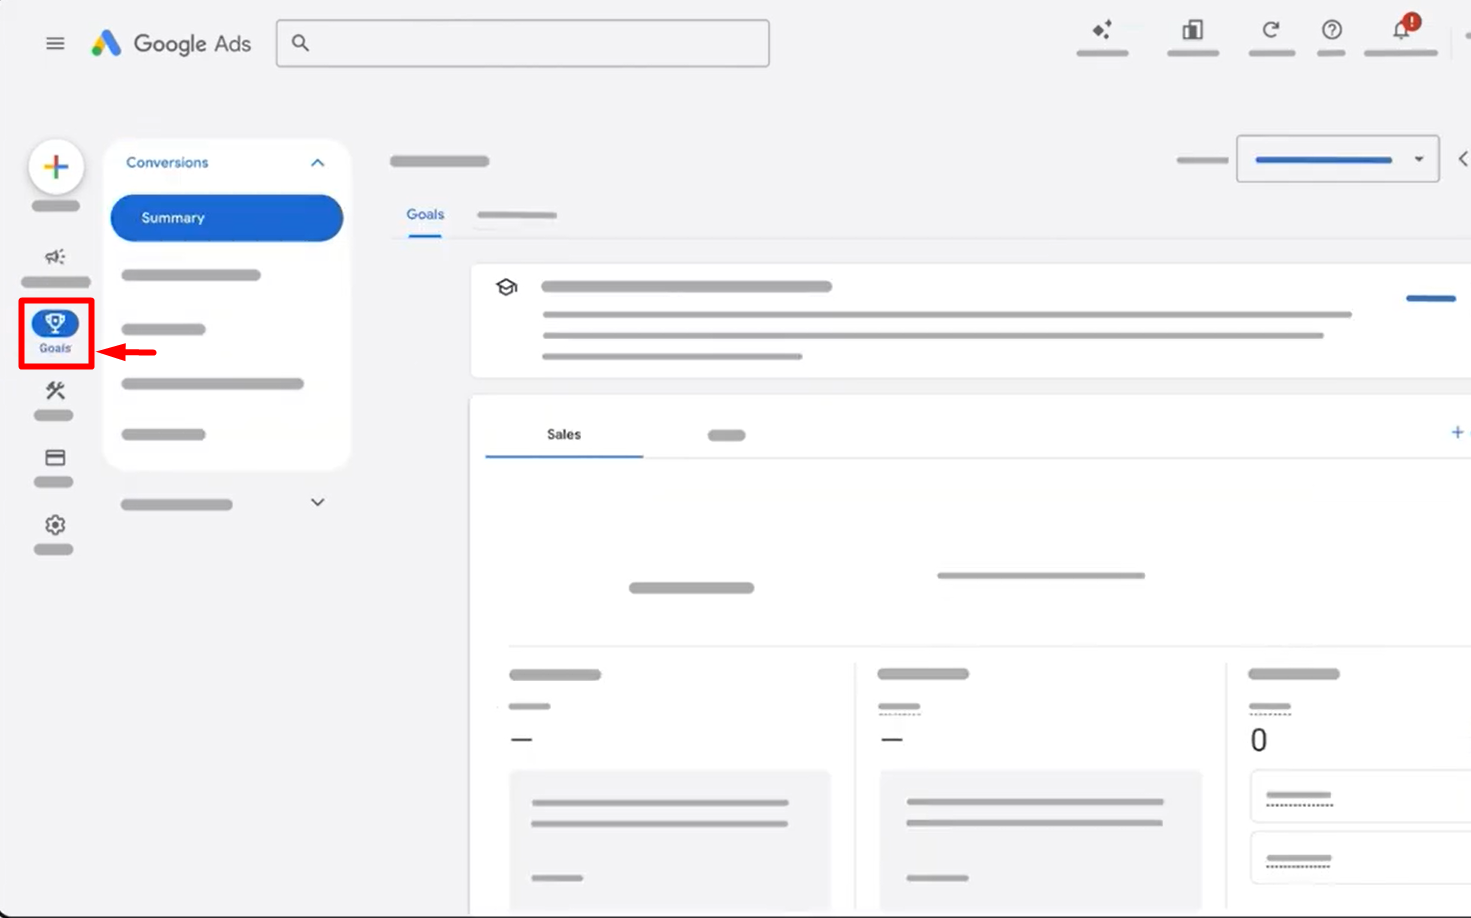
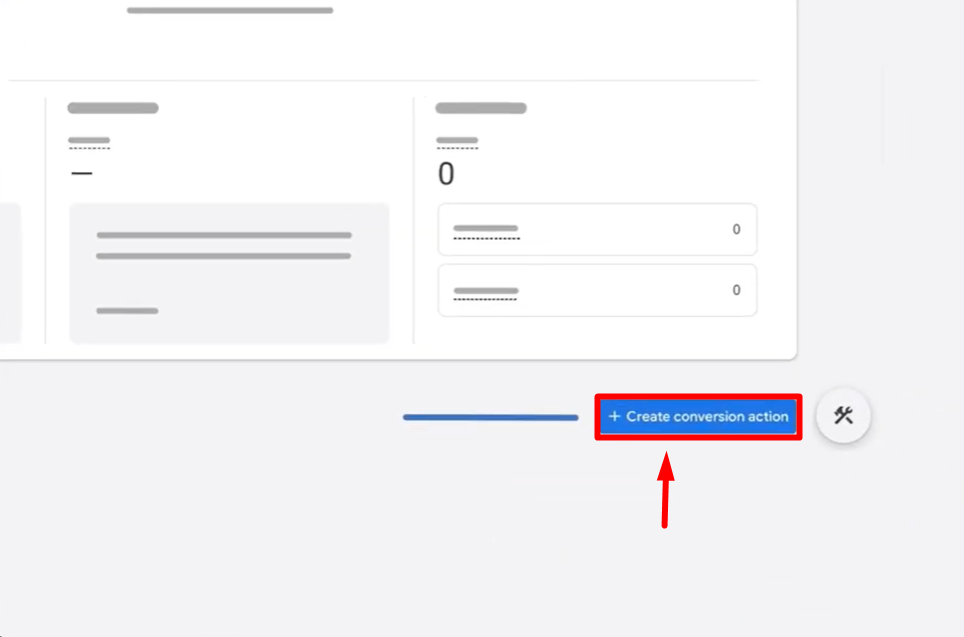
2.2. Create a conversion action for the payment you want to track by clicking Goals → Create conversion action.
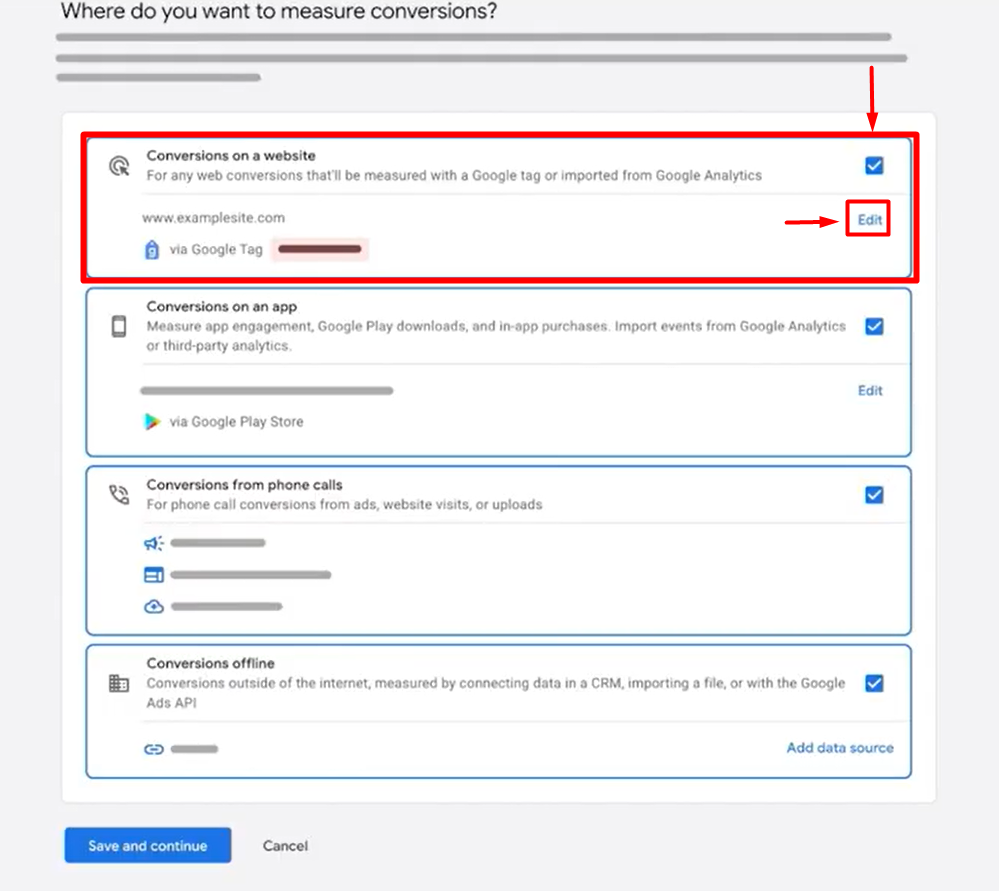
2.3. During the conversion setup, select Conversion on a website and click Edit.
2.4. Scan your website by entering your URL and clicking Scan.
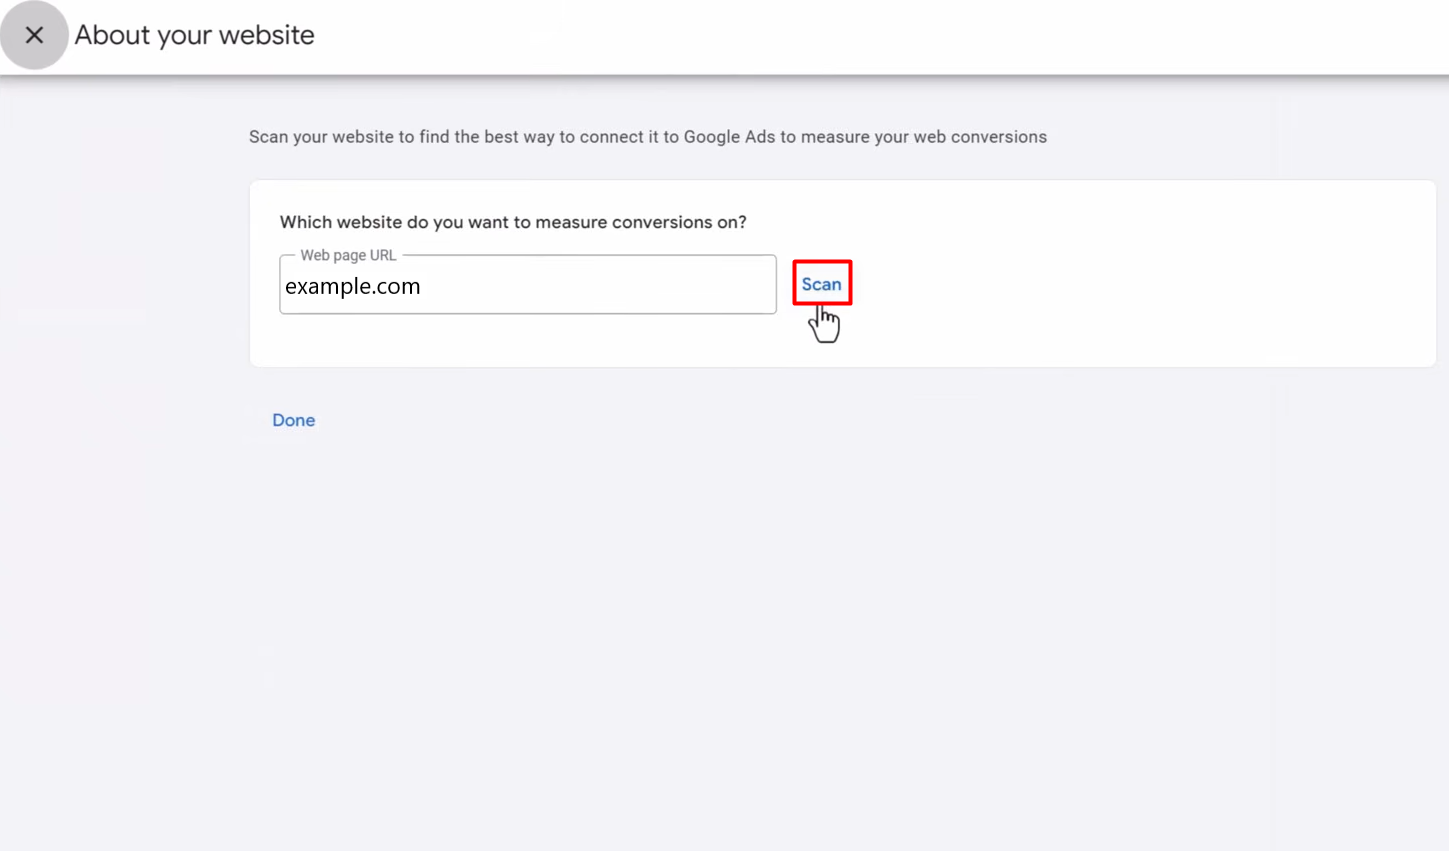
2.5. After scanning the site, Google Ads should display a message confirming that the Google tag is correctly installed. Click Done.
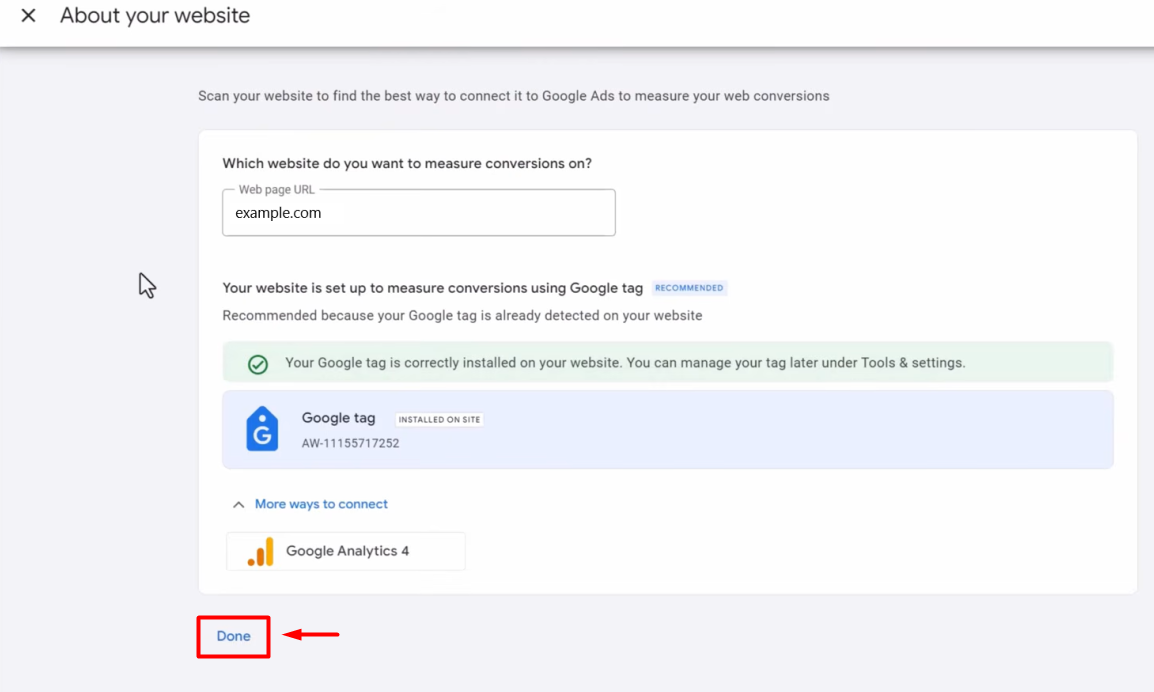
Important: If Google Ads does not detect the Google tag, make sure you have completed Step 1 and that Google Tag Manager is correctly connected to your eDirectory website.
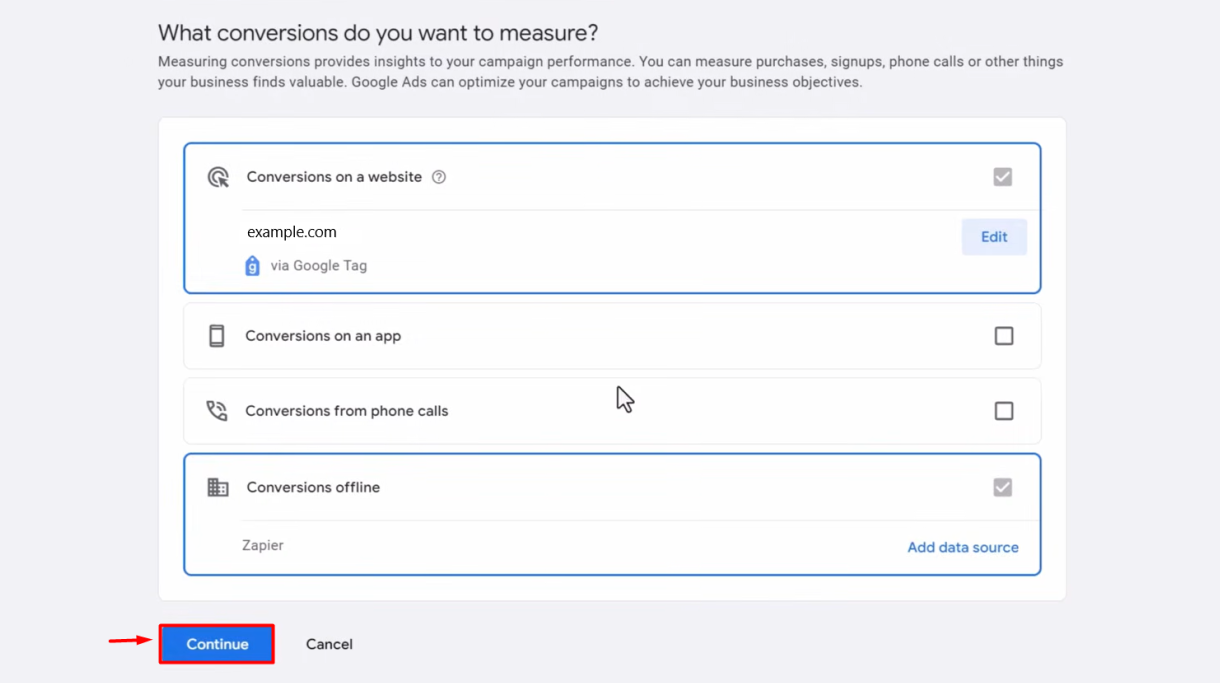
2.6. Click Continue.
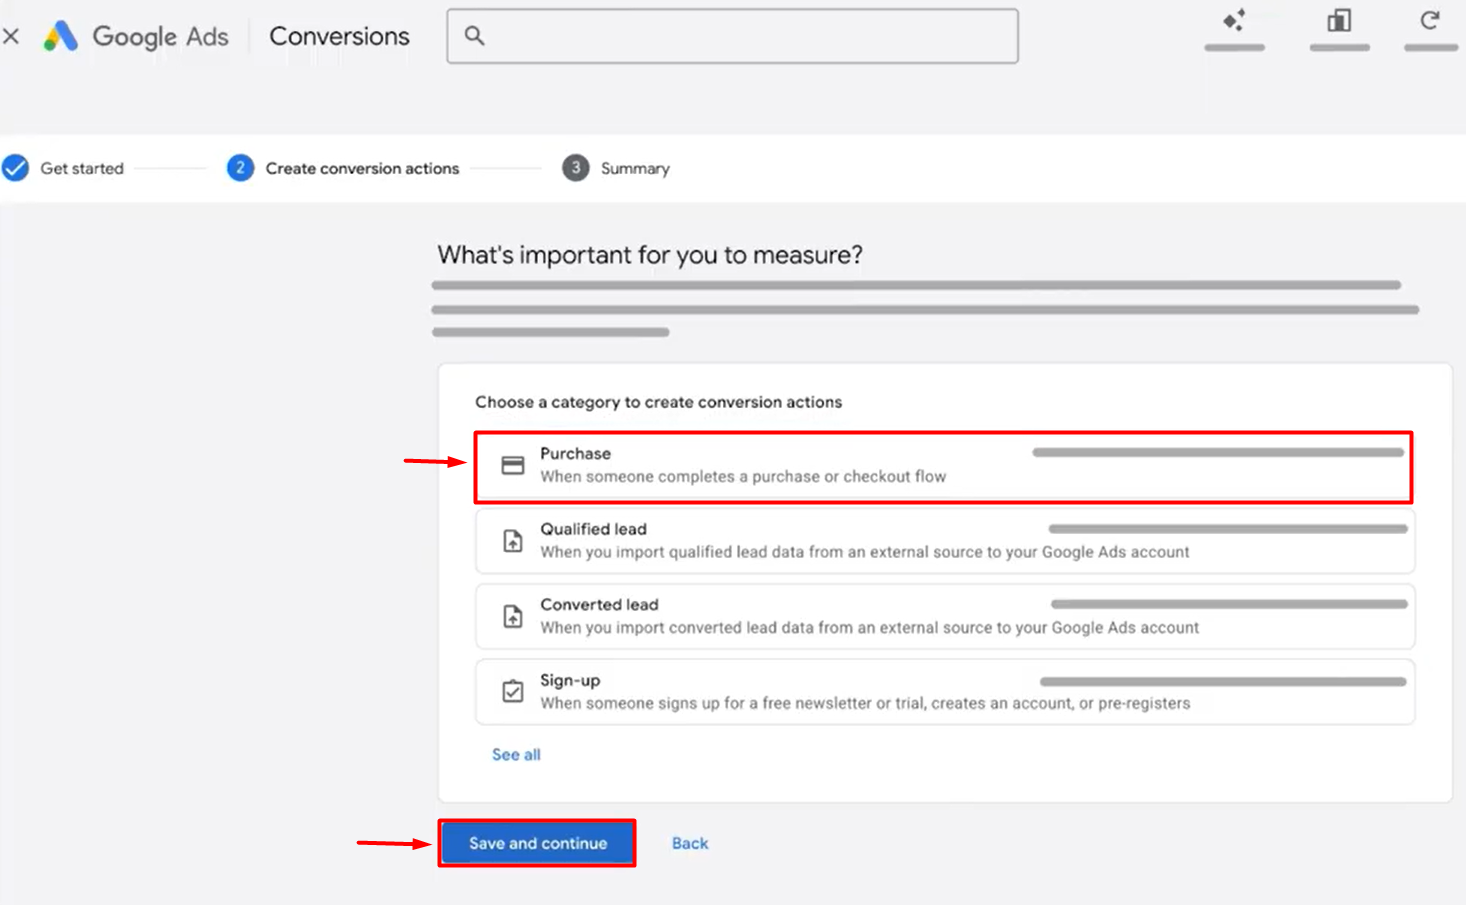
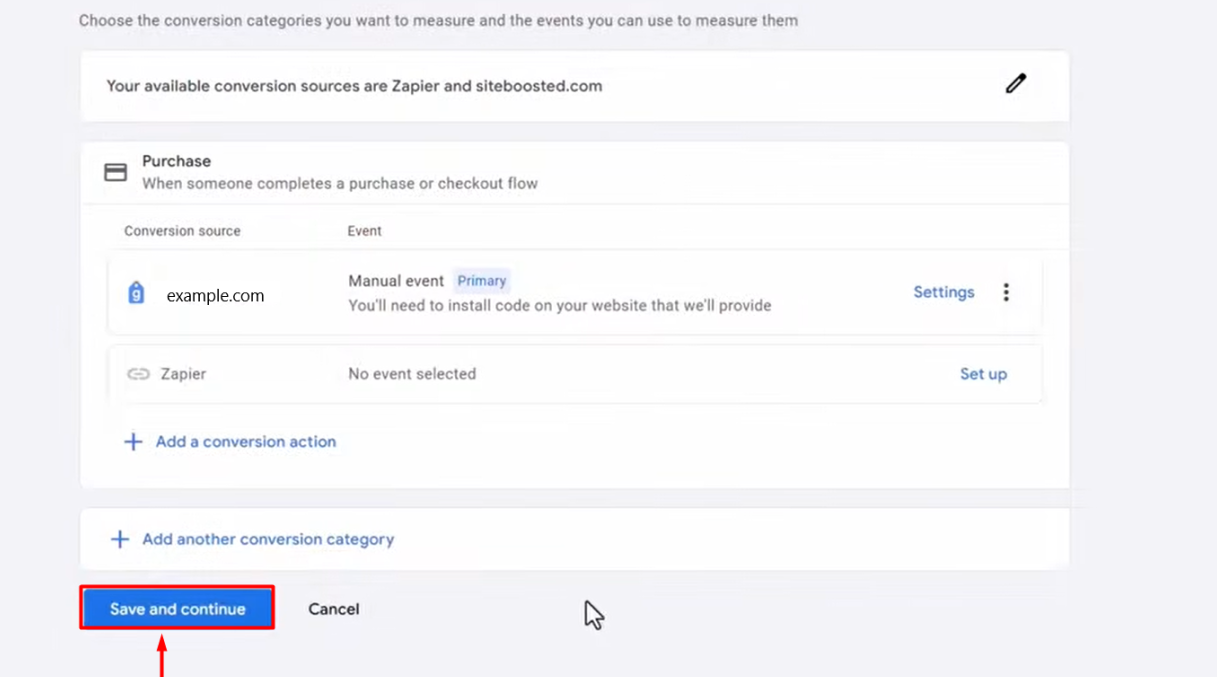
2.7. Select Purchase as the conversion action category and click Save and continue.
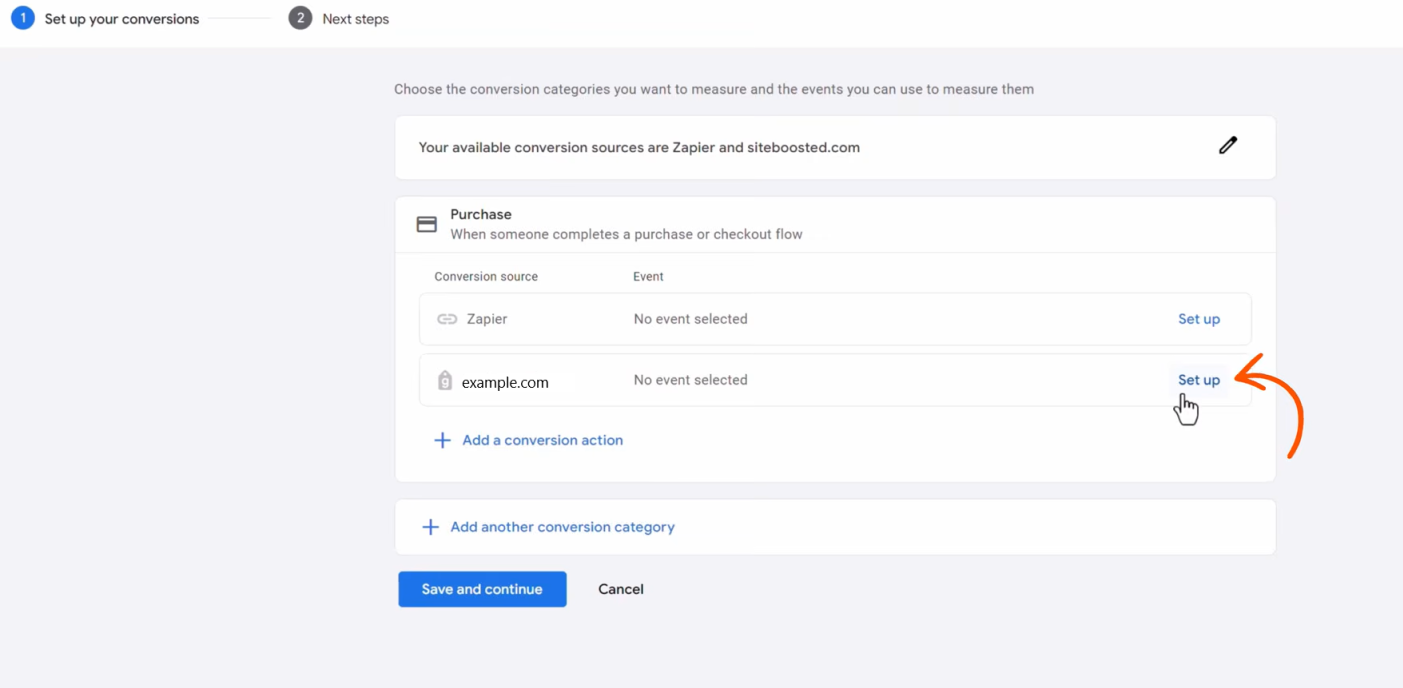
2.8. Click Setup on the Google Tag associated with this conversion.
2.9. Select Create a manual event, enter a name for your conversion, and click Use event.
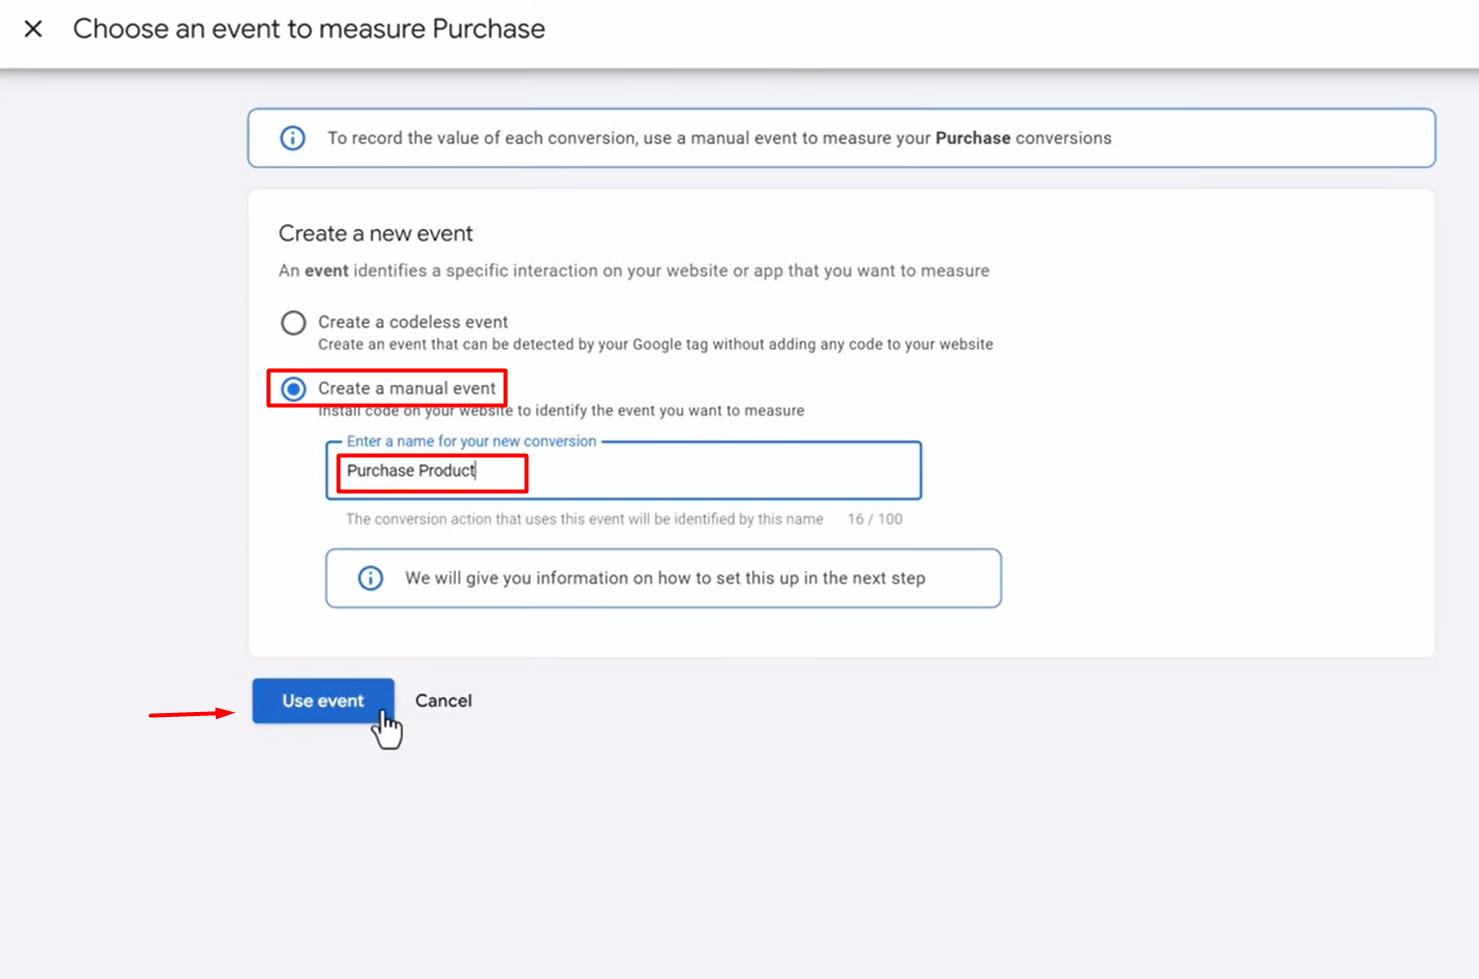
2.10. Click Save and continue.
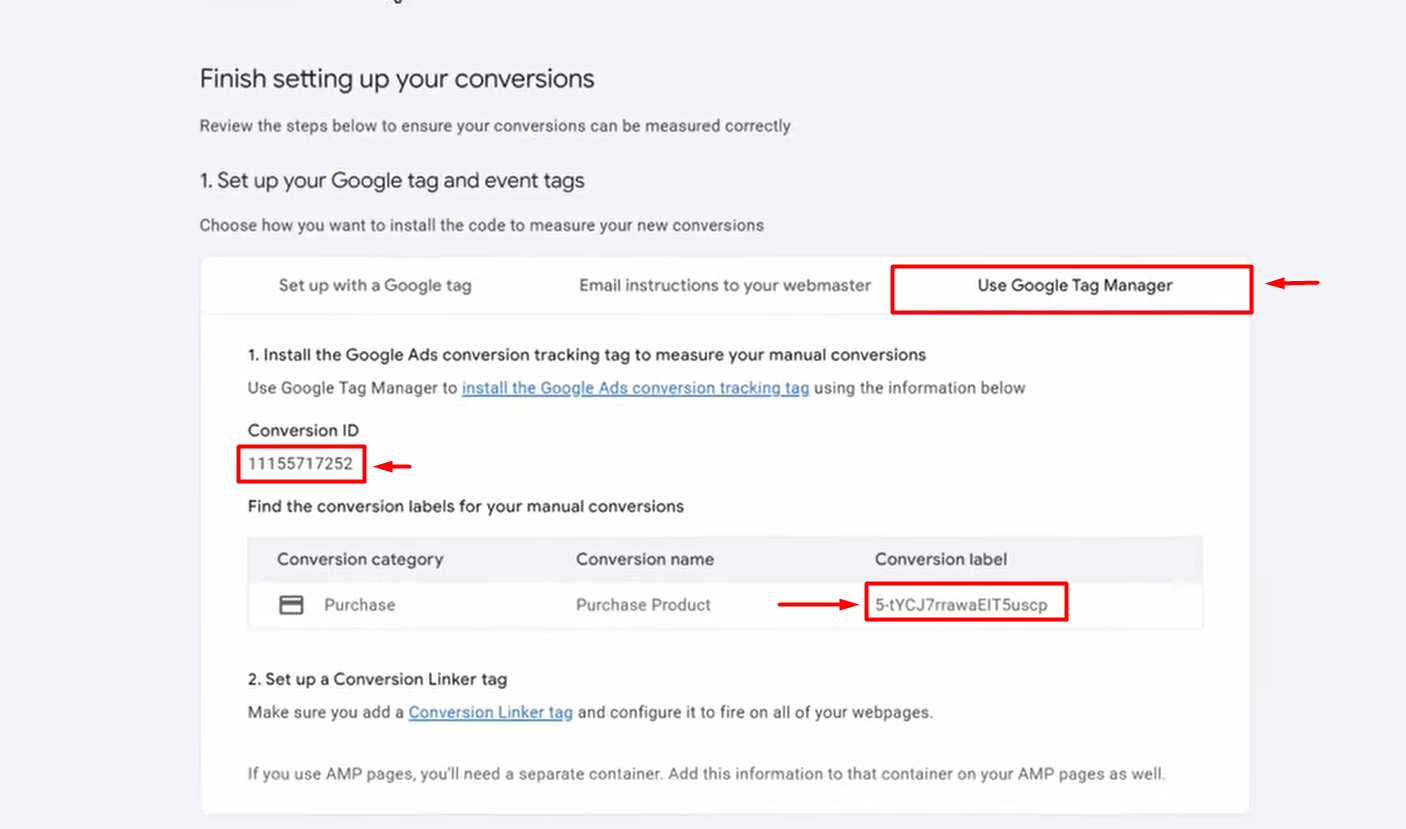
2.11. Select the Use Google Tag Manager tab.
2.12. Copy the Conversion ID and Conversion Label. You will need these values when creating the conversion tag in Google Tag Manager.
3. Create the Payment Confirmation Trigger
3.1. Log in to your Google Tag Manager account.
3.2. Select the container connected to your eDirectory website.
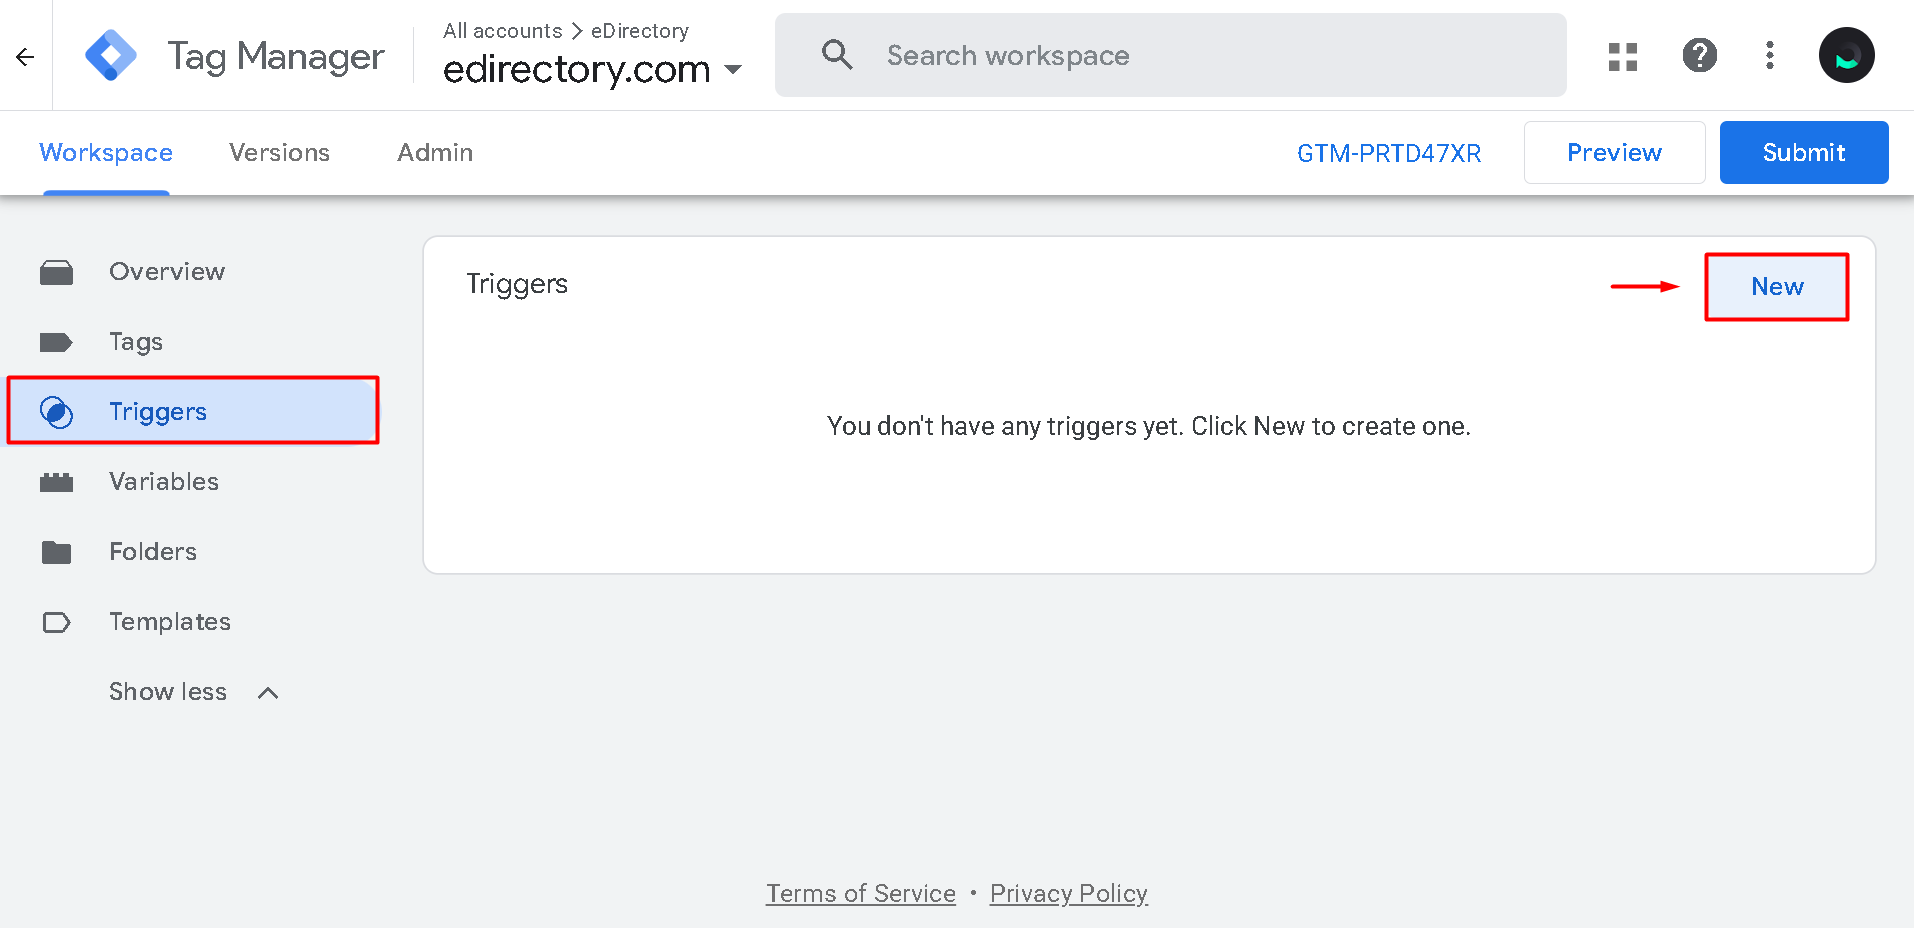
3.3. Go to Triggers.
3.4. Click New.
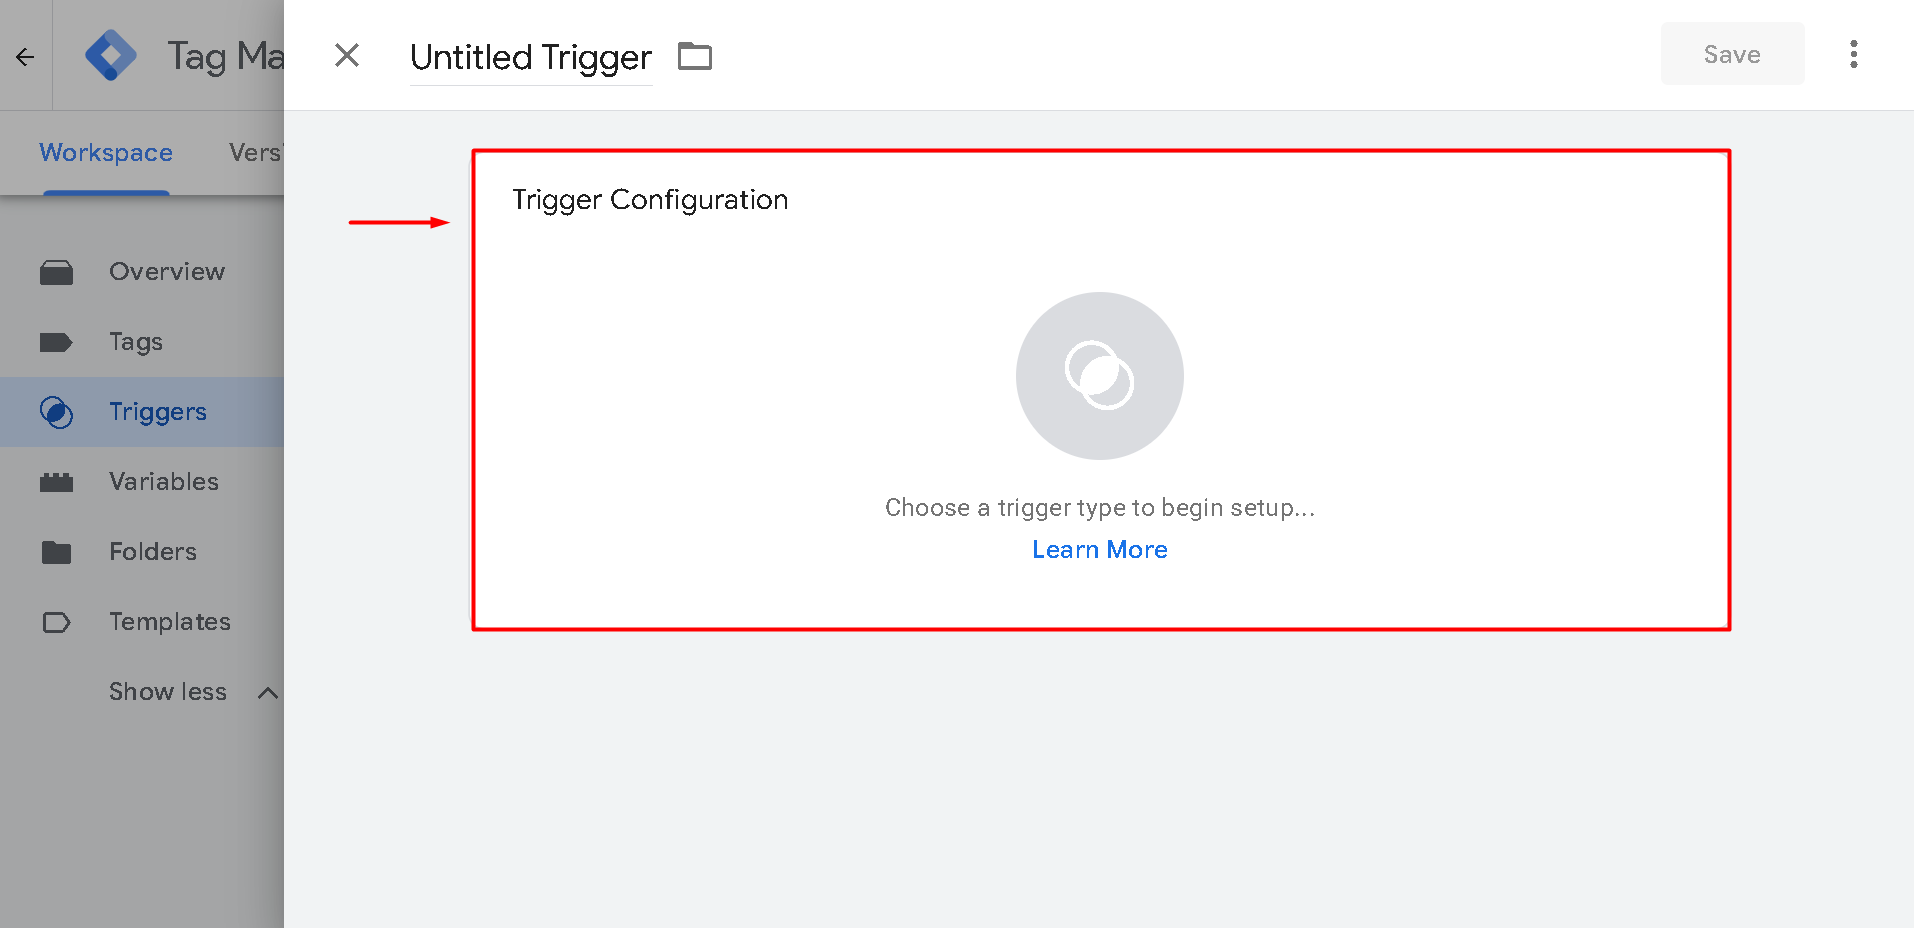
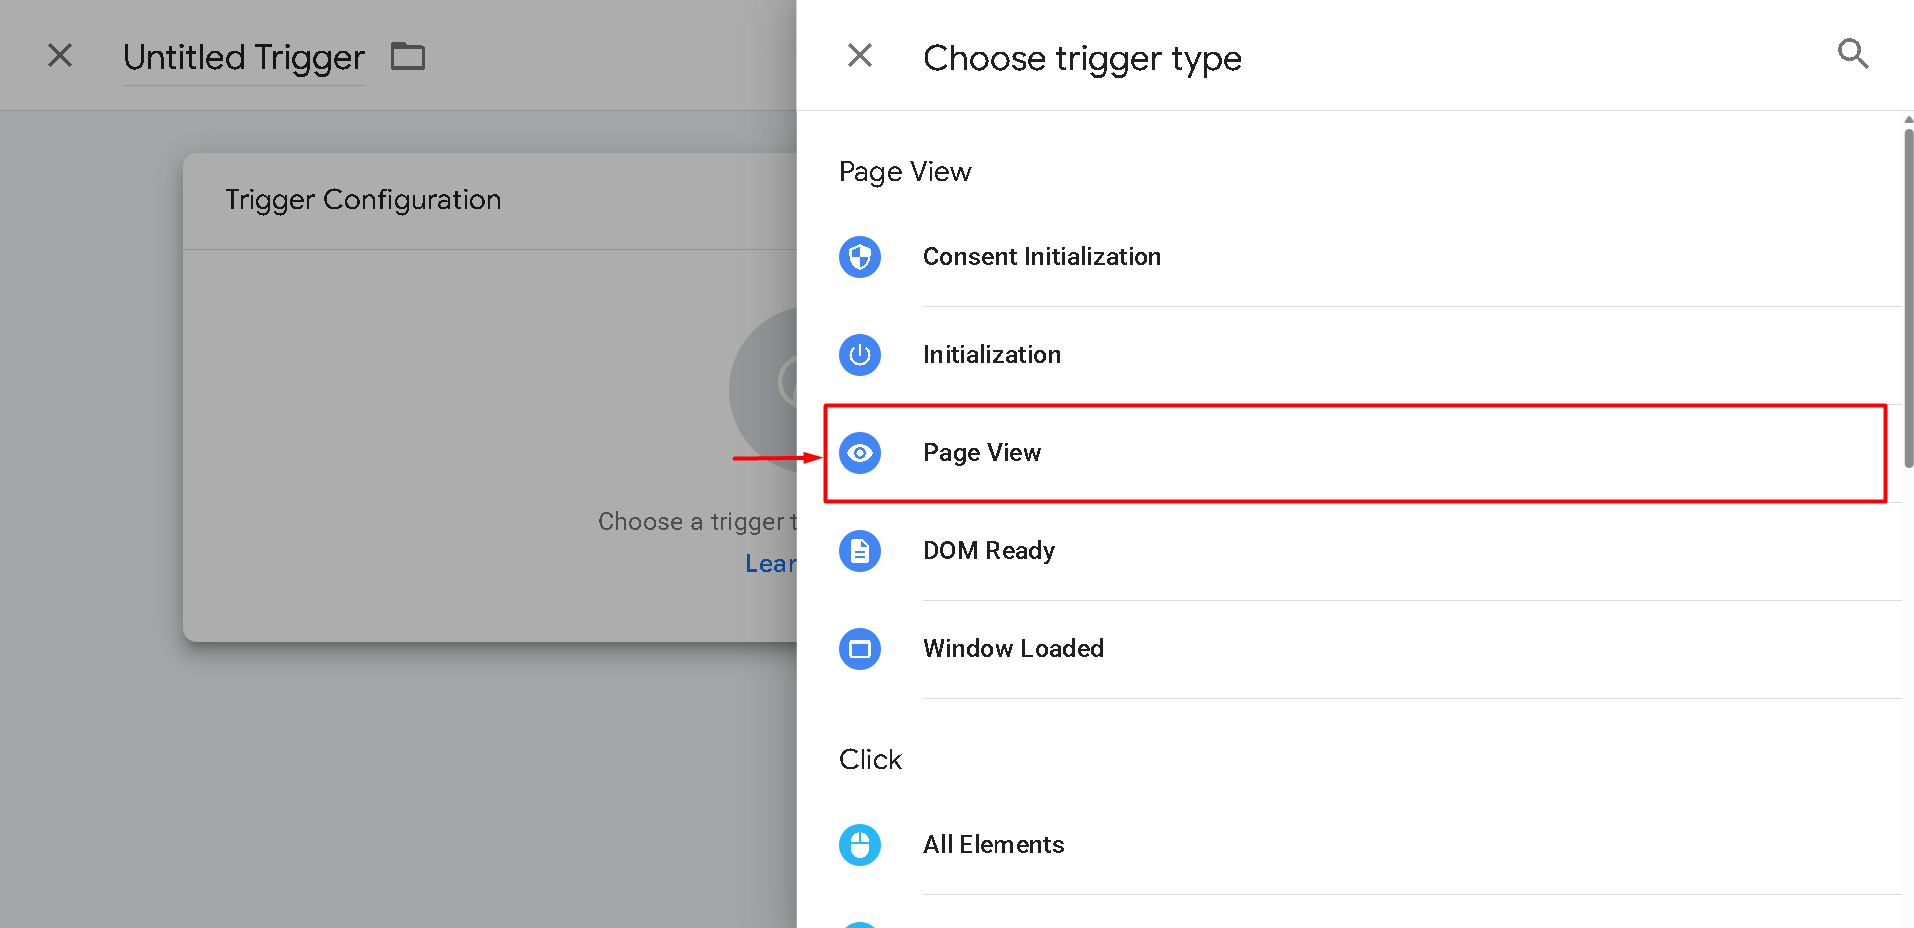
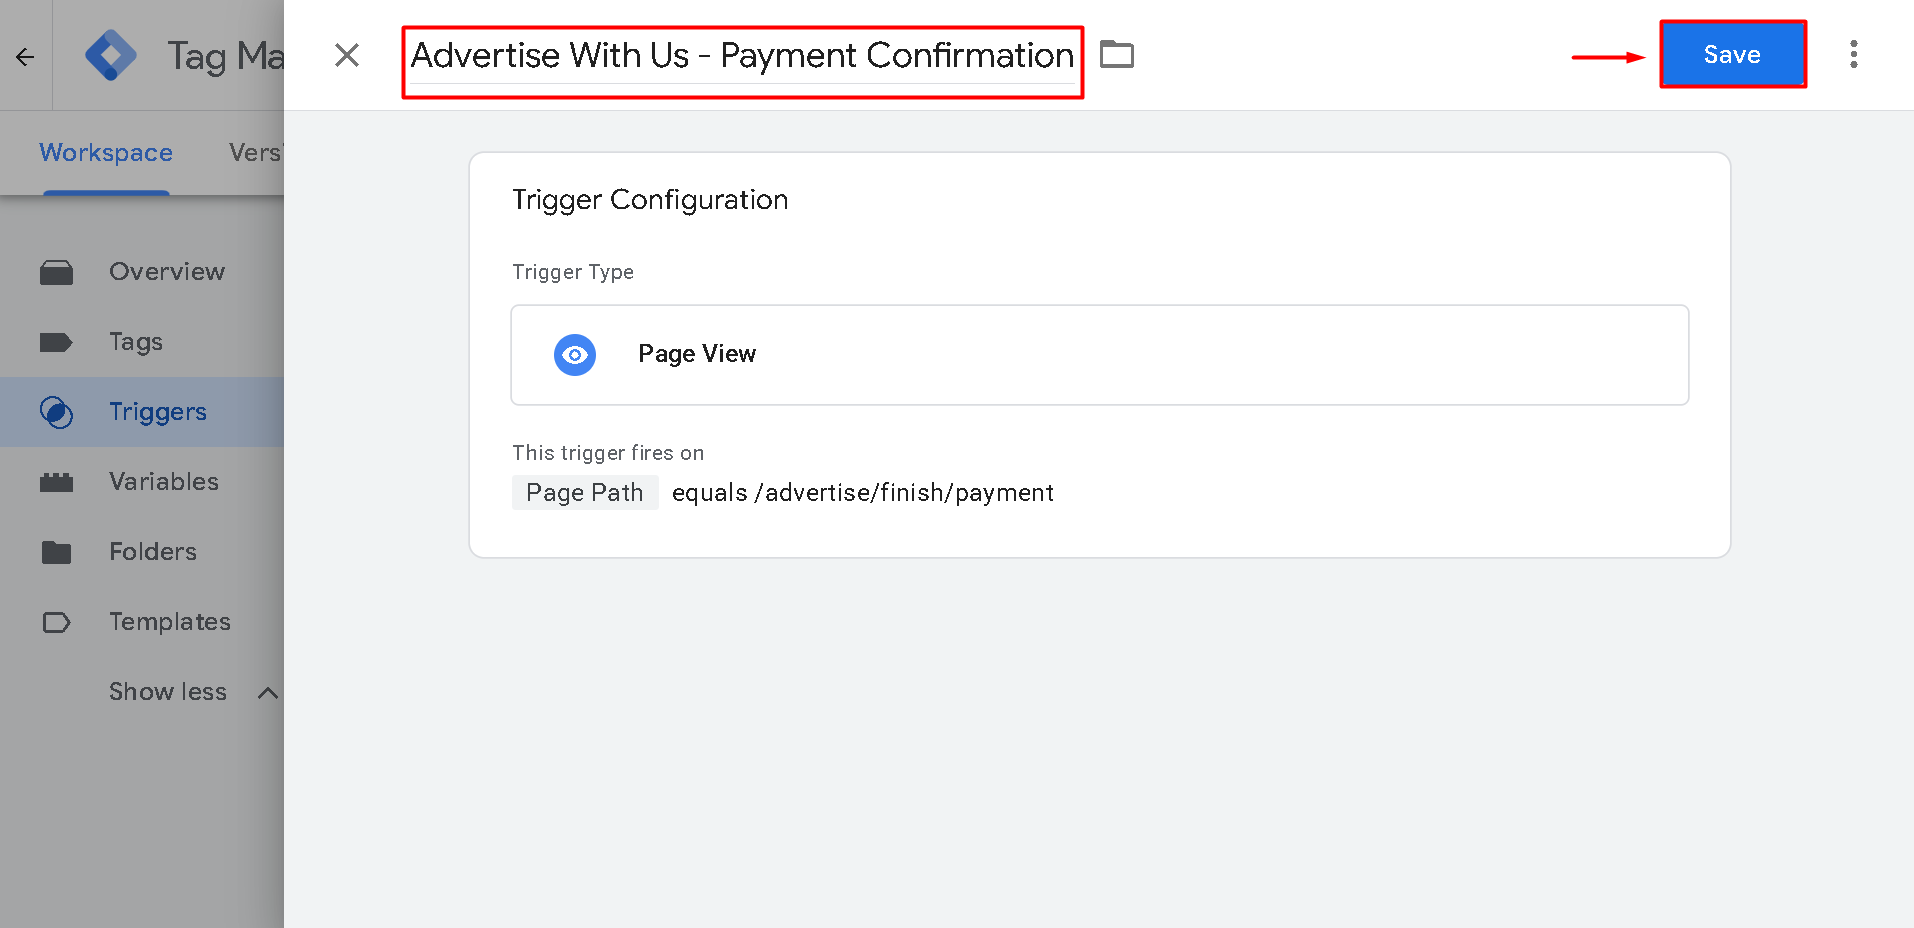
3.5. Click Trigger Configuration and select Page View.
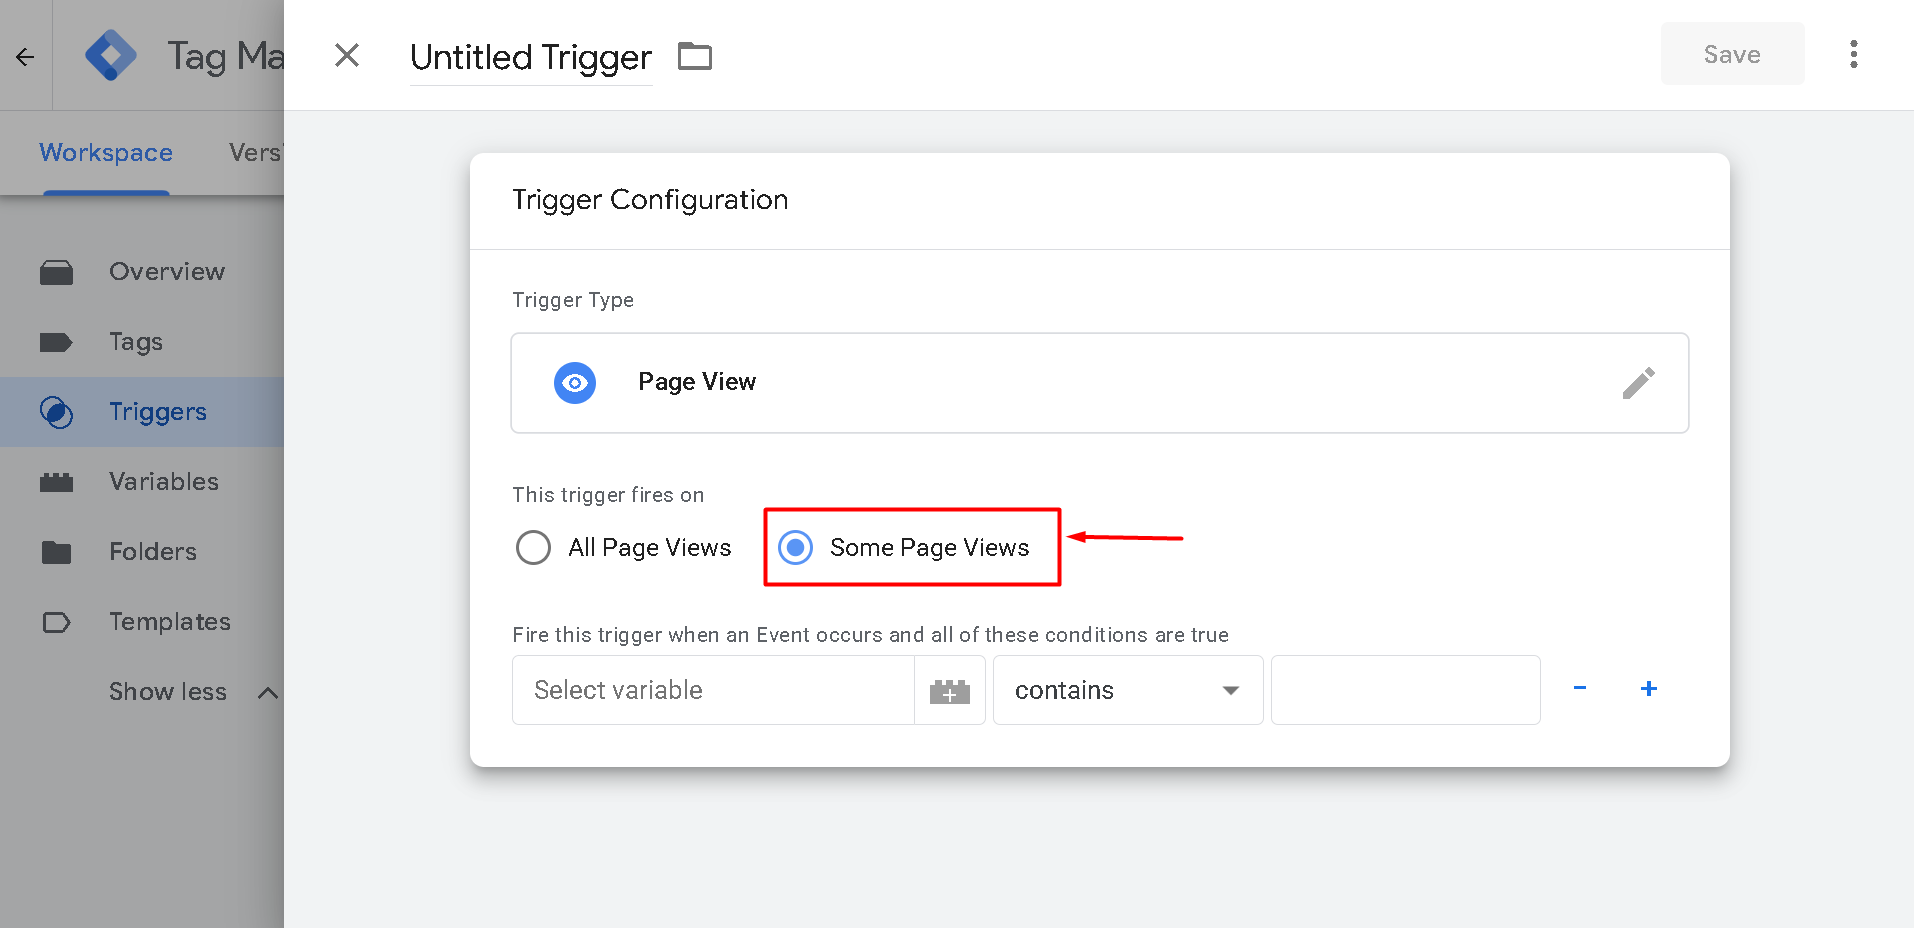
3.6. Select Some Page Views.
3.7. Set the following condition:
| Variable | Operator | Value |
|---|---|---|
| Page Path | contains | /advertise/finish/payment |
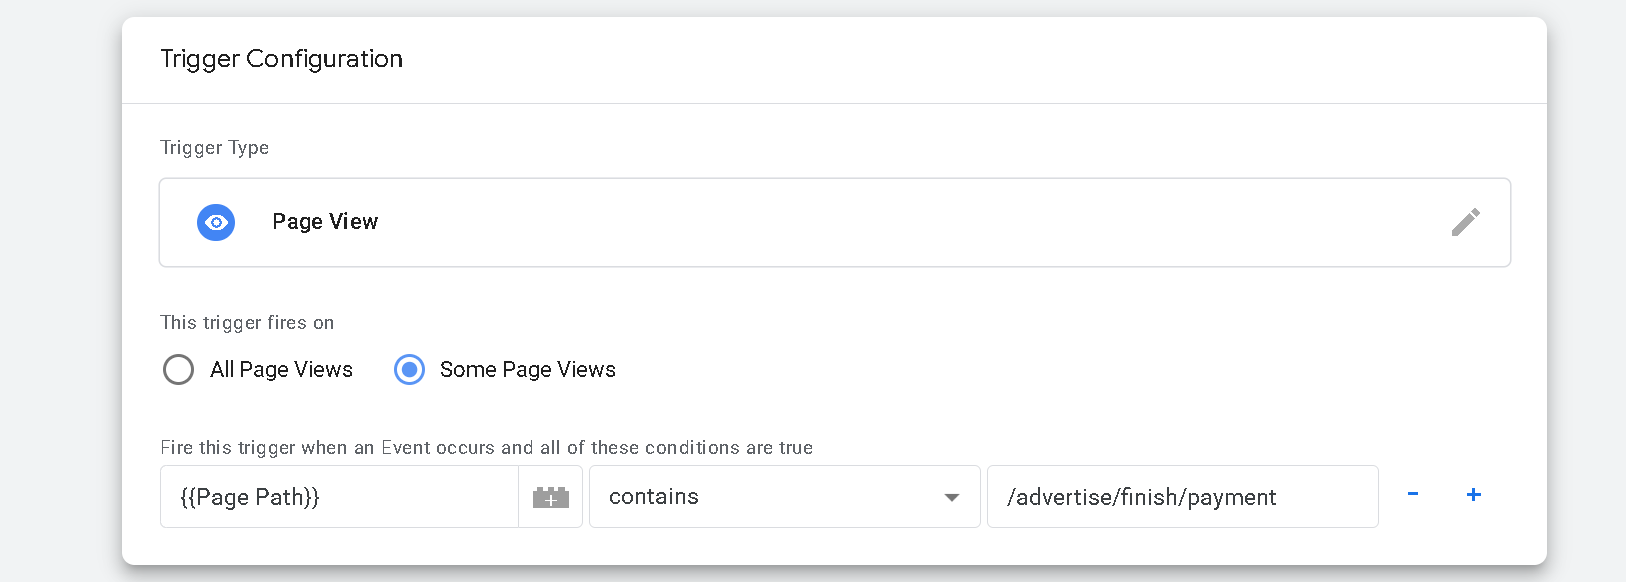
3.8. Give the trigger a name, such as Advertise With Us - Payment Confirmation.
3.9. Click Save.
4. Create the Conversion Tag
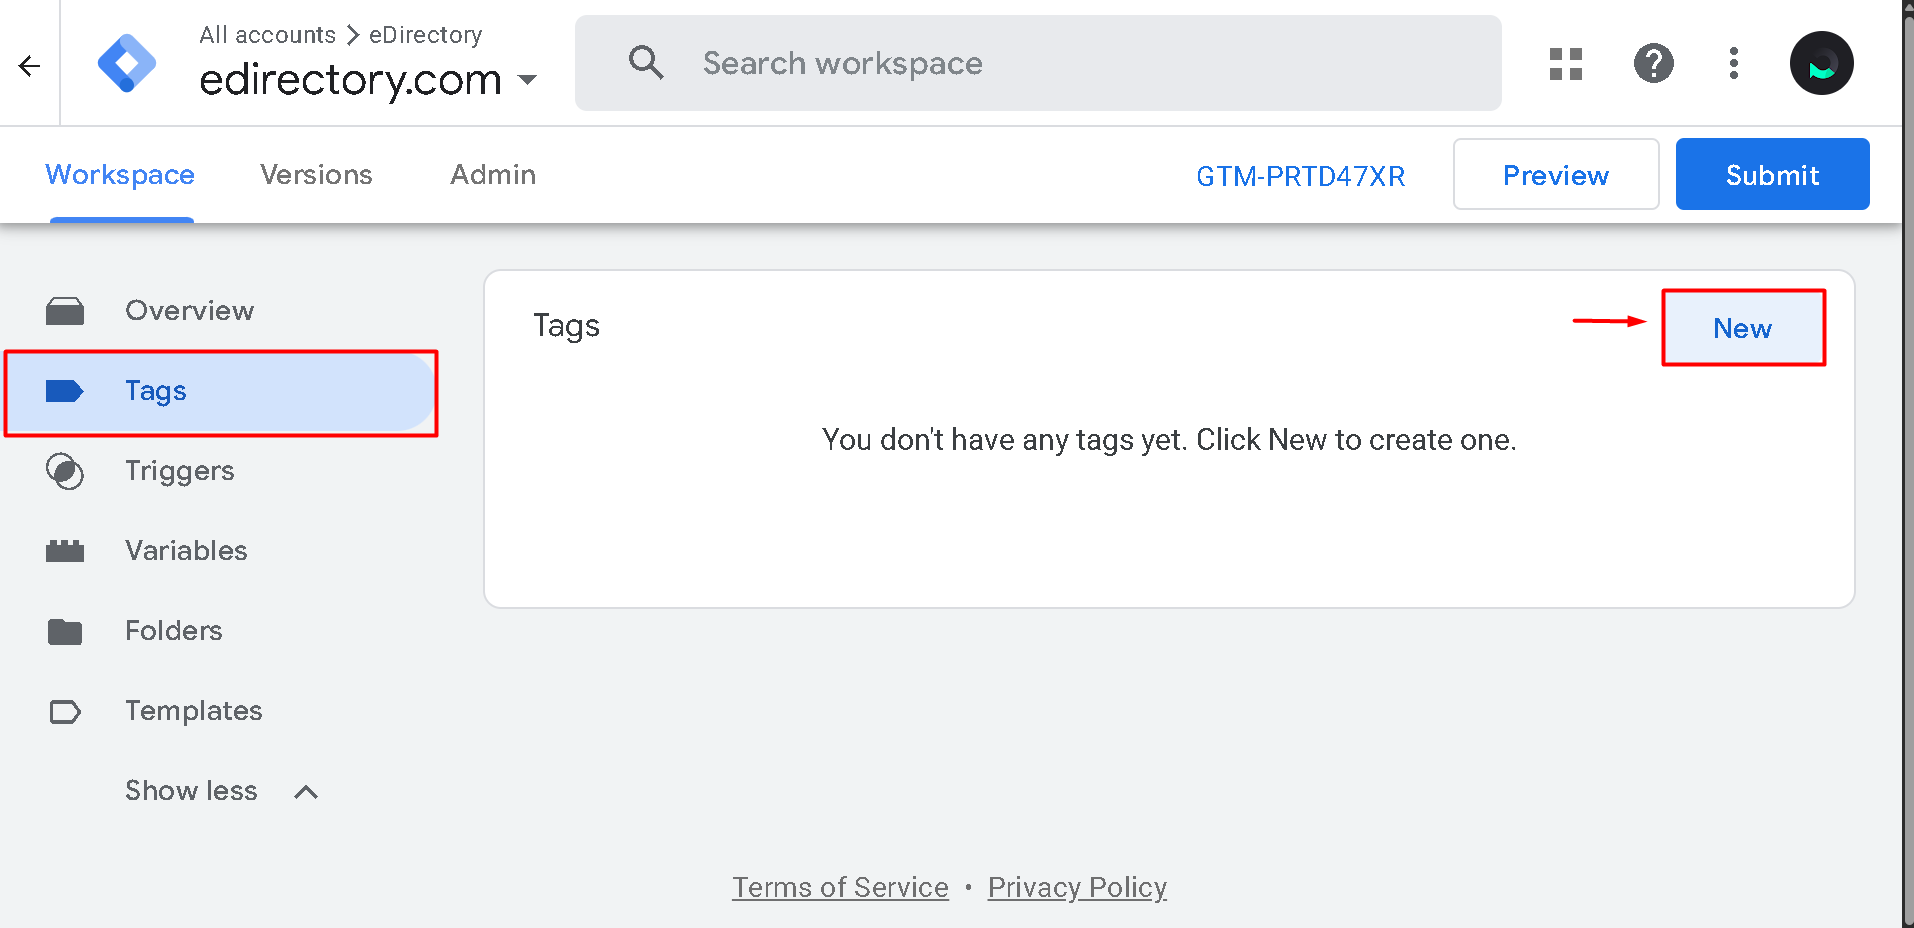
4.1. Go to Tags.
4.2. Click New.
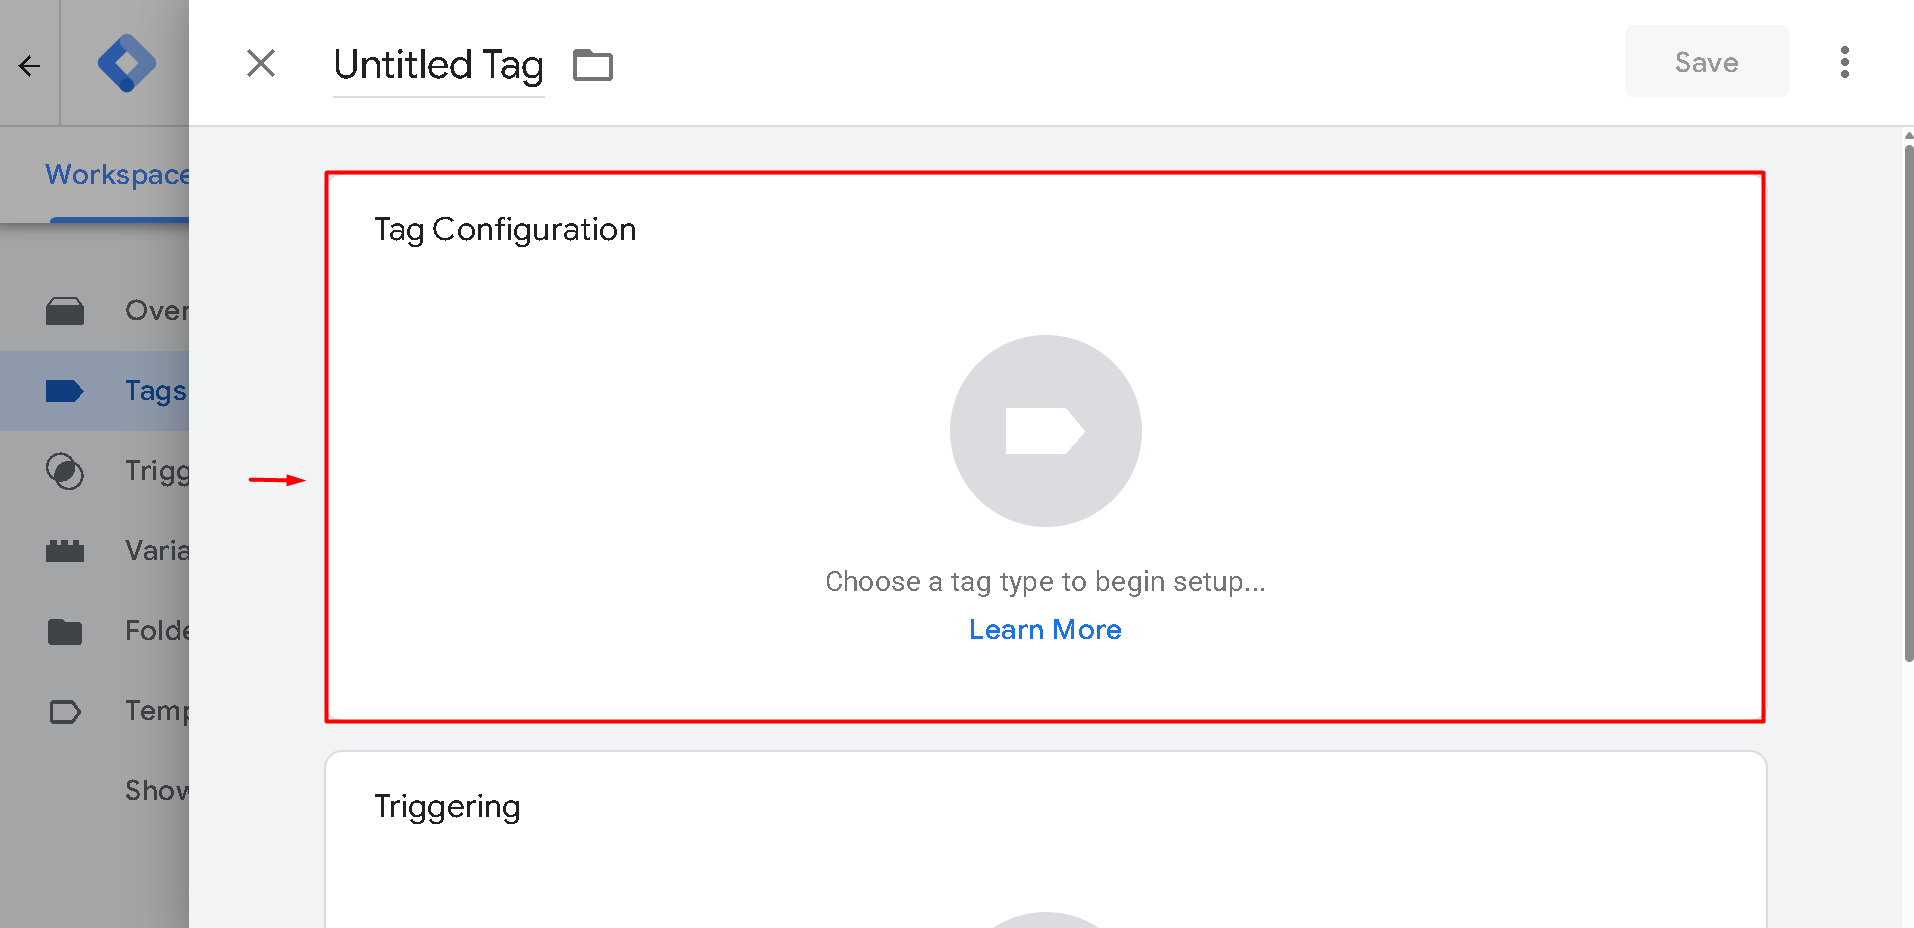
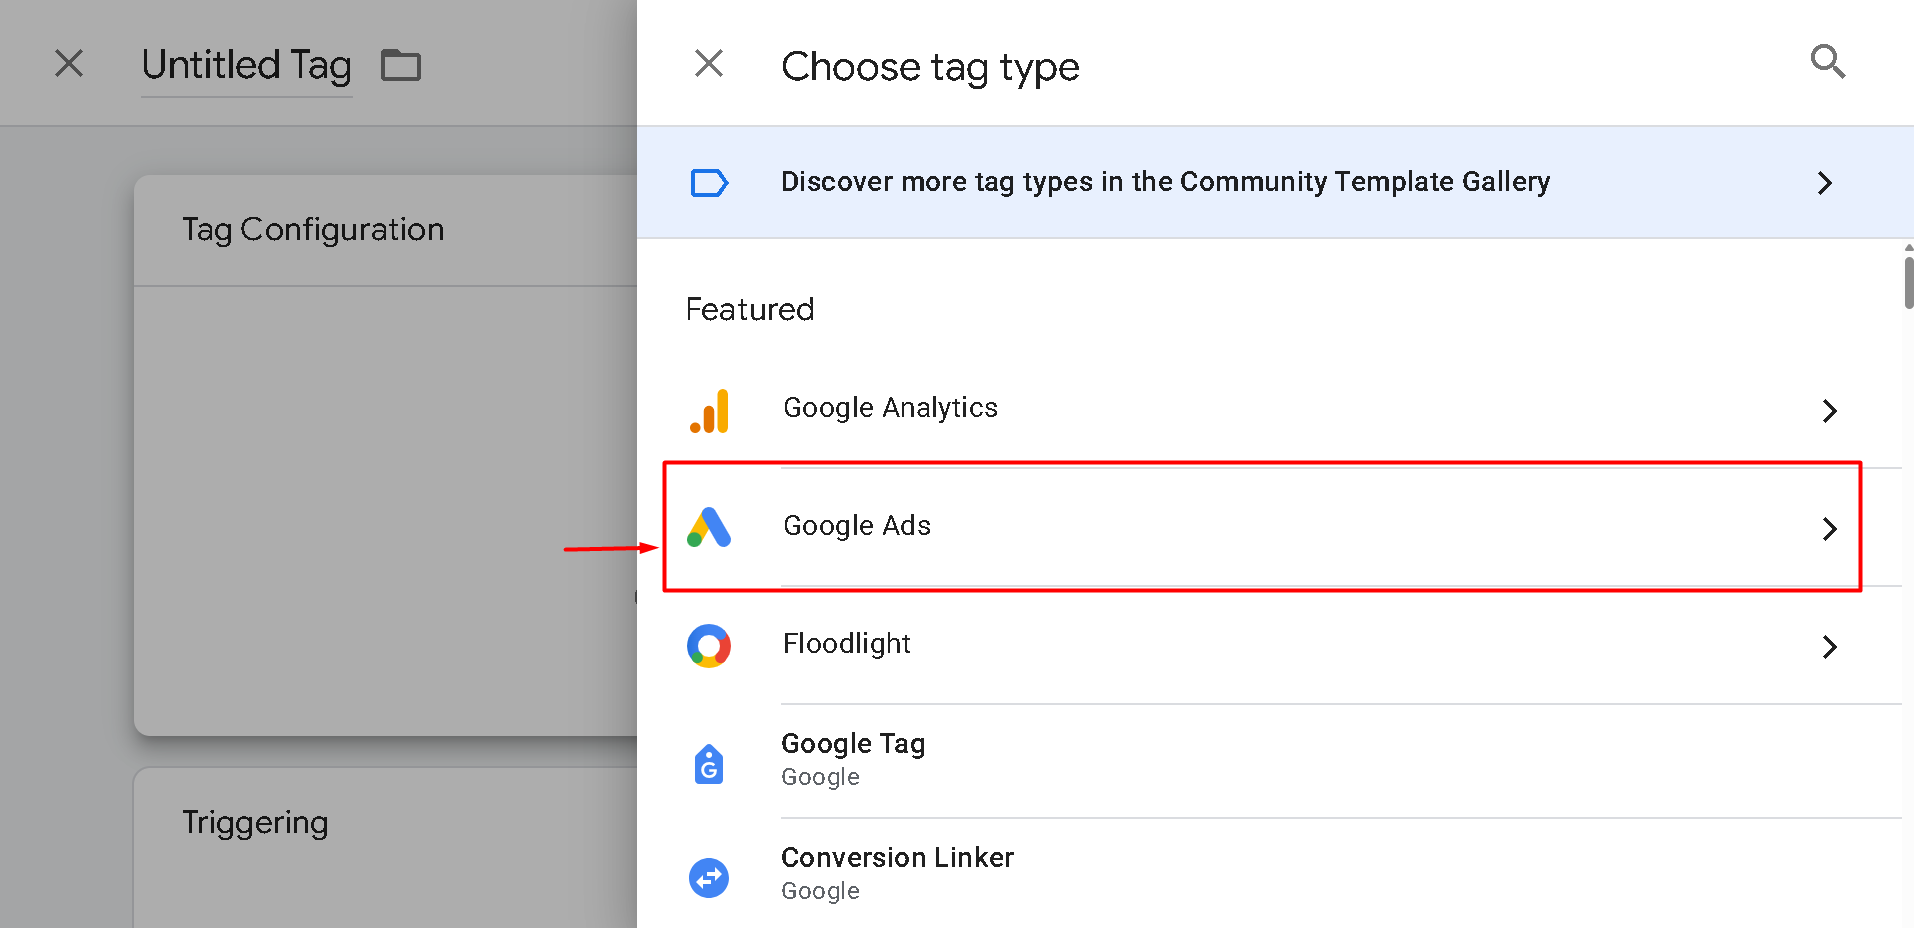
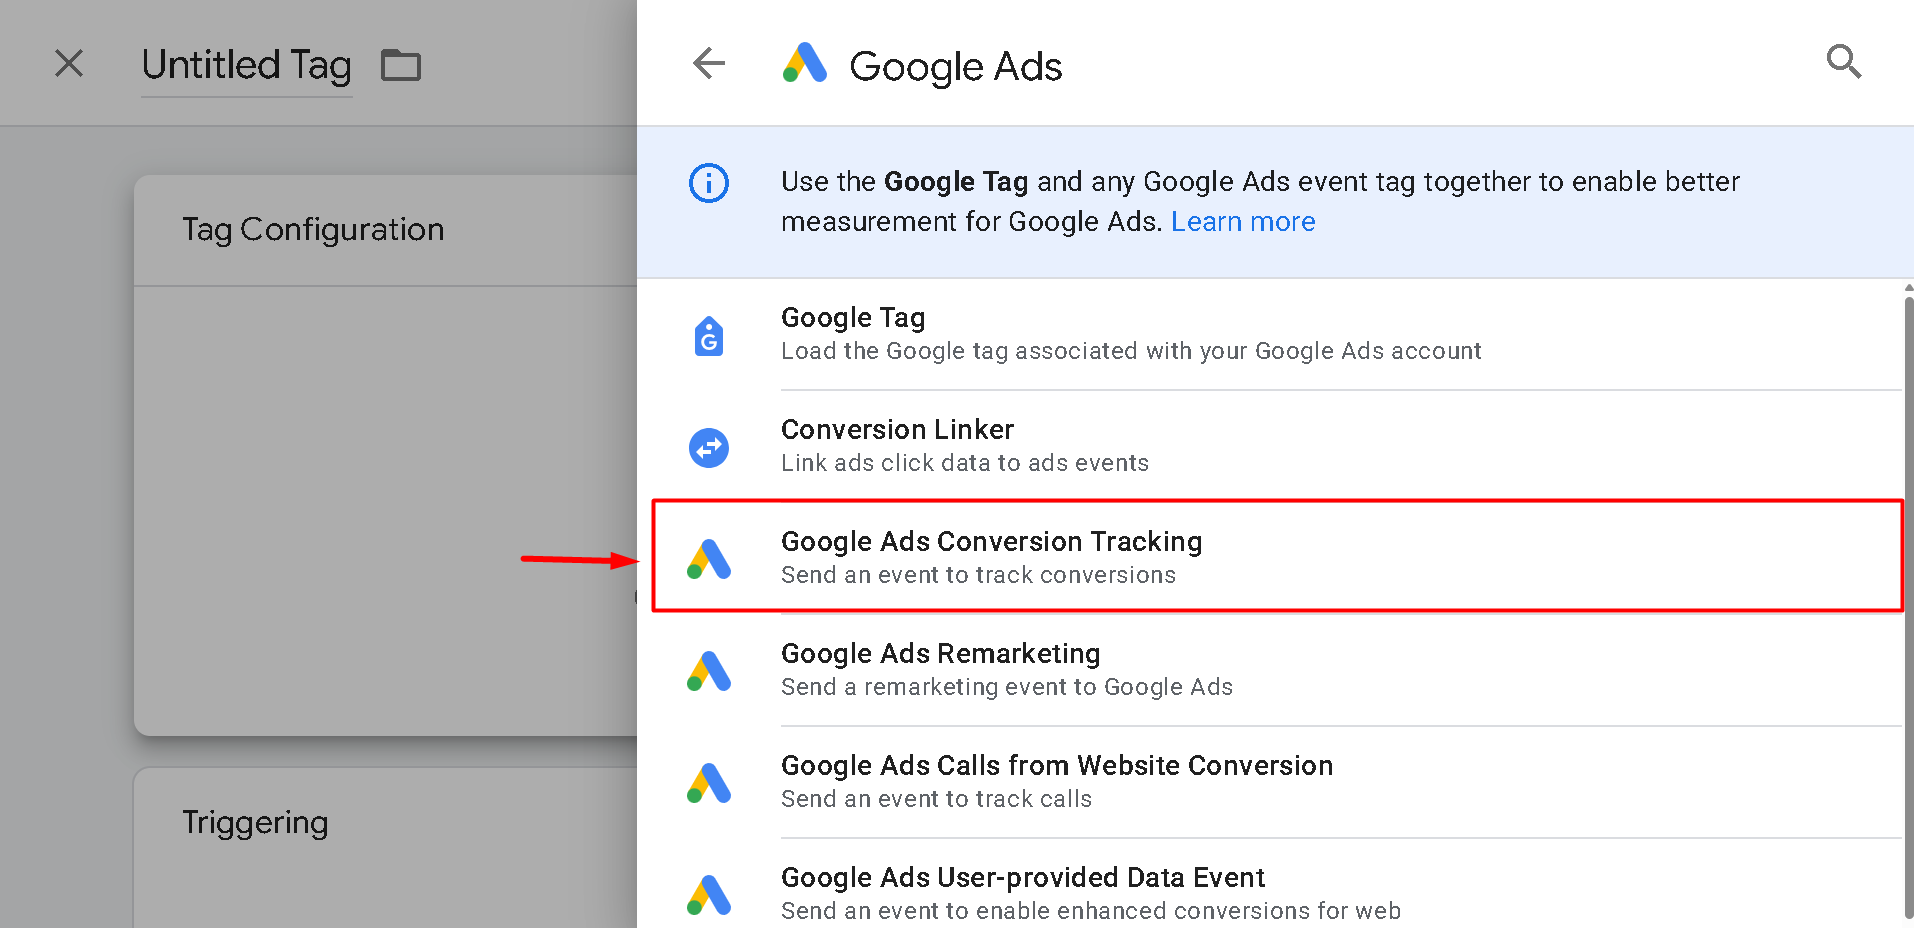
4.3. Click Tag Configuration and select Google Ads → Google Ads Conversion Tracking.
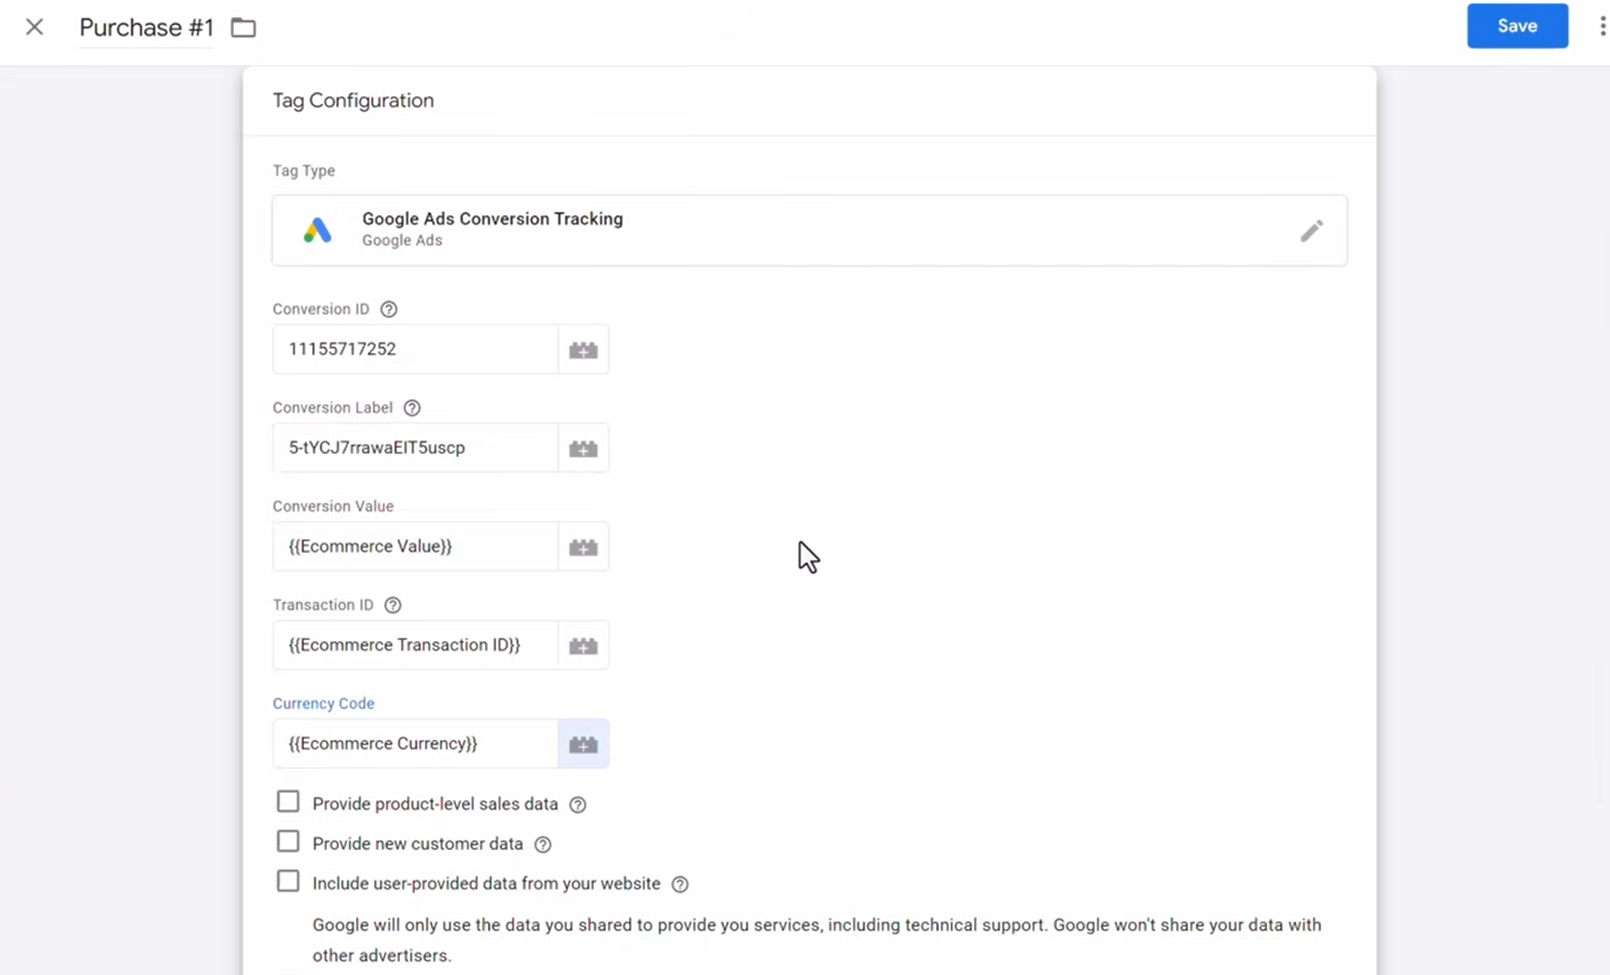
4.4. Enter the information below:
- Conversion ID and Label: enter theConversion ID and Conversion Label copied from Google Ads in Step 2.
- Conversion Value: enter the variable Ecommerce Value.
- Transaction ID: enter the variable Ecommerce Transaction ID.
- Currency Code: enter the variable Ecommerce Currency.
4.5. Under Triggering, select the Advertise With Us - Payment Confirmation trigger created in Step 3.

4.6. Give the tag a name and click Save.
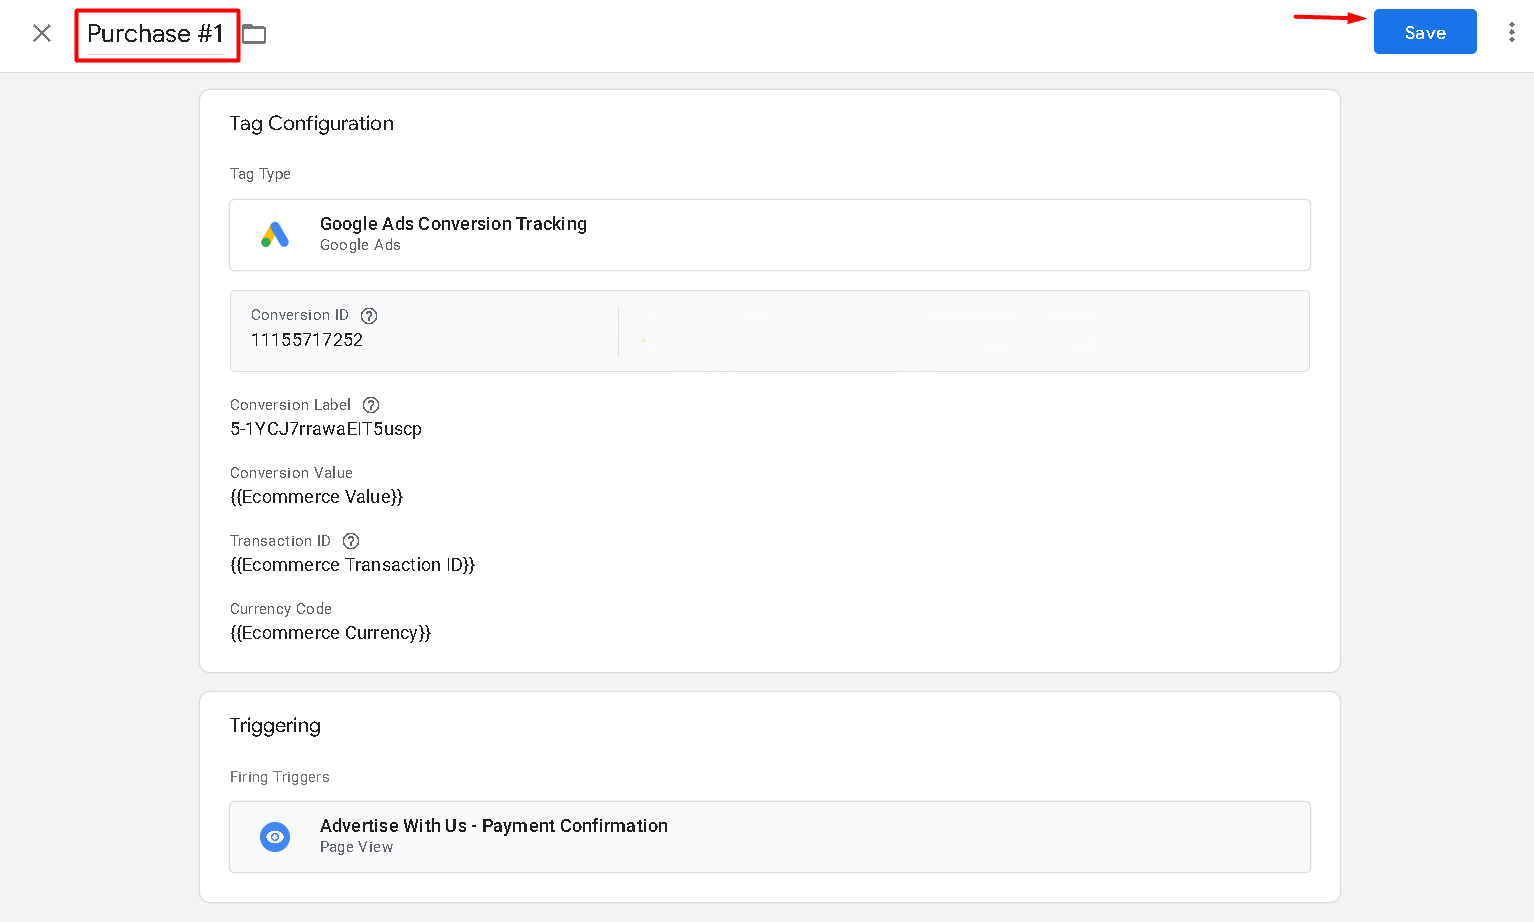
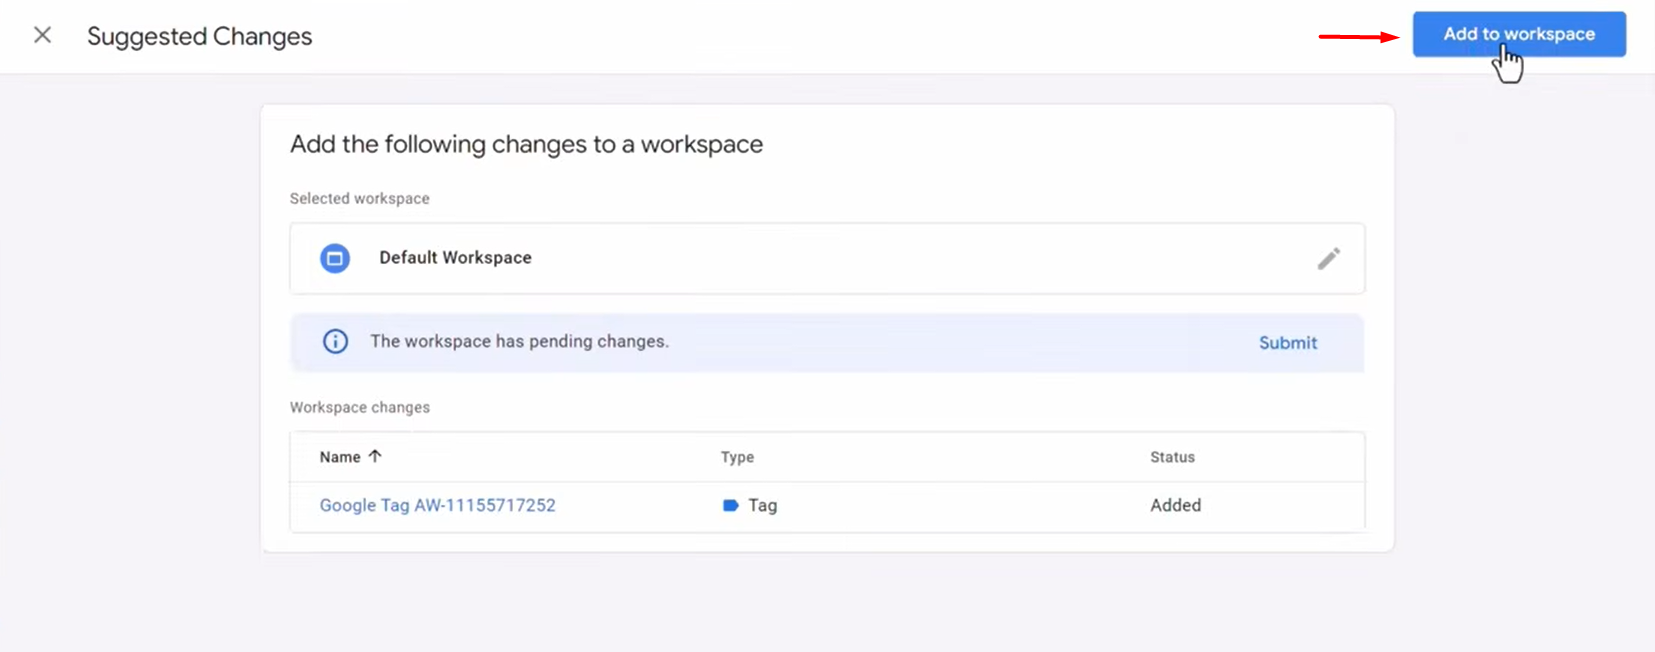
4.7. If you see the message "One missing Google tag found", click Fix in front of it.


4.8. Click Add to workspace.
4.9. Click Tag.
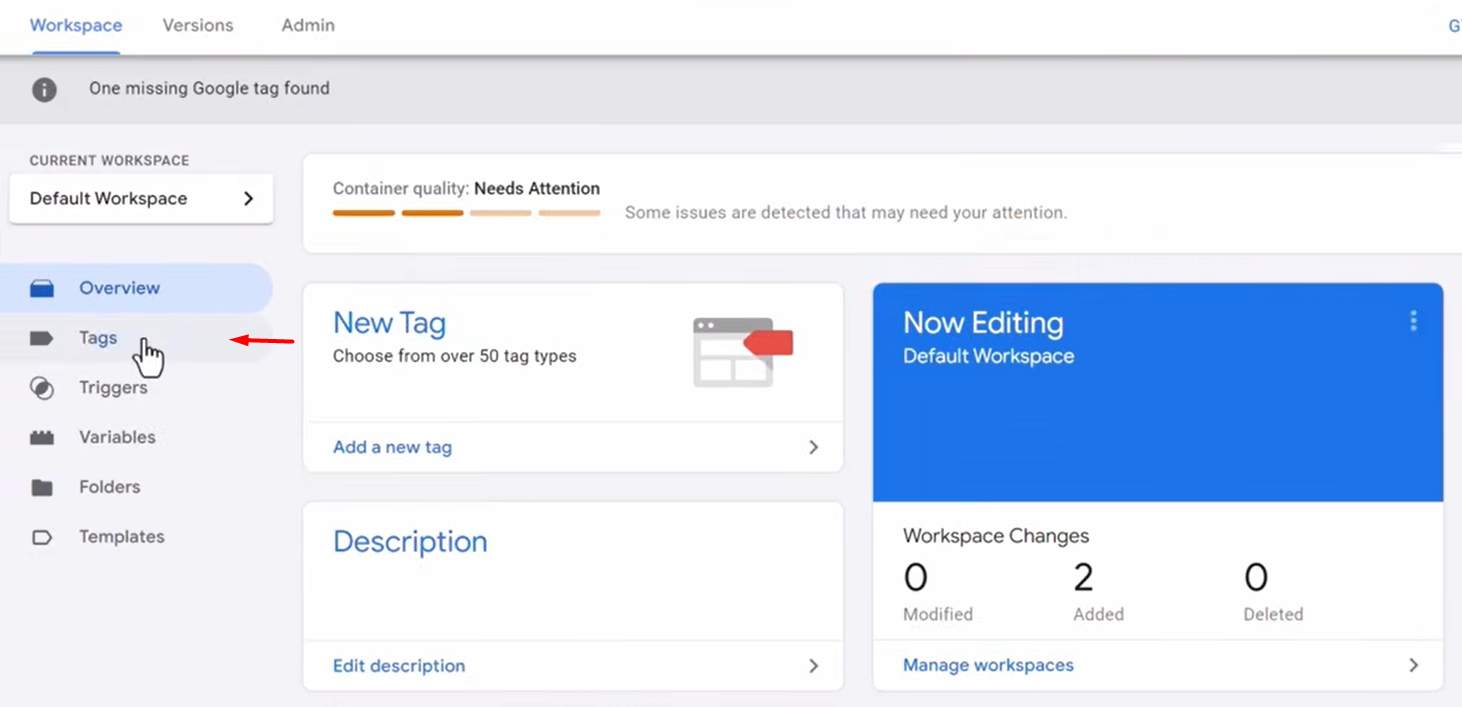
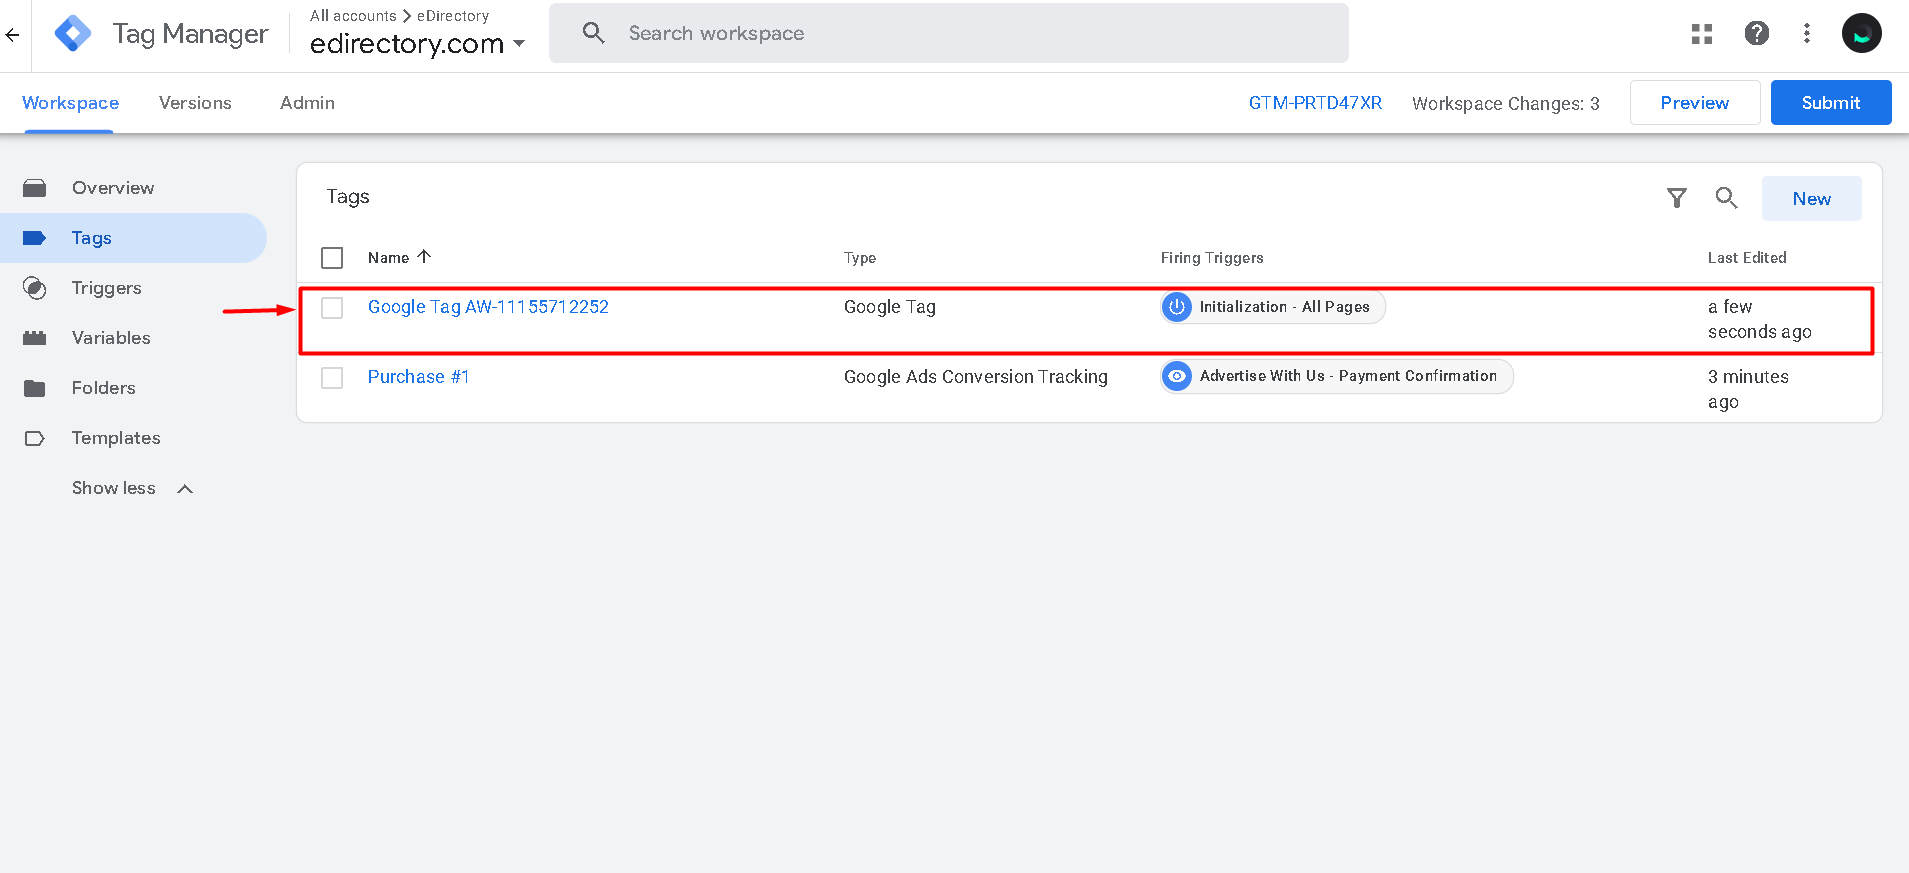
4.10. You will see the tag you have just created and the conversion ID tag. It simply added this conversion ID tag to your Google tag manager account to track your site.
5. Test the Conversion
Before publishing your changes, test the configuration to make sure the tag is triggered correctly.
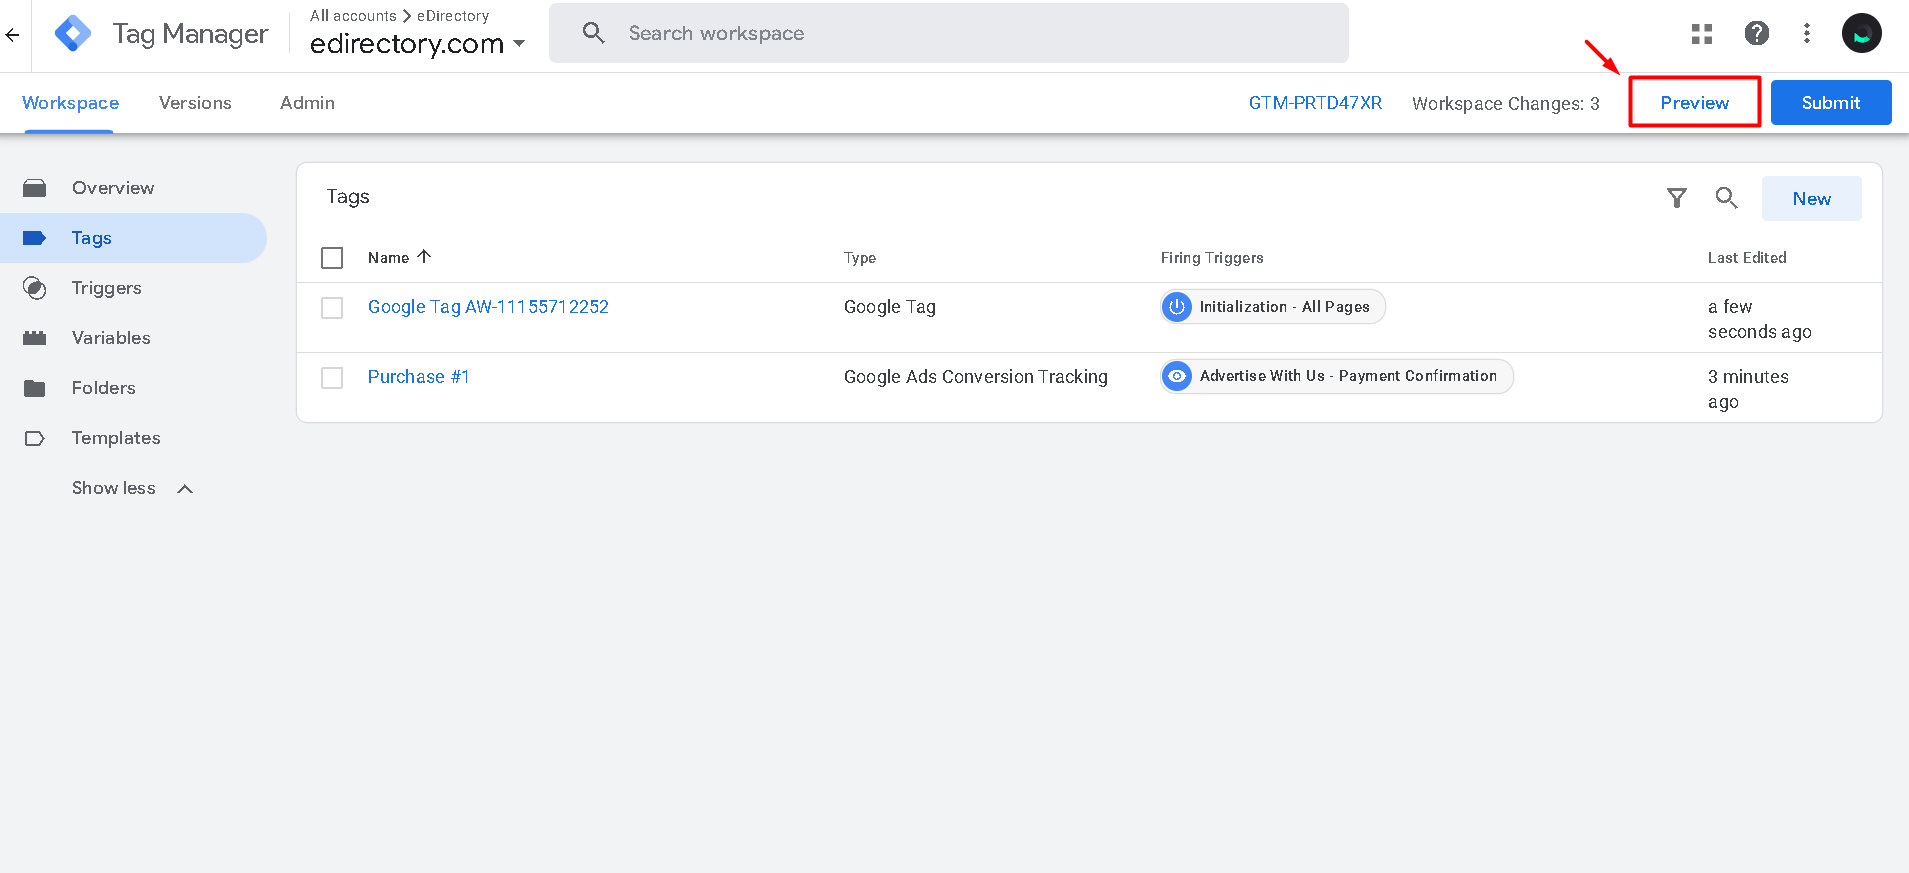
5.1. In Google Tag Manager, click Preview.
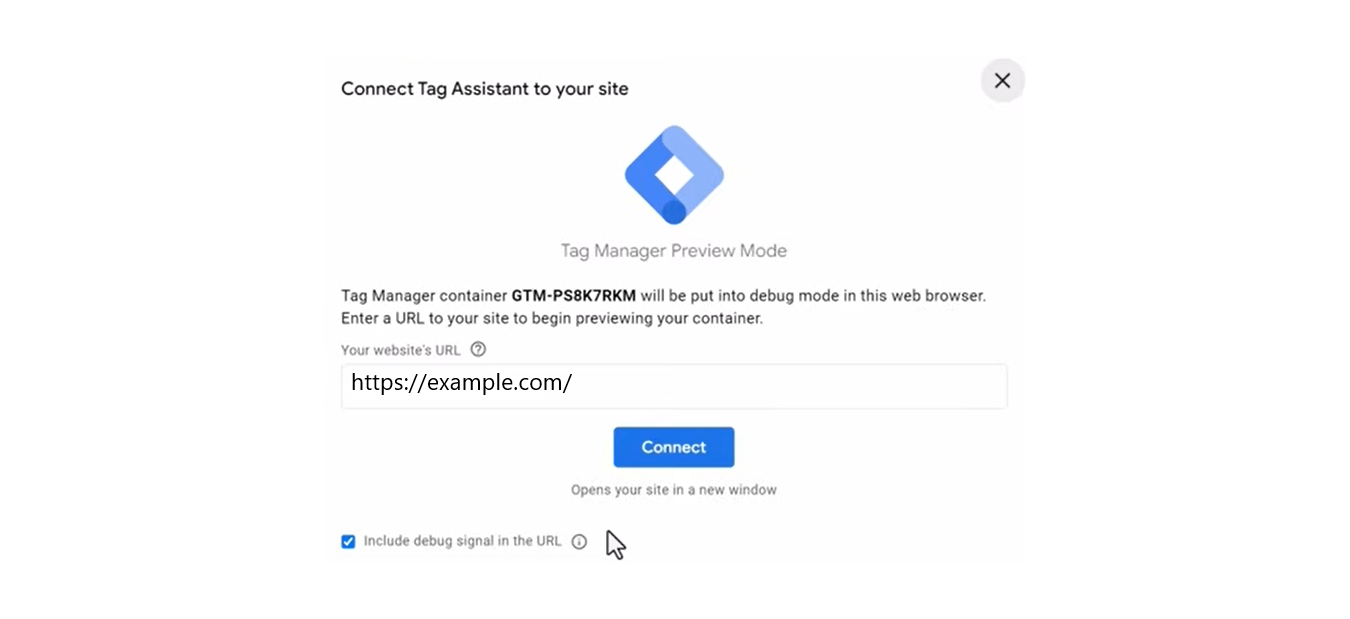
5.2. Enter your website URL and connect to the website.
5.3. Complete the Advertise With Us checkout process in the Preview mode.

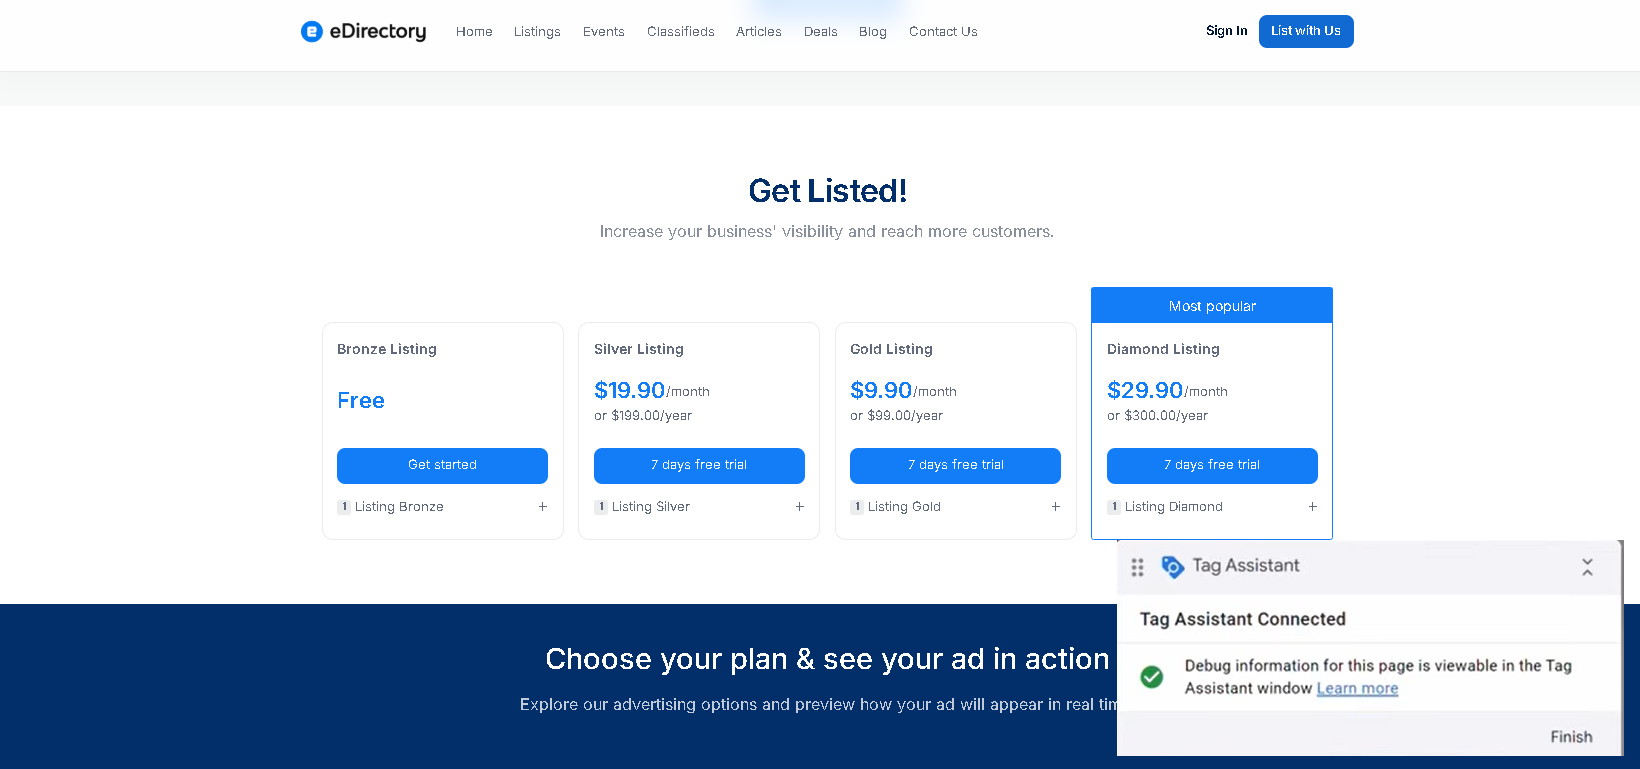
5.4. After completing the payment, verify that you are redirected to the payment confirmation page.
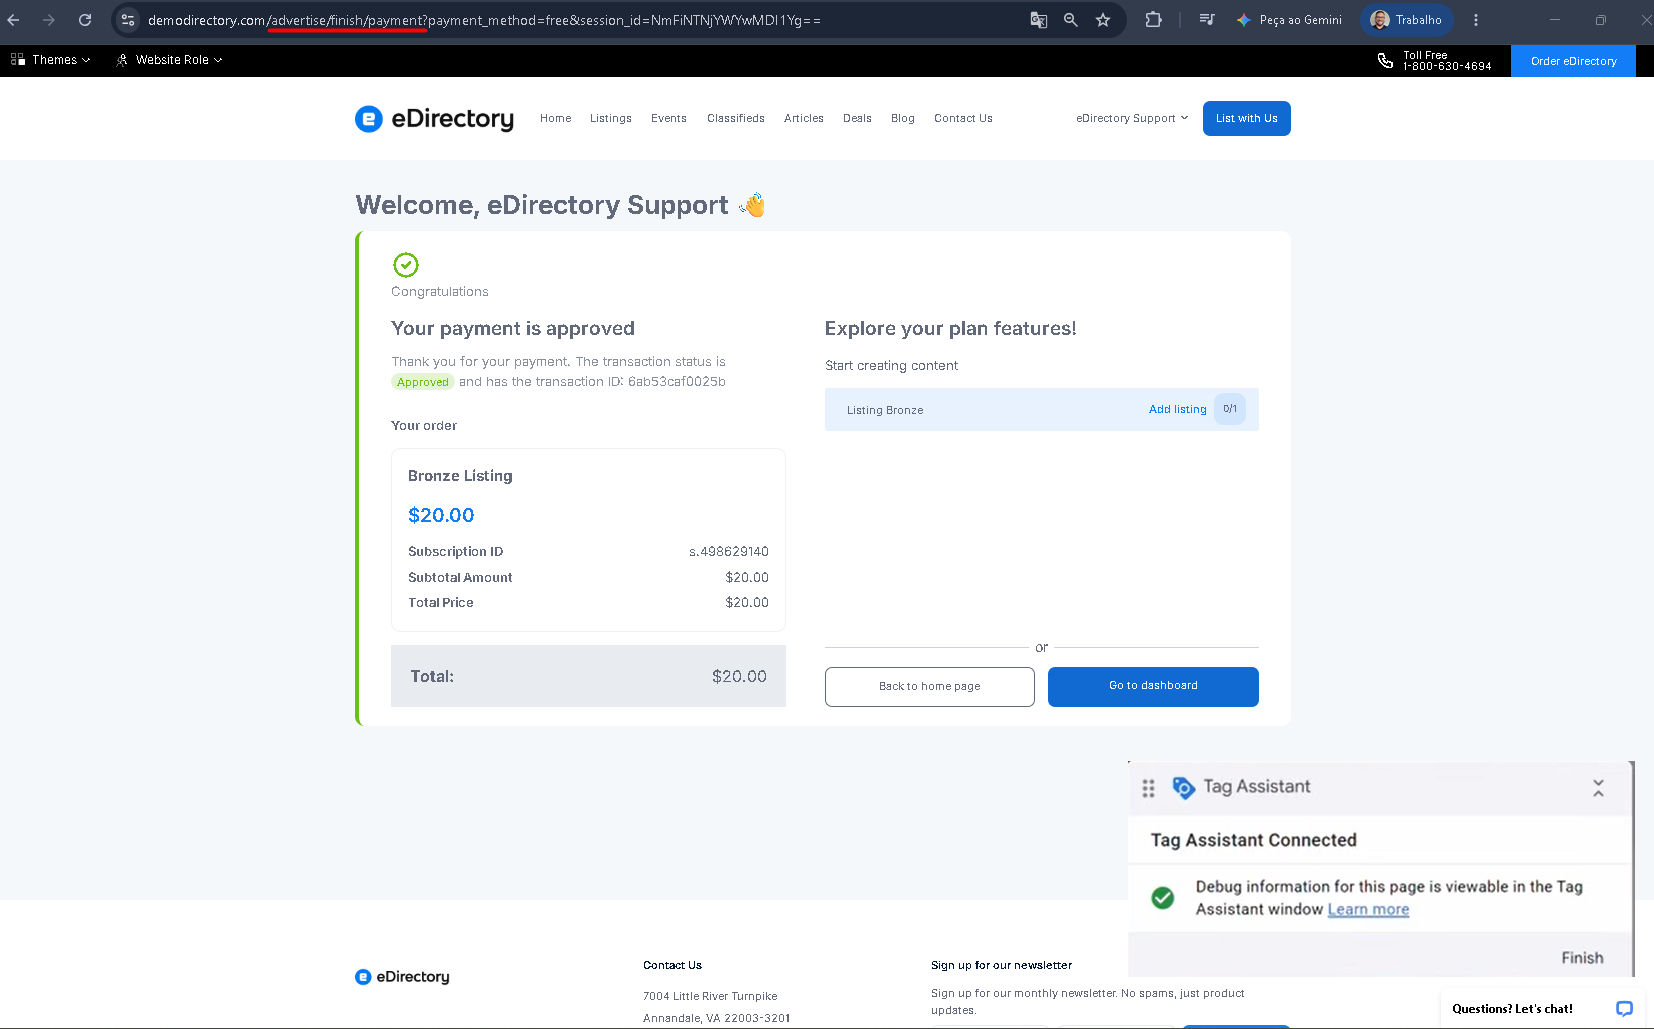
5.5. In Google Tag Manager's Preview mode (tag assistant), check that both the Payment and Google Ads Tags trigger were fired.
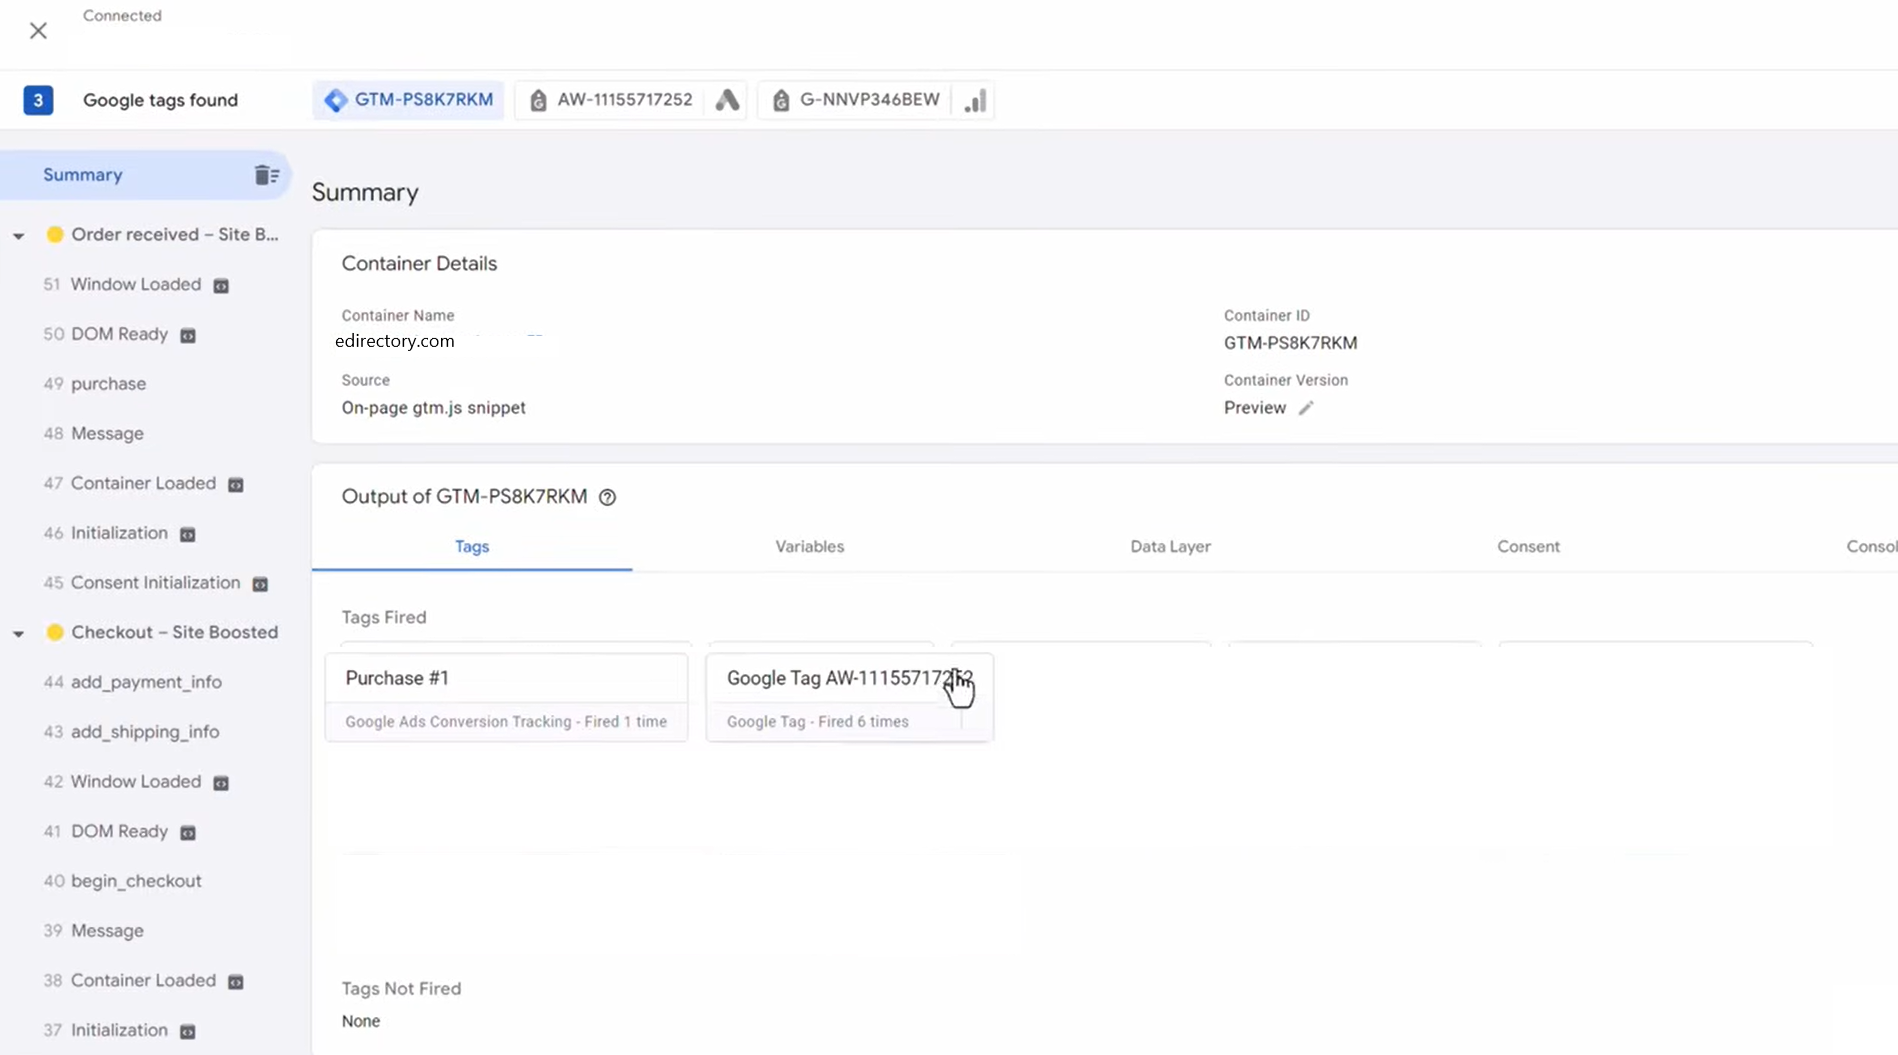
If you see that the tags were fired successfully, you can move to the next step and publish them.
6. Publish the Changes
Once you have confirmed that the conversion tag is working:
6.1. Return to Google Tag Manager.
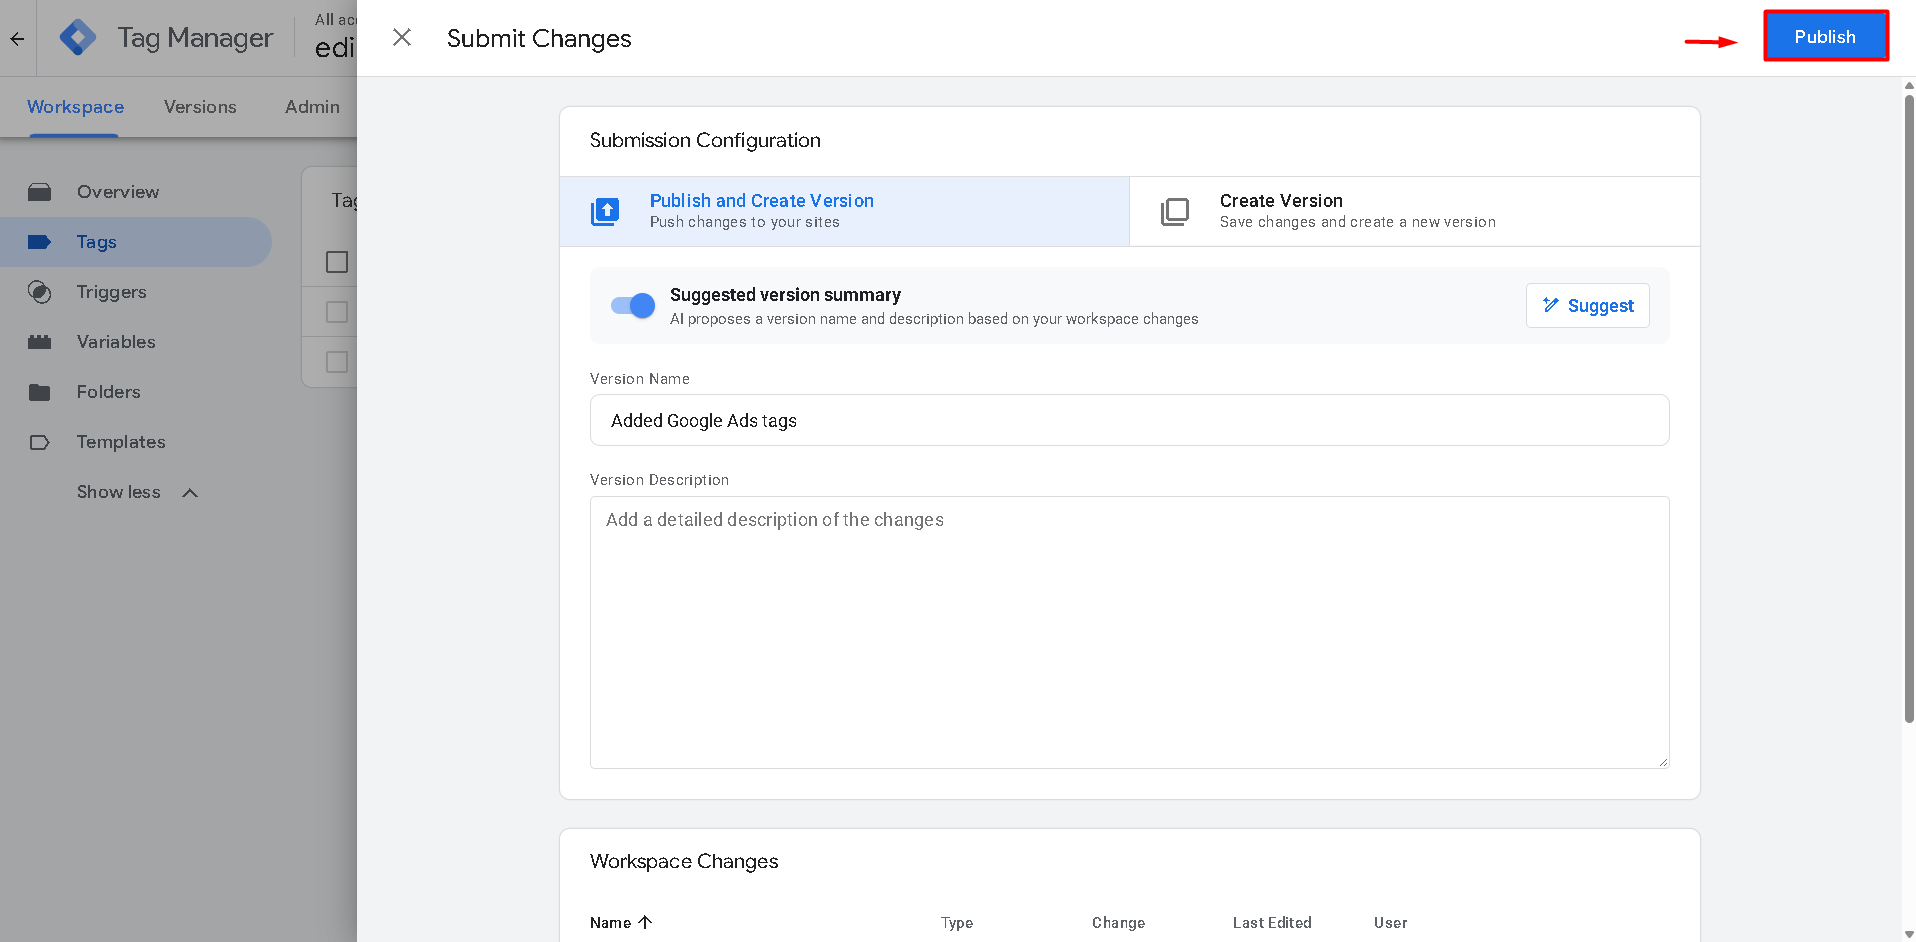
6.2. Click Submit.
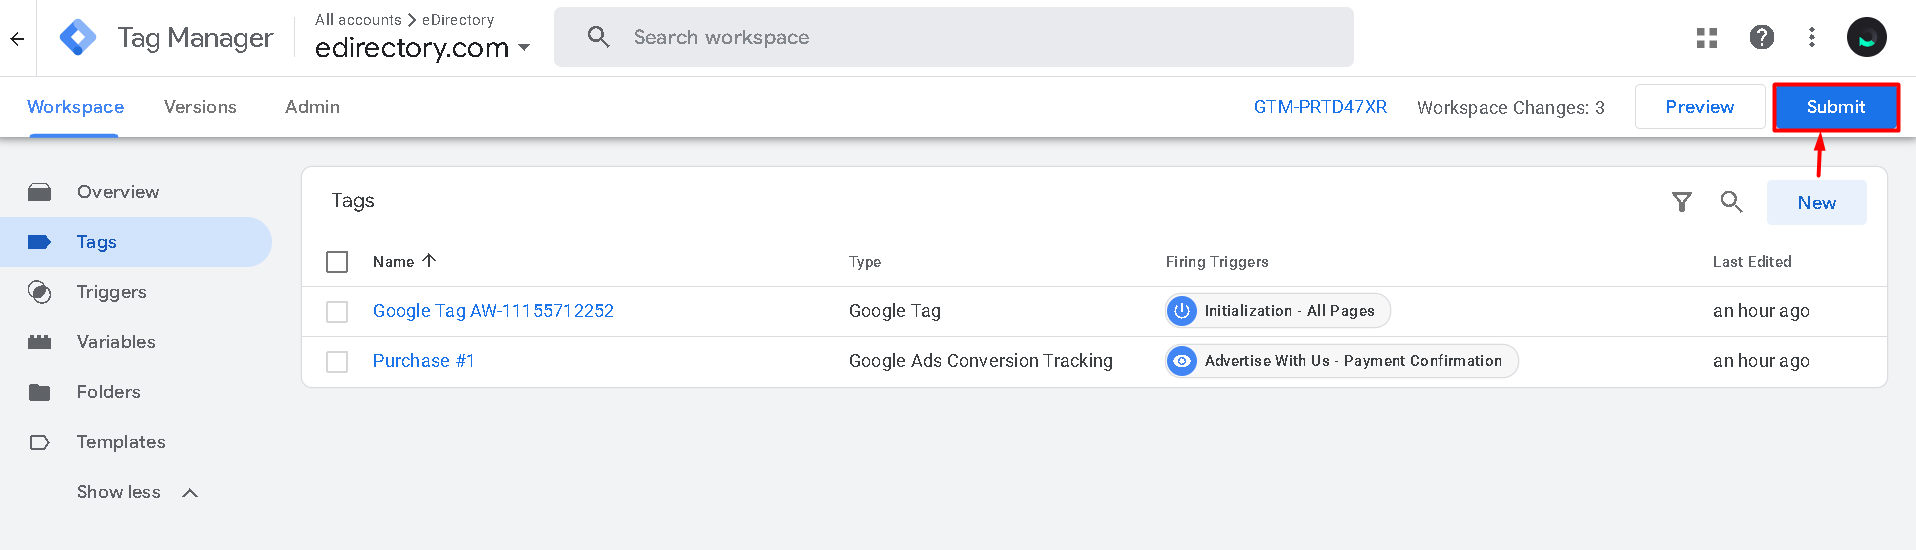
6.3. Add a name and description for the changes.
6.4. Click Publish.
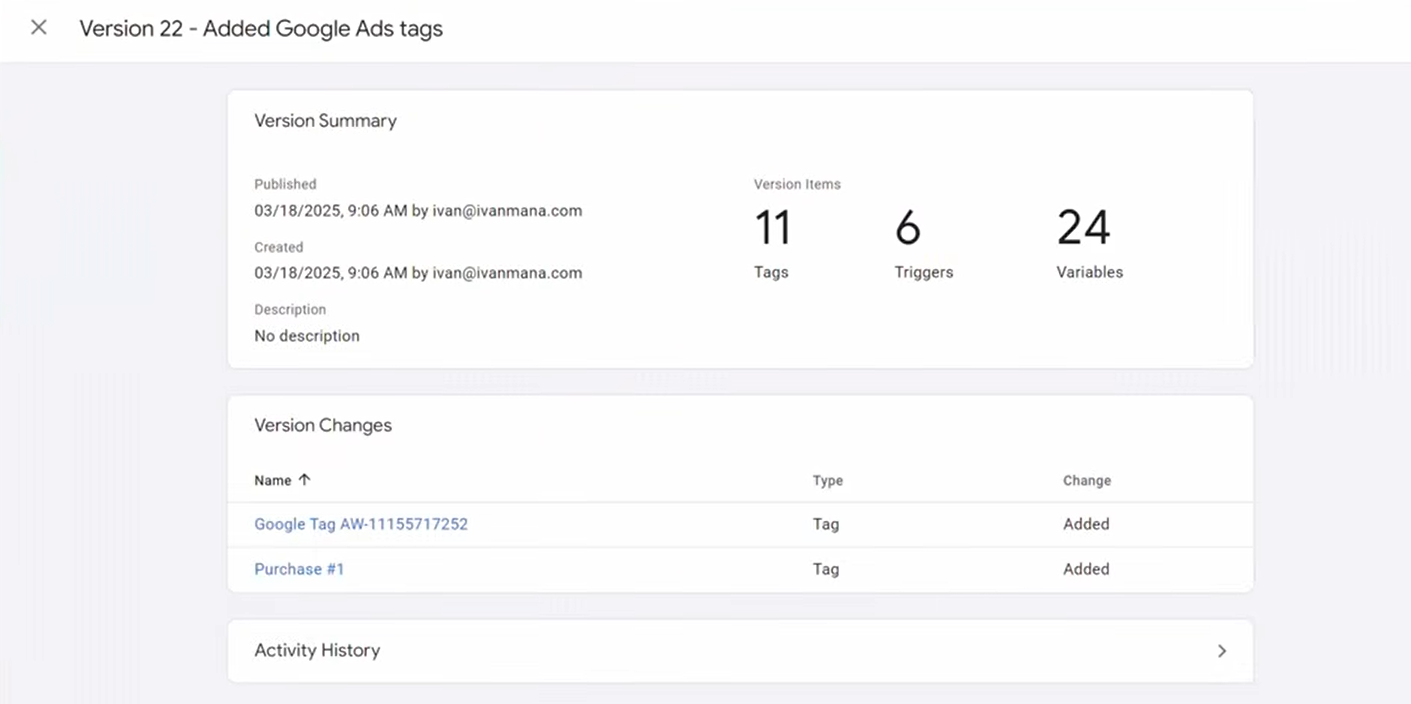
6.5. After publishing, you will see that the tags are live and ready to start measuring the converstions of your site.

Conclusion
Your Google Ads conversion tracking is now configured to record completed Advertise With Us payments.
Whenever a customer successfully completes the checkout and reaches the payment confirmation page, Google Tag Manager will trigger the conversion tag and send the conversion to Google Ads.